webvnc之novnc实战
环境准备
最近做一个安装部署工具,希望通过vnc去连接主机去看安装进度,集成到web中使用,novnc是一种选择。
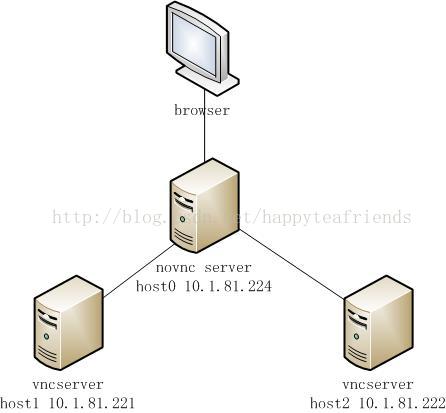
环境如下,两个主机host1 host2,web装载81.224中,环境使用的centos6
在host1和host2中都安装vncserver
yum install tigervnc-server
启动 service vncserver start 或者vncserver :1
关闭:service vncserver stop 或者vncserver -kill :1
修改password:vncpassword
配置:/etc/sysconfig/vncservers
VNCSERVERS="1:root"
下载novnc
地址 http://kanaka.github.io/noVNC/
下载到host0中,也就是要访问运行在host0中的novnc代理来访问host1 和host2
启动novnc
launch.sh 6080 --vnc 10.1.81.221:5901 这种启动方式仅能代理访问一台机器
要访问多台,则需要使用配置文件,创建vnc_tokens
内容:
host1: 10.1.81.221:5901
host2: 10.1.81.221:5902
这里5900是vncserver的基数
启动novnc:
[root@localhost noVNC]# utils/websockify --web=./ --target-config vnc_tokens 6080
WebSocket server settings:
  - Listen on :6080
  - Flash security policy server
  - Web server. Web root: /root/git/noVNC
  - No SSL/TLS support (no cert file)
  - proxying from :6080 to targets in /root/git/noVNC/vnc_tokens
--target-config 也可以指定一个目录,然后可以动态将此格式的文件写入这个目录,这样也可行。
使用novnc来登录主机
浏览器打开:http://10.1.81.224:6080/vnc_auto.html?path=websockify%2f%3ftoken=host1
输入密码即可访问。
这里注意 URL编码,含义是: path=websockify/?token=host1,但是直接输入这个是不行的,需要转码。
另外,发现最新版的novnc不需要转码就可以连接,可直接使用
http://10.1.81.224:6080/vnc_auto.html?path=websockify/?token=host1
