图解之安装owb11.2 的OBE(Oracle By Examples)样例
安装OBE(Oracle By Examples)样例
实验环境:oracle提供的owb示例文件owbdemo_files11.1 在owb11.2软件上运行。
源自:
http://www.oracle.com/webfolder/technetwork/tutorials/obe/db/11g/r1/owb/owb11g_update_getting_started_intro/lesson1/less1_start.htm#t2s5
http://blog.sina.com.cn/s/blog_6d2cab390100uv0d.html
1、解压后需把 Sequences.tcl 命名为 sequences.tcl。由于Oracle 11GR2有了一定变化,需修改load_sales.tcl,把 TIMES_CAL_MONTH_CODE 改成TIMES_CAL_MONTH_START_DATE。
注释:
下面两个脚本内容也要修改:
修改dim_times.tcl脚本,将里面的 POPULATE DATA FROM 2001 FOR 1 YEARS 改为 POPULATE DATA FROM 1998 FOR 4 YEARS。
修改load_sales.tcl脚本,将里面的VALUES ('NUMBER','TO_NUMBER(TO_CHAR( INGRP1.ORDER_FINISHED, ''MMYYYY''),''999999'')')改为VALUES(‘date’,‘to_date(`01-‘||to_char(INGRP1.ORDER_FINISHED,‘month-YY’))’)。
不过此时不修改这两个脚本,也可以。到了部署执行owb_demo项目时,在设计中心界面上修改也行的。
2、可选步骤:
Script changes made for OWB11g running on DB 10gR2. I modified Sophia Chen's recommendations:
- In createlocs.tcl, in the OMBCREATE LOCATION 'XSALES_LOCATION' section, the version value was changed from '10.1' to '10.2'
(If you've performed the optional step of importing xsales.dmp to populate the XSALES schema, and you are hosting XSALES schema on Database 11g, change this value to '11.1')
来自owbdemo_files.zip里的readme script changes for OWB11g incl all sophia updates.txt
setowbclientpwd workspace_owner
set sysusersys
set syspwdpwd
set hosthostname
set portportnumber
set serviceservicename
set projectowb_project_name
setowbclient workspace_owner
setsourcedir /path/to/newowbdemo
setindexspace USERS
setdataspace USERS
setsnapspace USERS
set sqlpath/path/to/$ORACLE_HOME/BIN
set sidservicename
4、运行OMB*Plus
% cd $ORACLE_HOME/owb/bin/unix
% ./OMBPlus.sh
OMB+> cd /path/to/newowbdemo
OMB+> source loadall.tcl
结果:
如果安装成功在OWB设置中心的Locations导航栏,展开Databases/Oracle,会看到如下locations:
OWB_REPOSITORY
SALES_WH_LOCATION
(0)、
将目标用户和工作流用户owf_mgr设置成为owb用户(使用owb安全ui),否则部署时分别提示rpe-2260和1012。
(1)RPE-02072: 在 Oracle Workflow 资料档案库中尚未启用 Oracle Workflow NLS 语言 ZHS。请使用 Oracle Workflow wfnlena.sql 服务器端脚本启用该语言。
- C:\oracle\product\10.2.0\db_1\wf\admin\sql>sqlplus owf_mgr/owf_mgr @wfnlena.sql ZHS Y
注意路径。
在owb_demo项目下,部署sales_wh目标数据库模块时,提示RPE-02259错误。
解决方法:
就是运行RPE-02259里的脚本:grant_upgrade_privileges.sql sales_wh
打开grant_upgrade_privileges.sql ,里面有提示说明让grant_upgrade_privileges.sql 在sys用户下执行。
(2)、ora-06550:package body,line 321 column 7:PL/SQL:ora-02289:序列不存在。
部署维时遇到上述错误提示。
因为维里用到了序列,所以部署维前要先部署序列。即解决方法:部署序列,再部署维。
(3)、PL/SQL:ora-00942:表或视图不存在。
部署映射遇到上述错误提示。
因为在映射里是将源数据库模块里的表的数据传送给目标数据库模块上的表,故而部署时目标用户要访问源数据库模块上的表,若此时目标用户没有访问源数据库模块上表的select权限的话,就会提示上述错误。总之,发生ora-00942:表或视图不存在,一般都是因为用户没有权限。解决方法:grant select on 源数据库模块上表 to 目标用户;
(4)、
部署load_sales时,提示
两个变量的数据类型【 (NUMERIC)和 (DATE)】 提示 数据不兼容,例如:
VLD-1011: Der Datentyp von OUTGRP1.FINISH_MONTH in AGGREGATOR (NUMERIC) ist nicht mit dem Datentyp von SALES.TIMES_CAL_MONTH_START_DATE in SALES_OUT (DATE) kompatibel.
两个变量的数据类型【 (NUMERIC)和 (varchar2)】 提示 数据不匹配,例如:
VLD-1001: The datatype of INOUTGRP1.NAME in TABLE_SRC (NVARCHAR) does not match the datatype of INOUTGRP1.NAME in TABLE_STG (VARCHAR)
数据不匹配(告警)是可以进行隐式数据类型转换的,故而不用处理也可以的; 数据不兼容(错误),则要进行处理,具体如下:
在设计中心界面上,打开映射load_sales,将组outgrp1里finished_month的表达式从TO_NUMBER(TO_CHAR( INGRP1.ORDER_FINISHED, ''MMYYYY''),''999999'')'【为NUMBER类型,该类型与date类型不兼容引起VLD-1011错误】改为的ingrp.finish_month【date类型】。
执行load_sales时,提示ora-02291:违反完整性约束条件(sales_wh.sales_times_fk)-未找到父项关键字,
这个意思是说数据库用户sales_wh下的外键约束对象sales_times_fk所管理的表上的那个列,该列里的有些值不存在于其所引用的表上的列里的值。
查询两个与约束相关的视图user_cons_columns和user_constrains,可知表sales上的列times引用了表times上的列cal_month_start_date。
在设计中心界面上,打开映射load_sales,可以看出,xsales.表orders下的列order_finished(date类型)里的值通过一系列中间环节最后会传送给方体sales对应的方体运算符里的列time_cal_month_start_date。从time_cal_month_start_date这个名字可以看出,这个列存放的值在逻辑业务上的意义为一个月开始的那一天,即如3月1号等,所以映射load_sales里的to_num_expr运算符里的组outgrp1上的finish_month无论是load_sales.tcl脚本里原来的TO_NUMBER(TO_CHAR( INGRP1.ORDER_FINISHED, ''MMYYYY''),''999999'')'【为NUMBER类型,该类型与date类型不兼容引起VLD-1011错误】,还是后来自己改为的ingrp.finish_month【date类型】,在逻辑业务上的意义都不是表示一个月开始的那一天,故而最后改为to_date(`01-‘||to_char(INGRP1.ORDER_FINISHED,‘month-YY’))【date类型】。还有,把时间维里的开始时间定为1998,年数定为4。这个修改可以在设计中心界面上,选中时间维times,右键选择打开,在名称选项卡上进行修改;也可以直接修改dim_times.tcl脚本,将里面的 POPULATE DATA FROM 2001 FOR 1 YEARS 改为 POPULATE DATA FROM 1998 FOR 4 YEARS。因为xsales.表orders下的列order_finished(date类型)里的值跨度从1998年到2002年的。这样,xsales.表orders下的列order_finished(date类型)里的值通过一系列中间环节变化了的值,最后传送给方体sales对应的方体运算符里的列time_cal_month_start_date,而这些变化了的值每一个都会在表times上的列cal_month_start_date里存在的。
参考:
插入的数据 如果某个字段是外键 那么该值要么为空 要么在主键表中 有对应的主键值 否则 就不满足参照完整性约束
外键约束ORA-02291错误的原因以及解决方法
具体过程如下:
In order to partially prepopulate your repository for this course, perform the following steps:
| Download the Setup Scripts | ||
| If Using DB10gR2, Create OWBSYS User and Enable Access to Control Center and Workspaces | ||
| Create the Design Center User and Repository | ||
| Run the Setup Scripts | ||
Back to Topic List
Download the Setup Scripts
| 1. | Download the owbdemo_files.zip file by right-clicking here and selecting Save Target As from the pop-up menu. Direct the download to any directory on your computer's hard drive.
|
| 2. | Open the owbdemo_files.zip file, select all files, and unzip them to a root level, such asc: ord:. If you unzip to your computer'sd:\ drive, your file locations will match the screenshots in the following lessons. Note: If you extract the files using WinZip, select the "Use folder names" check box. If you unzip this way to the d:\ drive, the resulting file locations will be:
Make sure that export.csv and expense_categories.csv files are in a "sourcefiles" subfolder of the "newowbdemo" folder. Make a note of thec: ord: or other directory location where you place these files.
|
| 3. | You can optionally download the xsales.zip file fromhere. Save the xsales.zip file in any directory on your computer's hard drive. Extract the xsales.dmp file from the xsales.zip file. Note: This download is not required or mandatory for the hands-on exercises. This is made available to you in case you want to explore XSALES table data on your own. |
Back to Topic
If Using DB10gR2, Create OWBSYS User and Enable Access to Control Center and Workspaces
Note: If you are using Oracle Database 10gR2 instead of Database 11g with this tutorial, you must perform the following steps.
If you are using Database 11g, skip ahead to the subtopic "Create the Design Center User and Repository".
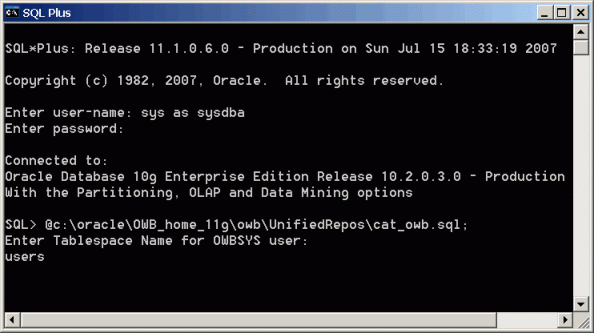
| 1. | If using DB 10gR2, you need to run a SQL script to create the OWBSYS repository schema that automatically comes with the install of DB11g, and which is needed by OWB 11g. This script, <your OWB home>/OWB/UnifiedRepos/cat_owb.sql, installs the OWBSYS database user that is otherwise automatically created when installing DB 11g. Note: The method by which you invoke SQL Plus is important. Do not invoke SQL Plus from Start > Programs > Oracle database home folder or Warehouse Builder folder! Instead, invoke SQL Plus from Start > Run > cmd.exe. Type thePath command and press Enter. You want to check that Warehouse Builder is near the front of the path statement, so that the SQL Plus session will invoke from the Warehouse Builder installation. If not, you may need to temporarily set the path, such as Path=<Warehouse Builder home>\bin. Then invoke SQL Plus asSYS with SYSDBA privileges. For example, at the command line you might type:sqlplus sys/<sys password> as sysdba. Connect to SQL Plus as sysdba and issue the following command to create OWBSYS: @<your OWB home>/owb/UnifiedRepos/cat_owb.sql; Press Enter. You will be prompted for a tablespace for the OWBSYS user. For this training, it is recommended that you specify the USERS tablespace. Typeusers and pressEnter. When this command finishes successfully, you will be prompted "If you are NOT using an OWB installed in the Oracle database home, please now run reset_owbcc_home".
|
| 2. | Earlier, you were instructed to install Warehouse Builder in an Oracle home other than thedatabase Oracle home. To ensure access to the Control Center on the 10g R2 database, run the script UnifiedRepos/reset_owbcc_home.sql and pass in your Oracle home for Warehouse Builder. Run the script as a system privileged user such as SYS or SYSTEM. For example, type the following command at the command prompt: SQL> @c:\oracle\OWB_home_11g\owb\UnifiedRepos\reset_owbcc_home; Press Enter. You will be prompted for the full path of the Oracle home for the OWB Control Center install. First read the following note. Note: In the following example, observe the required use of forward slashes "/", even when using a Windows machine. Also please note that your response with the full path must becase-sensitive! Be sure to type the drive letter in uppercase, such as "C:". And follow the case sensitivity of the folder names in the path of the Oracle home for OWB. Your response should appear somewhat like the following example: C:/oracle/OWB_home_11g Press Enter.
|
| 3. | If the strong password option is enabled on the Database, then after creating OWBSYS, you need to unlock the OWBSYS account and unexpire its password. Proceed with the 2nd and 3rd SQL Plus commands to unlock the OWBSYS account and assign a password also named OWBSYS: alter user OWBSYS account unlock; alter user OWBSYS identified by OWBSYS; The requirements explained above are also mentioned in the OWB 11g Installation Guide documentation, in the section titled �Hosting the Repository on Oracle Database 10g Release 2�.
|
| 4. | For each Warehouse Builder client installation, enable access to the workspaces hosted on your 10gR2 database. By default, Warehouse Builder 11g Release 1 (11.1) clients are set to connect to workspaces hosted on an Oracle 11g Database. That is, the Warehouse Builder repository is assumed to be hosted on an Oracle 11g Database. To enable access to a 10gR2 repository and its workspaces, alter the file<owb home>/owb/bin/admin/Preference.propertieson your machine. If the file does not exist, you can create it based on the example file available in the same directory, Preference.properties.tmp. In the preference properties file, add a property REPOS_DB_VERSION_ALLOWED and set its value to:Oracle 10g, Oracle 11g. (This property may already be present.) |
Back to Topic
Create the Design Center User and Repository
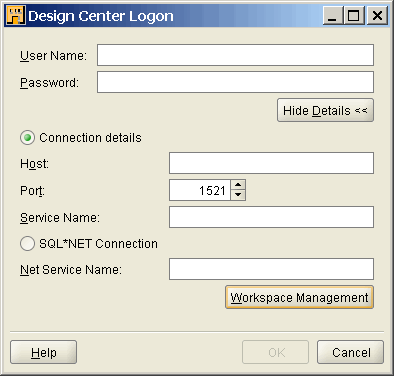
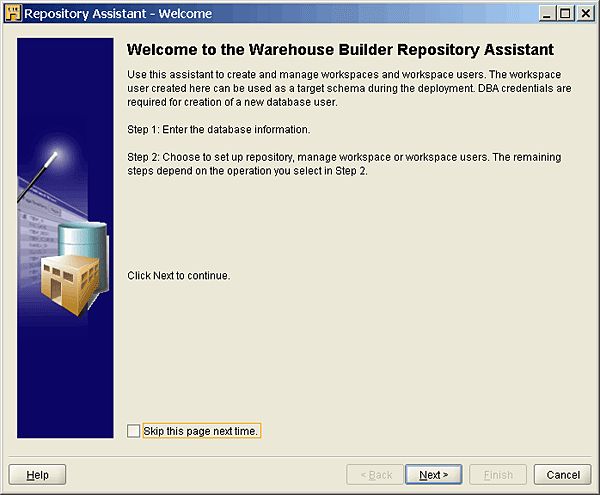
| 1. | When logging in to the OWB Design Center for the first time, you can create a Warehouse Builder user with which to log in. You create a new workspace, a new workspace user, and install the Warehouse Builder repository. Select Start > Programs > {your Oracle - OWB11gR1clientHome} > Warehouse Builder > Design Center. The Design Center Logon screen appears. If the Workspace Management button is not visible, click Show Details. Click Workspace Management . The Welcome screen of the Repository Assistant Wizard appears. Click Next.
|
||||||||||
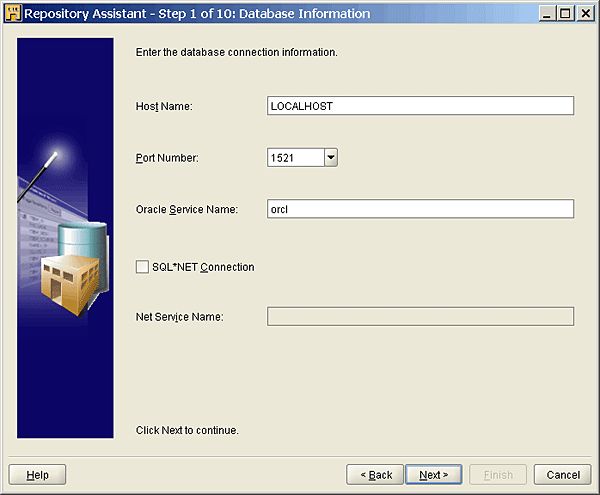
| 2. | In the Database Information window, enter the following values:
Click Next.
|
||||||||||
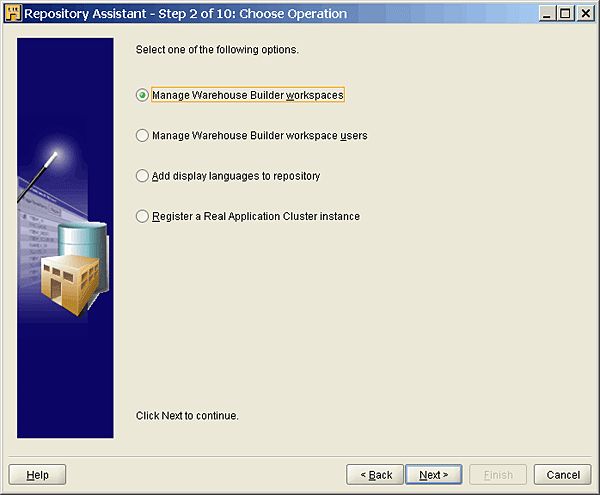
| 3. | In the Choose Operation window, click Manage Warehouse Builder workspaces. Click Next. |
||||||||||
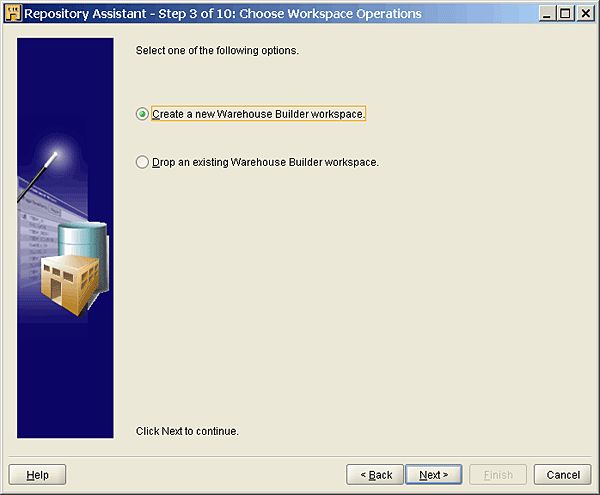
| 4. | In the Choose Workspace Operations window, click Create a new Warehouse Builder workspace. Click Next. |
||||||||||
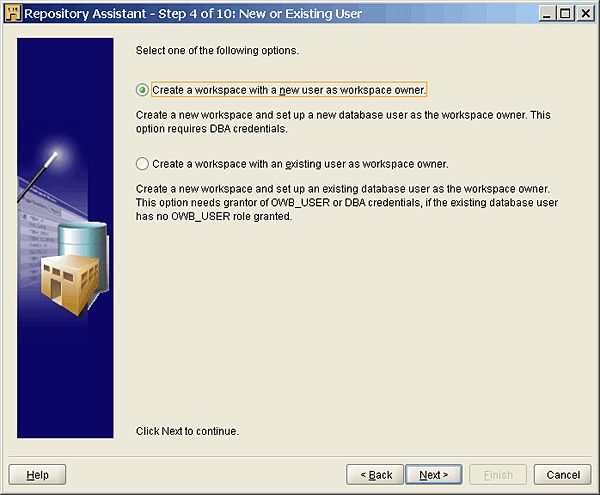
| 5. | In the New or Existing User window, click Create a workspace with a new user as workspace owner. Click Next. |
||||||||||
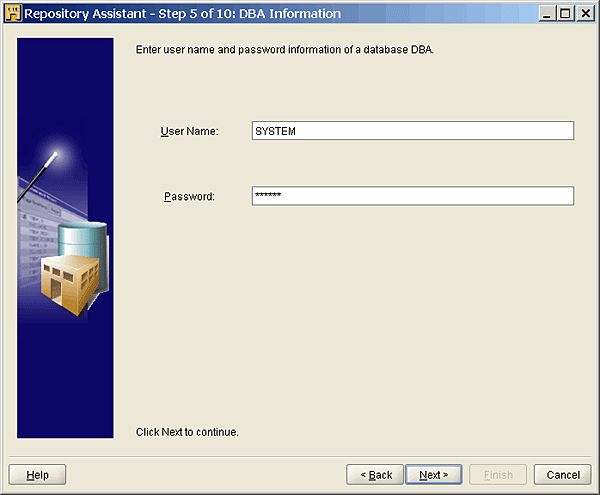
| 6. | In the DBA Information window, enter the following values:
Click Next. |
||||||||||
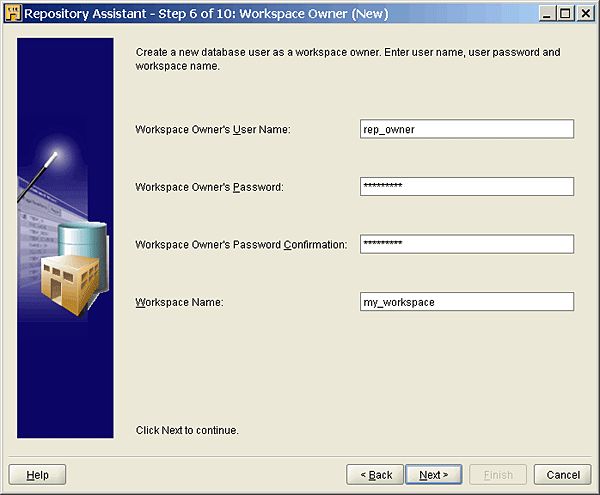
| 7. | In the Workspace Owner (New) window, enter the following values:
Click Next. |
||||||||||
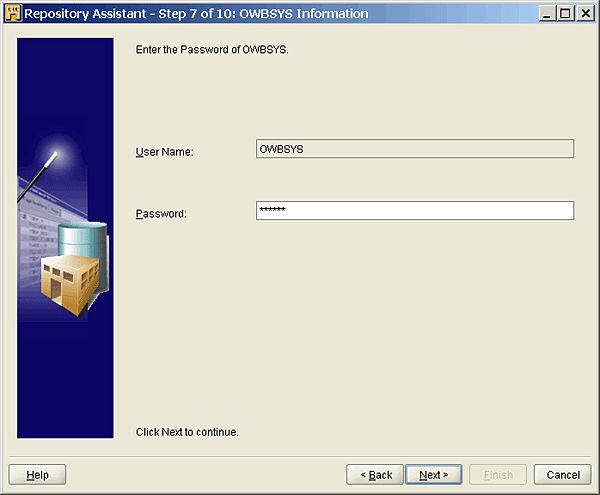
| 8. | In the OWBSYS Information window, enter the following values:
Click Next. |
||||||||||
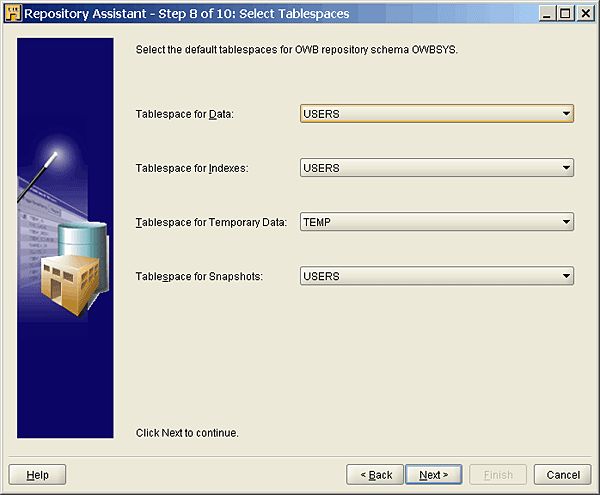
| 9. | In the Select Tablespaces window, accept all of the defaults and clickNext. |
||||||||||
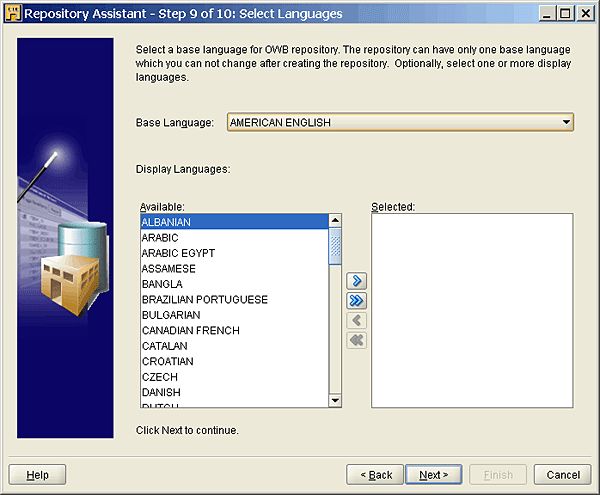
| 10. | In the Select Languages window, accept the defaults and clickNext. |
||||||||||
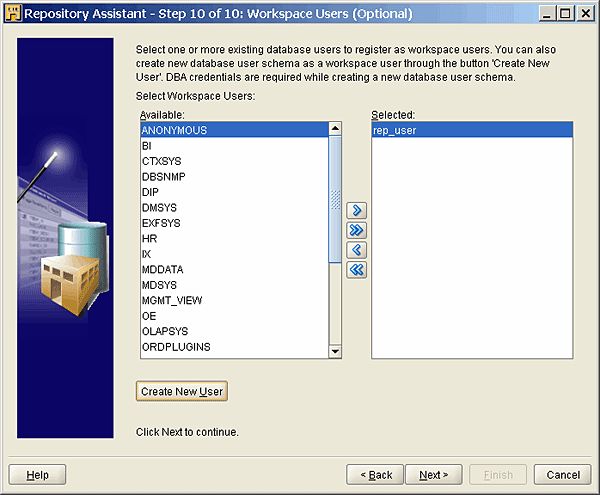
| 11. | The Workspace Users (Optional) window allows you to optionally select existing database users or create a new database user to serve as a workspace user. In addition to the workspace owner that you specified earlier in this wizard, you will create a new database user to serve as a workspaceuser. ClickCreate New User. |
||||||||||
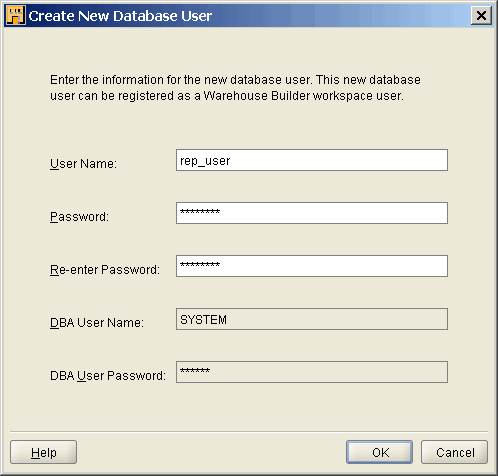
| 12. | In the Create New Database User window, enter the following values:
Click OK. |
||||||||||
| 13. | The Workspace Users (Optional) window reappears, with the new rep_user listed in theSelected panel. Click Next. |
||||||||||
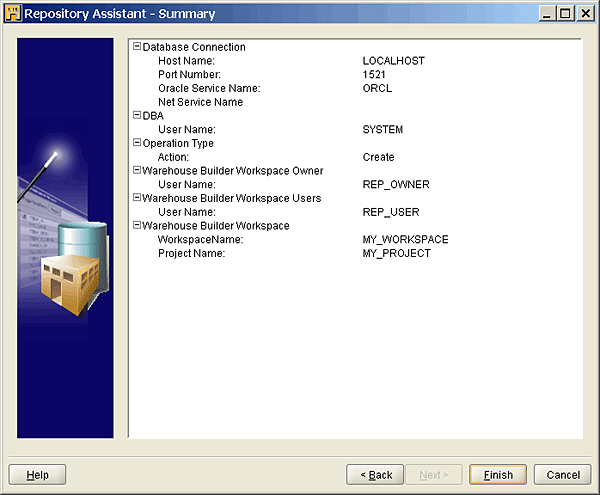
| 14. | In the Summary window, examine the information and click Finish. | ||||||||||
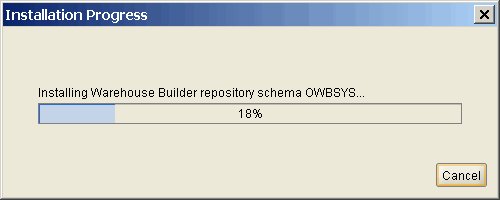
| 15. | An Installation Progress window appears. The installation of the OWBSYS user, repository owner will take several minutes. | ||||||||||
| 16. | An Installation Successful window appears. Click OK . The Repository Assistant closes. If the Design Center Logon window is still open, click Cancel to close it. In the Warehouse Builder Warning window, clickYes to quit Warehouse Builder. You will be logging in later in this lesson. |
Back to Topic
Run the Setup Scripts
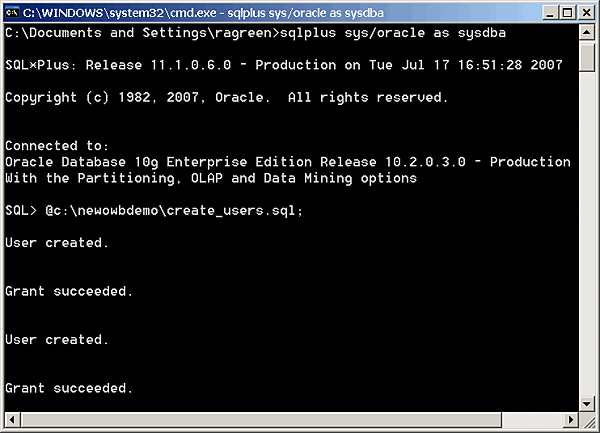
| 1. | Before you can begin working with the lessons, you need to run the scripts from theowbdemo_files.zip file that you downloaded. Note: The following directions and screenshots assume use of the D: drive. If you are using the C: drive, substitute accordingly. Log in to SQL*Plus as sys and run the create_users.sql script that you downloaded into the D:\newowbdemo folder. To run the script, enter the following command at the SQL> prompt: @d:\newowbdemo\create_users.sql; Exit SQL*Plus. Note: The create_users.sql script will create two users: xsales and eul_from_owb. If you plan to work optionally with xsales source data, as mentioned earlier in this lesson, you need to import the xsales.dmp file that you downloaded and extracted from the xsales.zip file. You Can Optionally Import xsales DataNote: The step of importing the xsales.dmp file is optional and only required if you want to use the xsales source data to explore your own examples. If you wish to import the optional dmp file, enter the following command at the DOS command prompt: <database ORACLE_HOME>\bin\imp xsales/xsales@<orcl or your database service name> file=<PATH>\xsales.dmp full=y Substitute <ORACLE_HOME> with your Oracle database home path and <PATH> with the location where you extracted the xsales.dmp file.
|
| 2. | Now you will run a set of tcl scripts to create a predefined OWB project. First, you need to edit theowbdemoinit.tcl script that defines and sets variables used by the other tcl scripts. Theowbdemoinit.tcl script is provided to you with the following variables;edit these variables to match the values in your computer's environment: set owbclient rep_owner You need to set all the values shown in bold above, as per your database and Warehouse Builder setup. The "set sqplpath" statement should point to the BIN directory of your OracleDATABASE home. Note: The scripts are written to run on default tablespaces. It is advised that you use default tablespaces for this hands-on activity. If you intend to run the scripts on your own defined tablespaces you need to set them in this script as well as in multiple other scripts.
|
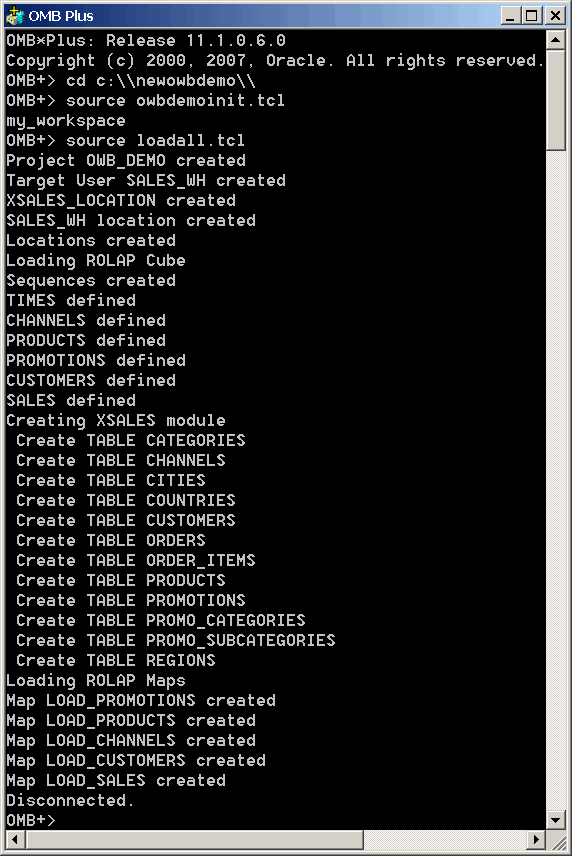
| 3. | To run the tcl scripts, start the OMB Plus environment. There are two ways to start OMB Plus. Within the Design Center, you could selectOMB Plus from theWindow menu. However, for this example, start OMB Plus the other way: selectStart > Programs > [Oracle - OWB11gR1clientHome] > Warehouse Builder > OMB Plus. On the OMB+> prompt, enter the cd command as shown below to change the working directory to the folder where you have unzipped the setup tcl scripts: (it is case sensitive): cd d:\\newowbdemo\\ After this command, enter the source commands on the OMB+> prompt as shown below. The first source command executes the owbdemoinit.tcl script that defines and sets variables used by the other tcl scripts.The second source command executes the loadall.tcl script that in turn runs all the other tcl scripts in the desired sequence. source owbdemoinit.tcl Press Enter. source loadall.tcl Press Enter. The scripts should finish with the statement "Disconnected" and return the OMB+> prompt. Exit the OMB Plus environment. The scripts have created a partially defined OWB project, OWB_DEMO, in which you will do your work.
|
Back to Topic
You will now examine the components that constitute the OWB installation.
| 1. | Select Start > Programs > [Oracle - OWB11gR1clientHome] > Warehouse Builder > Administration. This displays the range of components that make up the OWB product.
|
||||||||||||||||||
| 2. | Examine the menu choices:
|
||||||||||||||||||
Back to Topic List
To start the OWB Design Center, perform the following steps:
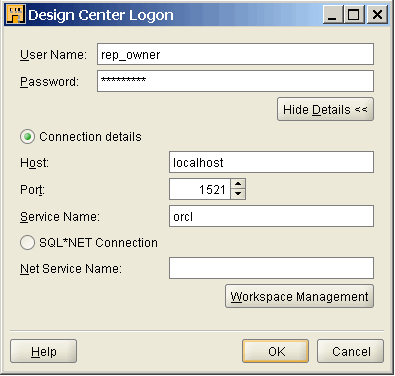
| 1. | Select Start > Programs > [Oracle - OWBclientHome] > Warehouse Builder > Design Center. The Design Center Logon window appears. Enter rep_owner as username and password. By default,Connection details option is selected. If you cannot see Connection details option, click Show Details. Enter host as localhost or <name of your computer>, port as 1521, and service name as orcl or <your database service name>. ClickOK.
|
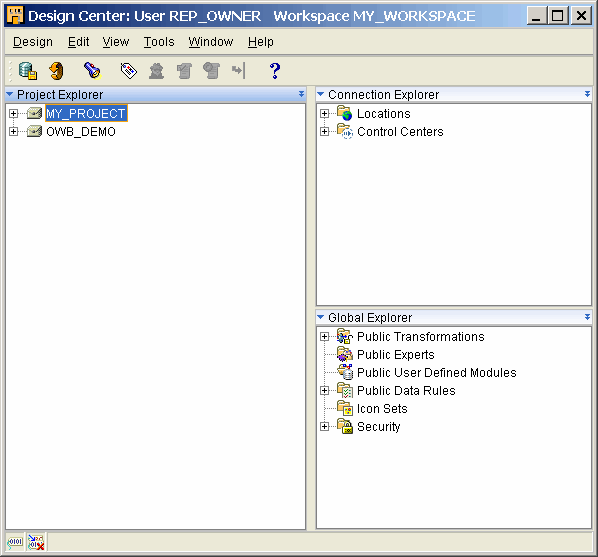
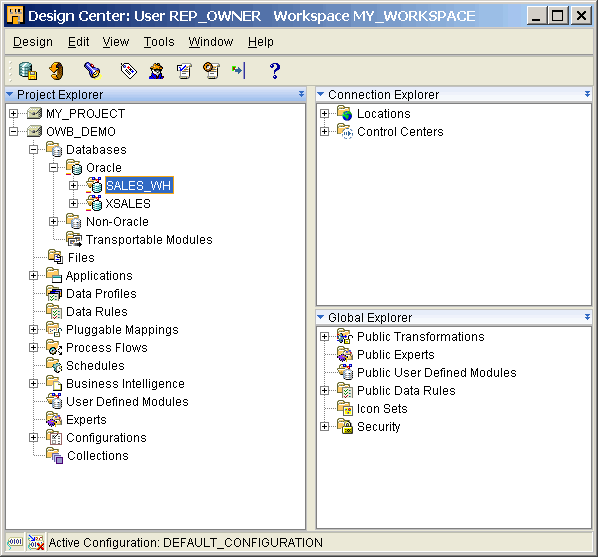
| 2. | The Design Center appears. The Design Center is divided into three panels: Project Explorer, Connection Explorer, and Global Explorer. The Project Explorer on the left side contains two projects: MY_PROJECT, an empty project created when OWB is installed, andOWB_DEMO, a partially defined project that you created with the setup scripts.
|
| 3. | A project is a container to manage your design work. After you create a project, you can create all the other Warehouse Builder objects. Warehouse Builder contains wizards, object editors, property sheets, and object finding tools that assist you in designing your business intelligence system. In the Project Explorer panel's navigation tree, expand the OWB_DEMO project. Various object types appear in the tree: Databases, Files, Applications, Data Profiles, and so on. Expand the Databases node, and you see various object types that can be included in design of your warehouse: Oracle databases, non-Oracle databases, and transportable modules. Expand the Oracle node, and you see two modules predefined by the setup scripts:SALES_WH andXSALES. Modules are logical groupings of source or target definitions.
|
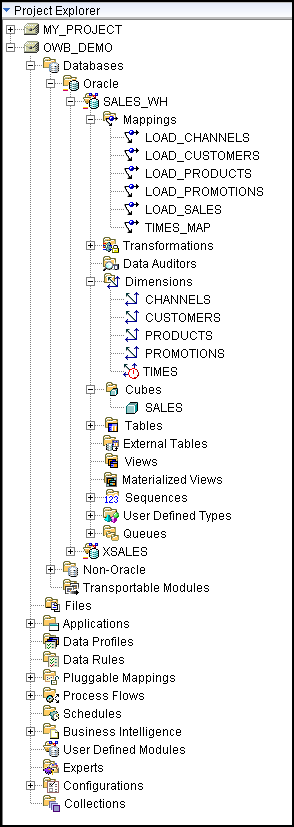
| 4. | Expand the SALES_WH module. The various object types appear in the tree: mappings, transformations, dimensions, cubes, tables, and so on. Expand some of these nodes to see the objects that have been predefined by the setup scripts.
|
Back to Topic List
In this module, you should have learned how to:
| Download and execute the setup files for the remaining Warehouse Builder lessons | |
| Create the OWB Design Center User and install the Repository | |
| Log in to the OWB Design Center and open an OWB project |
Back to Topic List
不用参考:
http://blog.sina.com.cn/s/blog_72293fd40100l554.html
http://oracle.chinaitlab.com/exploiture/738935_3.html
http://liking.blog.163.com/blog/static/147757222010929104035634/
注释:来自owb11.1的owbdemo_files里readme script changes for OWB11g incl all sophia updates.txt
- Because OWB 11g doesn‘t have OMBINSTALL OWB_TARGET_USER which also automatically created that user’s target location in the OWB10gR2 release, I added code to check for existence of SALES_WH_LOCATION and if not exist, OMBCREATE LOCATION.
- I also removed the chunk which checks for existence of SALES_WH_LOCATION and if exists, do OMBALTER, because OMBPLUS returned error of SALES_WH_LOCATION not found.
在oracle 11gR2的官文里是使用来自owb10.2的owbdemo_files文件,但是由于上述原因,脚本执行不成功。换成owb11.1的owbdemo_files即可。
