第十一天 乐在其中-Android与远端之JDBC
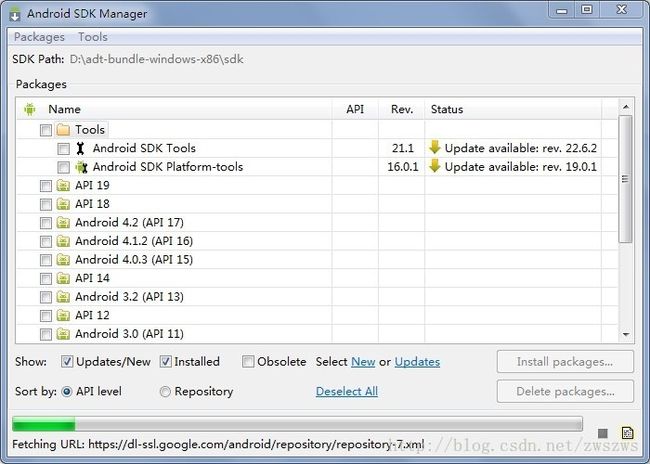
使用的开发工具是adt-bundle-windows-x86,Android SDK Platform-tools版本16.01,Android SDK Tools 21.1.
1、创建数据库librarydb,供测试使用.
/*
MySQL Data Transfer
Source Host: localhost
Source Database: librarydb
Target Host: localhost
Target Database: librarydb
Date: 2014/4/17 17:58:11
*/

SET FOREIGN_KEY_CHECKS=0;
-- ----------------------------
-- Table structure for book
-- ----------------------------
CREATE TABLE `book` (
  `ISBN` varchar(20) NOT NULL,
  `B_Name` varchar(50) default NULL,
  `B_Author` varchar(50) default NULL,
  `B_Publishment` varchar(80) default NULL,
  `B_BuyTime` varchar(50) default NULL,
  PRIMARY KEY  (`ISBN`)
) ENGINE=InnoDB DEFAULT CHARSET=utf8;

-- ----------------------------
-- Table structure for student
-- ----------------------------
CREATE TABLE `student` (
  `S_Num` varchar(20) NOT NULL,
  `S_Name` varchar(50) default NULL,
  `S_Age` varchar(10) default NULL,
  `S_Sex` varchar(50) default NULL,
  `S_Class` varchar(50) default NULL,
  `S_Department` varchar(50) default NULL,
  `S_Phone` varchar(11) default NULL,
  `S_Permitted` varchar(50) default NULL,
  `S_Pwd` varchar(20) default NULL,
  PRIMARY KEY  (`S_Num`)
) ENGINE=InnoDB DEFAULT CHARSET=utf8;

-- ----------------------------
-- Records
-- ----------------------------
INSERT INTO `book` VALUES ('9787030236630', 'PowerBuilder_10.5实用教程', '樊金生', '科学出版社', '2005-07-05');
INSERT INTO `book` VALUES ('9787111187776', '算法导论', '(美)科曼(Cormen,T.H.) 等著,潘金贵 等译', '机械工业出版社', '2005-07-09');
INSERT INTO `book` VALUES ('9787115227508', 'Android 2.0游戏开发实战宝典', '吴亚峰', '人民邮电出版社', '2003-06-07');
INSERT INTO `book` VALUES ('9787121060953', 'photoshop cs3 图像处理', '卓越科技', '电子工业出版社', '2003-02-01');
INSERT INTO `book` VALUES ('9787121079528', 'PowerBuilder 实用教程(第3版)', '郑阿奇', '电子工业出版社', '2005-07-09');
INSERT INTO `book` VALUES ('9787121102462', 'Java程序员职场全攻略-从小工到专家', '吴亚峰', '电子工业出版社', '2004-04-05');
INSERT INTO `book` VALUES ('9787302164289', '3ds max 9三维建模', '程凤娟', '清华大学出版社', '2010-02-01');
INSERT INTO `book` VALUES ('9787302244158', '大学计算机基础(21世纪普通高校计算机公共课程规划教材)', '许薇,王东来 ', '清华大学出版社', '2005-0-09');
INSERT INTO `book` VALUES ('9787562324560', '微型计算机原理及应用', '吴荣光,吕钧星', '华南理工大学出版社', '2005-07-09');
INSERT INTO `student` VALUES ('10001', '李亚', '20', '女', '计算机1班', '计算机系', '15176536034', '是', '001');
INSERT INTO `student` VALUES ('10002', '王飞', '21', '女', '计算机1班', '计算机系', '13730220123', '是', '002');
INSERT INTO `student` VALUES ('10003', '孙好', '20', '男', '计算机1班', '计算机系', '13633654578', '是', '003');
INSERT INTO `student` VALUES ('10004', '何光', '22', '男', '计算机1班', '计算机系', '2578975', '是', '004');
INSERT INTO `student` VALUES ('10005', '唐心', '21', '女', '计算机1班', '计算机系', '13936968956', '是', '005');
INSERT INTO `student` VALUES ('10006', '宋理光', '20', '男', '计算机2班', '计算机系', '1234667', '是', '006');
2、下载MySQL JDBC驱动程序,这是能否成功的关键。事实证明,只有使用mysql-connector-java-3.0.17-bin.jar,这个版本的驱动,才能成功。难怪网上说:遇到一些比较变态的错误就需要这个版本的mysql驱动包!果然,名不虚传呀。![]()
3、这个adt-bundle-windows-x86版本,真贴心,不仅集成了Android SDK Manager和Android Virtual Device Manager,省去了下载插件的麻烦。更贴心的还在你建好的工程里给了一个libs,你只需把下载好的mysql-connector-java-3.0.17-bin.jar放进去,右键---->在左侧选项“ Build Path”--->“Add to Build Path”即可。![]()
4、简单的测试mysql JDBC程序
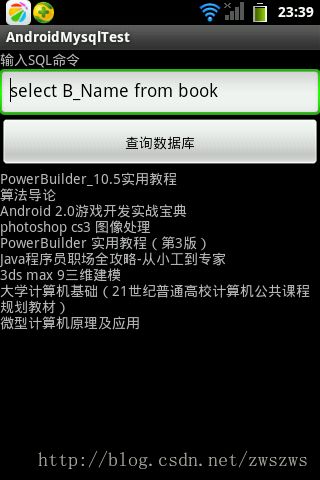
(1)AndroidMysqlTest.java
package com.androidmysqltest;

import java.sql.*;

import com.androidmysqltest1.R;
import com.mysql.jdbc.Connection;
import com.mysql.jdbc.Statement;
import android.app.Activity;
import android.os.Bundle;
import android.view.View;
import android.view.View.OnClickListener;
import android.widget.Button;
import android.widget.EditText;
import android.widget.TextView;

public class AndroidMysqlTest extends Activity {
	TextView message = null;
	EditText sql_command_et = null;
	Connection con = null;

	@Override
	public void onCreate(Bundle savedInstanceState) {
		super.onCreate(savedInstanceState);
		setContentView(R.layout.main);
		message = (TextView) findViewById(R.id.message);
		Button btn = (Button) findViewById(R.id.btn);
		sql_command_et = (EditText) findViewById(R.id.sql_command_et);
		message.setText("");
		try {
			Class.forName("com.mysql.jdbc.Driver");
			con = (Connection) DriverManager
					.getConnection(
							"jdbc:mysql://192.168.23.1:3306/librarydb?useUnicode=true&characterEncoding=UTF-8",
							"root", "root");
			// 连接URL为 jdbc:mysql//服务器地址/数据库名 ,后面的2个参数分别是登陆用户名和密码
			System.out.println("Success connect Mysql server!");
		} catch (SQLException ee) {
			ee.printStackTrace();
		} catch (Exception e) {
			System.out.print("Error loading Mysql Driver!");
			e.printStackTrace();
		}
		btn.setOnClickListener(new OnClickListener() {
			@Override
			public void onClick(View v) {

				String sql = sql_command_et.getText().toString().trim();
				try {
					Statement st = (Statement) con.createStatement();
					ResultSet rs = st.executeQuery(sql);
					while (rs.next()) {
						message.append(rs.getString("B_Name") + "\n");
					}
					rs.close();
					st.close();
					con.close();
				} catch (Exception e) {
					e.printStackTrace();
				}
			}
		});
	}
}
(2)main.xml
<?xml version="1.0" encoding="utf-8"?>
<LinearLayout xmlns:android="http://schemas.android.com/apk/res/android"
    android:orientation="vertical"
    android:layout_width="fill_parent"
    android:layout_height="fill_parent"
    >
	<TextView
	    android:id="@+id/txt"
	    android:layout_width="fill_parent"
	    android:layout_height="wrap_content"
	    android:text="输入SQL命令"
	    />
	 <EditText
	    android:id="@+id/sql_command_et"
	    android:layout_width="fill_parent"
	    android:layout_height="wrap_content"
	    android:text="select B_Name from book"
	   />
	<Button
	    android:id="@+id/btn"
	    android:layout_width="fill_parent"
	    android:layout_height="wrap_content"
	    android:text="查询数据库"
	/>
	<TextView
	    android:id="@+id/message"
	    android:layout_width="fill_parent"
	    android:layout_height="wrap_content"
	    />
</LinearLayout>
(3) strings.xml
<?xml version="1.0" encoding="utf-8"?>
<resources>
    <string name="hello">Hello World, AndroidMysqlTest1Activity!</string>
    <string name="app_name">AndroidMysqlTest</string>
</resources>
(4)AndroidManifest.xml
<?xml version="1.0" encoding="utf-8"?>
<manifest xmlns:android="http://schemas.android.com/apk/res/android"
    package="com.androidmysqltest1"
    android:versionCode="1"
    android:versionName="1.0" >

    <uses-sdk
        android:minSdkVersion="8"
        android:targetSdkVersion="8" />

    <application
        android:icon="@drawable/ic_launcher"
        android:label="@string/app_name" >
        <activity
            android:name="com.androidmysqltest.AndroidMysqlTest"
            android:label="@string/app_name" >
            <intent-filter>
                <action android:name="android.intent.action.MAIN" />

                <category android:name="android.intent.category.LAUNCHER" />
            </intent-filter>
        </activity>
    </application>
    <span style="color: rgb(255, 0, 0);"><uses-permission android:name="android.permission.INTERNET"></uses-permission></span>
</manifest>
注意: 由于要联网,所以要在AndroidManifest.xml里面加入连接网络的权限
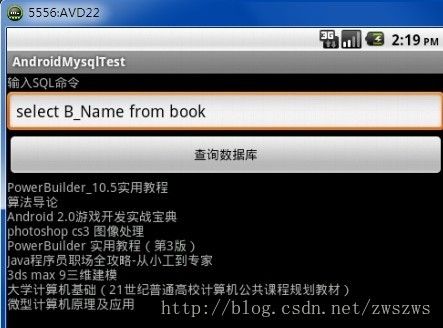
(5) 模拟器上运行结果:
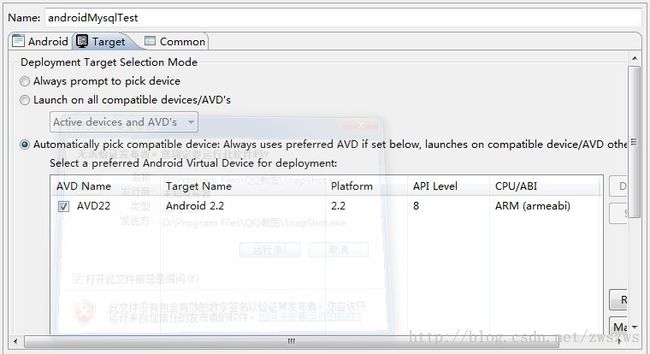
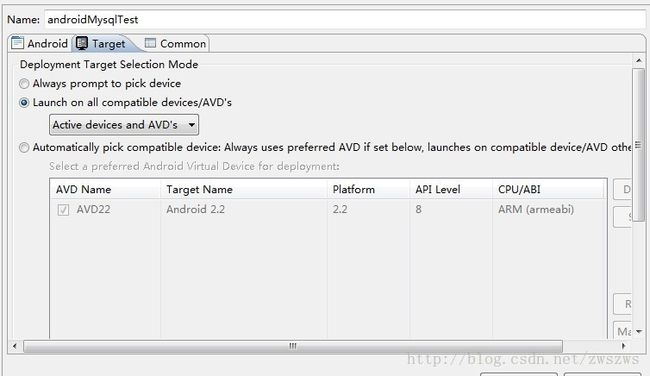
(6)手机测试
将程序发布到手机上,很简单如下图;或将bin目录下androidMysqlTest.apk文件考入手机,安装之。
5、简单的测试SQL Server2005 JDBC程序
同理,SQL JDBC驱动程序也是关键。经测试发现,用JTDS驱动可行,JTDS是基于freeTDS的,并且是目前最快的可企业级应用的SQL Server和Sybase的JDBC驱动程序。本例用的是:jtds-1.2.2.jar,真坑爹呀![]() 。
。
驱动加载同上。
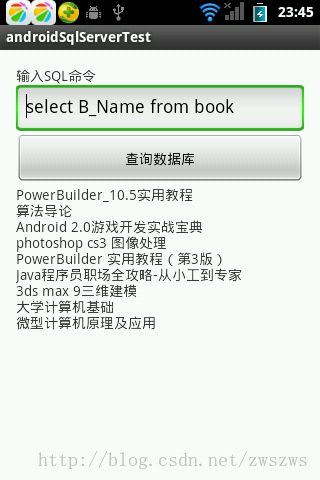
(1)AndroidSqlserverTest.java
package com.androidsqlservertest;

import java.sql.Connection;
import java.sql.DriverManager;
import java.sql.ResultSet;
import java.sql.Statement;

import android.os.Bundle;
import android.app.Activity;
import android.database.SQLException;
import android.view.Menu;
import android.view.View;
import android.view.View.OnClickListener;
import android.widget.Button;
import android.widget.EditText;
import android.widget.TextView;

public class AndroidSqlserverTest extends Activity {

	TextView message = null;
	EditText sql_command_et = null;
	Connection con = null;

	@Override
	protected void onCreate(Bundle savedInstanceState) {
		super.onCreate(savedInstanceState);
		setContentView(R.layout.main);

		message = (TextView) findViewById(R.id.message);
		Button btn = (Button) findViewById(R.id.btn);
		sql_command_et = (EditText) findViewById(R.id.sql_command_et);
		message.setText("");
		String UserName = "sa";// 用户名
		String Password = "sa";// 密码

		try {
			Class.forName("<span style="color: rgb(255, 0, 0);">net.sourceforge.jtds.jdbc.Driver</span>");

			con = DriverManager.getConnection(
					<span style="color: rgb(255, 0, 0);">"jdbc:jtds:sqlserver://192.168.23.1:1433/librarydb",
					UserName, Password);</span>

			// 连接URL为 jdbc:jtds:sqlserver://服务器地址/数据库名 ,后面的2个参数分别是登陆用户名和密码
			System.out.println("Success connect Mysql server!");
		} catch (SQLException ee) {
			ee.printStackTrace();
		} catch (Exception e) {
			System.out.print("Error loading Mysql Driver!");
			e.printStackTrace();
		}

		btn.setOnClickListener(new OnClickListener() {
			public void onClick(View v) {

				String sql = sql_command_et.getText().toString().trim();
				try {
					Statement st = con.createStatement();
					ResultSet rs = st.executeQuery(sql);
					while (rs.next()) {
						message.append(rs.getString("B_Name") + "\n");
					}
					rs.close();
					st.close();
					con.close();
				} catch (Exception e) {
					e.printStackTrace();
				}

				// message.append(DBManager.selectPwd("10001"));

			}
		});
	}

	@Override
	public boolean onCreateOptionsMenu(Menu menu) {
		// Inflate the menu; this adds items to the action bar if it is present.
		getMenuInflater().inflate(R.menu.main, menu);
		return true;
	}

}
(2)main.xml
<LinearLayout xmlns:android="http://schemas.android.com/apk/res/android"
    xmlns:tools="http://schemas.android.com/tools"
     android:orientation="vertical"
     android:layout_width="fill_parent"
    android:layout_height="fill_parent"
    android:paddingBottom="@dimen/activity_vertical_margin"
    android:paddingLeft="@dimen/activity_horizontal_margin"
    android:paddingRight="@dimen/activity_horizontal_margin"
    android:paddingTop="@dimen/activity_vertical_margin"
    tools:context=".MainActivity" >

   <TextView
	android:id="@+id/txt"
    android:layout_width="fill_parent"
    android:layout_height="wrap_content"
    android:text="输入SQL命令"
    />
	 <EditText
	 android:id="@+id/sql_command_et"
	 android:layout_width="fill_parent"
	 android:layout_height="wrap_content"
	 android:text="select B_Name from book"
	   />
	<Button
		android:id="@+id/btn"
	    android:layout_width="fill_parent"
	    android:layout_height="wrap_content"
	    android:text="查询数据库"
	/>
	<TextView
		android:id="@+id/message"
	    android:layout_width="fill_parent"
	    android:layout_height="wrap_content"
	    />
</LinearLayout>
(3) strings.xml
<?xml version="1.0" encoding="utf-8"?>
<resources>
    <string name="app_name">androidSqlServerTest</string>
    <string name="hello_world">Hello world!</string>
    <string name="action_settings">Settings</string>
</resources>
(4)AndroidManifest.xml
<?xml version="1.0" encoding="utf-8"?>
<manifest xmlns:android="http://schemas.android.com/apk/res/android"
    package="com.androidsqlservertest"
    android:versionCode="1"
    android:versionName="1.0" >

    <uses-sdk
        android:minSdkVersion="8"
        android:targetSdkVersion="8" />

    <application
        android:allowBackup="true"
        android:icon="@drawable/ic_launcher"
        android:label="@string/app_name"
        android:theme="@style/AppTheme" >
        <activity
            android:name="com.androidsqlservertest.AndroidSqlserverTest"
            android:label="@string/app_name" >
            <intent-filter>
                <action android:name="android.intent.action.MAIN" />

                <category android:name="android.intent.category.LAUNCHER" />
            </intent-filter>
        </activity>
    </application>
     <span style="color: rgb(255, 0, 0);"><uses-permission android:name="android.permission.INTERNET"></uses-permission></span>
</manifest>
(5) 模拟器上运行结果:

(6) 手机测试
手机截图如下:
oK,在Android工程中引入JDBC驱动,直接连接,是可以的,但太生猛,也不安全,你在测试的时候,如果不中,把防火墙关了,试一试。360好像没影响。![]()