Using GLEW, GLFW, and GLM
What Are These Libraries?
-
GLEW is on OpenGL library for handling OpenGL extensions. Users interested in diving into its source code can use git to clone its repository.
-
GLUT has been the defacto standard library for many OpenGL programmers, but it has not been actively maintained for decades. The last update to GLUT 3.x specification was dated in 1996. The most logical alternative to GLUT is FreeGLUT, however installation on Windows machines requires manual compile steps. I’m trying to look for a simpler alternative for my students.
After some research, I found GLFW. Windows users can doanload either the 32-bit or 64-bitversion of the library.
- GLM is a header-only math library designed for OpenGL programmers. It provides functions and classes for dealing with vectors, matrices, quaternions, and related operations.
This document shows how to use these libraries, mainly on Windows machines. At the end, I also show instructions for using these libraries with CLion. Using these libraries on OSX or Linux is relatively easier; specific instructions for Linux and OSX are provided at the end of this document.
The main steps are described below.
Step1: Install MinGW Using Win-Builds
If you have a previous version of MinGW, it is strongly recommended that you uninstall it first.
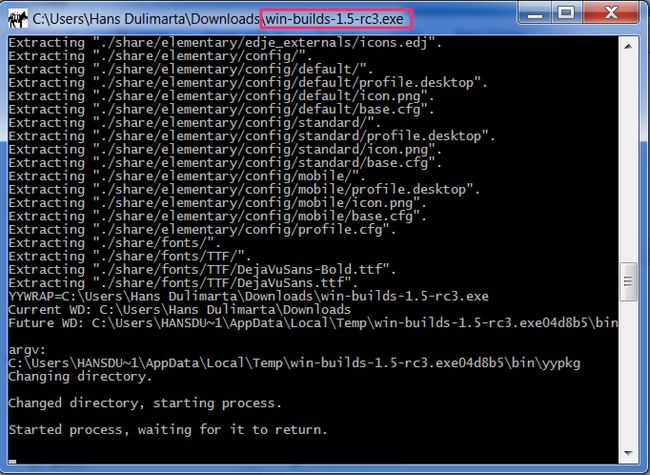
Windows users must install MinGW (32-bit or 64-bit) for CLion to compile C/C++ programs. To setup MinGW, first download win-build package manager. Linux/OSX users most likely already have g++ installed.
On the next screen, select the installation type (Native Windows), select the architecture (32- or 64-bit) to match your Windows. Click the Browse button to select the top directory of your MinGW installation (the following screenshot assumes a 64-bit architecture). Click “OK” to continue with installation.
On the next dialog window, click the “Process” button on the upper right corner of the window.

Edit the PATH environment variable to include C:\MinGW64\bin (or whatever name you chose during installation).
Step 2: Verify gcc and g++ are installed
From the command prompt type
gcc
g++
If the response is something other than “Command not found”, your compilers are installed correctly.
Step 3: Install GLFW
Windows users can download either 32-bit or 64-bit binary. Unzip the file directly under C:\ drive, (i.e. do not extract the files to C:\MyCourseWork, for instance), then rename the top installation directory to C:\GLFW. When the installation is complete, you will find the following subdirectories (among others):
-
C:/GLFW/include/ -
C:/GLFW/lib-mingw
OSX/Linux users should first use cmake to compile GLFW from source. After downloading GLFW source code, do the following:
If everything went smoothly, GLFW header files will be installed at /usr/local/include and its static library will be installed at /usr/local/lib.
Test your GLFW installation by typing the following program:
The #undef GLFW_DLL directive will compie the non-DLL version of the GLFW functions. Assuming the above code is saved as main.cpp, compile it with the following command line:
g++ -std=c++11 -IC:/GLFW/include -LC:/GLFW/lib-mingw main.cpp -o yay -lglfw3 -lopengl32
If the code is compiled using the DLL version of GLFW functions, the compiler options are:
g++ -std=c++11 -IC:/GLFW/include -LC:/GLFW/lib-mingw main.cpp -o yay C:/GLFW/lib-mingw/glfw3dll.a -lglfw3 -lopengl32 -lglu32 -lgdi32
The additional flags for the above compile are:
-
-Ic:/GLFW/includethe include directory for GLFW header files -
-LC:/GLFW/lib-mingwand-LC:/GLFW/lib-mingw\glfw3dll.athe link directory and library archive for GLFW (DLL) functions
When everything goes well, you fill find a new file yay.exe, but running the program will show an error message (missing glfw3.dll). Copy the missing file from c:/GLFW/lib-mingw to the current directory. After copying the .dll, you can now run yay.exe
yay
Step 4: Install GLEW Windows Binaries
Download and unzip the Windows binary of GLEW. Follow the same step as installing GLFW above (extract to C:\ drive and rename). The online installation instructions direct you to copy certain files to certain location of your windows, but I skipped those instructions.
After the installation you will find the following directories:
-
C:\GLEW\include -
C:\GLEW\bin\Release\Win32 -
C:\GLEW\bin\Release\x64 -
C:\GLEW\lib\Release\Win32 -
C:\GLEW\lib\Release\x64
Under the lib\Release\....\ you’ll find two library files glew32.lib (for non-static linking) and glew32s.lib (for static linking). We will use the static library
Compile the above code using the following:
g++ -std=c++11 -IC:/GLFW/include -IC:/GLEW/include -LC:/GLFW/lib-mingw main.cpp -LC:/GLEW/lib/Release/x64 -o yay C:/GLFW/lib-mingw/glfw3dll.a -lglew32s -lglfw3 -lopengl32 -lglu32 -lgdi32
The two additional flags here are:
-
-IC:/GLEW/include(the include directory for the hader fileglew.h) -
-LC:/GLEW/lib/Release/x64(for the 64-bit version of the static library)
Step 5: Install GLM
Download and unzip GLM or clone it from GitHub. This is a header only C++ library, no further installations steps required. Test your GLM installation by typing the following program:
Assuming GLM is installed at C:/GLM the above code is glmtest.cpp, compile the program as follows:
g++ -std=c++11 -IC:/GLM  glmtest.cpp  -o runme
runme
Expect to see output of a zero vector.
After the three libraries (GLEW, GLFW, and GLM) are installed, you can now compile your OpenGL program from the command line:
If you see a warning “corrupt .drectve at end of def file”, ignore it.
The above command is split into several lines for clarity. If you prefer to use an IDE or Linux “make” tool proceed to the next step.
Step 6: Prepare CMakeLists.txt [for CLion]
To speedup development time, I recommend you use cmake, a multi-platform development tool for setting up project for various IDEs. The following list of IDEs is just a small fraction of what cmake supports:
- Visual Studio
- Codeblock
- Eclipse
- Xcode
- Unix make
- KDevelop
Use cmake --help to see the complete list and use cmake -G to generate files for a specific project. For instance to generate an Xcode project:
Because cmake generates lots of files, it is recommended that we create a separate directory (buildin the above example) when running it.
To use cmake, we must create/edit a text file CMakeList.txt. If you plan to use CLion (the next step), it is not necessary to download cmake yourself because CLion comes bundled with cmake.
In the directory where you save your .cpp and .h files, create/edit CMakeLists.txt and add the following:
-
include_directories("C:/GLFW/include" "C:/GLEW/include" "C:/GLM") -
link_directories("C:/GLFW/lib-mingw" "C:/GLEW/lib/Release/x64") -
target_link_libraries(....... glfw3 glew32s glu32 opengl32)
See the following example:
Place the above CMakeLists.txt in the same folder as your .cpp files and that folder can now be imported as a CLion project. To test whether the above file is configured correctly, try to compile the code from the command line:
To run the executable on Linux, you have to type: ./sample.
For subsequent compiles, you just need to type make.
Step 7: CLion Setup
Once the three libraries (GLEW, GLFW, and GLM) are installed, you should be able to compile your program using CLion.
Download and install CLion. During the setup, select the top directory of your MinGW installation and select your CMake executable.

Visit Jetbrains E-store to apply for academic license.
Once you have a working copy of CLion, import your project into CLion (be sure the CMakeLists.txt is configured to match your personal settings).
Linux Users
Install mesa-common-dev, git-core, and the libraries
On Linux, GLFW depends on xorg-dev and libglu1-mesa-dev packages.
Build GLFW
After a successful compile and install you’ll find the following directories:
-
/usr/local/include/GLFW: the location of GLFW header files -
/usr/local/lib/cmake/glfw: GLFW3 cmake config files -
/usr/local/lib/libglfw.so.*: GLFW3 shared library
Build GLM
The installation will create:
-
/usr/local/include/glm: directory of GLM headers -
/usr/local/lib/x86_64-linux-gnu/cmake/FindGLM.cmake: CMake config file
The following CMakeLists.txt can be used to compile your code:
In addition to OpenGL related libraries, Linux programs also depend on X11-related libraries: Xxf86vm, Xrandr, Xinerama, Xi, and Xcursor.
OSX Users
Software development tools and compilers should be already installed on your OSX when your have Xcode installed. In addition, OSX users are recommended to use Homebrew for package management. After Homebrew is installed you can then install cmake, pkg-config, and glew:
Clone and install GLFW and GLM using the instructions for Linux users above.
To compile using XCode:
When the compile succeeds, the binary executable will go to the Debug directory of the current build.
The last command will generate a new Xcode project file. Open that using Xcode 5 or Xcode 6. CMake generates three targets: ALL_BUILD, ZERO_CHECK, and the-executable-name. Switch to the last target to run the program from Xcode