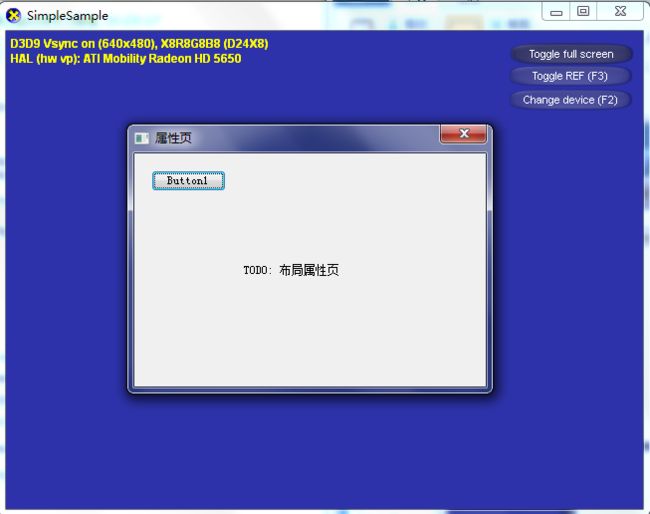
directx中使用windows 对话框
打开directx示例 SimpleSample
我们将在dxut中建立windows对话框
第一步 创建windows对话框
右击解决方案中的Resource Files文件夹-> 添加->资源 新建资源类型为Dialog IDD_PROPPAGE_LARGE
然后能看到正在编辑对话框 , 右键对话框选择属性 选项style设为popup ,选项system menu 设为true, 选项disabled设为false,DI该为IDD_1
添加一个button,属性不变
(查看和编辑对话框的操作是右击simplesample.rc,打开方式选择资源编辑器)
现在你就有个windows对话框 对话框只有一个button1按钮
第二步 使用对话框
在项目中新建两个文件OptionsDlg.h 和 OptionsDlg.cpp
在OptionsDlg.h 中粘贴如下代码
#pragma once
class COptinsDlg
{
public:
bool Show();
static INT_PTR CALLBACK StaticDlgProc( HWND hDlg, UINT uMsg, WPARAM wParam, LPARAM lParam );
};
在OptionsDlg.cpp 中粘贴如下代码
#include "DXUT.h"
#include "OptionsDlg.h"
#include "resource.h"
bool COptinsDlg::Show()
{
// Ask the user about param settings for the PRT Simulation
int nResult = (int) DialogBox( NULL, MAKEINTRESOURCE(IDD_1),
DXUTGetHWND(), StaticDlgProc );
return true;
}
INT_PTR CALLBACK COptinsDlg::StaticDlgProc( HWND hDlg, UINT msg, WPARAM wParam, LPARAM lParam )
{
switch( msg )
{
case WM_COMMAND:
switch( LOWORD(wParam) )
{
case IDC_BUTTON1:
{
EndDialog(hDlg, IDCANCEL);
break;
}
}
}
return 0;
}
在simplesample.cpp中添加头文件
#include "OptionsDlg.h"
然后在回调函数OnGUIEvent替换为如下代码
void CALLBACK OnGUIEvent( UINT nEvent, int nControlID, CDXUTControl* pControl, void* pUserContext )
{
switch( nControlID )
{
case IDC_TOGGLEFULLSCREEN:
{
COptinsDlg dlg;
bool bResult = dlg.Show();
break;
}
}
运行程序, 点击右上角的toggle full screen就能看到