android---widgets的使用
一.效果展示
在Android手机的桌面上,我们经常可以看到如下小控件
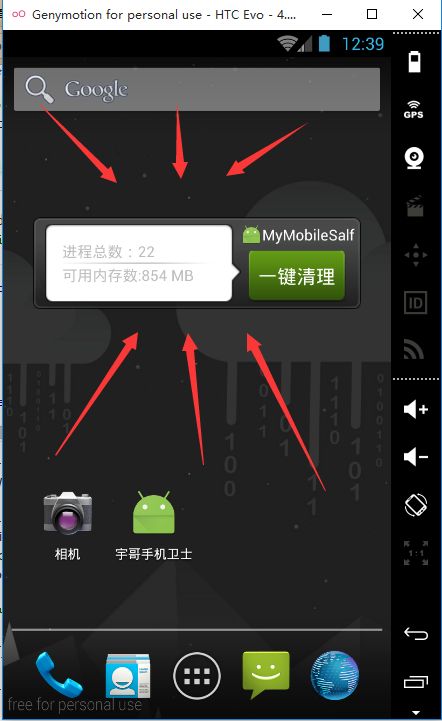
在这些控件上,可以显示我们APP的一些重要的交互信息,以我最近开发的手机卫士为例,在widget上可以显示进程总数,可用内存数,应用名称Logo,以及一键清理快捷键。接下来这篇文章就简单的记录下如何在自己的应用中创建widget。
二.查看Android官方文档
国内Android API镜像
如下所示:
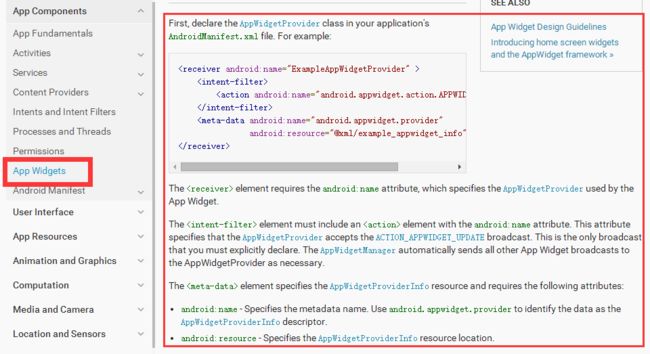
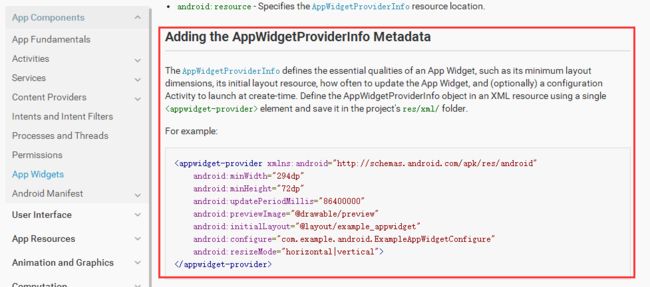
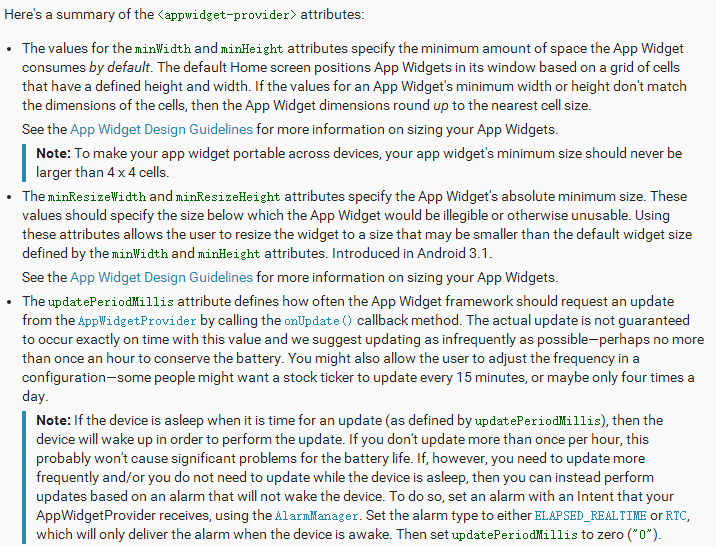
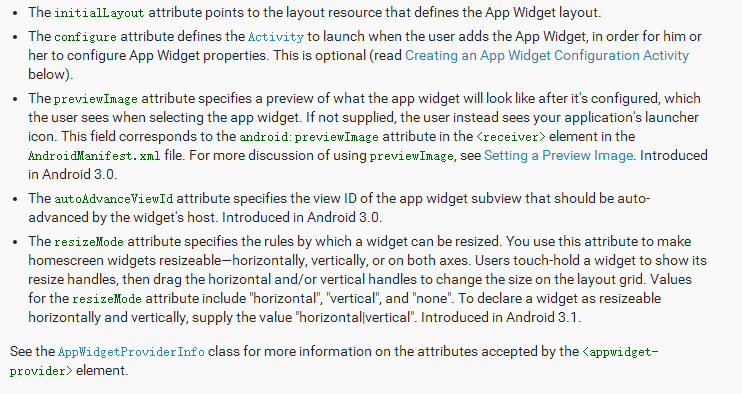
长篇大论一整面,我把最重要的几点扣了出来,英语比较好的看了这篇文档就应该知道怎么给自己的APP创建widget了,下面结合我结合实例,翻译并且记录一下用法
三.widget的创建
1. 在AndroidManifest文件中配置如下节点
<receiver android:name="receiver.myAppWidgetProvider" >
   <intent-filter>
       <action android:name="android.appwidget.action.APPWIDGET_UPDATE" />
   </intent-filter>

   <meta-data  android:name="android.appwidget.provider" android:resource="@xml/process_widget_provider" />
</receiver>
此处创建了一个XML文件(process_widget_provider),一个继承了Broadcast的类的子类。下面详细说一下这两个。
2.官方文档中给出的XML文件解释如下
<appwidget-provider xmlns:android="http://schemas.android.com/apk/res/android"
    android:minWidth="294dp"
    android:minHeight="72dp"//能被调整的最小宽高,若大于minWidth minHeight 则忽略
    android:updatePeriodMillis="86400000"//更新周期,毫秒,最短默认半小时
    android:previewImage="@drawable/preview"//选择部件时 展示的图像,3.0以上使用,默认是ic_launcher
    android:initialLayout="@layout/example_appwidget"//布局文件
    android:configure="com.example.android.ExampleAppWidgetConfigure"//添加widget之前,先跳转到配置的activity进行相关参数配置,这个我们暂时用不到
    android:resizeMode="horizontal|vertical"//widget可以被拉伸的方向。horizontal表示可以水平拉伸,vertical表示可以竖直拉伸
    android:widgetCategory="home_screen|keyguard"//分别在屏幕主页和锁屏状态也能显示(4.2+系统才支持)
    android:initialKeyguardLayout="@layout/example_keyguard"//锁屏状态显示的样式(4.2+系统才支持)
    >
    </appwidget-provider>
其中
android:initialLayout="@layout/example_appwidget"
这一条属性设置的layout文件就是最终显示在桌面上的widget的样式布局
不是所有的属性都需要配置,按需配置。下面贴出我应用中的widget的XML文件:
<?xml version="1.0" encoding="utf-8"?>
<appwidget-provider  xmlns:android="http://schemas.android.com/apk/res/android" android:initialLayout="@layout/process_widget" android:minHeight="72.0dip" android:minWidth="294.0dip" android:updatePeriodMillis="0"/>
其中initialLayout文件process_widget如下:
<?xml version="1.0" encoding="utf-8"?>
<LinearLayout  android:id="@+id/ll_root" xmlns:android="http://schemas.android.com/apk/res/android" android:layout_width="fill_parent" android:layout_height="wrap_content" android:background="@drawable/widget_bg_portrait" android:gravity="center_vertical">

    <LinearLayout  android:layout_width="0.0dip" android:layout_height="fill_parent" android:layout_marginLeft="5.0dip" android:layout_weight="1.0" android:background="@drawable/widget_bg_portrait_child" android:gravity="center_vertical" android:orientation="vertical" android:paddingBottom="3.0dip" android:paddingTop="3.0dip">

        <TextView  android:id="@+id/tv_process_count" android:layout_width="wrap_content" android:layout_height="wrap_content" android:layout_marginLeft="10.0dip" />

        <ImageView  android:layout_width="fill_parent" android:layout_height="wrap_content" android:layout_marginBottom="1.0dip" android:layout_marginTop="1.0dip" android:background="@drawable/widget_bg_portrait_child_divider"/>

        <TextView  android:id="@+id/tv_process_memory" android:layout_width="wrap_content" android:layout_height="wrap_content" android:layout_marginLeft="10.0dip" />
    </LinearLayout>

    <LinearLayout  android:layout_width="wrap_content" android:layout_height="wrap_content" android:gravity="center_horizontal" android:orientation="vertical">

        <LinearLayout  android:layout_width="wrap_content" android:layout_height="wrap_content" android:gravity="center_vertical">

            <ImageView  android:layout_width="20.0dip" android:layout_height="20.0dip" android:src="@mipmap/ic_launcher"/>

            <TextView  android:layout_width="wrap_content" android:layout_height="wrap_content" android:text="@string/app_name" android:textColor="#fff"/>
        </LinearLayout>

        <Button  android:id="@+id/btn_clear" android:layout_width="90.0dip" android:layout_height="wrap_content" android:layout_centerVertical="true" android:layout_marginTop="5.0dip" android:background="@drawable/selector_next_btn_bg" android:text="一键清理" android:textColor="#fff"/>
    </LinearLayout>
</LinearLayout>
这个layout文件决定了我应用的widget长下面这个样子(使用到的图片资源就不贴出来了):
3.myAppWidgetProvider
public class myAppWidgetProvider extends AppWidgetProvider {
    private static final String tag = "------>";

    @Override
    public void onReceive(Context context, Intent intent) {
        Log.i(tag, "onReceive............");
        super.onReceive(context, intent);
    }

    @Override
    public void onEnabled(Context context) {
        //创建第一个窗口小部件的方法
        Log.i(tag, "onEnabled 创建第一个窗体小部件调用方法");

        //开启服务
        context.startService(new Intent(context, updateWidgetService.class));
        super.onEnabled(context);
    }

    @Override
    public void onUpdate(Context context, AppWidgetManager appWidgetManager, int[] appWidgetIds) {
        Log.i(tag, "onUpdate 创建多一个窗体小部件调用方法");
        context.startService(new Intent(context, updateWidgetService.class));
        super.onUpdate(context, appWidgetManager, appWidgetIds);
    }

    @Override
    public void onAppWidgetOptionsChanged(Context context, AppWidgetManager appWidgetManager, int appWidgetId, Bundle newOptions) {
        //当窗体小部件宽高发生改变的时候调用方法,创建小部件的时候,也调用此方法
        context.startService(new Intent(context,updateWidgetService.class));

        Log.i(tag, "onAppWidgetOptionsChanged 创建多一个窗体小部件调用方法");

        super.onAppWidgetOptionsChanged(context, appWidgetManager, appWidgetId, newOptions);
    }

    @Override
    public void onDeleted(Context context, int[] appWidgetIds) {
        Log.i(tag, "onDeleted 删除一个窗体小部件调用方法");
        super.onDeleted(context, appWidgetIds);
    }

    @Override
    public void onDisabled(Context context) {
        Log.i(tag, "onDisabled 删除最后一个窗体小部件调用方法");
        context.stopService(new Intent(context, updateWidgetService.class));
        super.onDisabled(context);
    }
}
这个类和widget的生命周期相关联,重写的每个方法的回调情景已经在代码注释中给出,写到这里我们就可以在手机中调出这个widget了,但是这个widget还没有具体的功能,只是可以起到一个展示的作用。
四.完善widget功能
widget的功能业务逻辑要结合具体的应用。下面我记录下我自己最近的应用中widget的业务逻辑。
 @Override
    public void onEnabled(Context context) {
        //创建第一个窗口小部件的方法
        Log.i(tag, "onEnabled 创建第一个窗体小部件调用方法");

        //开启服务
        context.startService(new Intent(context, updateWidgetService.class));
        super.onEnabled(context);
    }
在widget被拖拽到桌面上时候,上述方法会被调用,我们在该方法中开启一个Service,因为widget的使用脱离了Activity,所以在服务中书写业务逻辑可以让widget脱离activity也可以完成某些功能。
public class updateWidgetService extends Service {

    private Timer mTimer;
    private InnerReceiver mInnerReceiver;

    @Override
    public void onCreate() {
        //管理进程总数和可用内存数更新(定时器)
        startTimer();

        //注册开锁解锁广播接收者
        IntentFilter intentFilter = new IntentFilter();
        intentFilter.addAction(Intent.ACTION_SCREEN_OFF);
        intentFilter.addAction(Intent.ACTION_SCREEN_ON);

        mInnerReceiver = new InnerReceiver();
        registerReceiver(mInnerReceiver, intentFilter);

        super.onCreate();
    }


    private class InnerReceiver extends BroadcastReceiver {
        @Override
        public void onReceive(Context context, Intent intent) {
            if (intent.getAction().equals(Intent.ACTION_SCREEN_ON)) {
                //开启定时更新任务
                startTimer();

            } else {
                //关闭定时更新任务
                cancelTimerTask();
            }

        }
    }

    private void startTimer() {
        //1.创建Timer对象
        mTimer = new Timer();
        mTimer.scheduleAtFixedRate(new TimerTask() {
            @Override
            public void run() {
                //UI定时刷新
                updateAppWidget();
                Log.i("------>", "5秒一次的定时任务正在运行");
            }
        }, 0, 5000);
    }

    private void updateAppWidget() {
        //1.获取APPWidget对象 单例模式
        AppWidgetManager appWidgetManager = AppWidgetManager.getInstance(this);
        //2.获取窗体小部件对应的布局转换成的对象(定位应用的包名,当前应用中的那个布局文件)
        RemoteViews remoteViews = new RemoteViews(getPackageName(), R.layout.process_widget);
        //3.给窗体小部件对应的View对象remoteViews 内部的控件赋值
        remoteViews.setTextViewText(R.id.tv_process_count, "进程总数:" + processInfoProvider.getProcessCount(this));
        //显示可使用内存大小
        String strAvailRAM = Formatter.formatFileSize(this, processInfoProvider.getAvailRAM(this));
        remoteViews.setTextViewText(R.id.tv_process_memory, "可用内存数:" + strAvailRAM);

        //点击窗口小部件进入应用 (1.在哪个控件上响应点击事件 2.延迟意图)
        Intent intent = new Intent("android.intent.action.HOME");
        intent.addCategory("android.intent.category.DEFAULT");
        PendingIntent pi = PendingIntent.getActivity(this, 0, intent, PendingIntent.FLAG_CANCEL_CURRENT);
        remoteViews.setOnClickPendingIntent(R.id.ll_root, pi);


        //通过延迟意图发送广播,在广播接收者中杀死进程
        Intent broadcastIntent = new Intent("android.intent.action.KILL_BACKGROUND_PROCESS");
        PendingIntent broadcast = PendingIntent.getBroadcast(this, 0, broadcastIntent, PendingIntent.FLAG_CANCEL_CURRENT);

        remoteViews.setOnClickPendingIntent(R.id.btn_clear, broadcast);


        //4.通知Manager更新
        //上下文环境 窗体小部件对应广播接收者的字节码文件
        ComponentName componentName = new ComponentName(this, myAppWidgetProvider.class);
        appWidgetManager.updateAppWidget(componentName, remoteViews);
    }


    @Nullable
    @Override
    public IBinder onBind(Intent intent) {
        return null;
    }


    private void cancelTimerTask() {

        if (mTimer != null) {
            mTimer.cancel();
            mTimer = null;
        }
    }

    @Override
    public void onDestroy() {

        if (mInnerReceiver != null) {
            unregisterReceiver(mInnerReceiver);
        }
        //onDestroy()方法被调用时,服务关闭,最后一个窗体小部件被移除,所以定时任务也关闭
        cancelTimerTask();
        super.onDestroy();
    }
}
updateWidgetService这个类完成的功能如下:
- 将进程总数和剩余内存显示在widget上。
- 通过定时器对显示的数据进行刷新,5秒刷新一次。
- 点击widget进入应用的HomeAcitvity界面。
- 锁屏时停止对widget的刷新操作。
- 点击一键清除按钮,清楚后台运行的程序。
接收到指定的广播"android.intent.action.KILL_BACKGROUND_PROCESS" 之后,下面拿到类中的onReceive()方法会被调用:
public class killProcessReceiver extends BroadcastReceiver {
    @Override
    public void onReceive(Context context, Intent intent) {
        //杀死进程
        processInfoProvider.killAll(context);

    }
}
其中杀死空闲进程的方法如下:
  public static void killAll(Context context){
        //1.拿刀
        ActivityManager activityManager =
                (ActivityManager) context.getSystemService(Context.ACTIVITY_SERVICE);
        //2.通过拿ActivityManager拿到正在运行的进程的信息列表
        List<ActivityManager.RunningAppProcessInfo> runningAppProcesses =
                activityManager.getRunningAppProcesses();
        //3.循环遍历所有进程,然后杀!!
        for (ActivityManager.RunningAppProcessInfo info:runningAppProcesses){
            //4除了手机卫士以外,其他的都杀!
            if (info.processName.equals(context.getPackageName())){
                continue;
            }
            activityManager.killBackgroundProcesses(info.processName);
        }

    }
五.后记
感觉现在做的这个项目,都不能称之为项目,准确的来说应该大型的Demo,它将Android中四大组件:Activity,Service,Content Provider,Broascast Receiver以及资源文件,Animation,等等都结合起来了,算是对Android基础的一个很好的复习。最主要的是提高了自己对知识点的索引能力(好吧,不吹牛逼了。。说通俗点就是怎么使用百度来解决问题)。