SVN版本管理系统的安装 CentOS + Subversion + Apache + Jsvnadmin
CI服务器:192.168.4.221
root用户操作
建议安装前更新操作系统
# yum update
更新完成后重启
# reboot
安装apache
# yum install httpd httpd-devel
# service httpdstart
# chkconfig httpdon
# vi/etc/httpd/conf/httpd.conf
找到ServerName 并修改成
ServerNamelocalhost:80
防火墙中打开80端口:
# vi /etc/sysconfig/iptables
-A INPUT -m state --state NEW-m tcp -p tcp --dport 80 -j ACCEPT
# service iptables restart
http://192.168.4.221/
安装SVN服务
# yum install mod_dav_svn subversion
必须安装mod_dav_svn模块
安装完svn后要重启apache
# service httpdrestart
查看测试是否安装svn模块
# ls /etc/httpd/modules/ | grep svn
mod_authz_svn.so
mod_dav_svn.so
# svn --version
创建svn库主目录(多库模式,一份配置文件管理多个库)
# mkdir /svn/
# cd /etc/httpd/conf.d
# ls
此时可以看到一个subversion.conf配置文件(是在安装mod_dav_svn模块时生成的)
# vi subversion.conf
添加以下内容
#Include /svn/httpd.conf
<Location /svn/>
DAV svn
SVNListParentPath on
SVNParentPath /svn
AuthType Basic
AuthName "Subversionrepositories"
AuthUserFile /svn/passwd.http
AuthzSVNAccessFile /svn/authz
Require valid-user
</Location>
RedirectMatch ^(/svn)$ $1/
创建/svn/passwd.http和/svn/authz
# touch/svn/passwd.http
# touch /svn/authz
重启apache
# service httpdrestart
安装jsvnadmin
svnadmin介绍
(在Google Code上,需要FQ才能下载。我们也会把最新版的jsvnadmin放到群共享中)
https://code.google.com/p/jsvnadmin/
https://jsvnadmin.googlecode.com/files/svnadmin-3.0.5.zip
安装MySQL(单独安装,与业务系统的数据库分开)
# rpm -qa | grepmysql ## 查看该操作系统上是否已经安装了mysql数据库,
有的话,可以通过 rpm -e 命令 或者rpm -e --nodeps 命令来卸载掉
# yum installmysql-server mysql mysql-devel
# service mysqldstart
# chkconfig --list| grep mysqld
mysqld 0:off 1:off 2:off 3:off 4:off 5:off 6:off
用上面的命令查看到MySQL并没有设置开机启动,所以需要设置开机启动
# chkconfig mysqldon
为了方便远程管理,防火墙中打开3306端口
# vi/etc/sysconfig/iptables
-A INPUT -m state --state NEW-m tcp -p tcp --dport 3306 -j ACCEPT
重启防火墙,使端口配置生效
# service iptablesrestart
设置MySQL数据库root用户的密码:
# mysqladmin -uroot password 'wusc.123'
登录数据库:
# mysql -u root -p
MySQL授权远程访问(先用root登录mysql)
mysql> GRANT ALLPRIVILEGES ON *.* TO 'root'@'%' IDENTIFIED BY 'wusc.321' WITH GRANT OPTION;
mysql> FLUSHPRIVILEGES;
使用Tomcat7部署svnadmin
# cd /root
使用wget下载最新版的tomcat7 的tar.gz包
# tar -zxvfapache-tomcat-7.0.xx.tar.gz
# mvapache-tomcat-7.0.xx svnadmin-tomcat
修改Tomcat的端口为9000和容器编码为UTF-8
# vi /root/svnadmin-tomcat/conf/server.xml
修改以下标红的内容
<Server port="9005"shutdown="SHUTDOWN">
<Connector port="9000"protocol="HTTP/1.1"
connectionTimeout="20000"
redirectPort="8443" URIEncoding="UTF-8" />
防火墙中打开9000端口
# vi/etc/sysconfig/iptables
-A INPUT -m state --state NEW-m tcp -p tcp --dport 9000 -j ACCEPT
重启防火墙,使端口配置生效
# service iptablesrestart
# cd /root/svnadmin-tomcat/webapps
# rm -rf *
上传 svnadmin.war 到/root/svnadmin-tomcat/webapps目录
# cd/root/svnadmin-tomcat/webapps
解压
# unzipsvnadmin.war -d svnadmin
备份
# mv svnadmin.war/root/tools/
# cdsvnadmin/WEB-INF
# vijdbc.properties
内容改为如下
db=MySQL
#MySQL
MySQL.jdbc.driver=com.mysql.jdbc.Driver
MySQL.jdbc.url=jdbc:mysql://127.0.0.1:3306/svnadmin?characterEncoding=utf-8
MySQL.jdbc.username=root
MySQL.jdbc.password=wusc.123
创建svnadmin数据库并导入相应数据(UTF-8编码)
执行db/mysql5.sql 和db/lang/en.sql
启动svnadmin-tomcat
# /root/svnadmin-tomcat/bin/startup.sh
浏览器中打开:http://192.168.4.221:9000/svnadmin/
如:输入admin,wusc.123
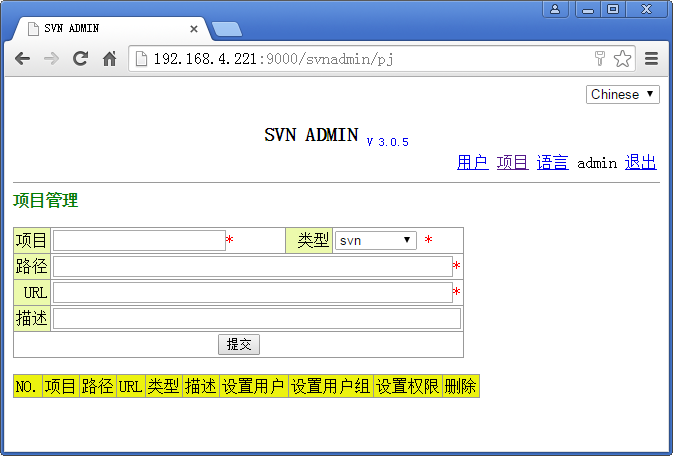
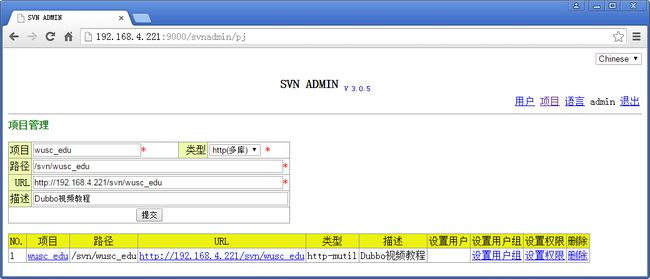
创建库
此时:
/svn/目录下会创建一个wusc_edu的SVN库目录。
同时也会多出一个httpd.conf文件,内容与subversion.conf一样,在/etc/httpd/conf.d/subversion.conf中已配置。
/svn/authz 授权文件中会多出如下内容:
[aliases]
[groups]
wusc_edu_developer=
wusc_edu_manager=
wusc_edu_tester=
[wusc_edu:/]
@wusc_edu_manager=rw
以上过程其实是调用了svn对应的命令做了相应的操作
配置库目录权限
# cd /svn
# chown -Rapache.apache wusc_edu
# chmod -R 777wusc_edu
(如创建新库,需要对新建的库目录执行以上两步授权操作)
关闭SELinux(Linux的访问控制)
修改/etc/selinux/config 文件
# vi /etc/selinux/config
将SELINUX=enforcing改为SELINUX=disabled
重启机器即可
# reboot
SVN版本管理平台(Subversion+Apache+Jsvnadmin)的使用:
先安装SVN管理客户端TortoiseSVN,方便对SVN库的操作和管理
http://tortoisesvn.net/downloads.html
(注意64位系统要安装64位版)
接下来可以对wusc_edu库进行相应的操作
(1) 用户组
(2) 用户
(3) 授权
(4) 导入项目

