sphinx 全文搜索 软件 工具 的安装使用
我使用的环境是windows,过程参考了这篇文章:http://www.kaiyuanba.cn/html/1/131/140/7577.htm
1.首先是在官方<http://sphinxsearch.com/>下载了此文件:sphinx-2.0.6-release-win64.zip
2.解压之后在bin同级目录建立log和data目录,然后将根目录的example.sql在mysql的localhost服务器的test数据库上执行。
3.
Install the searchd system as a Windows service:
参考这种方式注册服务:C:\Sphinx\bin> C:\Sphinx\bin\searchd --install --config C:\Sphinx\sphinx.conf.in --servicename SphinxSearch
(这一步来自于解压包里的doc手册)
4.之后将根目录的sphinx.conf.in拷贝到bin目录下并rename为sphinx.conf,并将里面的数据库配置,和index test1和searchd进行相关配置,将其中的@CONFDIR@都替换成你的根目录,例如C:\Sphinx\
5.然后要启动守护进程searchd:
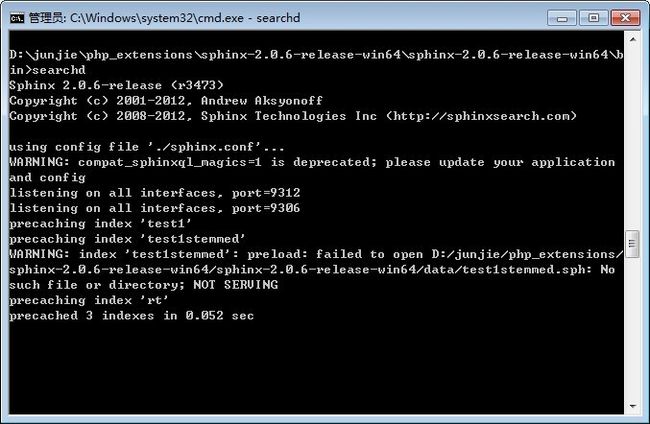
可以看到searchd监听了9312端口,并且里面已经将test1索引预先缓存了,其他的一些缓存失败我暂时没搭理
6.在解压包下面的api目录下的sphinxapi.php拿来,放到www目录下,然后编写:
<?php
require "sphinxapi.php";
$s = new SphinxClient();
$s->SetServer('localhost',9312);
$result = $s->Query('test','test1');
print_r($result);
?>
输出结果为:
Array
(
    [error] =>
    [warning] =>
    [status] => 0
    [fields] => Array
        (
            [0] => title
            [1] => content
        )

    [attrs] => Array
        (
            [group_id] => 1
            [date_added] => 2
        )

    [matches] => Array
        (
            [1] => Array
                (
                    [weight] => 2
                    [attrs] => Array
                        (
                            [group_id] => 1
                            [date_added] => 1359542960
                        )

                )

            [2] => Array
                (
                    [weight] => 2
                    [attrs] => Array
                        (
                            [group_id] => 1
                            [date_added] => 1359542960
                        )

                )

            [4] => Array
                (
                    [weight] => 1
                    [attrs] => Array
                        (
                            [group_id] => 2
                            [date_added] => 1359542960
                        )

                )

        )

    [total] => 3
    [total_found] => 3
    [time] => 0.000
    [words] => Array
        (
            [test] => Array
                (
                    [docs] => 3
                    [hits] => 5
                )

        )

)
结束。