Android之Fragment的使用(一)
每个人都会累,没人能为你承担所有悲伤,人总有一段时间要学会自己长
本讲内容:Fragment的使用
Fragment是一种可以嵌入在活动当中的UI片段,它能让程序更加合理和充分地利用大屏幕的空间,因而在平板上应用的非常广泛。
一、创建一个Fragment
继承Fragment类,重写生命周期方法,需要重写一个onCreateView()方法来返回这个Fragment的布局。
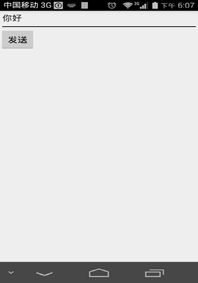
示例一:在一个活动当中添加两个碎片,并让这两个碎片平分活动空间(静态加载)

下面是res/layout/left_fragment.xml 布局文件:
<?xml version="1.0" encoding="utf-8"?>
<LinearLayout xmlns:android="http://schemas.android.com/apk/res/android"
    android:layout_width="match_parent"
    android:layout_height="match_parent"
    android:orientation="vertical" >

    <Button
        android:id="@+id/button"
        android:layout_width="wrap_content"
        android:layout_height="wrap_content"
        android:layout_gravity="center_horizontal"
        android:text="Button" />

</LinearLayout>
下面是res/layout/right_fragment.xml 布局文件:
<?xml version="1.0" encoding="utf-8"?>
<LinearLayout xmlns:android="http://schemas.android.com/apk/res/android"
    android:layout_width="match_parent"
    android:layout_height="match_parent"
    android:background="#0f0"
    android:orientation="vertical" >

     <TextView
        android:layout_width="wrap_content"
        android:layout_height="wrap_content"
        android:layout_gravity="center_horizontal"
        android:text="This is right fragment"
        android:textSize="20sp" />

</LinearLayout>
下面是LeftFragment.java文件:
public class LeftFragment extends Fragment {

	public View onCreateView(LayoutInflater inflater, ViewGroup container,Bundle savedInstanceState) {
		// 通过LayoutInflater的inflate()方法将定义的布局动态加载进来并转换成View对象
		/**
		 * resource:Fragment需要加载的布局文件
		 * root:加载布局文件的父ViewGroup
		 * attactToRoot:false为不返回父ViewGroup
		 */
		View view = inflater.inflate(R.layout.left_fragment, container, false);
		return view;
	}
}
下面是Right Fragment .java文件:
public class RightFragment extends Fragment{

	public View onCreateView(LayoutInflater inflater, ViewGroup container,Bundle savedInstanceState) {
		View view=inflater.inflate(R.layout.right_fragment, container, false);
		return view;
	}
}
下面是res/layout/activity_main.xml 布局文件:
<LinearLayout xmlns:android="http://schemas.android.com/apk/res/android"
    xmlns:tools="http://schemas.android.com/tools"
    android:layout_width="match_parent"
    android:layout_height="match_parent" >

    <fragment
        android:id="@+id/left_fragment"
        android:name="com.example.fragmenttest.LeftFragment"
        android:layout_width="0dp"
        android:layout_height="match_parent"
        android:layout_weight="1" />

    <fragment
        android:id="@+id/right_fragment"
        android:name="com.example.fragmenttest.RightFragment"
        android:layout_width="0dp"
        android:layout_height="match_parent"
        android:layout_weight="1" />

</LinearLayout>
下面是MainActivity.java主界面文件:
public class MainActivity extends Activity {
    protected void onCreate(Bundle savedInstanceState) {
        super.onCreate(savedInstanceState);
        setContentView(R.layout.activity_main);
    }
}
注意:如果Fragment引用的包是:import android.support.v4.app.Fragment; Activity必须是继承FragmentActivity
示例二:动态添加碎片(在示例一基础上修改)
动态添加碎片步骤:(对Fragment进行添加add()、移除remove()、替换replace()。)
1、创建待添加的碎片实例。
2、获取FragmentManager,调用getFragmentManager()方法得到。
3、开启一个事务,通过调用beginTransaction()方法开启。
4、向容器加入碎片,一般使用replace()方法实现,需要传入容器的id和待添加的碎片实例。
5、提交事务,调用commit()方法来完成。
点击按钮
下面是res/layout/another_right_fragment.xml 布局文件:
<?xml version="1.0" encoding="utf-8"?>
<LinearLayout xmlns:android="http://schemas.android.com/apk/res/android"
    android:layout_width="match_parent"
    android:layout_height="match_parent"
    android:background="#ff0"
    android:orientation="vertical" >

     <TextView
        android:layout_width="wrap_content"
        android:layout_height="wrap_content"
        android:layout_gravity="center_horizontal"
        android:text="This is another right fragment"
        android:textSize="20sp" />

</LinearLayout>
下面是AnotherRightFragment .java文件:
public class AnotherRightFragment extends Fragment{

	public View onCreateView(LayoutInflater inflater, ViewGroup container,Bundle savedInstanceState) {
		//通过LayoutInflater的inflate()方法将定义的布局动态加载进来
		View view=inflater.inflate(R.layout.another_right_fragment, container, false);
		return view;
	}
}
下面是res/layout/activity_main.xml 布局文件:
<LinearLayout xmlns:android="http://schemas.android.com/apk/res/android"
    xmlns:tools="http://schemas.android.com/tools"
    android:layout_width="match_parent"
    android:layout_height="match_parent" >

    <fragment
        android:id="@+id/left_fragment"
        android:name="com.example.fragmenttest.LeftFragment"
        android:layout_width="0dp"
        android:layout_height="match_parent"
        android:layout_weight="1" />

    <FrameLayout
        android:id="@+id/right_layout"
        android:layout_width="0dp"
        android:layout_height="match_parent"
        android:layout_weight="1" >

        <fragment
            android:id="@+id/right_fragment"
            android:name="com.example.fragmenttest.RightFragment"
            android:layout_width="match_parent"
            android:layout_height="match_parent" />
    </FrameLayout>

</LinearLayout>
下面是MainActivity.java主界面文件:
public class MainActivity extends Activity implements OnClickListener{
	private Button button;

    protected void onCreate(Bundle savedInstanceState) {
        super.onCreate(savedInstanceState);
        setContentView(R.layout.activity_main);
        button=(Button) findViewById(R.id.button);
        button.setOnClickListener(this);
    }

	public void onClick(View v) {
		switch (v.getId()) {
		case R.id.button:
			AnotherRightFragment fragment=new AnotherRightFragment();//创建待添加碎片
			FragmentManager manager=getFragmentManager();//获取FragmentManager
			FragmentTransaction transaction=manager.beginTransaction();//开启一个事务
			transaction.replace(R.id.right_layout, fragment);//向容器加入碎片
			transaction.commit();//提交事务
			break;
		default:
			break;
		}
	}
}
示例三:在碎片中模拟返回栈
在示例二,我们通过点击按钮添加一个碎片后,这时按下Back键程序就会直接退出。如果我们想模仿类似于返回栈的效果,按下Back键可以返回到上一个碎片,这时就要用到FragmentTransaction中提供一个addToBackStack()方法,可以用于将一个事务添加到返回栈中,它可以接收一个名字用于描述返回栈的状态,一般传入null即可。
修改下MainActivity.java主界面文件:
public class MainActivity extends Activity implements OnClickListener{
	private Button button;

    protected void onCreate(Bundle savedInstanceState) {
        super.onCreate(savedInstanceState);
        setContentView(R.layout.activity_main);
        button=(Button) findViewById(R.id.button);
        button.setOnClickListener(this);
    }

	public void onClick(View v) {
		switch (v.getId()) {
		case R.id.button:
			AnotherRightFragment fragment=new AnotherRightFragment();//创建待添加碎片
			FragmentManager manager=getFragmentManager();//获取FragmentManager
			FragmentTransaction transaction=manager.beginTransaction();//开启一个事务
			transaction.replace(R.id.right_layout, fragment);//向容器加入碎片
			transaction.addToBackStack(null);
			transaction.commit();//提交事务
			break;
		}
	}
}
二、碎片和活动之间进行通信
1、在活动中调用碎片里的方法
FragmentManager提供了一个findFragmentById()或findFragmentByTag()方法,可以在活动中得到相应碎片的实例,然后就能调用该碎片里的方法了。
RightFragment rightFragment=(RightFragment) getFragmentManager().findFragmentById(R.id.right_fragment);2、在碎片里调用活动中的方法
在每个碎片中都可以通过调用getActivity()方法来得到和当前碎片相关联的活动实例,如下
MainActivity activity=(MainActivity) getActivity()有了活动实例之后,就可以在碎片里调用活动里的方法了。
示例四:Activity向Fragment(动态加载)传递数据
在Activity中创建Bundle数据包,并调用Fragment的setArguments()方法
下面是res/layout/first_fragment.xml 布局文件:
<?xml version="1.0" encoding="utf-8"?>
<LinearLayout xmlns:android="http://schemas.android.com/apk/res/android"
    android:layout_width="match_parent"
    android:layout_height="match_parent"
    android:orientation="vertical" >

    <TextView
        android:id="@+id/id_text"
        android:layout_width="match_parent"
        android:layout_height="wrap_content"
        android:textSize="25sp" />

</LinearLayout>
下面是FirstFragment.java文件:
public class FirstFragment extends Fragment {
	private TextView tv;
	public View onCreateView(LayoutInflater inflater, ViewGroup container,Bundle savedInstanceState) {
		View view=inflater.inflate(R.layout.first_fragment, container,false);
		//注意通过view.findv,否则报错
		tv=(TextView) view.findViewById(R.id.id_text);
		String text=getArguments().get("name")+"";
		tv.setText(text);
		Toast.makeText(getActivity(), "Fragment接收到"+text, Toast.LENGTH_LONG).show();
		return view;
	}
}
下面是res/layout/activity_main.xml 布局文件:
<LinearLayout xmlns:android="http://schemas.android.com/apk/res/android"
    xmlns:tools="http://schemas.android.com/tools"
    android:layout_width="match_parent"
    android:layout_height="match_parent"
    android:id="@+id/layout"
    android:orientation="vertical" >

    <EditText
        android:id="@+id/id_edit"
        android:layout_width="match_parent"
        android:layout_height="wrap_content"
        android:hint="输入数据" />

    <Button
        android:id="@+id/id_send"
        android:layout_width="wrap_content"
        android:layout_height="wrap_content"
        android:text="发送" />

</LinearLayout>
下面是MainActivity.java主界面文件:
public class MainActivity extends FragmentActivity {
	private EditText edit;
	private Button send;

	protected void onCreate(Bundle savedInstanceState) {
		super.onCreate(savedInstanceState);
		setContentView(R.layout.activity_main);
		initViews();
	}

	private void initViews() {
		edit=(EditText) findViewById(R.id.id_edit);
		send=(Button) findViewById(R.id.id_send);
		send.setOnClickListener(new OnClickListener() {
			public void onClick(View v) {
				String text=edit.getText().toString();
				FirstFragment fragment=new FirstFragment();
				Bundle bundle=new Bundle();
				bundle.putString("name", text);
				fragment.setArguments(bundle);

				//向activity_main布局文件中动态加载Fragment
				FragmentManager manager=getFragmentManager();
				FragmentTransaction transaction=manager.beginTransaction();
				transaction.add(R.id.layout, fragment);
				transaction.commit();

				Toast.makeText(MainActivity.this, "Activity-->Fragment发送数据", Toast.LENGTH_LONG).show();
			}
		});
	}
}
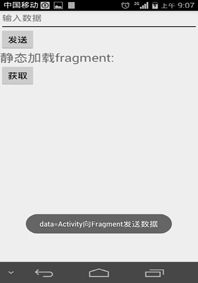
示例五:Activity向Fragment(静态加载)传递数据
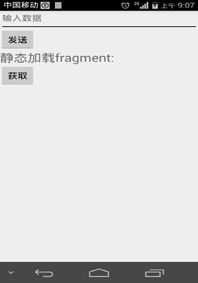
下面是res/layout/first_fragment.xml 布局文件:
<?xml version="1.0" encoding="utf-8"?>
<LinearLayout xmlns:android="http://schemas.android.com/apk/res/android"
    android:layout_width="match_parent"
    android:layout_height="match_parent"
    android:orientation="vertical" >

    <TextView
        android:id="@+id/id_text"
        android:layout_width="wrap_content"
        android:layout_height="wrap_content"
        android:textSize="25sp"
        android:text="静态加载fragment:" />

    <Button
        android:id="@+id/button"
        android:layout_width="wrap_content"
        android:layout_height="wrap_content"
        android:text="获取"/>

</LinearLayout>
下面是FirstFragment.java文件:
public class FirstFragment extends Fragment {
	private Button b;
	private String data;


	public String getData() {
		return data;
	}


	public void setData(String data) {
		this.data = data;
	}

	public View onCreateView(LayoutInflater inflater, ViewGroup container,Bundle savedInstanceState) {
		View view=inflater.inflate(R.layout.first_fragment, container,false);
		b=(Button) view.findViewById(R.id.button);
		b.setOnClickListener(new OnClickListener() {
			public void onClick(View v) {
				data=getData();
				Toast.makeText(getActivity(), "data="+data, Toast.LENGTH_SHORT).show();
			}
		});

		return view;
	}
}
下面是res/layout/activity_main.xml 布局文件:
<LinearLayout xmlns:android="http://schemas.android.com/apk/res/android"
    xmlns:tools="http://schemas.android.com/tools"
    android:layout_width="match_parent"
    android:layout_height="match_parent"
    android:id="@+id/layout"
    android:orientation="vertical" >

    <EditText
        android:id="@+id/id_edit"
        android:layout_width="match_parent"
        android:layout_height="wrap_content"
        android:hint="输入数据" />

    <Button
        android:id="@+id/id_send"
        android:layout_width="wrap_content"
        android:layout_height="wrap_content"
        android:text="发送" />

    <fragment
        android:id="@+id/first_fragment"
        android:name="com.example.fragmentdemo.FirstFragment"
        android:layout_width="wrap_content"
        android:layout_height="wrap_content"/>

</LinearLayout>
下面是MainActivity.java主界面文件:
public class MainActivity extends FragmentActivity {
	protected void onCreate(Bundle savedInstanceState) {
		super.onCreate(savedInstanceState);
		setContentView(R.layout.activity_main);
		initViews();
	}

	private void initViews() {
		FragmentManager manager=getFragmentManager();
		Fragment fragment = manager.findFragmentById(R.id.first_fragment);
		FirstFragment firstFragment=(FirstFragment) fragment;
		firstFragment.setData("Activity向Fragment发送数据");
	}
}
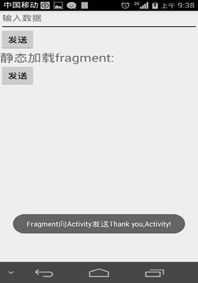
示例六:Fragment向Activity传递数据
Fragment-->Activity:需要在Fragment中定义一个内部回调接口,再让包含该Fragment的Activity实现回调接口。这样Fragment可调用该回调方法将数据传递给Activity
下面是FirstFragment.java文件:
public class FirstFragment extends Fragment {
	private Button b;

	private String data="Thank you,Activity!";
	private ISendData sendData;

	interface ISendData{
		void send(String data);
	}

	/**
	 * 当Fragment被添加到Activity时候会回调这个方法,并且只调用一次
	 */
	public void onAttach(Activity activity) {
		sendData=(ISendData) activity;
		super.onAttach(activity);
	}

	public View onCreateView(LayoutInflater inflater, ViewGroup container,Bundle savedInstanceState) {
		View view=inflater.inflate(R.layout.first_fragment, container,false);
		b=(Button) view.findViewById(R.id.button);
		b.setOnClickListener(new OnClickListener() {
			public void onClick(View v) {
				Toast.makeText(getActivity(), "Fragment向Activity发送"+data, Toast.LENGTH_SHORT).show();
				sendData.send(data);
			}
		});
		return view;
	}
}
下面是MainActivity.java主界面文件:
public class MainActivity extends FragmentActivity implements ISendData{

	protected void onCreate(Bundle savedInstanceState) {
		super.onCreate(savedInstanceState);
		setContentView(R.layout.activity_main);
	}

	public void send(String data) {
		Toast.makeText(MainActivity.this, "已成功接收到" + data + ",客气了!",Toast.LENGTH_SHORT).show();
	}
}
Take your time and enjoy it 要原码的、路过的、学习过的请留个言,顶个呗~~