Spring Boot学习入门篇(一)--Hello World
简介:Spring Boot是一种简化原有Spring应用繁杂配置的微框架。使开发者从繁杂的各种配置文件中解脱出来,通过Spring Boot能够很简单、很快速构建一个优秀的、产品级的Spring基础应用。运行Spring Boot和运行普通的Java类一样简单,仅仅run一下Spring Boot的入口main()方法即可开启应用;你也可以把Spring Boot应用打成jar,在命令行执行java -jar xxx.jar命令来运行;或者打成war包部署到服务器下运行服务器来开启应用。Spring Boot微框架考虑到了Spring平台和第三方库的情况,所以你需要做的则是最少的操作或配置。
Spring Boot特点:
1. 创建优秀的Spring Web应用;
2. 直接嵌入了Tomcat、Jetty和Undertow等三个Web服务器,很方便的部署应用;
3. 提供一系列不同类型的starter POMs简化原有Spring应用繁杂的Maven配置;
4. 充分利用JavaConfig的配置模式以及“约定优于配置”的理念,自动化配置、装配Spring,简化了人为的配置;
5. 提供生产就绪型功能,如指标,健康检查和外部配置(?不理解这点,求指教);
6. 没有代码产生、没有XML文件要求配置。
应用要求
一、系统要求
Spring Boot 2.0.0版本要求:
- Java 8;
- Spring 5或以上;
- 项目构建工具:Maven 3.2或以上版本,Gradle 3.4或以上版本。
二、Servlet容器
Spring Boot 2.0.0内嵌的Servlet容器支持情况:
- Tomcat 8.5支持Servlet 3.1版本;
- Jetty 9.4支持Servlet 3.1版本;
- Undertow 1.3支持Servlet 3.1版本。
换句话说,你可以把Spring Boot应用部署到任何支持Servlet 3.0以上版本的Servlet容器里。
第一个Spring Boot应用之Hello World
在此,使用idea作为Spring Boot应用的开发工具。使用Maven来管理项目依赖。
一,idea自动化构建Spring Boot应用
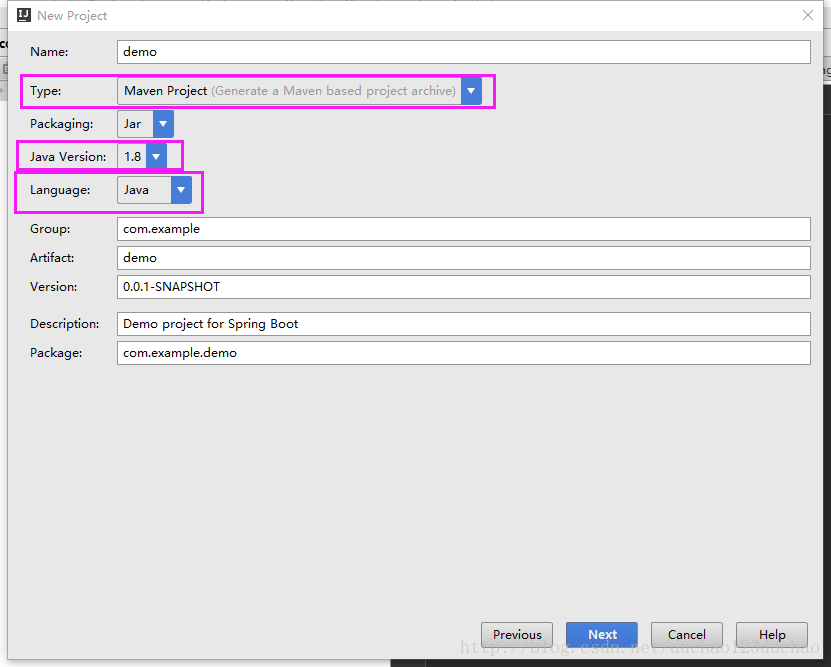
1、【File】-> 【New】 -> 【Project】出现New Project面板,选中【Spring Initializr】,填写情况默认即可,如下图:
注意:
Initializr Service URL为https://start.spring.io,这一步骤需要联网,请确保你的电脑正常联网,不然项目构建会失败。
2、点击【Next】,填写情况默认即可,如下图:
3、点击【Next】,填写情况如下图:
注意:
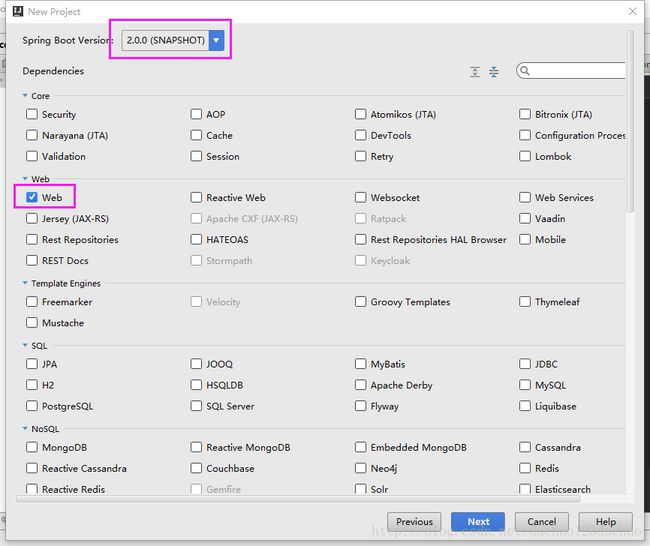
1,这里我们选择Spring Boot 2.0.0版本;2,选择依赖中,我们这里勾选Web,表示这里构建的是Web应用。
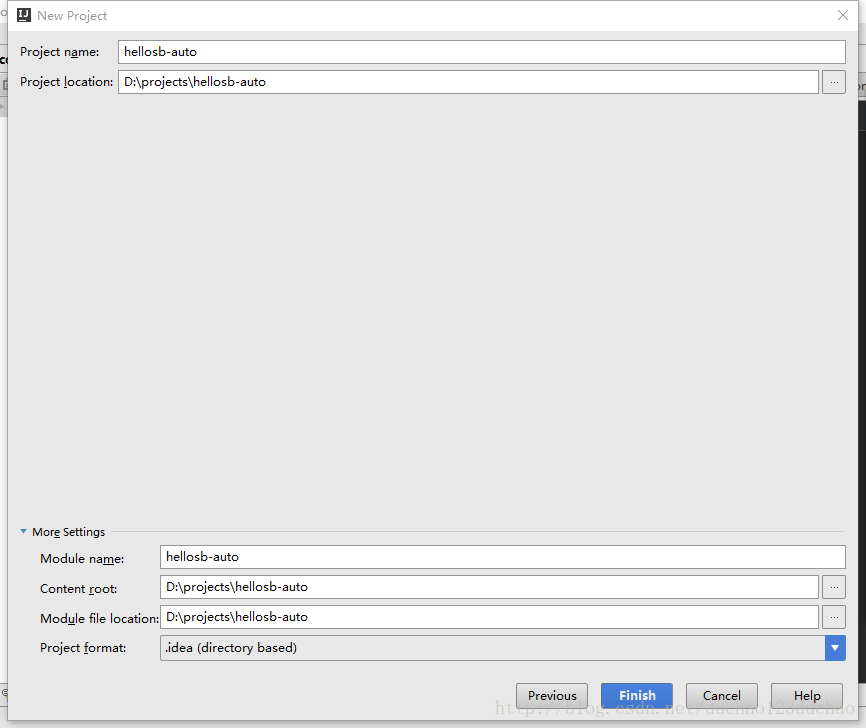
4、点击【Next】,填写项目名和选择所属本地目录,这里项目名为hellosb-auto,如下图:
5、点击【Finish】项目开始构建,等待一会,你会看到一个Spring Boot应用,结构如下图:
@SpringBootApplication
就这样,人为没有添加任何的配置,一个Spring Boot的Web应用就快速构建成功了。每个Spring Boot项目都会有一个@SpringBootApplication注解,@SpringBootApplication注解的XXXAplication.java类,表示这是一个Spring Boot应用。Spring Boot建议只有一个带有该注解的类,因为@SpringBootApplication注解的类是Spring Boot项目的入口类。运行这个Spring Boot的入口类,Spring Boot读取到注解@SpringBootApplication注解的注解@EnableAutoConfiguration,会根据你引入的Starter依赖来自动配置项目(具体详情,后面学习进阶篇中介绍),其中,Spring读取@EnableAutoConfiguration注解所在的目录来进行扫面装配。
Starters and Auto-Configuration
Auto-configuration is designed to work well with “Starters”, but the two concepts are not directly
tied. You are free to pick-and-choose jar dependencies outside of the starters and Spring Boot will still do its best to auto-configure your application.
因为一系列Starter,Spring能够很好的对Spring Boot应用进行自动配置,但是自动配置和Starter并没有直接联系在一起。因为Starters,你省了挑选jar依赖,而Spring Boot却能尽可能好的自动配置你的应用。
main方法
入口方法main()方法执行,main() 方法委托SpringApplication类运行run()方法,SpringApplication将引导Spring Boot应用,开启Spring来自动配置Tomcat服务器。把入口类作为run()方法入参来告诉SpringApplication类这个入口类是一个基本的Spring组件。也因此,可以在这个类上注解@RestController来作为一个控制类处理请求。
看看pom.xml文件具体情况:
<project xmlns="http://maven.apache.org/POM/4.0.0" xmlns:xsi="http://www.w3.org/2001/XMLSchema-instance" xsi:schemaLocation="http://maven.apache.org/POM/4.0.0 http://maven.apache.org/xsd/maven-4.0.0.xsd">
    <modelVersion>4.0.0modelVersion>

    <groupId>com.examplegroupId>
    <artifactId>demoartifactId>
    <version>0.0.1-SNAPSHOTversion>
    <packaging>jarpackaging>

    <name>demoname>
    <description>Demo project for Spring Bootdescription>


    <parent>
        <groupId>org.springframework.bootgroupId>
        <artifactId>spring-boot-starter-parentartifactId>
        <version>2.0.0.BUILD-SNAPSHOTversion>
        <relativePath/>
    parent>


    <properties>
        <project.build.sourceEncoding>UTF-8project.build.sourceEncoding>
        <project.reporting.outputEncoding>UTF-8project.reporting.outputEncoding>
        <java.version>1.8java.version>
    properties>

    <dependencies>

        <dependency>
            <groupId>org.springframework.bootgroupId>
            <artifactId>spring-boot-starter-webartifactId>
        dependency>


        <dependency>
            <groupId>org.springframework.bootgroupId>
            <artifactId>spring-boot-starter-testartifactId>
            <scope>testscope>
        dependency>
    dependencies>

    <build>
        <plugins>

            <plugin>
                <groupId>org.springframework.bootgroupId>
                <artifactId>spring-boot-maven-pluginartifactId>
            plugin>
        plugins>
    build>

    <repositories>
        <repository>
            <id>spring-snapshotsid>
            <name>Spring Snapshotsname>
            <url>https://repo.spring.io/snapshoturl>
            <snapshots>
                <enabled>trueenabled>
            snapshots>
        repository>
        <repository>
            <id>spring-milestonesid>
            <name>Spring Milestonesname>
            <url>https://repo.spring.io/milestoneurl>
            <snapshots>
                <enabled>falseenabled>
            snapshots>
        repository>
    repositories>

    <pluginRepositories>
        <pluginRepository>
            <id>spring-snapshotsid>
            <name>Spring Snapshotsname>
            <url>https://repo.spring.io/snapshoturl>
            <snapshots>
                <enabled>trueenabled>
            snapshots>
        pluginRepository>
        <pluginRepository>
            <id>spring-milestonesid>
            <name>Spring Milestonesname>
            <url>https://repo.spring.io/milestoneurl>
            <snapshots>
                <enabled>falseenabled>
            snapshots>
        pluginRepository>
    pluginRepositories>
project>
6、修改入口类如下代码,然后点击DemoApplication.java,鼠标右键run DemoApplication运行项目,你会发现内置的Tomcat服务器启动起来,然后访问http://localhost:8080 页面出现hello world即成功。
package com.example.demo;

import org.springframework.boot.SpringApplication;
import org.springframework.boot.autoconfigure.SpringBootApplication;
import org.springframework.web.bind.annotation.RequestMapping;
import org.springframework.web.bind.annotation.RestController;

@RestController //表示这个入口类也是控制类,=@Controller+@ResponseBody
@SpringBootApplication
public class DemoApplication {

    @RequestMapping("/")   //请求的映射路由
    public String home(){
        return "hello world";
    }


    public static void main(String[] args) {
        SpringApplication.run(DemoApplication.class, args);
    }
}
二,idea手动构建Spring Boot应用
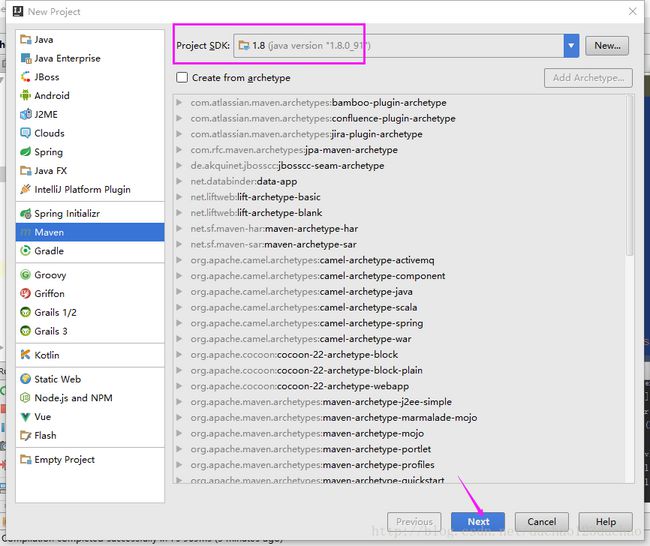
1、【File】-> 【New】 -> 【Project】出现New Project面板,选中【Maven】,填写情况默认即可,如下图:
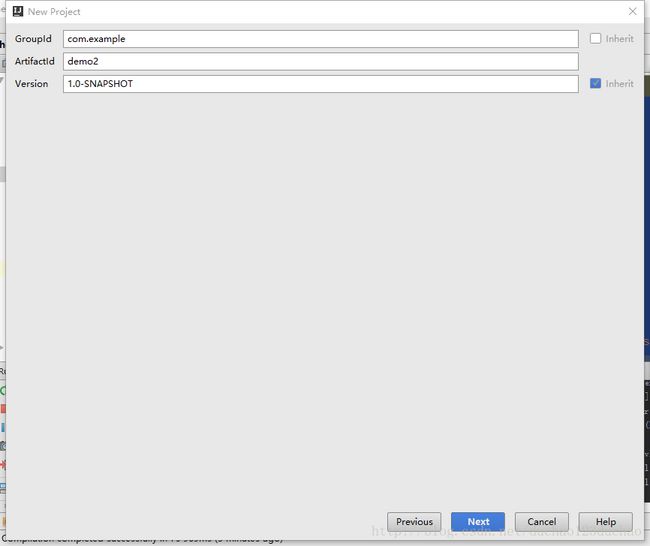
2、点击【Next】,填写项目Maven坐标情况如下图:
3、点击【Next】,填写项目名和项目本地所属目录,这里只填写了项目名称为hellosb-hand,其余默认,点击【Finish】即可创建maven项目基本结构。
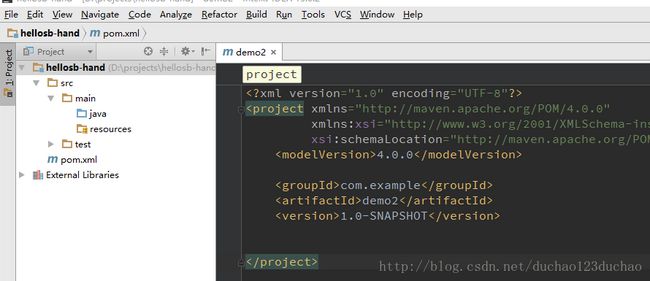
4、修改pom.xml文件:
<project xmlns="http://maven.apache.org/POM/4.0.0" xmlns:xsi="http://www.w3.org/2001/XMLSchema-instance" xsi:schemaLocation="http://maven.apache.org/POM/4.0.0 http://maven.apache.org/xsd/maven-4.0.0.xsd">
    <modelVersion>4.0.0modelVersion>

    <groupId>com.examplegroupId>
    <artifactId>demo2artifactId>
    <version>1.0-SNAPSHOTversion>

    <parent>
        <groupId>org.springframework.bootgroupId>
        <artifactId>spring-boot-starter-parentartifactId>
        <version>2.0.0.BUILD-SNAPSHOTversion>
        <relativePath/>
    parent>

    <properties>
        <project.build.sourceEncoding>UTF-8project.build.sourceEncoding>
        <project.reporting.outputEncoding>UTF-8project.reporting.outputEncoding>
        <java.version>1.8java.version>
    properties>

    <dependencies>
        <dependency>
            <groupId>org.springframework.bootgroupId>
            <artifactId>spring-boot-starter-webartifactId>
        dependency>

        <dependency>
            <groupId>org.springframework.bootgroupId>
            <artifactId>spring-boot-starter-testartifactId>
            <scope>testscope>
        dependency>

    dependencies>

    <build>
        <plugins>
            <plugin>
                <groupId>org.springframework.bootgroupId>
                <artifactId>spring-boot-maven-pluginartifactId>
            plugin>
        plugins>
    build>

project>
更新项目依赖:鼠标右键项目根目录 -> 【Maven】 -> 【Download Sources】。
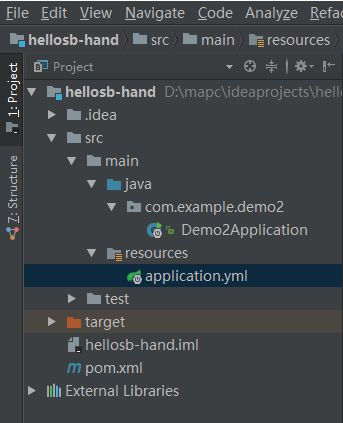
4、构建项目结构如下图,并添加Spring Boot入口类文件Demo2Application.java和配置文件application.yml(提示:Spring Boot支持yml和properties两种扩展名的配置文件)。
Demo2Application.java代码如下:
package com.example.demo2;

import org.springframework.boot.SpringApplication;
import org.springframework.boot.autoconfigure.SpringBootApplication;
import org.springframework.web.bind.annotation.RequestMapping;
import org.springframework.web.bind.annotation.RestController;

/** * Created by chao.du on 2017/6/12. */
@RestController
@SpringBootApplication
public class Demo2Application {
    @RequestMapping("/")
    public String getHome(){
        return "hello world!";
    }

    public static void main(String[] args) {
        SpringApplication.run(Demo2Application.class,args);
    }
}
5、测试:鼠标右键Demo2Application.java -> 【run Demo2Application】,在浏览器中输入localhost:8080查看到如下页面即成功!
参考资料:
1、《Spring Boot Reference Guide - II. Getting started》

