Spring Boot的Web开发
Spring Boot的Web开发
一、Spring Boot的Web支持
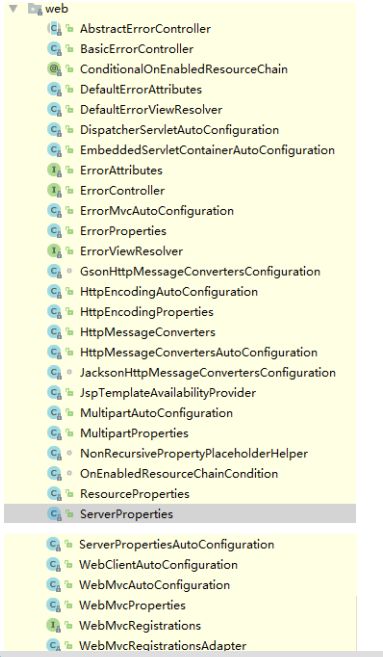
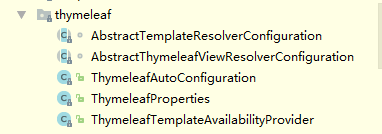
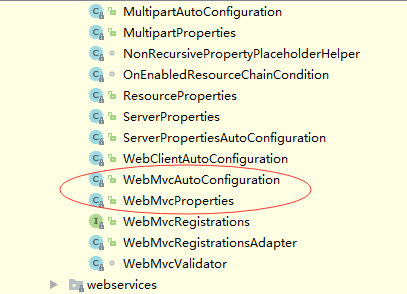
Spring Boot提供了spring-boot-starter-web为Web开发予以支持,spring-boot-starter-web为我们提供了嵌入的Tomcat以及Spring MVC的依赖。与Web相关的自动配置存储在spring-boot-autoconfigure.jar的org.springframework.boot.web下,如下图所示:
1、ServerPropertiesAutoConfiguration和ServerProperties自动配置内嵌Servlet容器;
2、HttpEncodingAutoConfiguration和HttpEncodingProperties自动配置http的编码;
3、WebMvcAutoConfiguration和WebMvcProperties自动配置Spring MVC。
二、Thymeleat模板引擎
Thymeleaf是一个Java类库,它是一个xml/xhtml/html5的模板引擎,可以作为MVC的Web应用的View层。Thymeleaf还提供了额外的模块与Spring MVC集成,因此我们可以使用Thymeleaf完全替代JSP。
Thymeleaf是面向Web和独立环境的现代服务器端Java模板引擎。
Thymeleaf的主要目标是为您的开发工作流程带来优雅的自然模板 - 可以在浏览器中正确显示HTML,还可以作为静态原型工作,从而在开发团队中进行更强大的协作。
使用Spring Framework的模块,与您最喜爱的工具进行大量集成,以及插入自己的功能的能力,Thymeleaf是现代HTML5 JVM Web开发的理想选择,尽管它可以做的更多。
(一)Thymeleaf基础知识
1、引入Thymeleaf
(1)通过
xmlns:
th
=
"http://www.thymeleaf.org"
命名空间,将镜头页面转换为动态的视图。需要进行动态处理的元素将使用“th:”为前缀。
(2)通过“@{}”访问Web静态资源,这在JSP下是极易出错的。
2、访问Model数据
使用“th:each”来做循环迭代(
th
:each=
"product:${products}"
),product作为迭代元素来使用,然后通过
th
:text=
"${元素.属性}"
方式来访问迭代元素的属性。
4、数据判断
通过
${not #lists.isEmpty(products)}
表达式判断products是否为空。Thymeleaf支持>、<、>=、<=、==、!=作为比较条件,同时也支持SpringEL表达式语言用于条件中。
5、在JavaScript中访问model
通过
th
:inline=
"javascript"
添加到script标签,这样JavaScript即可访问model中属性。通过[[${属性}]]格式获得实际的值。
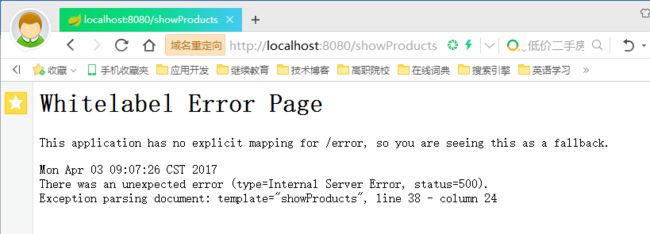
改成循环结构来遍历产品数组列表,运行程序就要报错,不知何故。
经过一番折腾,搞清楚是浏览器执行的部分被thymeleaf试图解析才报的错。
修改代码:
问题终于搞定。
(二)与Spring MVC集成
Thymeleaf给我们提供了一个SpringTemplateEngine类,用来驱动在Spring MVC下使用Thymeleaf模板引擎,另外还提供了一个TemplateResolver来设置通用的模板引擎(包含前缀、后缀等),这使我们在Spring MVC中集成Thymeleaf引擎变得十分简单。
通过案例讲解如何使用Thymeleaf模板引擎和JSP页面。
1、在pom.xml里添加依赖
        org.springframework
        spring-core
        4.3.6.RELEASE


        org.springframework
        spring-beans
        4.3.6.RELEASE


        org.springframework
        spring-webmvc
        4.3.6.RELEASE


        junit
        junit
        4.12


        log4j
        log4j
        1.2.17


        org.slf4j
        slf4j-api
        1.7.5


        org.slf4j
        jcl-over-slf4j
        1.7.5


        org.thymeleaf
        thymeleaf
        3.0.5.RELEASE


        org.thymeleaf
        thymeleaf-spring4
        3.0.5.RELEASE


        javax.servlet
        jstl
        1.2
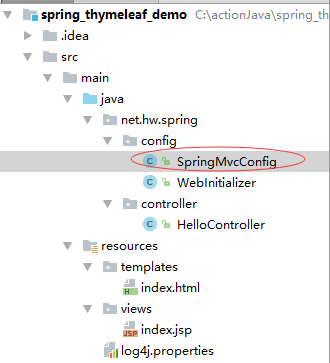
2、SpringMvcConfig配置类
package net.hw.spring.config;

import org.springframework.context.annotation.Bean;
import org.springframework.context.annotation.ComponentScan;
import org.springframework.context.annotation.Configuration;
import org.springframework.web.servlet.config.annotation.EnableWebMvc;
import org.springframework.web.servlet.config.annotation.WebMvcConfigurerAdapter;
import org.springframework.web.servlet.view.InternalResourceViewResolver;
import org.springframework.web.servlet.view.JstlView;
import org.thymeleaf.spring4.SpringTemplateEngine;
import org.thymeleaf.spring4.templateresolver.SpringResourceTemplateResolver;
import org.thymeleaf.spring4.view.ThymeleafView;
import org.thymeleaf.spring4.view.ThymeleafViewResolver;

/**
 * Created by howard on 2017/4/4.
 */
@Configuration
@EnableWebMvc
@ComponentScan("net.hw.spring")
public class SpringMvcConfig extends WebMvcConfigurerAdapter {
    // 定义Servlet容器模板解析器
    @Bean
    public SpringResourceTemplateResolver templateResolver() {
        SpringResourceTemplateResolver templateResolver = new SpringResourceTemplateResolver();
        templateResolver.setPrefix("/WEB-INF/classes/templates/");
        templateResolver.setSuffix(".html");
        templateResolver.setTemplateMode("HTML5");
        return templateResolver;
    }

    // 定义Spring模板引擎
    @Bean
    public SpringTemplateEngine springTemplateEngine() {
        SpringTemplateEngine springTemplateEngine = new SpringTemplateEngine();
        springTemplateEngine.setTemplateResolver(templateResolver());
        return springTemplateEngine;
    }

    // 定义Thymeleaf视图解析器
    @Bean
    public ThymeleafViewResolver thymeleafViewResolver() {
        ThymeleafViewResolver viewResolver = new ThymeleafViewResolver();
        viewResolver.setTemplateEngine(springTemplateEngine());
        viewResolver.setViewClass(ThymeleafView.class);
        viewResolver.setOrder(1);
        return viewResolver;
    }

    // 定义JSP视图解析器Bean
    @Bean
    public InternalResourceViewResolver internalResourceViewResolver() {
        InternalResourceViewResolver viewResolver = new InternalResourceViewResolver();
        viewResolver.setPrefix("/WEB-INF/classes/views/");
        viewResolver.setSuffix(".jsp");
        viewResolver.setViewClass(JstlView.class);
        viewResolver.setOrder(2);
        return viewResolver;
    }
}
说明:
通过setOrder方法可以设置不同视图解析器的优先顺序,数字越小越优先。
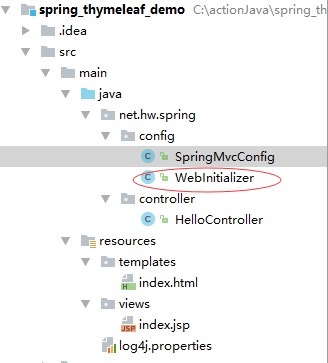
3、Web初始化器WebInitializer
package net.hw.spring.config;

import org.springframework.web.WebApplicationInitializer;
import org.springframework.web.context.support.AnnotationConfigWebApplicationContext;
import org.springframework.web.servlet.DispatcherServlet;

import javax.servlet.ServletContext;
import javax.servlet.ServletException;
import javax.servlet.ServletRegistration.Dynamic;

/**
 * Created by howard on 2017/4/4.
 */
public class WebInitializer implements WebApplicationInitializer {
    @Override
    public void onStartup(ServletContext servletContext) throws ServletException {
        // 创建Web应用容器
        AnnotationConfigWebApplicationContext context = new AnnotationConfigWebApplicationContext();
        // 注册Spring MVC配置类
        context.register(SpringMvcConfig.class);
        // 与当前ServletContext关联
        context.setServletContext(servletContext);
        // 注册Spring MVC的前端控制器(DispatcherServlet)
        Dynamic servlet = servletContext.addServlet("dispatcher", new DispatcherServlet(context));
        // 过滤一切资源请求
        servlet.addMapping("/");
        // 设置启动加载顺序
        servlet.setLoadOnStartup(1);
    }
}
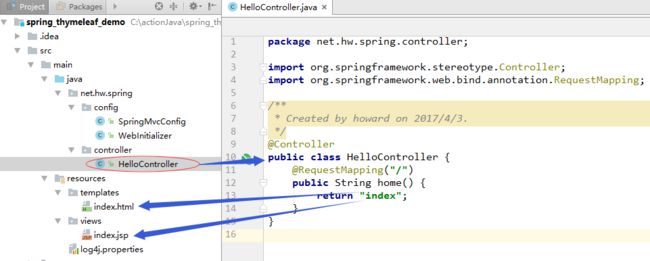
4、创建控制HelloController
package net.hw.spring.controller;

import org.springframework.stereotype.Controller;
import org.springframework.web.bind.annotation.RequestMapping;

/**
 * Created by howard on 2017/4/3.
 */
@Controller
public class HelloController {
    @RequestMapping("/")
    public String home() {
        return "index";
    }
}
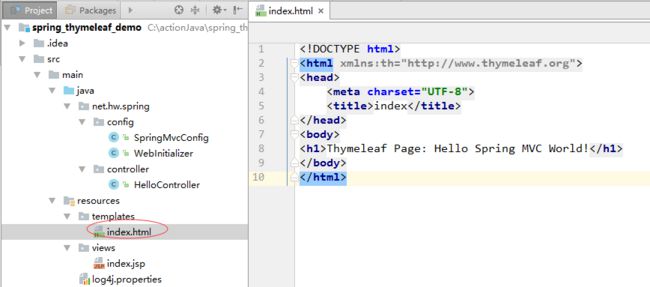
5、创建Thymeleaf页面index.html
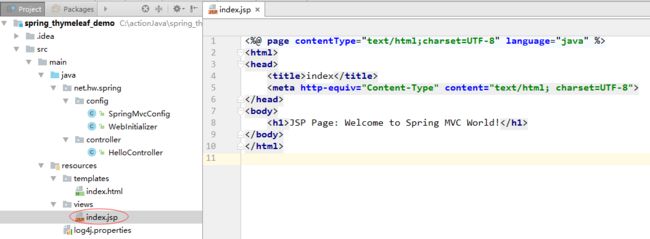
6、创建JSP页面index.jsp
7、启动服务器,访问
http://localhost:8080
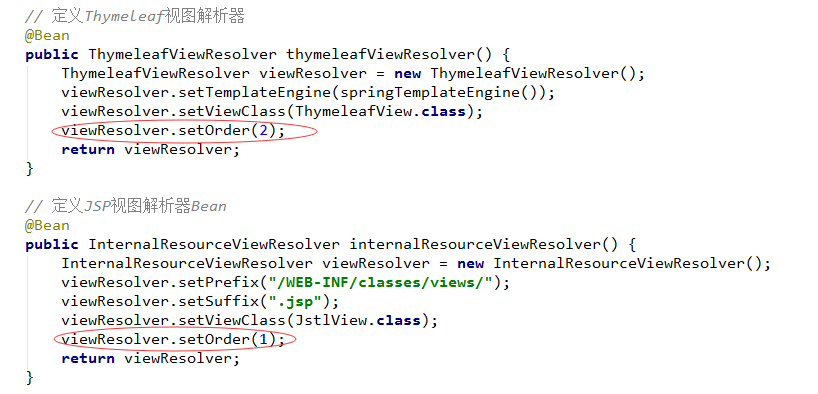
对于相同的逻辑视图名,如果希望优先考虑使用JSP视图解析器来映射,那么在SpringMvcConfig配置类里将JSP视图解析器的顺序设置为1,而Thymeleaf视图解析器的顺序设置为2。
此时,重启服务器,再访问
http://localhost:8080
引申说明
:
如果两个视图解析器都没有设置优先顺序,那么优先考虑定义在前面的视图解析器,即谁先定义,就优先考虑谁。
(三)Spring Boot的Thymeleaf支持
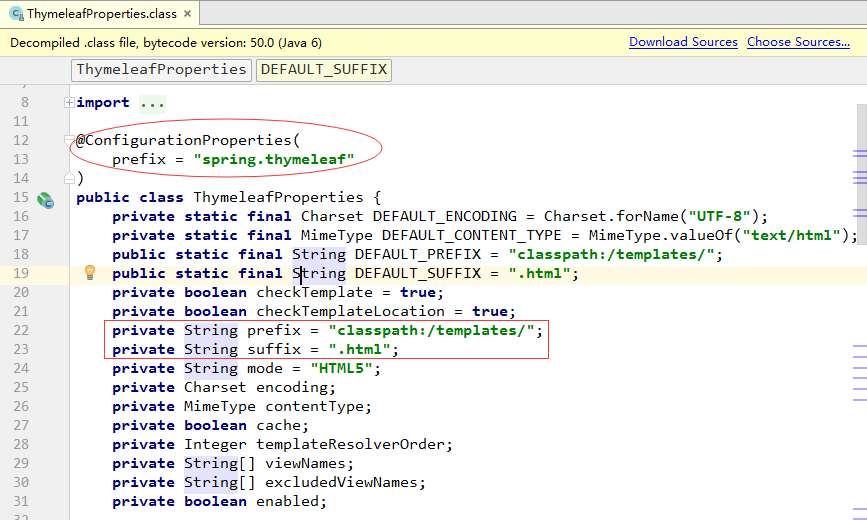
通过Thymeleaf类对集成所需的Bean进行自动配置,包括templateResolver、templateEngine和thymeleafViewResolver的配置。
可以在applicaiton.properties里修改Thymeleaf的属性。要加前缀spring.thymeleaf。
(四)项目实战
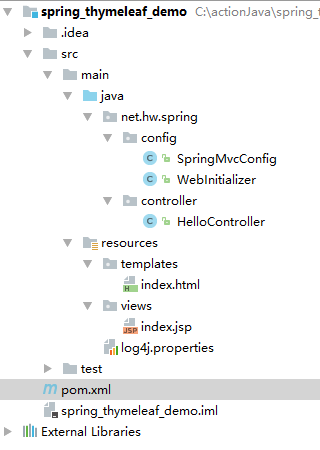
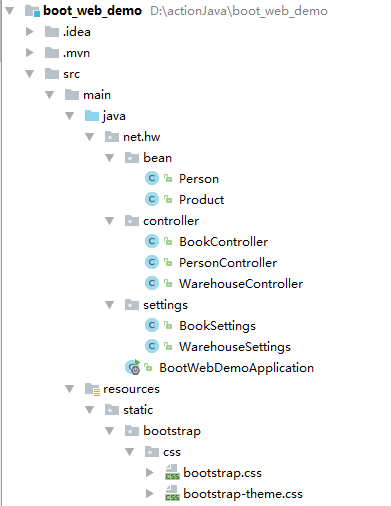
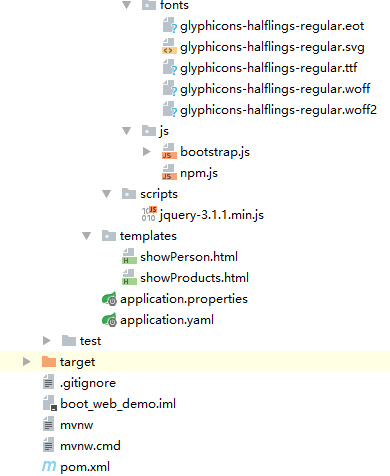
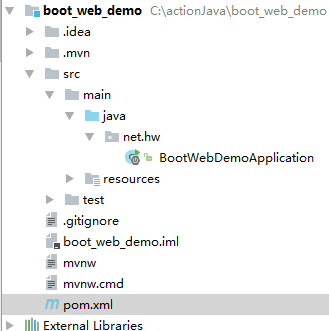
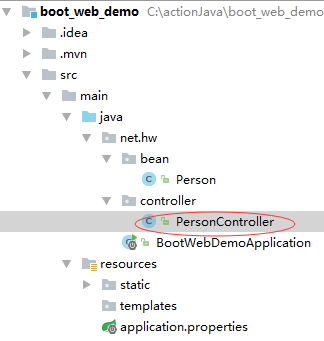
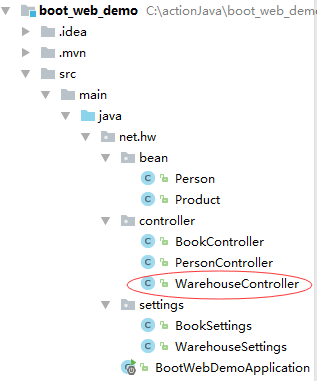
1、项目结构
2、实现步骤
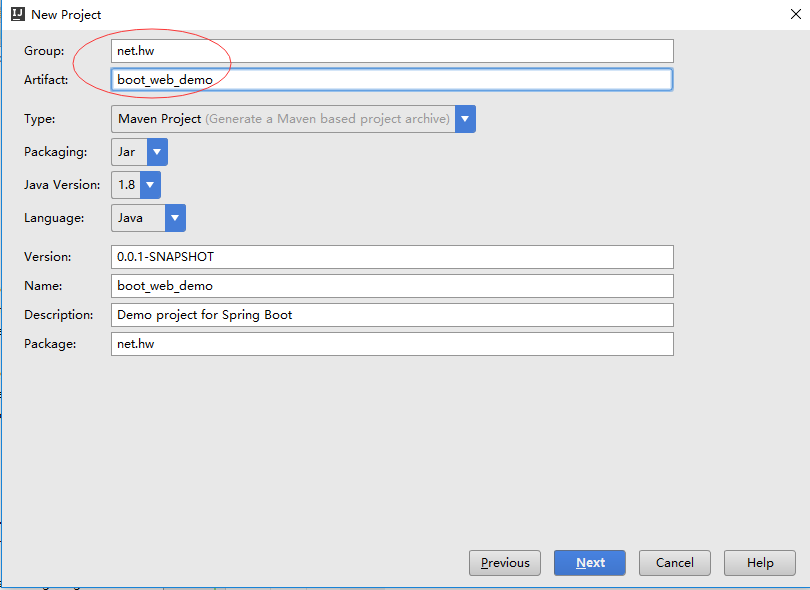
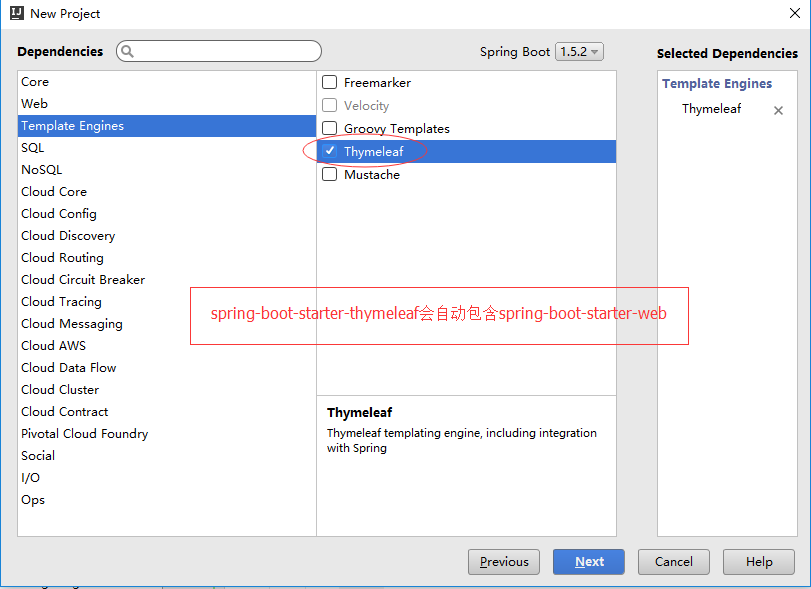
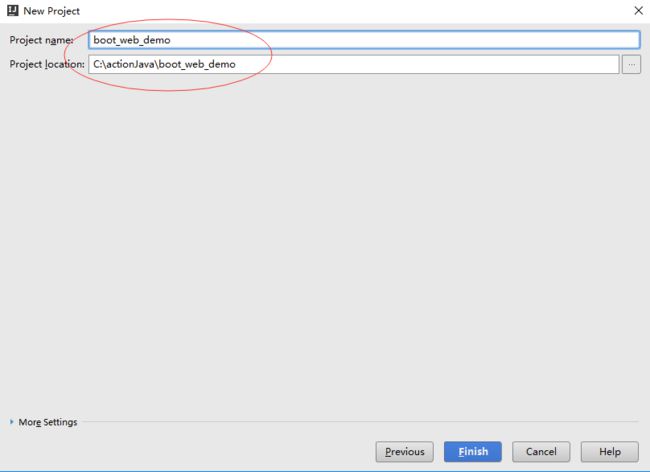
(1)创建支持Thymeleaf的Spring Boot项目
(2)在pom.xml文件里添加对yaml的依赖
   org.yaml
   snakeyaml
   1.18
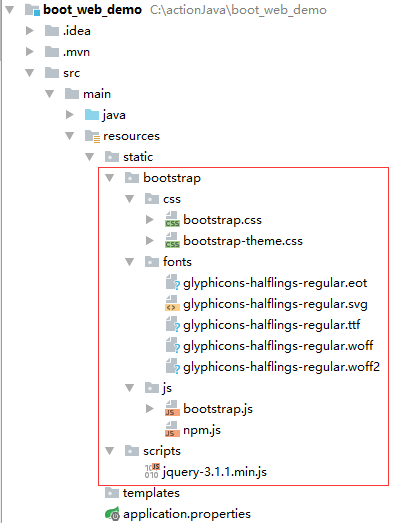
(3)在resources/static里拷贝bootstrap和jQuery
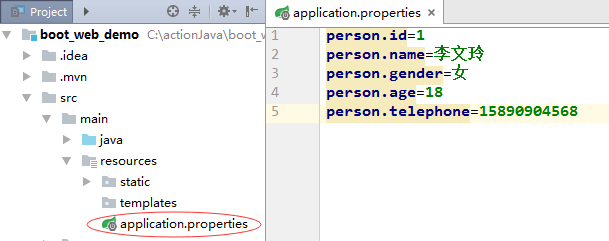
(4)在application.properties文件里添加个人信息
(5)在net.hw创建bean子包,在里面创建Person实体类读取属性文件中个人信息
package net.hw.bean;

import org.springframework.boot.context.properties.ConfigurationProperties;
import org.springframework.stereotype.Component;

/**
 * Created by howard on 2017/4/4.
 */
@Component
@ConfigurationProperties(prefix = "person")
public class Person {
    private int id;
    private String name;
    private String gender;
    private int age;
    private String telephone;

    public int getId() {
        return id;
    }

    public void setId(int id) {
        this.id = id;
    }

    public String getName() {
        return name;
    }

    public void setName(String name) {
        this.name = name;
    }

    public String getGender() {
        return gender;
    }

    public void setGender(String gender) {
        this.gender = gender;
    }

    public int getAge() {
        return age;
    }

    public void setAge(int age) {
        this.age = age;
    }

    public String getTelephone() {
        return telephone;
    }

    public void setTelephone(String telephone) {
        this.telephone = telephone;
    }

    @Override
    public String toString() {
        return "Person{" +
                "id=" + id +
                ", name='" + name + '\'' +
                ", gender='" + gender + '\'' +
                ", age=" + age +
                ", telephone='" + telephone + '\'' +
                '}';
    }
}
(6)在net.hw里创建子包controller,在里面创建控制器PersonController
package net.hw.controller;

import net.hw.bean.Person;
import org.springframework.beans.factory.annotation.Autowired;
import org.springframework.stereotype.Controller;
import org.springframework.ui.Model;
import org.springframework.web.bind.annotation.RequestMapping;

/**
 * Created by howard on 2017/4/2.
 */
@Controller
public class PersonController {
    @Autowired
    private Person person;

    @RequestMapping("/showPerson")
    public String showPerson(Model model) {
        model.addAttribute("person", person);
        return "showPerson";
    }
}
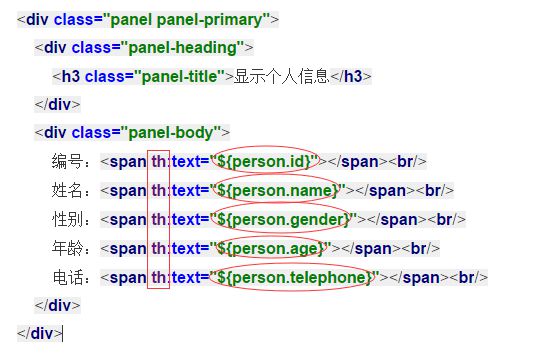
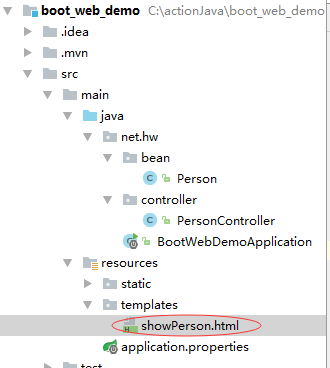
(7)在resources/templates创建Thymeleaf模板页面showPerson.html
显示个人信息
显示个人信息
编号:
姓名:
性别:
年龄:
电话:
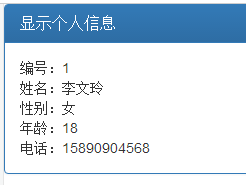
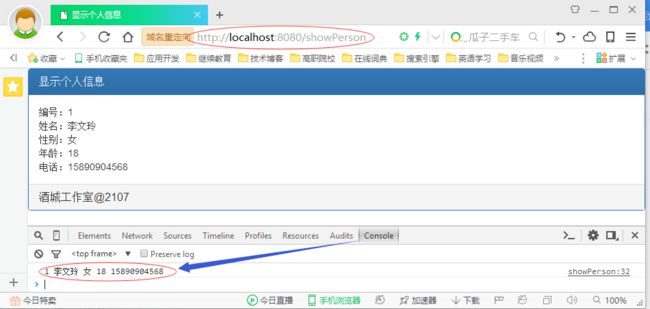
(8)启动程序,访问
http://localhost:8080/showPerson
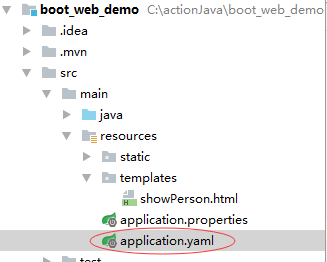
(9)在resources里创建application.yaml文件
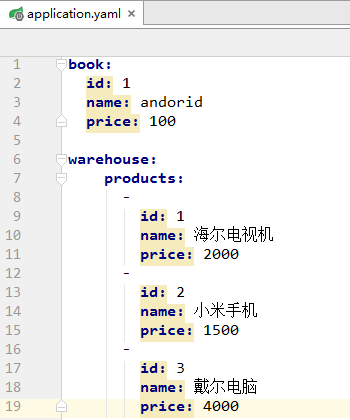
book是单个对象,而warehouse里的products是列表对象,如何读取它们呢?
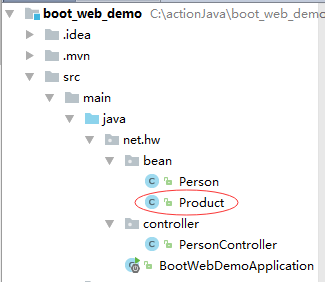
(10)在net.hw.bean包里创建Product实体类
package net.hw.bean;

/**
 * Created by howard on 2017/4/4.
 */
public class Product {
    private int id;
    private String name;
    private double price;

    public int getId() {
        return id;
    }

    public void setId(int id) {
        this.id = id;
    }

    public String getName() {
        return name;
    }

    public void setName(String name) {
        this.name = name;
    }

    public double getPrice() {
        return price;
    }

    public void setPrice(double price) {
        this.price = price;
    }

    @Override
    public String toString() {
        return "Product{" +
                "id=" + id +
                ", name='" + name + '\'' +
                ", price=" + price +
                '}';
    }
}
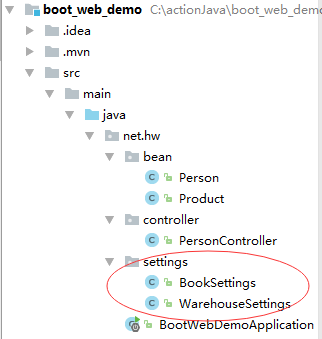
(11)在net.hw里创建settings子包,在里面创建BookSettings和WarehouseSettings
- BookSettings类
package net.hw.settings;

import org.springframework.boot.context.properties.ConfigurationProperties;
import org.springframework.stereotype.Component;

/**
 * Created by howard on 2017/4/4.
 */
@Component
@ConfigurationProperties(prefix = "book")
public class BookSettings {
    private int id;
    private String name;
    private double price;

    public int getId() {
        return id;
    }

    public void setId(int id) {
        this.id = id;
    }

    public String getName() {
        return name;
    }

    public void setName(String name) {
        this.name = name;
    }

    public double getPrice() {
        return price;
    }

    public void setPrice(double price) {
        this.price = price;
    }

    @Override
    public String toString() {
        return "Book{" +
                "id=" + id +
                ", name='" + name + '\'' +
                ", price=" + price +
                '}';
    }
}- WarehouseSettings类
package net.hw.settings;

import net.hw.bean.Product;
import org.springframework.boot.context.properties.ConfigurationProperties;
import org.springframework.stereotype.Component;

import java.util.List;

/**
 * Created by howard on 2017/4/4.
 */
@Component
@ConfigurationProperties(prefix = "warehouse")
public class WarehouseSettings {
    List products;

    public List getProducts() {
        return products;
    }

    public void setProducts(List products) {
        this.products = products;
    }
}
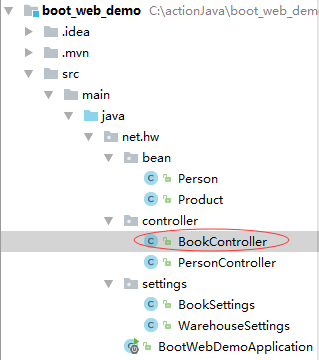
(12)在net.hw.controller包里创建BookController
package net.hw.controller;

import net.hw.settings.BookSettings;
import org.springframework.beans.factory.annotation.Autowired;
import org.springframework.web.bind.annotation.RequestMapping;
import org.springframework.web.bind.annotation.RestController;

/**
 * Created by howard on 2017/4/4.
 */
@RestController
public class BookController {
    @Autowired
    private BookSettings book;

    @RequestMapping("/book")
    public String book() {
        return book.toString();
    }
}
(13)在net.hw.controller包里创建WarehouseController
package net.hw.controller;

import net.hw.bean.Product;
import net.hw.settings.WarehouseSettings;
import org.springframework.beans.factory.annotation.Autowired;
import org.springframework.stereotype.Controller;
import org.springframework.ui.Model;
import org.springframework.web.bind.annotation.RequestMapping;

import java.util.List;

/**
 * Created by howard on 2017/4/4.
 */
@Controller
public class WarehouseController {
    @Autowired
    private WarehouseSettings warehouse;

    @RequestMapping("/showProducts")
    public String showProducts(Model model) {
        List products = warehouse.getProducts();
        model.addAttribute("products", products);
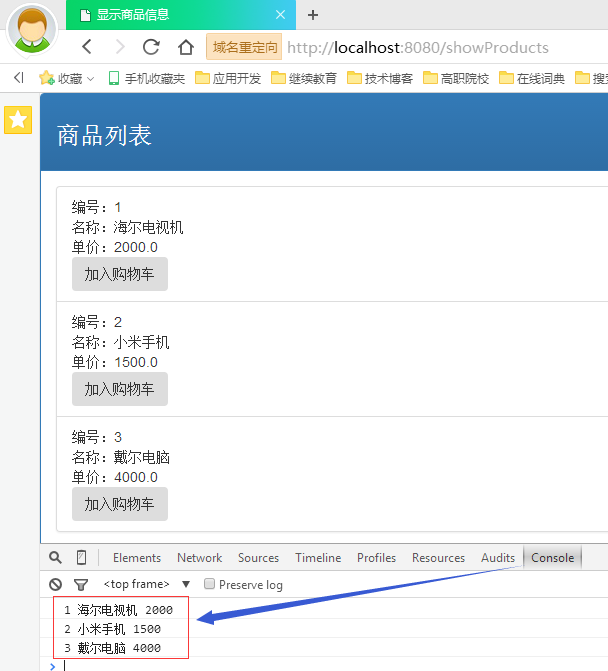
        System.out.println(products);
        return "showProducts";
    }
}
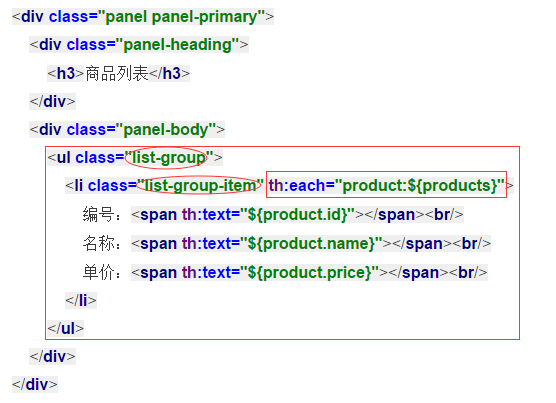
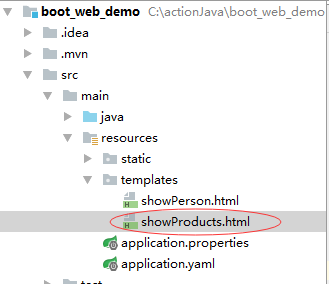
(14)在template里创建Thymeleaf模板页面showProducts.html
显示商品信息
商品列表
-
编号:
名称:
单价:
(15)修改入口类BootWebDemoApplication
package net.hw;
import org.springframework.boot.SpringApplication;
import org.springframework.boot.autoconfigure.SpringBootApplication;
import org.springframework.web.bind.annotation.RequestMapping;
import org.springframework.web.bind.annotation.RestController;
@RestController
@SpringBootApplication
public class BootWebDemoApplication {
@RequestMapping("/")
public String home() {
return "Welcome to Spring Boot!
";
}
public static void main(String[] args) {
SpringApplication.run(BootWebDemoApplication.class, args);
}
}
(16)启动程序
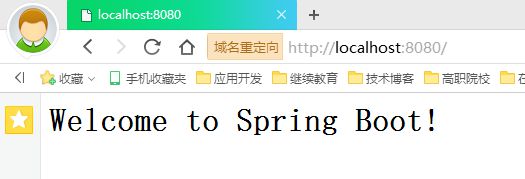
- 访问http://localhost:8080
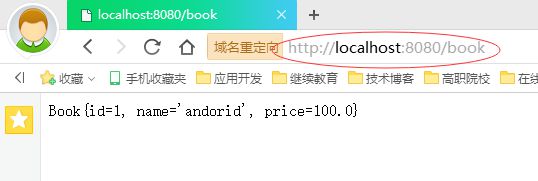
- 访问http://localhost:8080/book
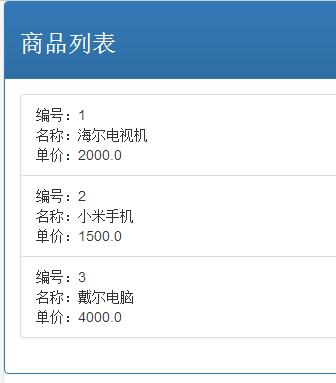
- 访问http://localhost:8080/showProducts
三、Web相关配置
(一)Spring Boot提供的自动配置
1、自动配置的ViewResolver
(1)
ContentNegotiatingViewResolver
@Bean
@ConditionalOnBean({ViewResolver.class})
@ConditionalOnMissingBean(
    name = {"viewResolver"},
    value = {ContentNegotiatingViewResolver.class}
)
public ContentNegotiatingViewResolver viewResolver(BeanFactory beanFactory) {
    ContentNegotiatingViewResolver resolver = new ContentNegotiatingViewResolver();
    resolver.setContentNegotiationManager((ContentNegotiationManager)beanFactory.getBean(ContentNegotiationManager.class));
    resolver.setOrder(-2147483648);
    return resolver;
}
该视图解析器不是自己处理View,而是代理给不同的视图解析器来处理不同的View,因此具有最高的优先级。
(2)BeanNameViewResolver
@Bean
@ConditionalOnBean({View.class})
@ConditionalOnMissingBean
public BeanNameViewResolver beanNameViewResolver() {
    BeanNameViewResolver resolver = new BeanNameViewResolver();
    resolver.setOrder(2147483637);
    return resolver;
}
该视图解析器具有最低的优先级。
案例演示:
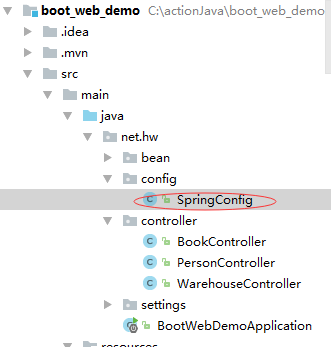
- 在net.hw里创建config子包,在里面创建SpringConfig配置类
package net.hw.config;

import org.springframework.context.annotation.Bean;
import org.springframework.context.annotation.Configuration;
import org.springframework.web.servlet.view.json.MappingJackson2JsonView;

/**
 * Created by howard on 2017/4/4.
 */
@Configuration
public class SpringConfig {
    @Bean
    public MappingJackson2JsonView jsonView() {
        MappingJackson2JsonView jsonView = new MappingJackson2JsonView();
        return jsonView;
    }
}- 修改PersonController
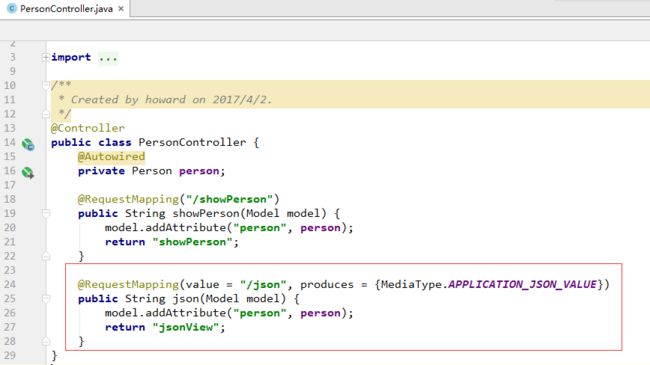
返回字符串jsonView,它会找Bean的名称为jsonView的视图来渲染。
- 启动程序,访问http://localhost:8080/json
(3)InternalResourceViewResolver
该视图解析器极为常用,主要通过设置前缀、后缀、以及控制器中方法来返回视图名的字符串,映射得到实际的页面。
@Bean
@ConditionalOnMissingBean
public InternalResourceViewResolver defaultViewResolver() {
    InternalResourceViewResolver resolver = new InternalResourceViewResolver();
    resolver.setPrefix(this.mvcProperties.getView().getPrefix());
    resolver.setSuffix(this.mvcProperties.getView().getSuffix());
    return resolver;
}
该视图解析器我们在映射JSP页面就使用过,此处不再举例说明。
2、自动配置的静态资源
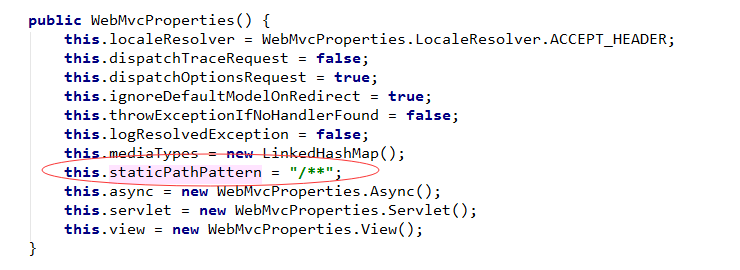
在自动配置类的addResourceHandlers方法中定义了静态资源的自动配置。
public void addResourceHandlers(ResourceHandlerRegistry registry) {
    if(!this.resourceProperties.isAddMappings()) {
        logger.debug("Default resource handling disabled");
    } else {
        Integer cachePeriod = this.resourceProperties.getCachePeriod();
        if(!registry.hasMappingForPattern("/webjars/**")) {
            this.customizeResourceHandlerRegistration(registry.addResourceHandler(new String[]{"/webjars/**"}).addResourceLocations(new String[]{"classpath:/META-INF/resources/webjars/"}).setCachePeriod(cachePeriod));
        }

        String staticPathPattern = this.mvcProperties.getStaticPathPattern();
        if(!registry.hasMappingForPattern(staticPathPattern)) {
            this.customizeResourceHandlerRegistration(registry.addResourceHandler(new String[]{staticPathPattern}).addResourceLocations(this.resourceProperties.getStaticLocations()).setCachePeriod(cachePeriod));
        }
    }
}

private static final String[] CLASSPATH_RESOURCE_LOCATIONS = new String[]{"classpath:/META-INF/resources/", "classpath:/resources/", "classpath:/static/", "classpath:/public/"};
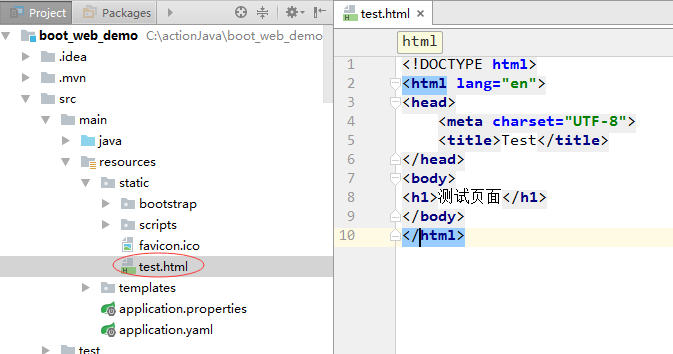
把类路径下的/static、/public、/resources和META-INF/resources文件夹下的静态文件直接映射为/**,可以通过http://localhost:8080/**来访问。
比如在resources/static下创建测试页面test.html:
启动程序,访问
http://localhost:8080/test.html
将test.html放在resources/目录下,访问不到,放到resources/resources目录下,就可以访问;将test.html放在resources/public目录下,可以访问。
3、自动配置的Formatter和Converter
public void addFormatters(FormatterRegistry registry) {
    Iterator var2 = this.getBeansOfType(Converter.class).iterator();

    while(var2.hasNext()) {
        Converter formatter = (Converter)var2.next();
        registry.addConverter(formatter);
    }

    var2 = this.getBeansOfType(GenericConverter.class).iterator();

    while(var2.hasNext()) {
        GenericConverter formatter1 = (GenericConverter)var2.next();
        registry.addConverter(formatter1);
    }

    var2 = this.getBeansOfType(Formatter.class).iterator();

    while(var2.hasNext()) {
        Formatter formatter2 = (Formatter)var2.next();
        registry.addFormatter(formatter2);
    }
}
4、自动配置的HttpMessageConverter
public void configureMessageConverters(List> converters) {
    converters.addAll(this.messageConverters.getConverters());
}
5、静态首页的支持
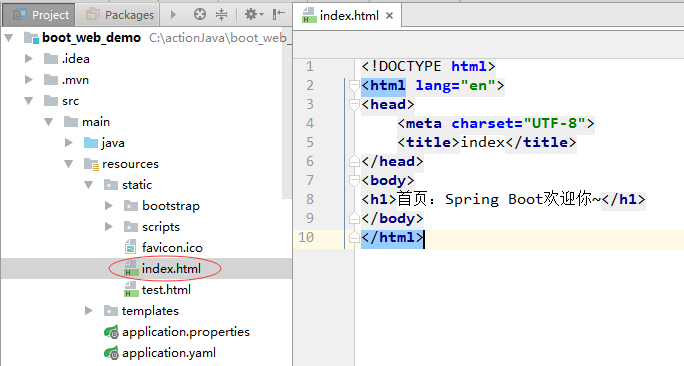
把静态index.html放在如下目录:
(1)classpath:/META-INF/resources/index.html
(2)classpath:/resources/index.html
(3)classpath:/static/index.html
(4)classpath:/public/index.html
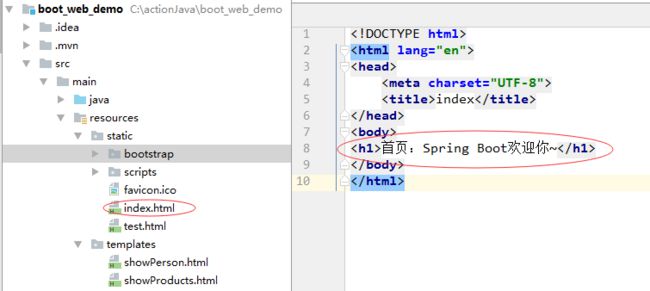
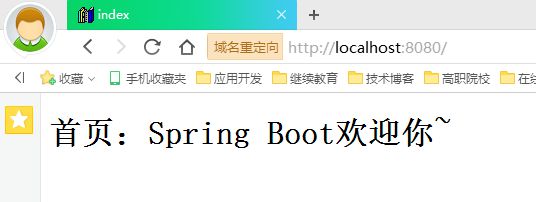
当我们访问http://localhost:8080/时,会直接映射。
在static目录里创建首页index.html
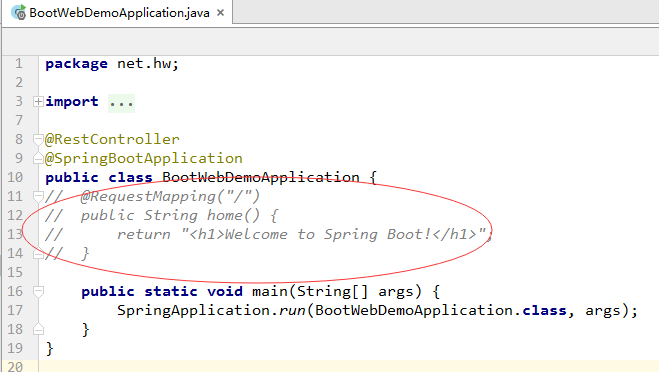
注释掉入口类里的映射方法:
如果不注释掉,那么会优先考虑入口类的映射。
启动程序,访问
http://localhost:8080
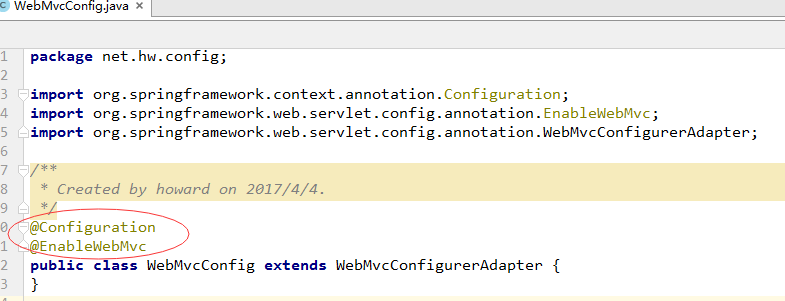
(二)接管Spring Boot的Web配置
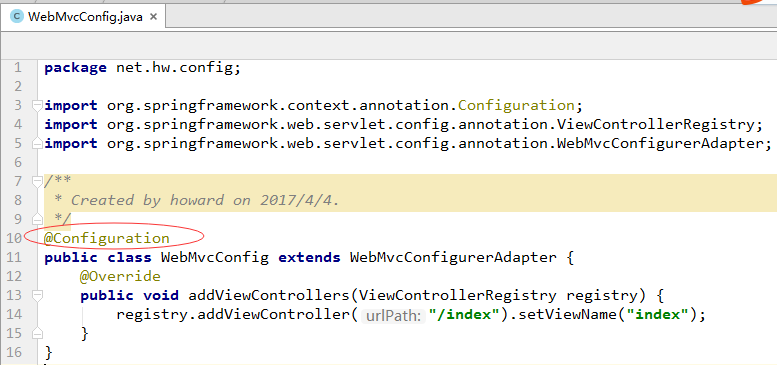
1、取代Spring Boot提供的Spring MVC配置
2、补充Spring Boot提供的Spirng MVC配置
(三)注册Servlet、Filter和Listener
1、直接注册Bean示例
@Bean
public XxServlet xxServlet () {
    return new XxServlet();
}

@Bean
public YyFilter yyFilter() {
    return new YyFilter();
}

@Bean
public ZzListener zzListener() {
    return new ZzListener();
}
2、通过RegistrationBean示例
@Bean
public ServletRegistrationBean servletRegistrationBean() {
    return new ServletRegistrationBean(new XxServlet(), "/xx/**");
}

@Bean
public FilterRegistrationBean filterRegistrationBean() {
    FilterRegistrationBean filterRegistrationBean = new FilterRegistrationBean();
    filterRegistrationBean.setFilter(new YyFilter());
    filterRegistrationBean.setOrder(2);
    return filterRegistrationBean;
}

@Bean
public ServletListenerRegistrationBean servletListenerRegistrationBean() {
    return new ServletListenerRegistrationBean(new ZzListener());
}
四、Tomcat配置
(一)配置Tomcat
通用的Servlet同期配置都以server作为前缀,而Tomcat特有配置都已server.tomcat作为前缀。
server.port=8888
server.session.timeout=100
server.context-path=/index

server.tomcat.uri-encoding=GBK
server.tomcat.compression=on
(二)代码配置Tomcat
package net.hw.config;

import org.springframework.boot.context.embedded.ConfigurableEmbeddedServletContainer;
import org.springframework.boot.context.embedded.EmbeddedServletContainerCustomizer;
import org.springframework.boot.web.servlet.ErrorPage;
import org.springframework.http.HttpStatus;
import org.springframework.stereotype.Component;

/**
 * Created by howard on 2017/4/5.
 */
@Component
public class CustomServletContainer implements EmbeddedServletContainerCustomizer {
    @Override
    public void customize(ConfigurableEmbeddedServletContainer container) {
        container.setPort(8888);
        container.addErrorPages(new ErrorPage(HttpStatus.NOT_FOUND, "/404.html"));
    }
}
(三)替换Tomcat
1、替换为Jetty
    org.springframework.boot
    spring-boot-starter-thymeleaf


            org.springframework.boot
            spring-boot-starter-tomcat


    org.springframework.boot
    spring-boot-starter-jetty
启动程序,控制台输出:
2、替换为Undertow
    org.springframework.boot
    spring-boot-starter-thymeleaf


            org.springframework.boot
            spring-boot-starter-tomcat


    org.springframework.boot
    spring-boot-starter-undertow
启动程序,控制台输出:
(四)SSL配置
SSL(Secure Sockets Layer)在网络传输层对网络连接进行加密。在基于B/S的Web应用中,是通过HTTPS来实现SSL的。
Spring Boot是内嵌的Tomcat,配置SSL步骤如下:
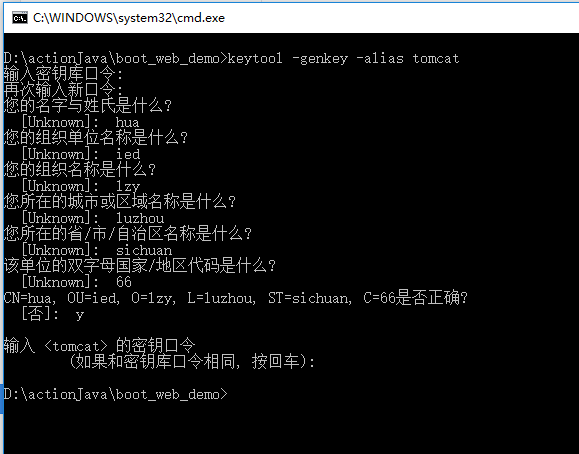
1、生成证书
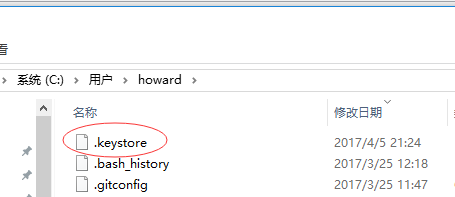
每个JDK都有一个keytool工具——证书管理工具,可用来生成自签名的证书。
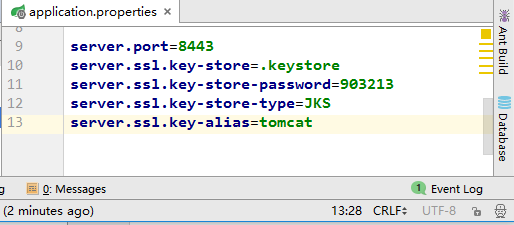
2、Spring配置SSL
将.keystore文件复制到项目根目录,然后在application.properties中做如下SSL配置:
启动程序,控制台输出效果:
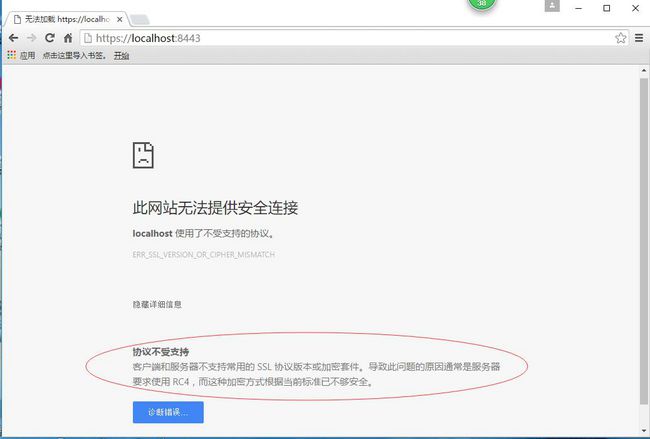
此时访问
https://localhost:8443
说明:没有解决此问题。
3、http转向https
package net.hw;

import org.apache.catalina.Context;
import org.apache.catalina.connector.Connector;
import org.apache.tomcat.util.descriptor.web.SecurityCollection;
import org.apache.tomcat.util.descriptor.web.SecurityConstraint;
import org.springframework.boot.SpringApplication;
import org.springframework.boot.autoconfigure.SpringBootApplication;
import org.springframework.boot.context.embedded.EmbeddedServletContainer;
import org.springframework.boot.context.embedded.EmbeddedServletContainerFactory;
import org.springframework.boot.context.embedded.tomcat.TomcatEmbeddedServletContainerFactory;
import org.springframework.context.annotation.Bean;
import org.springframework.web.bind.annotation.RequestMapping;
import org.springframework.web.bind.annotation.RestController;

import javax.xml.ws.spi.http.HttpContext;

@RestController
@SpringBootApplication
public class BootWebDemoApplication {
   public static void main(String[] args) {
      SpringApplication.run(BootWebDemoApplication.class, args);
   }

   @Bean
   public Connector httpConnector() {
      Connector connector = new Connector("org.apache.coyote.http11.Http11NioProtocol");
      connector.setScheme("http");
      connector.setPort(8080);
      connector.setSecure(false);
      connector.setRedirectPort(8443);
      return connector;
   }

   @Bean
   public EmbeddedServletContainerFactory servletContainer() {
      TomcatEmbeddedServletContainerFactory tomcat = new TomcatEmbeddedServletContainerFactory() {
         @Override
         protected void postProcessContext(Context context) {
            SecurityConstraint securityConstraint = new SecurityConstraint();
            securityConstraint.setUserConstraint("CONFIDENTIAL");
            SecurityCollection collection = new SecurityCollection();
            collection.addPattern("/*");
            securityConstraint.addCollection(collection);
            context.addConstraint(securityConstraint);
         }
      };

      tomcat.addAdditionalTomcatConnectors(httpConnector());
      return tomcat;
   }
}
访问http://localhost:8080会自动跳转到https://localhost:8443。
实际开发中,用nginx作为前端服务做ssl,后边接tomcat。
实际部署程序从来不会用单tomcat的,前边还要加个nginx。
五、Favicon配置
1、默认的Favicon
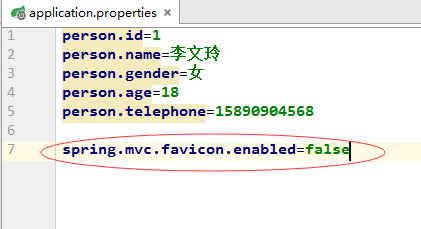
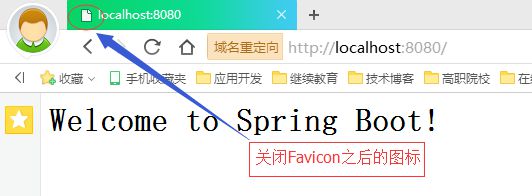
2、关闭Favicon
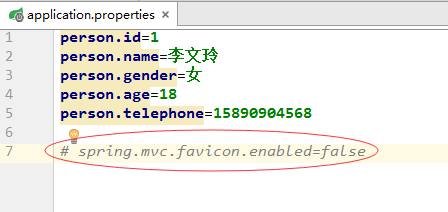
将关闭Favicon的设置注释掉。
3、设置自己的Favicon
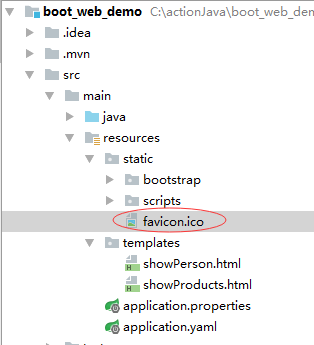
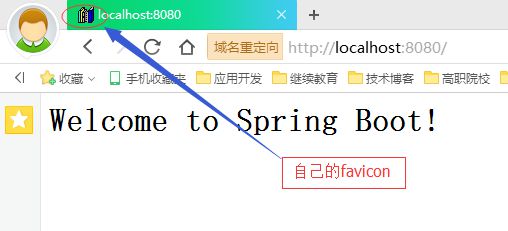
将自己的favicon.ico(文件名不能改动)文件放置在类路径根目录、类路径META-INF/resources/下、类路径resources/下、类路径static/下或类路径public/下。
六、WebSocket
(一)什么是WebSocket
WebSocket协议是基于TCP的一种新的协议。WebSocket最初在HTML5规范中被引用为TCP连接,作为基于TCP的套接字API的占位符。它实现了浏览器与服务器全双工(full-duplex)通信。
现很多网站为了实现即时通讯,所用的技术都是轮询(polling)。轮询是在特定的的时间间隔(如每1秒),由浏览器对服务器发出HTTP request,然后由服务器返回最新的数据给客户端的浏览器。这种传统的HTTP request 的模式带来很明显的缺点 – 浏览器需要不断的向服务器发出请求,然而HTTP request 的header是非常长的,里面包含的有用数据可能只是一个很小的值,这样会占用很多的带宽。
而比较新的技术去做轮询的效果是Comet – 用了AJAX。但这种技术虽然可达到全双工通信,但依然需要发出请求。
在 WebSocket API,浏览器和服务器只需要做一个握手的动作,然后,浏览器和服务器之间就形成了一条快速通道。两者之间就直接可以数据互相传送。在此WebSocket 协议中,为我们实现即时服务带来了两大好处:
1. Header:互相沟通的Header是很小的-大概只有 2 Bytes
2. Server Push:服务器的推送,服务器不再被动的接收到浏览器的request之后才返回数据,而是在有新数据时就主动推送给浏览器。
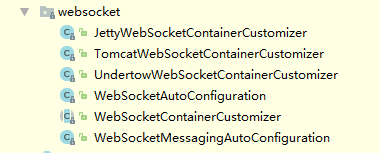
(二)Spring Boot提供的自动配置
(三)项目实战
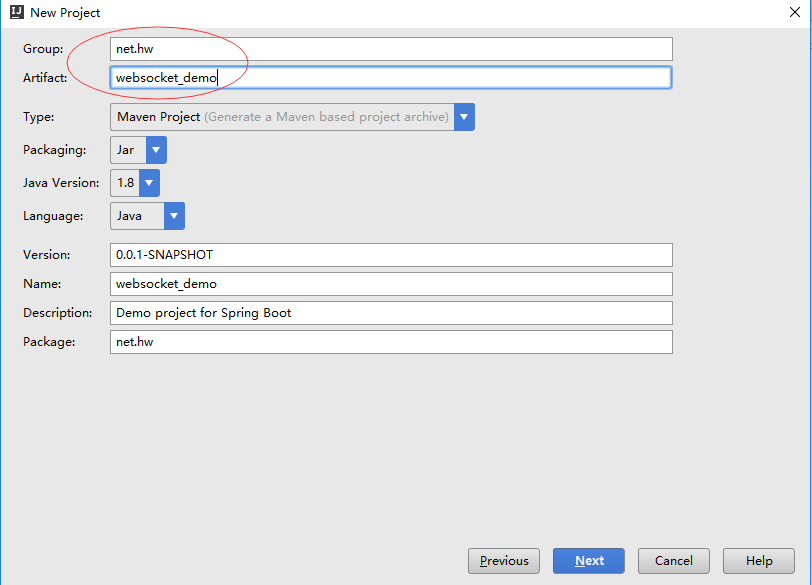
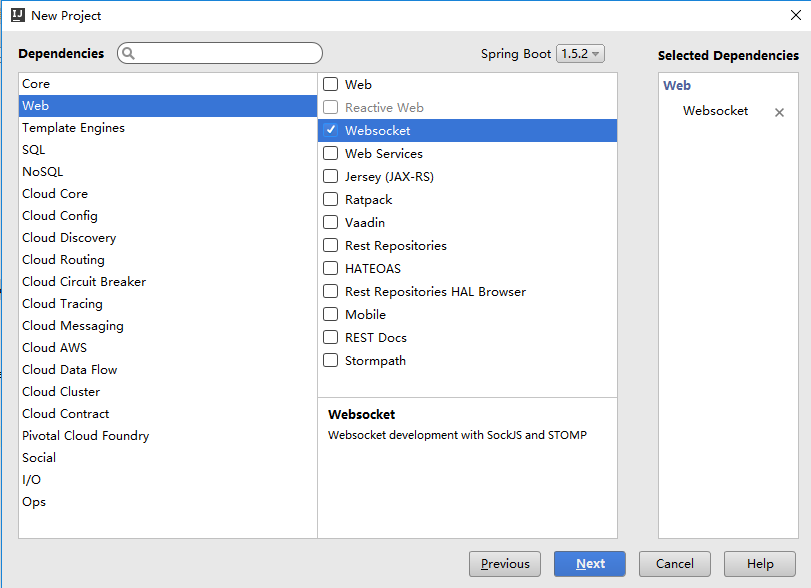
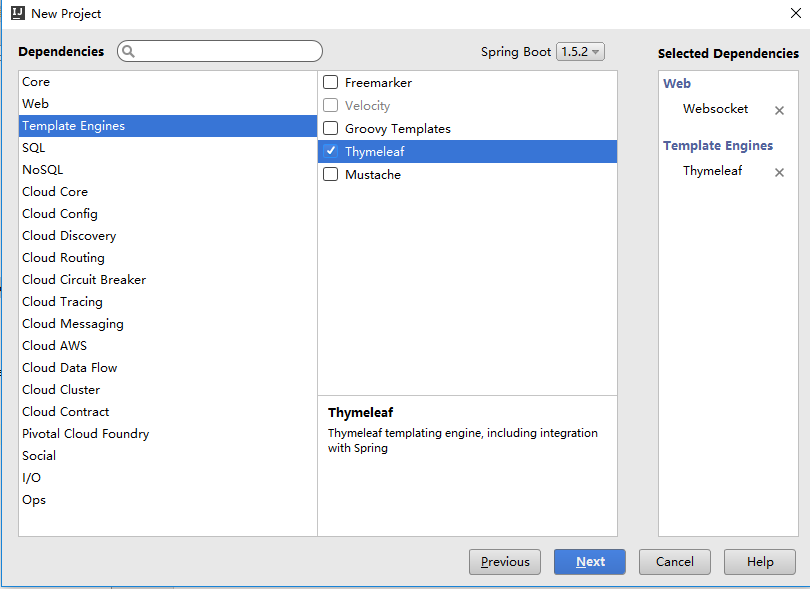
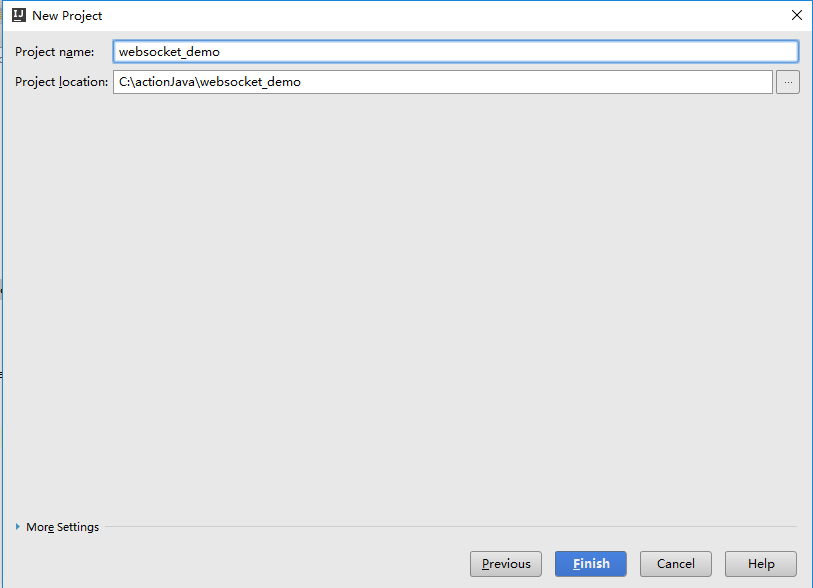
1、创建Spring Boot项目,选择Thymeleaf和Websocket依赖
2、广播式
广播式即服务端有消息时,会将消息发给所有连接了当前endpoint的浏览器。
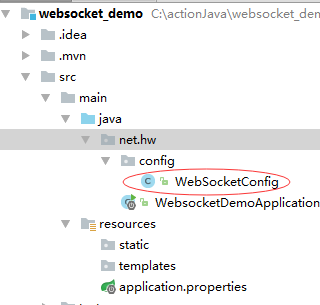
(1)配置WebSocket
package net.hw.config;

import org.springframework.context.annotation.Configuration;
import org.springframework.messaging.simp.config.MessageBrokerRegistry;
import org.springframework.web.socket.config.annotation.AbstractWebSocketMessageBrokerConfigurer;
import org.springframework.web.socket.config.annotation.EnableWebSocketMessageBroker;
import org.springframework.web.socket.config.annotation.StompEndpointRegistry;

/**
 * Created by howard on 2017/4/5.
 */
@Configuration
@EnableWebSocketMessageBroker
public class WebSocketConfig extends AbstractWebSocketMessageBrokerConfigurer {
    @Override
    public void configureMessageBroker(MessageBrokerRegistry registry) {
        // 广播式应该配置一个/topic消息代理
        registry.enableSimpleBroker("/topic");
    }

    @Override
    public void registerStompEndpoints(StompEndpointRegistry registry) {
        // 注册一个STOMP的endpoint,并指定使用SockJS协议
        registry.addEndpoint("/endpointSmart").withSockJS();
    }
}
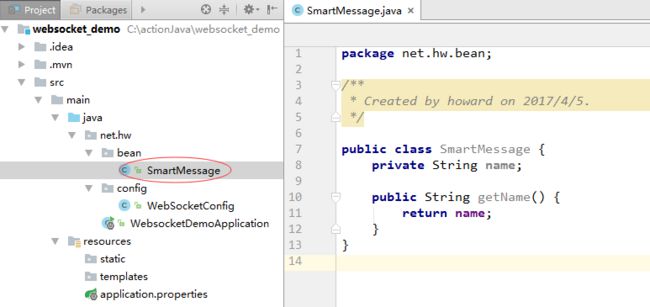
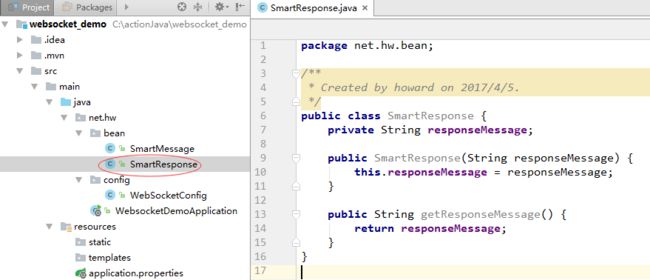
(2)创建实体类SmartMessage(用于接受从浏览器向服务器端发送的消息)
(3)创建实体类SmartResponse(服务器端向浏览器发送的消息)
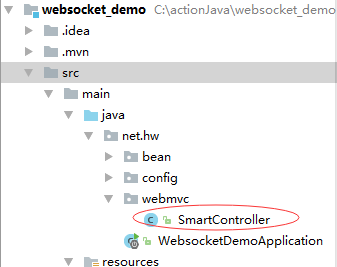
(4)创建SmartController
package net.hw.webmvc;

import net.hw.bean.SmartMessage;
import net.hw.bean.SmartResponse;
import org.springframework.messaging.handler.annotation.MessageMapping;
import org.springframework.messaging.handler.annotation.SendTo;
import org.springframework.stereotype.Controller;

/**
 * Created by howard on 2017/4/5.
 */
@Controller
public class SmartController {
    @MessageMapping("/welcome")
    @SendTo("/topic/getResponse")
    public SmartResponse say (SmartMessage message) throws Exception {
        Thread.sleep(3000);
        return new SmartResponse("Welcome, " + message.getName() + "!");
    }
}
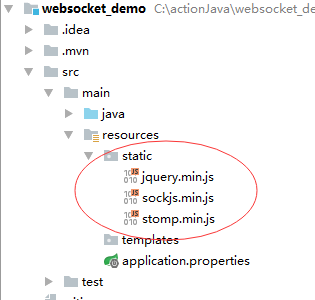
(5)添加脚本:将stomp.min.js、sockjs.min.js以及jQuery放在static下
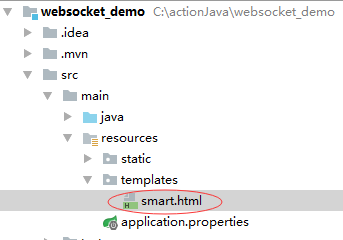
(6)在templates下创建smart.html页面
Spring Boot + WebSocket + 广播式
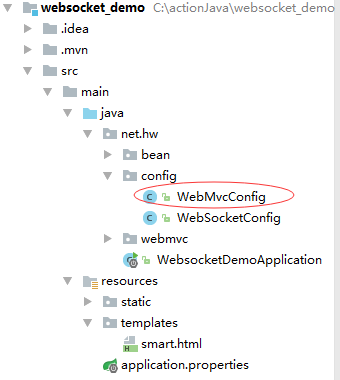
(7)在WebMvcConfig配置类里配置viewController
package net.hw.config;

import org.springframework.context.annotation.Configuration;
import org.springframework.web.servlet.config.annotation.ViewControllerRegistry;
import org.springframework.web.servlet.config.annotation.WebMvcConfigurerAdapter;

/**
 * Created by howard on 2017/4/9.
 */
@Configuration
public class WebMvcConfig extends WebMvcConfigurerAdapter{
    @Override
    public void addViewControllers(ViewControllerRegistry registry) {
        registry.addViewController("/smart").setViewName("smart");
    }
}
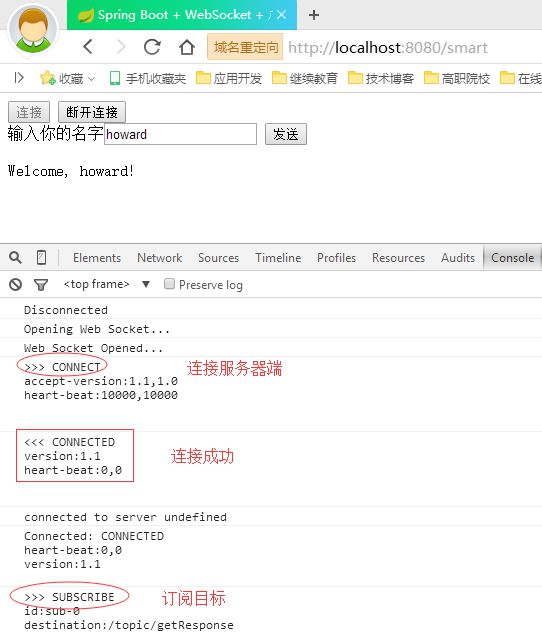
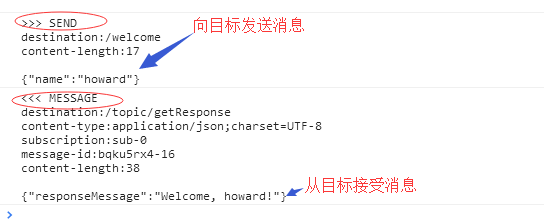
(8)运行程序,查看效果
预期效果:当一个浏览器发送一个消息到服务端时,其它浏览器也能收到从服务器端送来的这个消息。
3、点对点式
本例演示一个简单的聊天室程序。例子中只有两个用户,互相发送消息给彼此,因需要用户相关的内容,所以在此引入最简单的Spring Security相关内容。
(1)在pom.xml文件里添加Spring Security的starter依赖
   org.springframework.boot
   spring-boot-starter-security
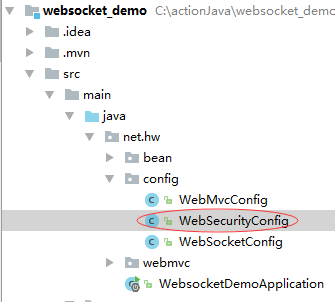
(2)安全配置类WebSecurityConfig
package net.hw.config;

import org.springframework.context.annotation.Configuration;
import org.springframework.security.config.annotation.authentication.builders.AuthenticationManagerBuilder;
import org.springframework.security.config.annotation.web.builders.HttpSecurity;
import org.springframework.security.config.annotation.web.builders.WebSecurity;
import org.springframework.security.config.annotation.web.configuration.EnableWebSecurity;
import org.springframework.security.config.annotation.web.configuration.WebSecurityConfigurerAdapter;

/**
 * Created by howard on 2017/4/9.
 */
@Configuration
@EnableWebSecurity
public class WebSecurityConfig extends WebSecurityConfigurerAdapter {
    @Override
    protected void configure(HttpSecurity http) throws Exception {
        http.authorizeRequests()
                .antMatchers("/", "/login").permitAll() // 对"/", "/login"路径不拦截
         .anyRequest().authenticated()
                .and()
                .formLogin()
                .loginPage("/login") // 设置登录页面访问路径为/login
                .defaultSuccessUrl("/chat") // 登录成功后转向/chat路径
         .permitAll()
                .and()
                .logout()
                .permitAll();
    }

    @Override
    protected void configure(AuthenticationManagerBuilder auth) throws Exception {
        // 在内存里配置两个用户
        auth.inMemoryAuthentication()
                .withUser("howard").password("11111").roles("USER")
                .and()
                .withUser("alice").password("22222").roles("USER");
    }

    @Override
    public void configure(WebSecurity web) throws Exception {
        // 不拦截静态资源
        web.ignoring().antMatchers("/resources/static/**");
    }
}package net.hw.config;
import org.springframework.context.annotation.Configuration;
import org.springframework.messaging.simp.config.MessageBrokerRegistry;
import org.springframework.web.socket.config.annotation.AbstractWebSocketMessageBrokerConfigurer;
import org.springframework.web.socket.config.annotation.EnableWebSocketMessageBroker;
import org.springframework.web.socket.config.annotation.StompEndpointRegistry;
/**
* Created by howard on 2017/4/5.
*/
@Configuration
@EnableWebSocketMessageBroker
public class WebSocketConfig extends AbstractWebSocketMessageBrokerConfigurer {
@Override
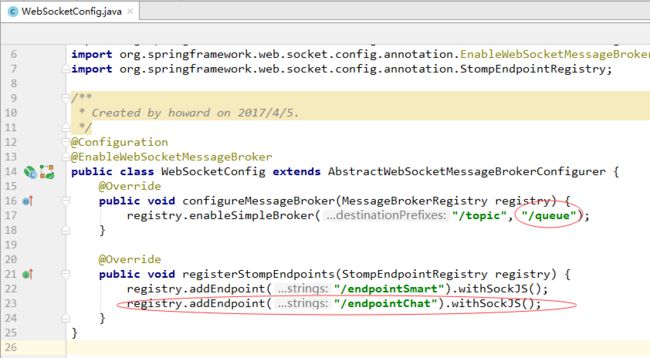
public void configureMessageBroker(MessageBrokerRegistry registry) {
registry.enableSimpleBroker("/topic", "/queue");
}
@Override
public void registerStompEndpoints(StompEndpointRegistry registry) {
registry.addEndpoint("/endpointSmart").withSockJS();
registry.addEndpoint("/endpointChat").withSockJS();
}
}
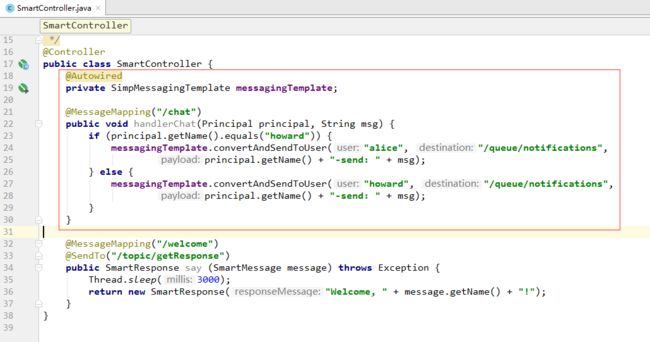
(4)在SmartController控制器添加代码
package net.hw.webmvc;

import net.hw.bean.SmartMessage;
import net.hw.bean.SmartResponse;
import org.springframework.beans.factory.annotation.Autowired;
import org.springframework.messaging.handler.annotation.MessageMapping;
import org.springframework.messaging.handler.annotation.SendTo;
import org.springframework.messaging.simp.SimpMessagingTemplate;
import org.springframework.stereotype.Controller;

import java.security.Principal;

/**
 * Created by howard on 2017/4/5.
 */
@Controller
public class SmartController {
    @Autowired
    private SimpMessagingTemplate messagingTemplate;

    @MessageMapping("/chat")
    public void handlerChat(Principal principal, String msg) {
        if (principal.getName().equals("howard")) {
            messagingTemplate.convertAndSendToUser("alice", "/queue/notifications",
                    principal.getName() + "-send: " + msg);
        } else {
            messagingTemplate.convertAndSendToUser("howard", "/queue/notifications",
                    principal.getName() + "-send: " + msg);
        }
    }

    @MessageMapping("/welcome")
    @SendTo("/topic/getResponse")
    public SmartResponse say (SmartMessage message) throws Exception {
        Thread.sleep(3000);
        return new SmartResponse("Welcome, " + message.getName() + "!");
    }
}
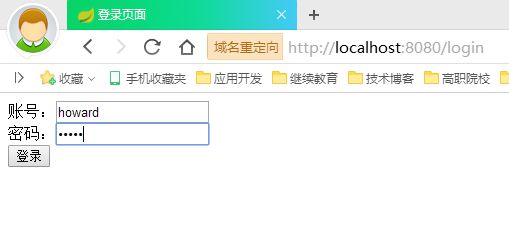
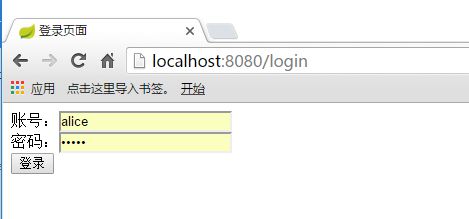
(5)登录页面login.html
登录页面
无效的账号和密码
你已注销
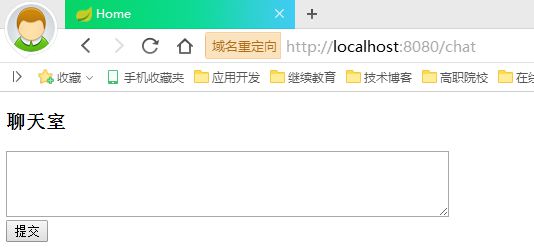
(6)聊天页面chat.html
Home
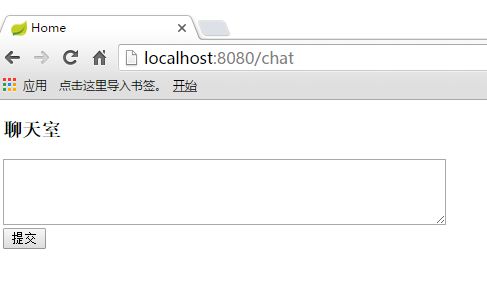
聊天室
(7)在WebMvcConfig里添加viewController
package net.hw.config;

import org.springframework.context.annotation.Configuration;
import org.springframework.web.servlet.config.annotation.ViewControllerRegistry;
import org.springframework.web.servlet.config.annotation.WebMvcConfigurerAdapter;

/**
 * Created by howard on 2017/4/9.
 */
@Configuration
public class WebMvcConfig extends WebMvcConfigurerAdapter{
    @Override
    public void addViewControllers(ViewControllerRegistry registry) {
        registry.addViewController("/smart").setViewName("smart");
        registry.addViewController("/login").setViewName("login");
        registry.addViewController("/chat").setViewName("chat");
    }
}
(8)运行效果
