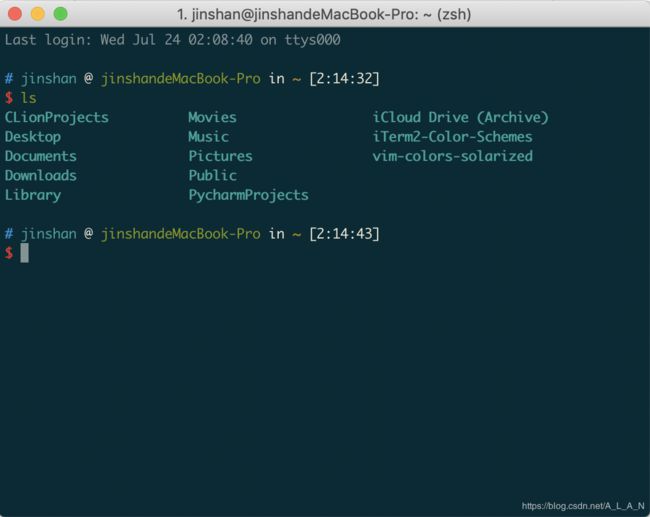
iTerm2+oh my zsh代替Mac自带的Terminal
0、最终效果:
1、安装配置iTerm2:
下载:https://iterm2.com
安装完成后,在/bin目录下会多出一个zsh文件(macOS已经自带zsh ?),Mac默认使用bash作为终端,使用以下命令修改默认使用zsh
chsh -s /bin/zsh
查看是否切换成功, 应返回 /bin/zsh
echo $SHELL
zsh拥有语法高亮,命令行tab补全,自动提示符,显示Git仓库状态等功能 ,不想用zsh时用以下命令再切换回bash
chsh -s /bin/bash # 切换后重启终端才生效
可查看自己机子装了哪些shell
cat /etc/shells
设置背景图片:iTerm2 -> Preferences -> Profiles -> window -> Background Image,可通过Blending调节壁纸透明度
设置iTem2为默认终端:iTerm2 -> Make iTerm2 Default Term
设置颜色主题:iTerm2 -> Preferences -> Profiles -> Colors -> Color Presets,如选择Solarized Dark,也可以自己下载颜色主题
设置系统热键, 只要按option+space,就能快速唤出/隐藏iTerm2:iTerm2 -> Preferences -> Keys ->Hotkey打勾
2、配置 iTerm2 颜色主题
主题官网:https://iterm2colorschemes.com/
将 GitHub 仓库整个克隆至本地:
git clone https://github.com/mbadolato/iTerm2-Color-Schemes.git
导入下载的颜色主题:iTerm2 -> Preferences -> Profiles -> Colors -> Color Presets ->import,如选择iTerm2-Color-Schemes/schemes/Gruvbox Dark.itermcolors
查看~目录下是否有.bash_profile配置文件,没有则创建一个,输入下列配置信息:
#enables colorin the terminal bash shell export
export CLICOLOR=1

#setsup thecolor scheme for list export
export LSCOLORS=gxfxcxdxbxegedabagacad

#sets up theprompt color (currently a green similar to linux terminal)
export PS1='\[\033[01;32m\]\u@\h\[\033[00m\]:\[\033[01;36m\]\w\[\033[00m\]\$ '

#enables colorfor iTerm
export TERM=xterm-256color
更新配置文件,使其字体颜色生效:
source .bash_profile
3、iTerm2常用快捷键:
| 命令 | 说明 |
|---|---|
| command + t | 新建标签 |
| command + w | 关闭标签 |
| command + 数字 或 command + 左右方向键 | 切换标签 |
| command + enter | 切换全屏 |
| command + f | 查找 |
| command + d | 垂直分屏 |
| command + shift + d | 水平分屏 |
| command + option + 方向键 command + [ 或 command + ] | 切换屏幕 |
| command + ; | 查看历史命令 |
| command + shift + h | 查看剪贴板历史 |
| ctrl + u | 清除当前行 |
| ctrl + l 或 command + r | 清屏 |
| ctrl + a | 到行首 |
| ctrl + e | 到行尾 |
| ctrl + f/b 或 左右方向键 | 前进后退 |
| ctrl + p 或 !! | 上一条命令 |
| ctrl + r | 搜索命令历史 |
| ctrl + k | 删除到文本末尾 |
| ctrl + d | 删除当前光标的字符 |
| ctrl + h | 删除光标之前的字符 |
| ctrl + w | 从光标处删至字首 |
| ctrl + y |
在iTerm2中,选中即复制,不需要再去按command+C了。
4、安装 oh my zsh(简化对 zsh 的配置)
oh-my-zsh源码放在github上,可以使用curl或wget安装
# 通过wget安装
wget https://github.com/robbyrussell/oh-my-zsh/raw/master/tools/install.sh -O - | sh
# 通过curl安装
curl -L https://github.com/robbyrussell/oh-my-zsh/raw/master/tools/install.sh | sh
若要更新oh_my_zsh :
upgrade_oh_my_zsh
若要卸载oh_my_zsh:
uninstall_oh_my_zsh
5、配置zsh主题
选择喜欢的主题:主题列表
修改主题:
vim ~/.zshrc
如将ZSH_THEME改成"ys",默认"robbyrussell"
还可以在这个文件里给我们的命令起别名,这样可以来缩短命令使用别名。例如
# Example aliases
alias zshconfig="mate ~/.zshrc"
alias ohmyzsh="mate ~/.oh-my-zsh"
alias cls='clear'
alias ll='ls -l'
alias la='ls -a'
alias vi='vim'
更新配置:
source ~/.zshrc
6、安装oh_my_zsh插件
插件地址:https://github.com/zsh-users
cd ~/.oh-my-zsh/custom/plugins
git clone https://github.com/zsh-users/zsh-syntax-highlighting.git # 语法高亮插件
git clone https://github.com/zsh-users/zsh-autosuggestions.git # 自动补全插件
将 ~/.zshrc 文件里的 plugins=(git) 改为 plugins=(git zsh-syntax-highlighting zsh-autosuggestions),再 source ~/.zshrc
其他插件有:
autojump:直达常用目录(用法:j
z:快速跳转目录(用法:z
extract :解压一切文件 (用法:x
web-search :命令行可以直接google (用法:google
7、其他
问题:zsh中*通配符在scp的时候不能用
解决:在 ~/.zshrc 里加 setopt nonomatch 或 加引号 scp "~/dir/*.jpg" name@dst
技巧:按住command+点击终端中的目录,即在 Finder 中打开该文件夹。
8、给Vim配色
Vim 的配色最好和终端的配色保持一致,不然在 iTerm2 里使用vim 会很别扭,这里iTerm2和vim都采用solarized配色。
git clone git://github.com/altercation/vim-colors-solarized.git
mkdir -p ~/.vim/colors
cp vim-colors-solarized/colors/solarized.vim ~/.vim/colors

cp /usr/share/vim/vimrc ~/.vimrc # 将vim的环境文件copy到home目录下
vim .vimrc
添加以下设置
syntax enable "设置vim语法高亮 (或 syntax on)
set background=dark "(或 set background=light)
colorscheme solarized
