分析Ajax爬取今日头条街拍美图(准备+实战)
本文参考自崔庆才老师所做《Python3网络爬虫开发实战》
https://germey.gitbooks.io/python3webspider/content/
本文共有约1500字,建议阅读时间5分钟,代码较多,请注重理论与实践相结合
觉得文章比较枯燥和用电脑观看的可以点击阅读原文即可跳转到CSDN网页
前期目录:
一、准备工作
二、抓取分析
一、准备工作
在本节开始之前,请确保已经安装好requests库。如果没有安装,请参考https://zhuanlan.zhihu.com/p/33746149。我们使用的编辑器还是PyCharm;
二、抓取分析
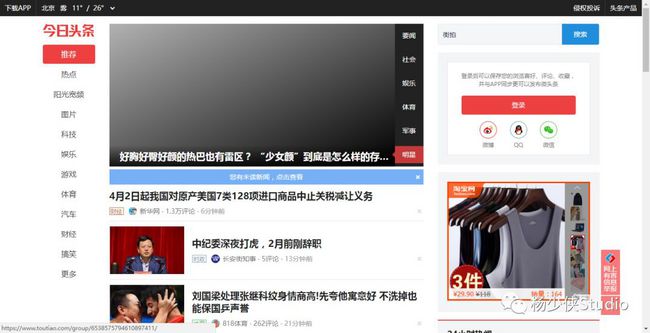
抓取前分析抓取对象:打开今日头条首页https://www.toutiao.com/
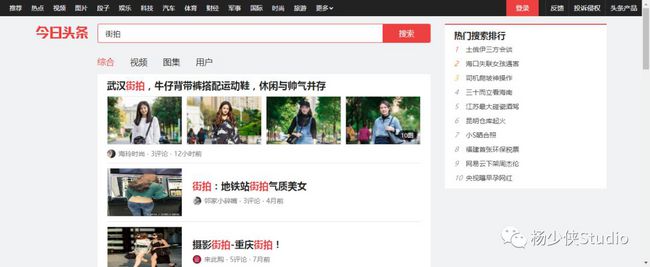
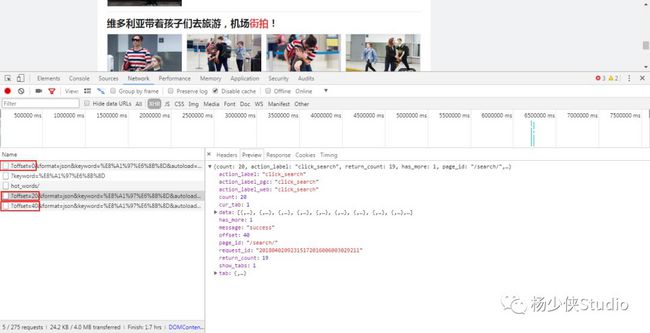
为了验证我们抓取内容是否一致,我们可以尝试搜索一下搜索结果的标题,比如“路人”二字。若搜索结果为0,可以将过滤选项选为“XHR”,就可以得到我的输出结果了。从侧面就可以确定这些数据确实是由Ajax加载的。
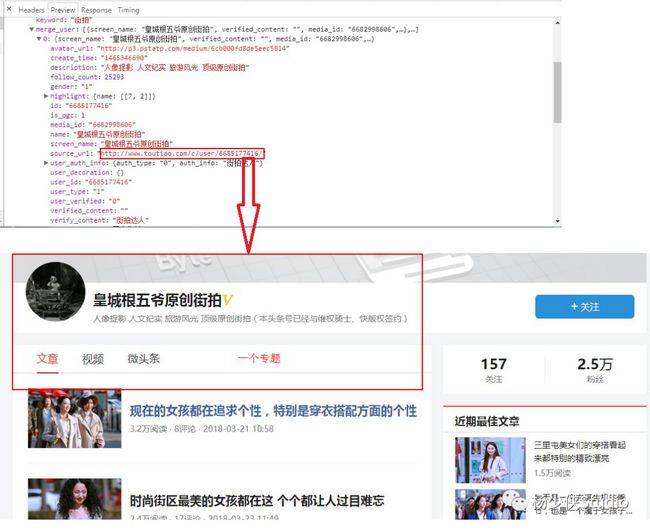
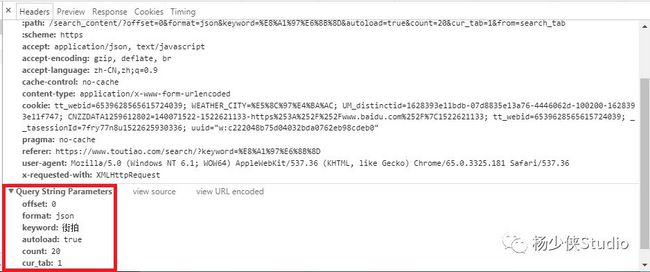
现在我们切换到请求URL和header信息,利用urlencode对offset、format、keyword、autoload、count和cur_tab进行编码,将字典对象转化为url的请求参数
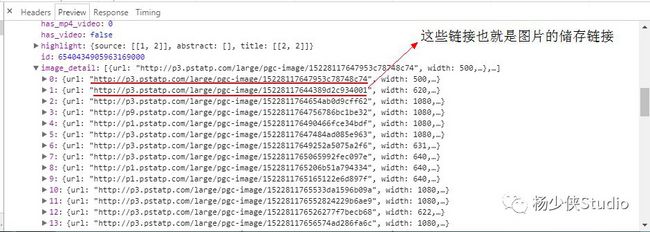
这里观察一下后续链接的参数,发现变化的参数只有offset,其他参数都没有变化,而且第二次请求的offset值为20,第三次为40,第四次为60,所以可以发现规律,这个offset值就是偏移量,进而可以推断出count参数就是一次性获取的数据条数。因此,我们可以用offset参数来控制数据分页。这样一来,我们就可以通过接口批量获取数据了,然后将数据解析,将图片下载下来即可。
实战目录:
目标站点分析
获取文章URL—》解析URL—》返回源代码
子文章解析
分解文章URL(子文章)—》获取子文章url—》解析url—》返回图片链接
图片下载
路径创建—》图片写入
主程序设计
用于解析每个部分的运行及运行逻辑
运行
结果展示
一、目标站点分析(https://www.toutiao.com/search/?keyword=%E8%A1%97%E6%8B%8D)
获取URL,开头先将前面我们提到的利用urlencode()方法进行编码
from urllib.parse import urlencode
import requests
from requests.exceptions import RequestException

def get_page_index(offset,keyword):
    data = {
        'offset': offset,
        'format': 'json',
        'keyword': keyword,
        'autoload': 'true',
        'count': '20',
        'cur_tab': '1',
        'from': 'search_tab'
    }
    url = 'http://www.toutiao.com/search_content/?' + urlencode(data)
    response = requests.get(url)
    try:
        if response.status_code == 200:
            response.encoding = 'utf-8'
            return response.text
        return None
    except RequestException:
        print('Fail')
        return None

def main():
    html = get_page_index(0,'街拍')
    print(html)

if __name__ == '__main__':
    main()
运行一下你就会发现有些显示是乱码的,也有一部分是一些链接格式,点开链接之后会直接跳到“街拍”网站,你们也可以对比崔老师的视频,确实是乱码中夹杂着链接;
以上就实现用urlencode()方法构造GET请求参数,然后requests请求这个链接,通过状态码是否是200来判断请求是否成功,若成功就用response的json()方法将结果转为JSON格式,然后返回。
二、子文章解析
分解URL,由上图可知:我们捕捉的这个URL里面含有多个文章的URL,进而我们将它做一个分解,分解成多个文章URL
#分解这个URL
def parse_page_index(html):
    data = json.loads(html)
    if data and 'data' in data.keys():
        for item in data.get('data'):
            yield item.get('article_url')
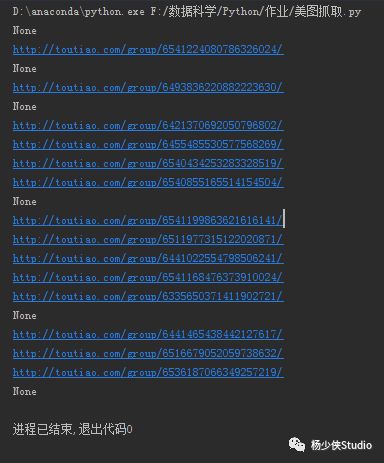
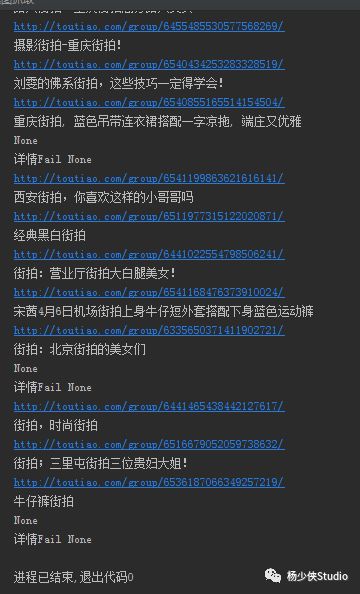
使用一个for循环将分解之后的文章URl “print”出来‘如下:
解析文章URL+BeautifulSoup处理HTML:重复第一步的操作获取文章URL的源代码,再使用BeautifulSoup将文章html作为对象处理从而获取文章title
#获取文章的URL
def get_page_detail(url2):
try:
#print(url2)
response = requests.get(url2,headers = headers)
#print(response.text)
if response.status_code == 200:
#print(response.text)
return response.text
except RequestException:
print('详情Fail',url2)
return None
#解析文章URl
def parse_page_detail(html2):
#提取组图的名称
soup = BeautifulSoup(html2,'lxml')
#print(soup)
#soup其实就是网页源代码(这里复习一下)
title = soup.select('title')[0].get_text()#获取标签文本信息:[重庆街拍, 蓝色吊带连衣裙搭配一字凉拖, 端庄又优雅 ]
print(title)#主程序
def main(offset):
html = get_page_index(offset)
for url2 in parse_page_index(html):
print(url2)
html2 = get_page_detail(url2)
#print(html2)
if html2:
parse_page_detail(html2)
打印结果:
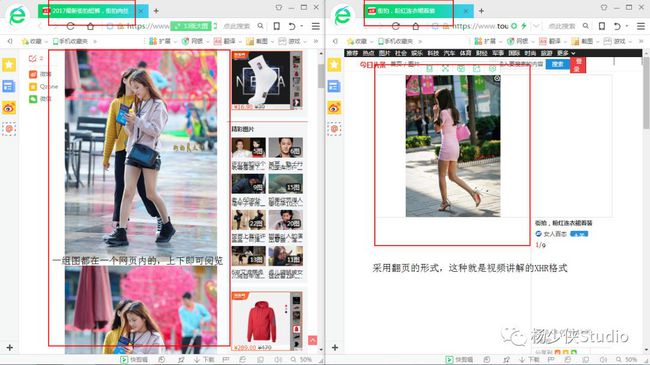
我们不一样!!!
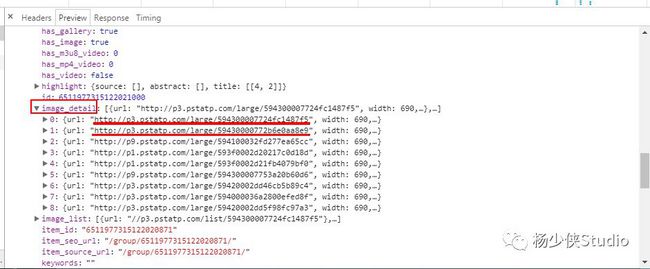
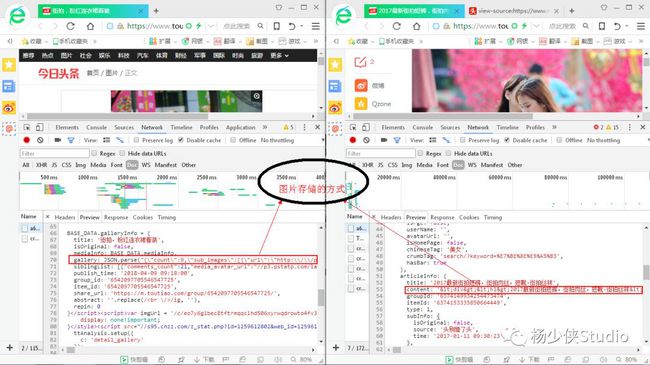
 所以就需要你分两个部分去解析一下子文章url,审查元素—》network—》doc—》刷新
以上两张图都是网页源代码,只是看的位置不一样而已,这里我将它详细的呈现给大家参考参考(第二章右键点击查看源代码就可以了);
从上图分析,这两种网页的关键词是不一样的,代码演示给大家分析一下:
非json格式:
def parse_page_detail(html2,url):
#提取组图的名称
soup = BeautifulSoup(html2,'lxml')
#print(soup)
#soup其实就是网页源代码(这里复习一下)
title = soup.select('title')[0].get_text()#获取标签文本信息:[重庆街拍, 蓝色吊带连衣裙搭配一字凉拖, 端庄又优雅 ]
#print(title)
image_pattern = re.compile('"http://(.*?)"',re.S)
if html2 is not '详情Fail':
result = re.findall(image_pattern,html2)
#print(result)
#由于头条内并非所有的都是Json格式的数据,导致我们需要分开解析
image = []
if result:
for i in range(0,len(result)):
image1 = 'http://'+result[i]
image.append(image1)#append会修改a本身,并且返回None。不能把返回值再赋值给a
return {
'title':title,
'url':url,
'image':image
}json格式:
def parse_page_detail2(html2,url):
    soup = BeautifulSoup(html2,'lxml')
    title = soup.select('title')[0].get_text()
    #print(title)
    image_pattern2 = re.compile('gallery: JSON\.parse\("(.*?)"\)',re.S)#“\”保证原本网页代码的符号不被正则表达式所翻译
    result2 = re.search(image_pattern2,html2)
    if result2 is not None:
        goal = re.sub('\\\\','',result2.group(1))
        #print(goal)
        data = json.loads(goal)
        #print(data.keys())
        if data and 'sub_images' in data.keys():
            #print(data.keys())
            sub_images = data.get("sub_images")
            #print(sub_images)
            images = [item.get('url') for item in sub_images]
            return{
                'title' : title,
                'url' :url,
                'images': images
            }
其中,“print”的部分可以多设几个,方便大家验收成果
三、图片下载
路劲创建与写入
(os.mkdir可参照:http://www.runoob.com/python3/python3-os-mkdir.html)
(format函数可参照:http://www.runoob.com/python/att-string-format.html)
def save_image(content,title):
    if not os.path.exists(title):
        #os.mkdir() 方法用于以数字权限模式创建目录。默认的模式为 0777 (八进制)。
        os.mkdir(title)
    try:
        #"{0} {1}".format("hello", "world")   设置指定位置
        file_path = '{0}/{1}.{2}'.format(title,md5(content).hexdigest(),'jpg')
        print(file_path)
        if not os.path.exists(file_path):#判断文件是否存在
            if not os.path.exists(file_path):
                with open(file_path,'wb') as f:
                    f.write(content)
                    f.close()
            else:
                print('Already Download',file_path)
    except requests.RequestException:
        print('Failed to Save Image')
解析图片链接并调用(save_image())
#图片下载
def download_image(url,title):
    print('正在下载',url)
    try:
        response = requests.get(url,headers = headers)
        if response.status_code == 200:
            save_image(response.content,title)#content返回二进制,text:返回网页正常请求结果
        return None
    except RequestException:
        print('PictureURL Has Exception')
        return None
四、主程序设计
#主程序
def main(offset):
    #目标站点分析
    html = get_page_index(offset)
    #分解文章URL成一个个子文章url
    for url2 in parse_page_index(html):
        #print(url2)
        #解析子文章url
        html2 = get_page_detail(url2)
        #print(html2)
        if html2:
            #非json格式解析
            result = parse_page_detail(html2,url2)
            #print(result)
            #json格式解析
            result2 = parse_page_detail2(html2,url2)
            #print(result2)
有些小伙伴觉得很奇怪,图片下载函数没有调用,这里吧图片下载的函数放在json与非json获取的链接当中了,如果有不懂的,请阅读源代码的这两个部分
五、运行
if __name__ == '__main__':
#使用group是由于每次刷新返回的offset是10、20、40...
    group = [x *20 for x in range(1,4)]
    for i in group:
main(i)![]()
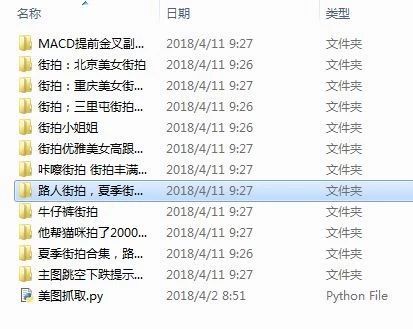
六、结果展示
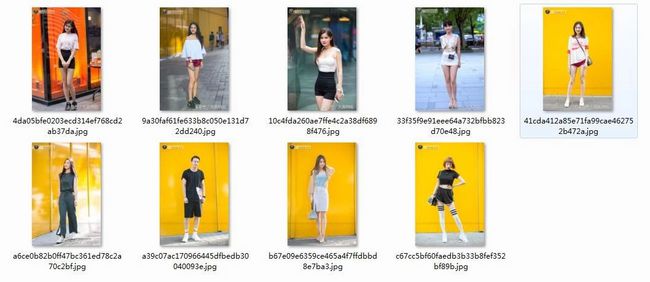
这里,并未使用多线程下载和MongoDB,仅仅为大家讲解整个爬虫的思路(这里仅是我小白的总结),也欢迎大家继续学习写出更加优质和完善的代码
崔庆才老师知乎学习链接:
https://zhuanlan.zhihu.com/p/33877753
