Ubuntu18.04 GitLab仓库服务器搭建
0、首先是安装git
sudo apt-get install git
创建用户git(我后续发生问题就是从这开始的,生成公钥私钥的时候要切换到git用户否则会出现权限问题,其他方法自行探索吧)
adduser git
在这个过程中会要求输入密码。
然后给git用户添加sudo权限,这部分涉及到后续切换到git用户下进行操作,部分操作需要sudo权限。当然权限熟的话,通过命令行进行设置可以跳过此步。
sudo usermod -aG sudo git
切换到git用户
su - git
1.安装依赖包,运行命令
sudo apt-get install curl openssh-server ca-certificates postfix
执行完成后,出现邮件配置,选择Internet那一项(不带Smarthost的)
2.利用清华大学的镜像来进行主程序的安装。
curl https://packages.gitlab.com/gpg.key 2> /dev/null | sudo apt-key add - &>/dev/null
(如果下载过程中访问超时出错,请用curl -sS https://packages.gitlab.com/install/repositories/gitlab/gitlab-ce/script.deb.sh | sudo bash,并直接跳入gitlab-ce安装)
3.gitlab-ce的下载利用root用户打开文件。
vi /etc/apt/sources.list.d/gitlab-ce.list
加入下载地址:
deb https://mirrors.tuna.tsinghua.edu.cn/gitlab-ce/ubuntu xenial main
安装 gitlab-ce:
sudo apt-get update
sudo apt-get install gitlab-ce
4.执行配置
sudo gitlab-ctl reconfigure
5.检查GitLab是否安装好并且已经正确运行,输入下面的命令(查看gitlab的状态)
sudo gitlab-ctl status
6.检测是否开启正确
如果得到类似下面的结果,则说明GitLab运行正常
run: gitlab-workhorse: (pid 1148) 884s; run: log: (pid 1132) 884s
run: logrotate: (pid 1150) 884s; run: log: (pid 1131) 884s
run: nginx: (pid 1144) 884s; run: log: (pid 1129) 884s
run: postgresql: (pid 1147) 884s; run: log: (pid 1130) 884s
run: redis: (pid 1146) 884s; run: log: (pid 1133) 884s
run: sidekiq: (pid 1145) 884s; run: log: (pid 1128) 884s
run: unicorn: (pid 1149) 885s; run: log: (pid 1134) 884s
7.更改创建项目后git地址gitlab.example.com为ip地址(此步可省略,若使用gitlab.example.com不能访问,则修改)
vim /opt/gitlab/embedded/service/gitlab-rails/config/gitlab.yml
host: localhost中将localhost改为主机的IP即可
8.更改访问ip(出现502错误时或主动更改ip)
命令sudo vim /etc/gitlab/gitlab.rb后
把文件中的
external_url 'http://localhost'
改为:
externa_url 'http://localhost:4567'
命令sudo vim /var/opt/gitlab/gitlab-rails/etc/unicorn.rb
把文件中的
listen "127.0.0.1:8080"
改为:
listen "127.0.0.1:4567"
9.gtilab部分命令
sudo gitlab-ctl stop停止
sudo gitlab-ctl start开启
sudo gitlab-ctl restart重启
sudo gitlab-ctl status查看状态
sudo gitlab-ctl reconfigure确认配置(修改配置后,必须执行)
sudo gitlab-ctl tail 查看日志
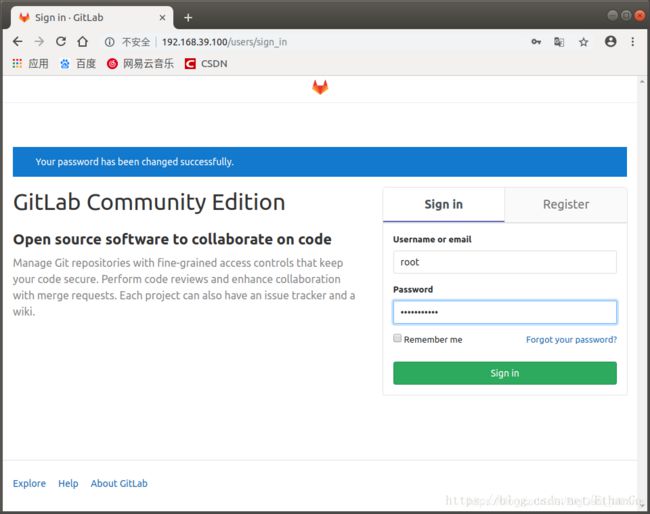
浏览器进行访问
http://电脑的IP地址
第一次进入,需要输入管理员账号的密码,以方便后期的管理。
输入好之后,就可以以管理员进行登录,账号是root,密码就是你刚才输入的密码。
至此,gitlab已安装成功,之后的使用方式,和github没有太大差异,就不进行介绍了。
创建证书登录
收集所有需要登录的用户的公钥,公钥位于id_rsa.pub文件中,把我们的公钥导入到/home/git/.ssh/authorized_keys文件里,一行一个。
如果没有该文件创建它:
cd /home/git/
mkdir .ssh
chmod 755 .ssh
touch .ssh/authorized_keys
chmod 644 .ssh/authorized_keys
这里的路径中的git是账户名的名称,/home/账户名/.ssh/authorized_keys,必须要所属账户下。
初始化git仓库
首先我们选定一个目录作为Git仓库,假定是/home/gitrepo/runoob.git,在/home/gitrepo目录下输入命令:
cd /home
mkdir gitrepo
chown git:git gitrepo/
cd gitrepo
git init --bare runoob.git
Initialized empty Git repository in /home/gitrepo/runoob.git/
以上命令Git创建一个空仓库,服务器上的Git仓库通常都以.git结尾。然后,把仓库所属用户改为git:
chown -R git:git runoob.git
克隆仓库
$ git clone [email protected]:/home/gitrepo/runoob.git
Cloning into 'runoob'...
warning: You appear to have cloned an empty repository.
Checking connectivity... done.
192.168.0.106 为 Git 所在服务器 ip ,你需要将其修改为你自己的 Git 服务 ip。
此时,会报错
ssh: connect to host 192.168.0.106 port 22: Connection refused
fatal: 无法读取远程仓库。
请确认您有正确的访问权限并且仓库存在。
这个问题详见Ubuntu18.04 ssh server配置
此时再去clone
$ git clone [email protected]:/home/gitrepo/runoob.git
正克隆到 'runoob'...
[email protected]'s password:
remote: 对象计数中: 3, 完成.
remote: Total 3 (delta 0), reused 0 (delta 0)
接收对象中: 100% (3/3), 完成.
如此,我们的git仓库就搭建完毕了。
---------------------
10.卸载gitlab
执行如下四步:
sudo gitlab-ctl uninstall
sudo dpkg -r gitlab-ce
sudo rpm -e gitlab-ce
reboot(重启)

