springboot搭建后台框架 (一)整合tkMapper
springboot整合tkMapper
想着每次搭建新项目时框架都要从新搭建,基本常用的也就哪几种,现在就来搭建一种常用的springboot后台框架,以后新开小项目可以直接拿来使用
项目整体结构图

1.新建springboot空白项目,选中web依赖(略,也可以完全根据本人代码操作)
2.pom文件依赖项展示
    4.0.0

        org.springframework.boot
        spring-boot-starter-parent
        2.1.5.RELEASE


    com.cxt
    demo
    0.0.1-SNAPSHOT
    demo
    Demo project for Spring Boot


        1.8


            org.springframework.boot
            spring-boot-starter-web


            org.projectlombok
            lombok
            true


            org.springframework.boot
            spring-boot-starter-test
            test


            org.mybatis.spring.boot
            mybatis-spring-boot-starter
            1.3.2


            mysql
            mysql-connector-java
            8.0.16
            runtime


            tk.mybatis
            mapper-spring-boot-starter
            RELEASE


            tk.mybatis
            mapper
            3.4.5


            com.alibaba
            druid
            1.1.3


                org.springframework.boot
                spring-boot-maven-plugin


                org.mybatis.generator
                mybatis-generator-maven-plugin
                1.3.2

                    ${basedir}/src/main/resources/generator/generatorConfig.xml
                    true
                    true


                        mysql
                        mysql-connector-java
                        8.0.16


                        tk.mybatis
                        mapper-generator
                        1.1.3
- application.yml文件内容
server:
  port: 8081

#数据源配置
spring:
  datasource:
    type: com.alibaba.druid.pool.DruidDataSource #Druid连接池
    url: jdbc:mysql://localhost:3306/springboot-demo?useUnicode=true&characterEncoding=UTF-8&zeroDateTimeBehavior=convertToNull&useSSL=true&nullCatalogMeansCurrent=true
    username: root #数据库用户名
    password: root #数据库密码
    driver-class-name: com.mysql.cj.jdbc.Driver #mysql驱动
    initialSize: 10 #初始化连接池大小
    minIdle: 10 #初始化最小连接池数量
    maxActive: 100 #初始化最大连接池数量
    maxWait: 6000 #配置获取连接等待超时的时间
    timeBetweenEvictionRunsMills: 6000 #配置间隔多久才进行一次检测,检测需要关闭的空闲连接,单位是毫秒
    minEvictableIdleTimeMillis: 30000 #配置一个连接在池中最小生存的时间,单位是毫秒
    validationQuery: SELECT 'x' #测试连接
mybatis:
  mapper-locations: classpath:/mapper/*.xml
  configuration:
    map-underscore-to-camel-case: true
    #打印sql
    #log-impl: org.apache.ibatis.logging.stdout.StdOutImpl
mapper:
  identity: MYSQL # 配置主键自动增长(使用MYSQL原生方式)
logging:
  level:
    com.cxt.demo: debug
# 分页插件
pagehelper:
  reasonable: true
  page-size-zero: true
  params: pageNum=start;pageSize=limit
  support-methods-arguments: true
- 新建MyBaseMapper,(****** 注意此接口不能被扫描到 *******)
package com.cxt.demo.tk;

import org.springframework.stereotype.Repository;
import tk.mybatis.mapper.common.ExampleMapper;
import tk.mybatis.mapper.common.Mapper;
import tk.mybatis.mapper.common.MySqlMapper;

/**
 * @author liBai
 * @Classname MyBaseMapper
 * @Description TODO base mapper 不能被扫描
 * @Date 2019-06-02 10:41
 */
@Repository
public interface MyBaseMapper  extends Mapper, MySqlMapper , ExampleMapper {
}
- 启动类添加扫描mapper
注意此处@MapperScan要引tk包下面的,否则会报错
(import tk.mybatis.spring.annotation.MapperScan;)
package com.cxt.demo;


import org.springframework.boot.SpringApplication;
import org.springframework.boot.autoconfigure.SpringBootApplication;
import tk.mybatis.spring.annotation.MapperScan;

/**
 * @author liBai
 * mapperscan 要引tk包下面的
 */
@SpringBootApplication
@MapperScan(basePackages = "com.cxt.demo.dao")
public class DemoApplication {

    public static void main(String[] args) {
        SpringApplication.run(DemoApplication.class, args);
    }

}
- 添加MybatisConfigurer配置类
package com.cxt.demo.config;

import org.apache.ibatis.session.SqlSessionFactory;
import org.mybatis.spring.SqlSessionFactoryBean;
import org.springframework.boot.SpringBootConfiguration;
import org.springframework.context.annotation.Bean;
import javax.annotation.Resource;
import javax.sql.DataSource;

/**
 * @author liBai
 * @Classname MybatisConfigurer
 * @Description TODO
 * @Date 2019-06-02 10:42
 */
@SpringBootConfiguration
public class MybatisConfigurer {
    @Resource
    private DataSource dataSource;

    @Bean
    public SqlSessionFactory sqlSessionFactoryBean() throws Exception {
        SqlSessionFactoryBean bean = new SqlSessionFactoryBean();
        bean.setDataSource(dataSource);
        bean.setTypeAliasesPackage("com.cxt.demo.bean");
        return bean.getObject();
    }

}
- 数据库创建sql语句(测试tkmapper链接数据库)
CREATE TABLE `test_sys` (
  `id` int(11) NOT NULL AUTO_INCREMENT,
  `name` varchar(45) NOT NULL,
  PRIMARY KEY (`id`,`name`)
) ENGINE=InnoDB AUTO_INCREMENT=3 DEFAULT CHARSET=utf8mb4 COLLATE=utf8mb4_0900_ai_ci;

#插入数据
INSERT INTO `springboot-demo`.`test_sys` (`id`, `name`) VALUES ('1‘, 'test1');
INSERT INTO `springboot-demo`.`test_sys` (`id`, `name`) VALUES ('2‘, 'test2');
INSERT INTO `springboot-demo`.`test_sys` (`id`, `name`) VALUES ('3‘, 'test3');
- generator自动生成bean,dao,mapper,generator配置内容如下
- 点击maven命令执行生成相对应的bean,dao,mapper
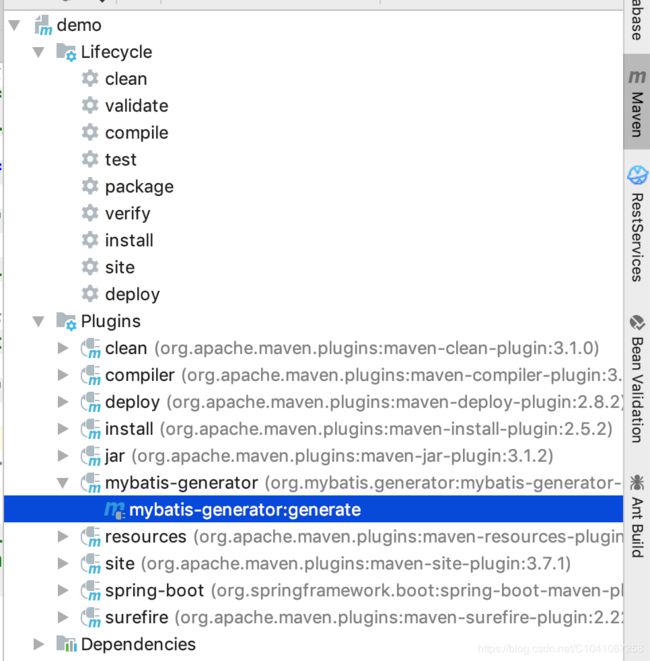
或者使用maven命令
mybatis-generator:generate –e
- 创建HelloController
package com.cxt.demo.controller;

import com.cxt.demo.service.HelloService;
import org.springframework.beans.factory.annotation.Autowired;
import org.springframework.stereotype.Repository;
import org.springframework.web.bind.annotation.RequestMapping;
import org.springframework.web.bind.annotation.RestController;

/**
 * @author liBai
 * @Classname HelloController
 * @Description TODO
 * @Date 2019-06-02 10:49
 */
@RestController
@RequestMapping("/test")
public class HelloController {
    @Autowired
    private HelloService helloService;
    @RequestMapping("/hello")
    public String hello(){
        return helloService.sayHello();
    }
}
- 创建HelloService
package com.cxt.demo.service;

/**
 * @author liBai
 * @Classname HelloService
 * @Description TODO
 * @Date 2019-06-02 10:49
 */
public interface HelloService {
    String sayHello();

}
- 创建HelloServiceImpl实现
package com.cxt.demo.service.impl;

import com.cxt.demo.bean.TestSys;
import com.cxt.demo.dao.TestSysMapper;
import com.cxt.demo.service.HelloService;
import lombok.extern.slf4j.Slf4j;
import org.springframework.beans.factory.annotation.Autowired;
import org.springframework.stereotype.Service;

/**
 * @author liBai
 * @Classname HelloServiceImpl
 * @Description TODO
 * @Date 2019-06-02 10:50
 */
@Service
@Slf4j
public class HelloServiceImpl implements HelloService {
    @Autowired
    private TestSysMapper testSysMapper;

    @Override
    public String sayHello() {
        TestSys testSys = testSysMapper.selectByPrimaryKey("1");
        log.debug("testSys  =  [{}]",testSys.toString());
        return testSys.getName();
    }
}
- 浏览器测试,url中输入 http://localhost:8081/test/hello 显示

- 到此为止,springboot整合通用mapper,使用mysql的demo就结束了,后续整合请关注后续博客
- 源码地址 https://github.com/TianPuJun/springboot-demo.git