SpringCloud微服务架构之服务的调用
个人博客传送门
微服务架构中,业务都会被拆分成一个独立的服务,服务与服务的通讯是基于http restful的。Spring cloud有两种服务调用方式,一种是ribbon+restTemplate,另一种是feign。接下来分别对这两种的进行讲解。服务的调用还是在上一节服务的注册和发现的基础上进行的。
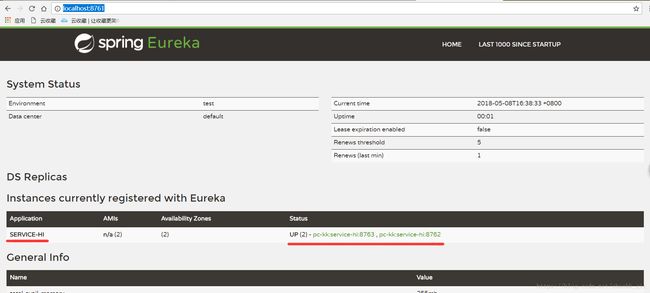
一. 准备工作,服务的调用基于上一节,服务的注册和发现进行的,因此我们需要先启动上一节的服务注册中心,然后再启动我们需要注册的服务service-hi,然后修改service 的端口号重新启动,访问http://localhost:8761/,你会看到如下图则表示我们的准备工作已经完成了。
二. 创建一个基于Ribbon+restTemplate的服务消费者:ribbon是一个负载均衡客户端,可以很好的控制htt和tcp的一些行为。
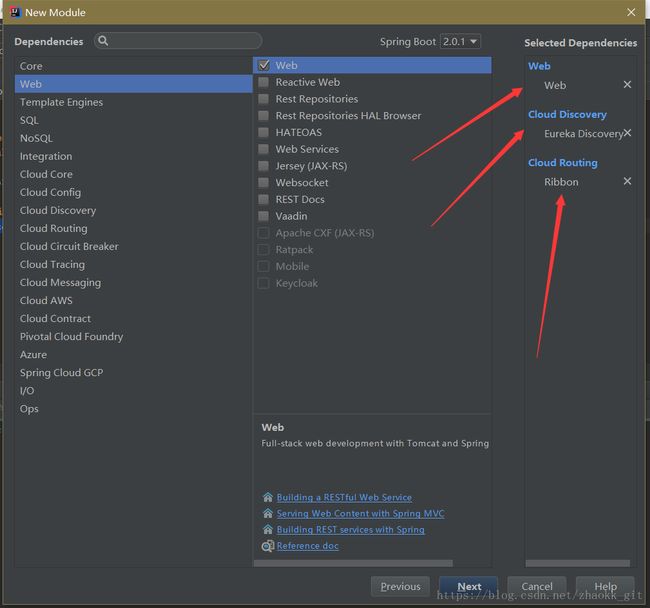
1. 新建一个module,分别引入如下的包,然后finish
2.新建好了之后,RibbonApplication中增加注解@bean 将RestTemplate注入到容器中去,
@SpringBootApplication
public class RibbonApplication {

   public static void main(String[] args) {
      SpringApplication.run(RibbonApplication.class, args);
   }

   @Bean
   @LoadBalanced
   public RestTemplate restTemplate(){
      return  new RestTemplate();
   }
}
3,然后创建一个service类和一个controller类,如图
@Service
public class service {

    @Autowired
    private RestTemplate restTemplate;

    public  String  sayHello(String name){
        return  this.restTemplate.getForObject("http://service-hi/hi?name=" + name,String.class);
    }

}
Service中需要注入的是resttemplate接口,并且可以去访问对应的服务和服务的接口。
在创建一个
@RestController
public class controller {

    @Autowired
    private service service;

    @RequestMapping(value = "/hello",method = {RequestMethod.GET,RequestMethod.POST})
    public String sayHello(String name){
        return  service.sayHello(name);
    }

}
4,接下来我们需要修改下我们前一节所写的服务,如图:
@SpringBootApplication
@EnableDiscoveryClient
@RestController
public class ServiceApplication {

   public static void main(String[] args) {
      SpringApplication.run(ServiceApplication.class, args);
   }

   @Value("${server.port}")
   String port;

   @RequestMapping(value = "/hi",method = {RequestMethod.GET,RequestMethod.POST})
   public String sayHello(String name){
      return "I am service-hi ,my port is :" + port + "my name is " + name;
   }
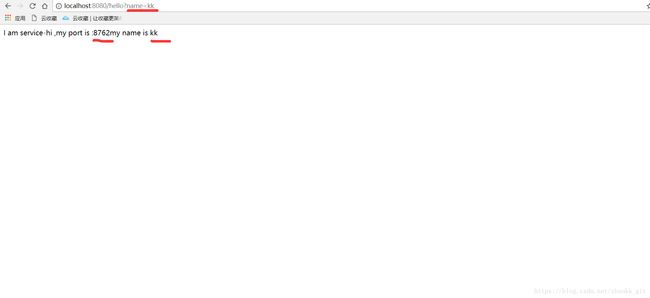
}5,然后一次重启所有的服务:serverservice1service2Ribbon,然后访问http://localhost:8080/hello?name=kk,你会发现界面上会重复交替出现两个服务service1和service2的端口号和传递过去的参数。
到此Ribbon和restTemplate的消费服务已经完成,接下来我们看看Feign的服务。
三. 创建一个基于Feign去消费服务:
Feign 采用的是基于接口的注解
Feign 整合了ribbon
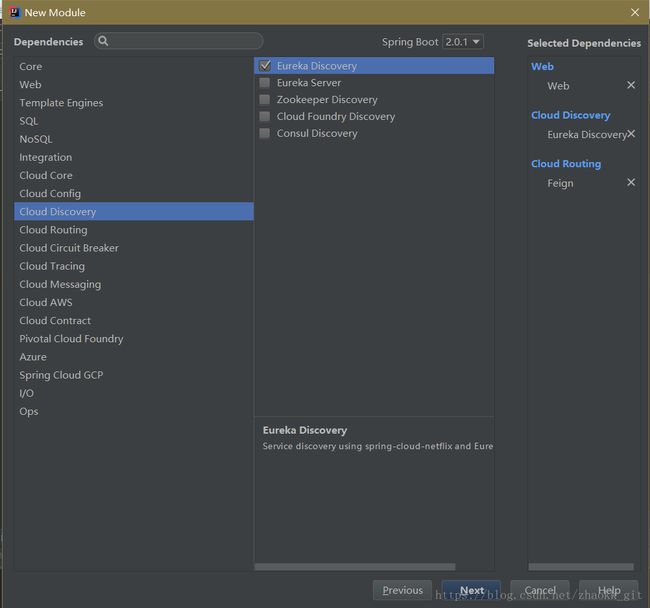
1.同理我们也是需要在一的步骤下进行的,必须先开启服务注册中心,并且将我们的服务注册进去,然后新建一个Feign,如图:
然后需要创建一个Iservice接口和FeignController类:
创建该接口用来调用服务@FeignClient(value = “service-hi”) 注解配置的是服务的名称
@RequestMapping("/hi") //配置的调用的接口
@FeignClient(value = "service-hi")
@Service
public interface Iservice {

    @RequestMapping("/hi")
     String SayHello(@RequestParam(value = "name") String name);
}
@RestController
public class FeignController {

    @Autowired
    private Iservice iservice;

    @RequestMapping(value = "/feign/hello")
    public String sayHello(String name){
        return   iservice.SayHello(name);
    }

}
配置下该启动类,如下:
@SpringBootApplication
@EnableFeignClients
public class FeignApplication {

   public static void main(String[] args) {
      SpringApplication.run(FeignApplication.class, args);
   }
}然后访问:http://localhost:8080/feign/hello?name=kk
你会看到如下的界面:
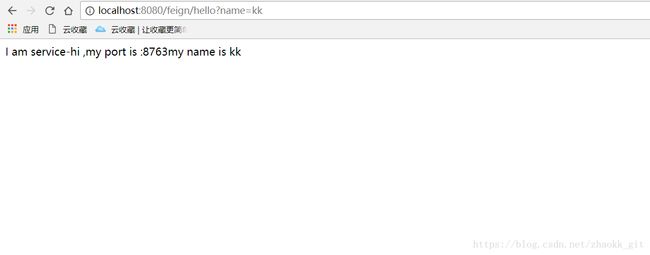
以上就是服务的消费的两种方式。
附上我的完整的博文:
从零开始学习SpringCloud
代码地址