Android之极光推送SDK集成和基础功能的实现
-----------------转载请注明出处:http://blog.csdn.net/android_cll
一:先来效果图、

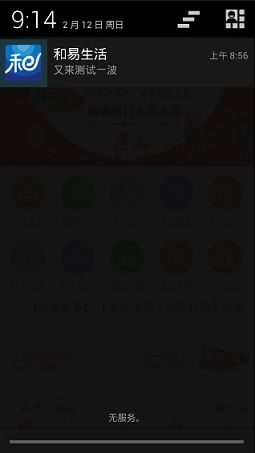
二:功能实现步骤:
极光推送官网网址:https://www.jiguang.cn/push
1.如果有账号直接登录,没有的自己注册,就不用多说这个问题了。
注意一点:
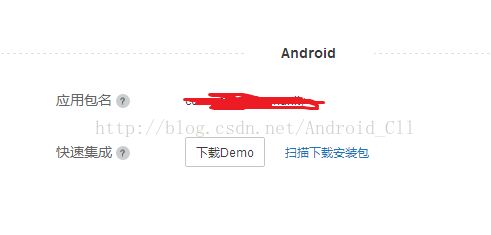
这里的包名必须一定及肯定得和注册文件AndroidManifest的包名一样,不然后面就不用做了、
2.在官网下载Android的SDK文件,下载解压打开就是以下目录、
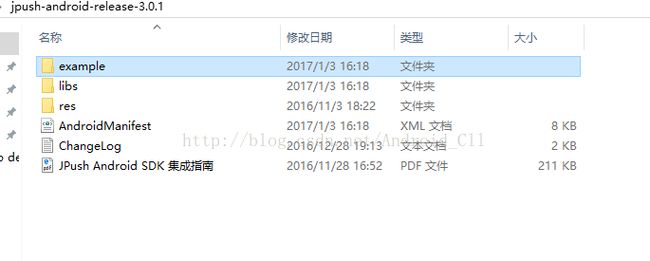
example是一个演示的demo,libs文件里面就是我们需要的so文件和jar文件、
3.根据你的需求复制相应的so文件,这里一般常用就是arm64-v8a,armeabi,armeabi-v7a三个文件,有些需要用到x86和x86_64的也复制进去,然后再把那两个jar文件复制到libs目录下,jar文件点击右键添加引用进去、
4.复制res里面的文件、

drawable_hdpi里面有图片和drawable的文件,你可以都复制到drawable文件下,规范一点也可以分开复制到相应的文件里,然后就是layout布局复制到相应的文件,values里面就是一个样式,也复制到相应的文件里去,也可以复制里面的代码进去,看自己的心情和爱好就不多说这个问题了、
4.在项目主工程build.gradle下添加一句代码引用工程libs文件,不添加会报错的哦、

5.AndroidManifest注册文件里面添加一些需要的应用权限和注册receiver、
application里面添加相应的代码和Appkey,Appkey就是注册完应用的那个key值、
6.在application的onCreate方法中添加初始化代码、
//极光推送
JPushInterface.setDebugMode(true);
JPushInterface.init(this);
7.自定义一个消息接收器MyReceiver,里面可都有注释我就不多说了、
package 和易生活; import android.content.BroadcastReceiver; import android.content.Context; import android.content.Intent; import android.os.Bundle; import android.text.TextUtils; import android.util.Log; import org.json.JSONException; import org.json.JSONObject; import java.util.Iterator; import cn.jpush.android.api.JPushInterface; /** * 自定义接收器 * 如果不定义这个 Receiver,则跳转默认用户会打开主界面,接收不到自定义消息 */ public class MyReceiver extends BroadcastReceiver { private static final String TAG = "JPush"; @Override public void onReceive(Context context, Intent intent) { Bundle bundle = intent.getExtras(); Log.d(TAG, "[MyReceiver] onReceive - " + intent.getAction() + ", extras: " + printBundle(bundle)); if (JPushInterface.ACTION_REGISTRATION_ID.equals(intent.getAction())) { String regId = bundle.getString(JPushInterface.EXTRA_REGISTRATION_ID); Log.d(TAG, "[MyReceiver] 接收Registration Id : " + regId); } else if (JPushInterface.ACTION_MESSAGE_RECEIVED.equals(intent.getAction())) { Log.d(TAG, "[MyReceiver] 接收到推送下来的自定义消息: " + bundle.getString(JPushInterface.EXTRA_MESSAGE)); } else if (JPushInterface.ACTION_NOTIFICATION_RECEIVED.equals(intent.getAction())) { Log.d(TAG, "[MyReceiver] 接收到推送下来的通知"); int notifactionId = bundle.getInt(JPushInterface.EXTRA_NOTIFICATION_ID); Log.d(TAG, "[MyReceiver] 接收到推送下来的通知的ID: " + notifactionId); } else if (JPushInterface.ACTION_NOTIFICATION_OPENED.equals(intent.getAction())) { Log.d(TAG, "[MyReceiver] 用户点击打开了通知"); String hqfjzd = bundle.getString(JPushInterface.EXTRA_EXTRA);//接收附加字段 JSONObject object = null; try { object = new JSONObject(hqfjzd); String cllhqfj = object.getString("Article");//获取附加字段 //根据附加字段的值判断跳相应的界面 if (cllhqfj.equals("1")) { //通知栏跳转APP消息界面 Intent i = new Intent(context, ReceiverCS.class); i.putExtras(bundle); i.setFlags(Intent.FLAG_ACTIVITY_NEW_TASK | Intent.FLAG_ACTIVITY_CLEAR_TOP); context.startActivity(i); } else { //通知栏跳转html网页 } } catch (JSONException e) { e.printStackTrace(); } } else if (JPushInterface.ACTION_RICHPUSH_CALLBACK.equals(intent.getAction())) { Log.d(TAG, "[MyReceiver] 用户收到到RICH PUSH CALLBACK: " + bundle.getString(JPushInterface.EXTRA_EXTRA)); //在这里根据 JPushInterface.EXTRA_EXTRA 的内容处理代码,比如打开新的Activity, 打开一个网页等.. } else if (JPushInterface.ACTION_CONNECTION_CHANGE.equals(intent.getAction())) { boolean connected = intent.getBooleanExtra(JPushInterface.EXTRA_CONNECTION_CHANGE, false); Log.w(TAG, "[MyReceiver]" + intent.getAction() + " connected state change to " + connected); } else { Log.d(TAG, "[MyReceiver] Unhandled intent - " + intent.getAction()); } } // 打印所有的 intent extra 数据 private static String printBundle(Bundle bundle) { StringBuilder sb = new StringBuilder(); for (String key : bundle.keySet()) { if (key.equals(JPushInterface.EXTRA_NOTIFICATION_ID)) { sb.append("\nkey:" + key + ", value:" + bundle.getInt(key)); } else if (key.equals(JPushInterface.EXTRA_CONNECTION_CHANGE)) { sb.append("\nkey:" + key + ", value:" + bundle.getBoolean(key)); } else if (key.equals(JPushInterface.EXTRA_EXTRA)) { if (TextUtils.isEmpty(bundle.getString(JPushInterface.EXTRA_EXTRA))) { Log.i(TAG, "This message has no Extra data"); continue; } try { JSONObject json = new JSONObject(bundle.getString(JPushInterface.EXTRA_EXTRA)); Iteratorit = json.keys() ; while (it.hasNext()) { String myKey = it.next().toString(); sb.append("\nkey:" + key + ", value: [" + myKey + " - " + json.optString(myKey) + "]"); } } catch (JSONException e) { Log.e(TAG, "Get message extra JSON error!"); } } else { sb.append("\nkey:" + key + ", value:" + bundle.getString(key)); } } return sb.toString(); } }
补充一点就是设置标签:
Setset = new HashSet<>();//名字任意,可多添加几个 set.add(jo.getString("sex")); set.add(jo.getString("sheng")); set.add(jo.getString("shi")); set.add(jo.getString("qu"));
JPushInterface.setTags(LoginAndRegisterActivity.this, set, null);//设置标签
----------补充极光推送自定义样式和铃声等,铃声最好是mp3格式,放在res下raw文件中,这个自定义的方法应该放在接收自定义消息那里,但是我通知需要自定义的铃声,所以我放在了接收通知这里、
/**
 * 自定义消息样式,铃声
 *
 * @param context
 * @param bundle
 */
private void processCustomMessage(Context context, Bundle bundle) {
    NotificationManager manger = (NotificationManager) context.getSystemService(Context.NOTIFICATION_SERVICE);
    //为了版本兼容  选择V7包下的NotificationCompat进行构造
    NotificationCompat.Builder builder = new NotificationCompat.Builder(context);
    //Ticker是状态栏显示的提示
    builder.setTicker(bundle.getString(JPushInterface.EXTRA_TITLE));
    //第一行内容  通常作为通知栏标题
    builder.setContentTitle(bundle.getString(JPushInterface.EXTRA_TITLE));
    //第二行内容 通常是通知正文
    builder.setContentText(bundle.getString(JPushInterface.EXTRA_MESSAGE));
    //可以点击通知栏的删除按钮删除
    builder.setAutoCancel(true);
    //系统状态栏显示的小图标
    builder.setSmallIcon(R.mipmap.logo_new);
    Notification notification = builder.build();
    notification.sound = Uri.parse("android.resource://"
            + context.getPackageName() + "/" + R.raw.dingdan);
    builder.setDefaults(NotificationCompat.DEFAULT_VIBRATE | NotificationCompat.DEFAULT_LIGHTS);
    notification.flags |= Notification.FLAG_AUTO_CANCEL;
    Intent clickIntent = new Intent(); //点击通知之后要发送的广播
    int id = (int) (System.currentTimeMillis() / 1000);
    clickIntent.setAction(JPushInterface.ACTION_NOTIFICATION_OPENED);
    clickIntent.putExtra(JPushInterface.EXTRA_EXTRA, bundle.getString(JPushInterface.EXTRA_EXTRA));
    PendingIntent contentIntent = PendingIntent.getBroadcast(context, id, clickIntent, PendingIntent.FLAG_UPDATE_CURRENT);
    notification.contentIntent = contentIntent;
    manger.notify(id, notification);
}
--------------退出机关和恢复机关,一般在退出APP的时候退出极光,启动APP的时候恢复极光:
//启动极光
JPushInterface.resumePush(getApplicationContext());
//退出极光
JPushInterface.stopPush(MianHomePage.this);
--------------这样就OK了,运行APP然后去发送消息看看是否成功、
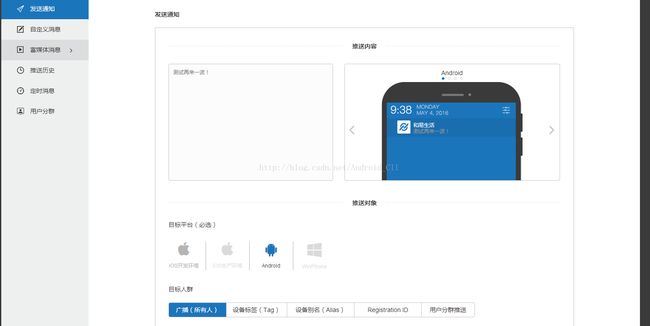
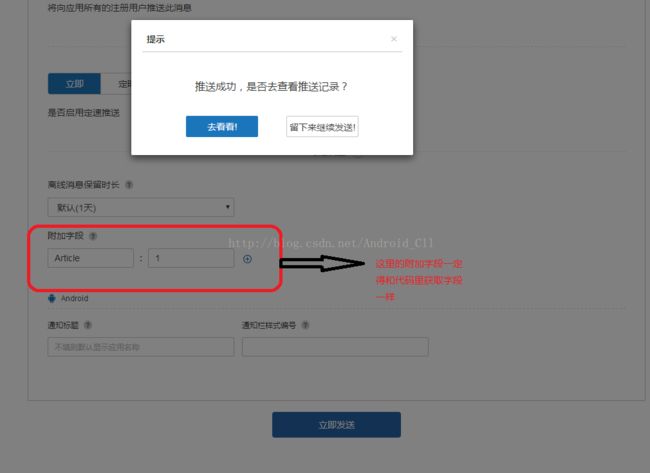
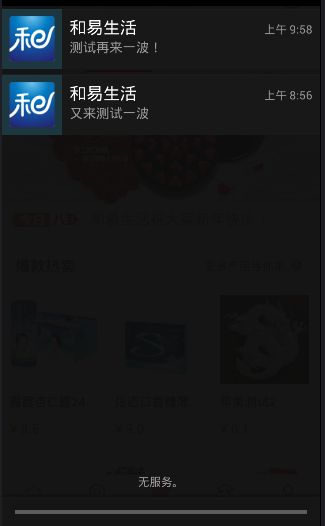
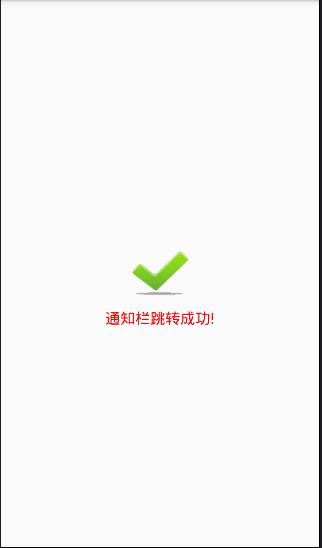
可以看到是已经成功了的,我也是个菜鸟,初学者或者对你有用的人看一下,大神就别喷我了,有什么不足的地方有大神看到欢迎指导、、、、、、