Unity3D游戏高性能战争迷雾系统实现
一 效果图
先上效果图吧,这是为了吸引到你们的ヽ(。◕‿◕。)ノ゚
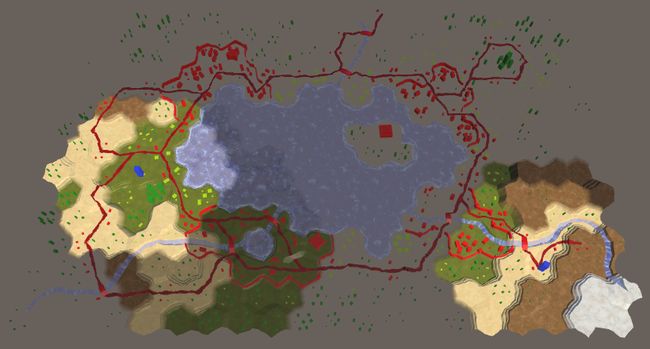
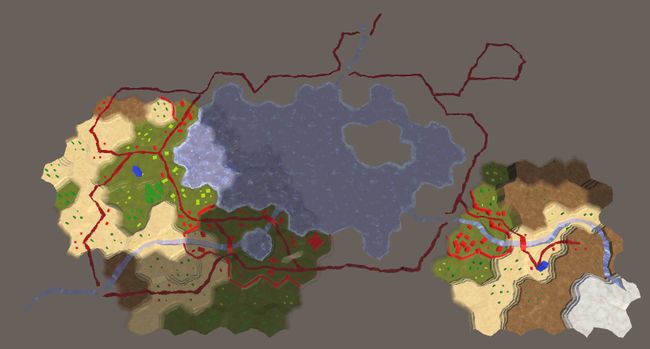
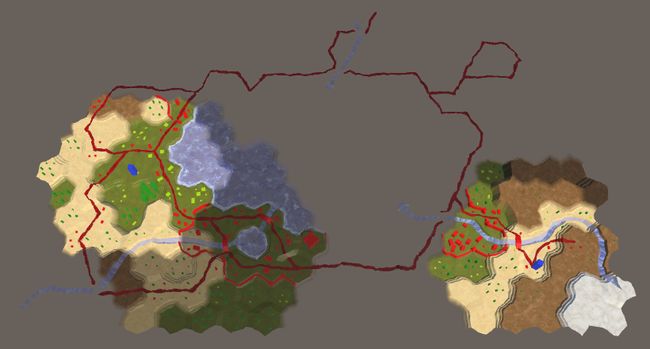
战争迷雾效果演示图
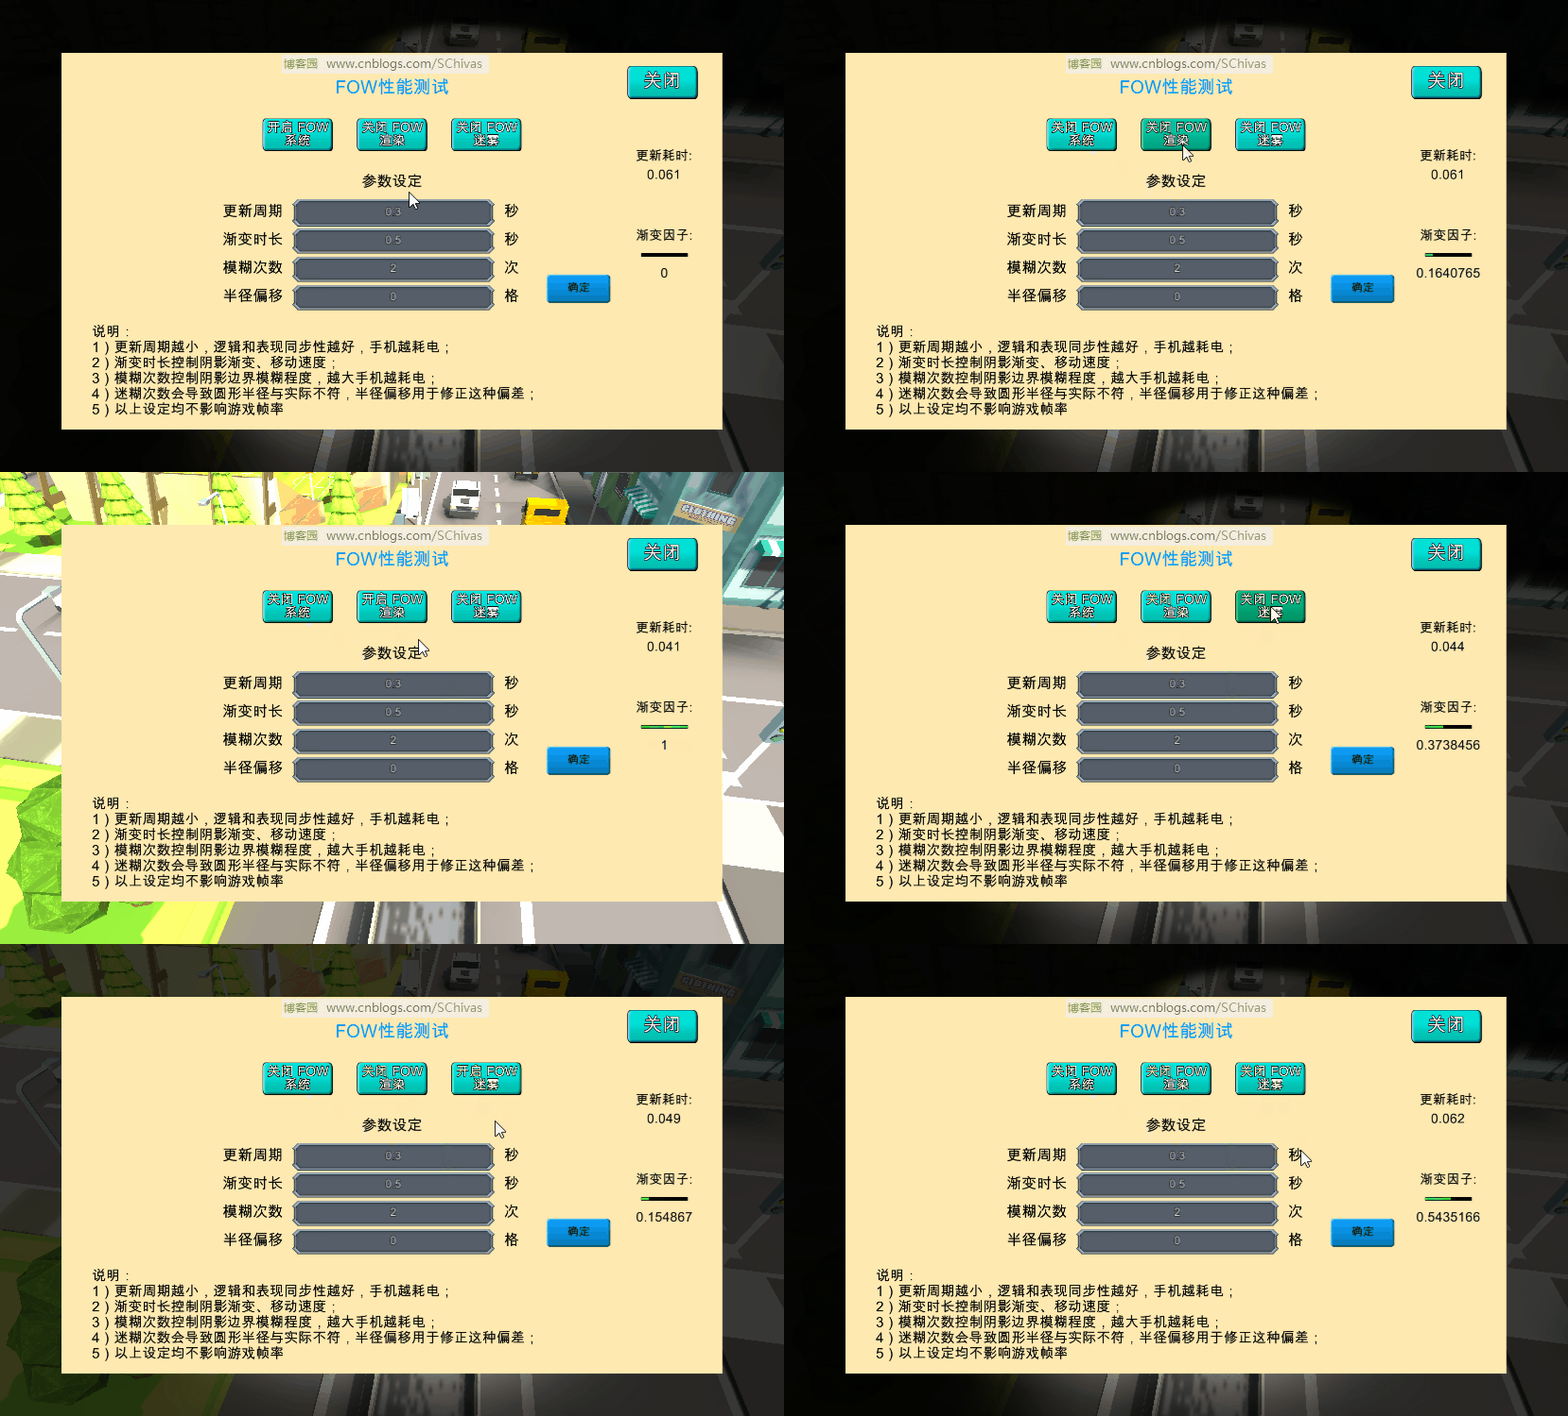
战争迷雾调试界面演示图
由于是gif录制,为了压缩图片,帧率有点低,实际运行时,参数调整好是不会像这样一卡一顿的。
二 战争迷雾概述
战争迷雾一般用于Startcraft等RTS类型游戏,还有就是War3等Moba类型游戏,主要包括三个概念:未探索区域、已探索区域、当前视野。
1)未探索区域:一般展示为黑色区域,像星际争霸这样的游戏,开局时未探索区域一般是暗黑的,只有地图上的原始晶体矿产能够被看到,敌人建筑、角色等都不暴露。
2)已探索区域:一般显示为灰色区域,已探索表示某块区域曾经被你的视野覆盖过,星际争霸中已探索的区域会保留你当时视野离开时该区域的建筑状态,所以可以看到敌人的建筑。
3)当前视野:一般全亮,视野范围内除了隐身单位等特殊设定,所有的建筑、角色、特效等都是可见的,视野一般锁定在可移动角色或者特定魔法上面,会随着角色的移动而移动,随着魔法的消失而消失。
三 实现原理
战争迷雾的实现方式大体上可以分为两个步骤:贴图生成、屏幕渲染。
3.1 贴图生成
贴图的生成有两种方式:
1)拼接法:
使用类似地图拼接的原理去实现,贴图如下:
战争迷雾拼接贴图
这种方式个人认为很不靠谱,局限性很大,而且迷雾总是会运动的,在平滑处理这点上会比较粗糙,不太自然。这里不再赘述它的实现原理。
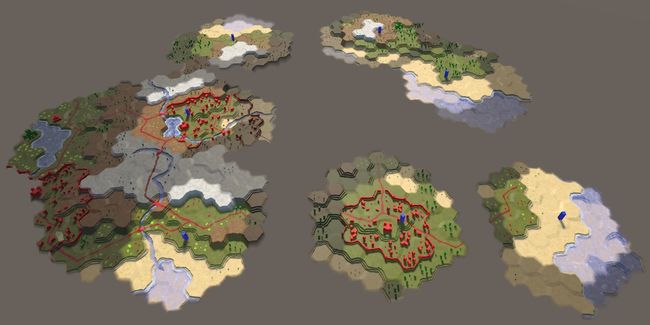
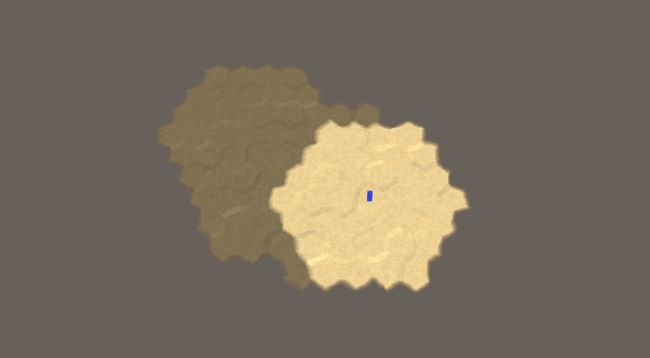
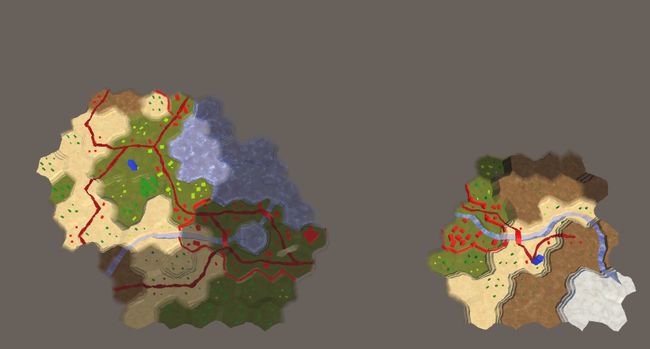
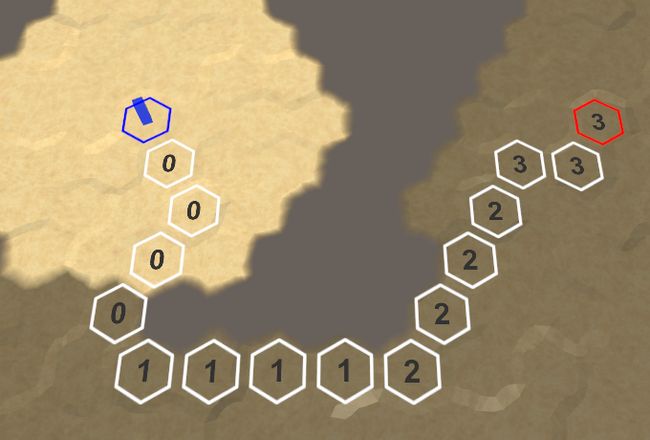
2)绘制法:绘制法和使用的地图模型有很大关系,一般使用的有两种模型:一个是正方形地图,另外一个是六边形地图。六边形地图示例如下:
战争迷雾六边形地图贴图
原理简单直白,使用正方形/者六边形划分地图空间,以正方形/六边形为单位标记被探索过和当前视野区域。这里探索过的区域是棱角分明的,可以使用高斯模糊进行模糊处理。一般来说,正方形/六边形边长要选择合适,太长会导致模糊处理效果不理想,太短会导致地图单元格太多,全图刷新消耗增大。另外说一句,战争迷雾的地图和战斗系统的逻辑地图其实是可以分离的,所以两者并没有必然联系,你可以单独为你的战争迷雾系统选择地图模型。我也建议你不管是不是同一套地图,实现时都实现解耦。
3.2 屏幕渲染
得到如上贴图以后,就可以渲染到屏幕了,渲染方式一般来说有3种:
1)屏幕后处理:在原本屏幕显示图像上叠加混合战争迷雾贴图。
2)摄像机投影:使用投影仪进行投影,将战争迷雾投影到世界空间。
3)模型贴图:使用一张覆盖整个世界空间的平面模型来绘制战争迷雾贴图。
不管你选择使用哪一种方式,在这一步当中都需要在Shader里进行像素级别的平滑过渡。从上一个时刻的贴图状态过渡到当前时刻的贴图状态。
四 代码实现
原理大致上应该是清楚了,因为这个系统的设计原理实际上也不算是复杂,下面就一些重要步骤给出代码实现。这里实践的时候采用的是正方形地图,模型贴图方式。正方形地图模型不管是模糊处理还是Shader绘制都要比六边形地图简单。正方形贴图Buffer使用Color32的二维数组表示,根据位置信息,每个正方形网格会对应一个Color32数据,包含颜色值和透明度,能够很好的进行边缘平滑效果。
1 // Color buffers -- prepared on the worker thread.
2 protected Color32[] mBuffer0;
3 protected Color32[] mBuffer1;
4 protected Color32[] mBuffer2;
这里使用了3个Buffer,是因为图像处理是很耗时的,所以为它单独开辟了线程去处理,为了线程同步问题,才增设了Buffer,关于线程这点稍后再说。
4.1 刷新贴图Buffer
贴图Buffer需要根据游戏逻辑中各个带有视野的单位去实时刷新,在正方形地图模型中,是根据单位当前位置和视野半径做圆,将圆内圈住的小正方形标记为探索。
![]()
 1 void RevealUsingRadius (IFOWRevealer r, float worldToTex)
 2 {
 3     // Position relative to the fog of war
 4     Vector3 pos = (r.GetPosition() - mOrigin) * worldToTex;
 5     float radius = r.GetRadius() * worldToTex - radiusOffset;
 6
 7     // Coordinates we'll be dealing with
 8     int xmin = Mathf.RoundToInt(pos.x - radius);
 9     int ymin = Mathf.RoundToInt(pos.z - radius);
10     int xmax = Mathf.RoundToInt(pos.x + radius);
11     int ymax = Mathf.RoundToInt(pos.z + radius);
12
13     int cx = Mathf.RoundToInt(pos.x);
14     int cy = Mathf.RoundToInt(pos.z);
15
16     cx = Mathf.Clamp(cx, 0, textureSize - 1);
17     cy = Mathf.Clamp(cy, 0, textureSize - 1);
18
19     int radiusSqr = Mathf.RoundToInt(radius * radius);
20
21     for (int y = ymin; y < ymax; ++y)
22     {
23         if (y > -1 && y < textureSize)
24         {
25             int yw = y * textureSize;
26
27             for (int x = xmin; x < xmax; ++x)
28             {
29                 if (x > -1 && x < textureSize)
30                 {
31                     int xd = x - cx;
32                     int yd = y - cy;
33                     int dist = xd * xd + yd * yd;
34
35                     // Reveal this pixel
36                     if (dist < radiusSqr) mBuffer1[x + yw].r = 255;
37                 }
38             }
39         }
40     }
41 }
![]()
第一个参数包含了视野单位的信息,包括位置和视野半径;第二个参数为世界坐标到贴图坐标的坐标变换,R通道用于记录视野信息。
4.2 贴图Buffer模糊
每次贴图刷新以后,进行一次贴图模糊处理。
![]()
 1 void BlurVisibility ()
 2 {
 3     Color32 c;
 4
 5     for (int y = 0; y < textureSize; ++y)
 6     {
 7         int yw = y * textureSize;
 8         int yw0 = (y - 1);
 9         if (yw0 < 0) yw0 = 0;
10         int yw1 = (y + 1);
11         if (yw1 == textureSize) yw1 = y;
12
13         yw0 *= textureSize;
14         yw1 *= textureSize;
15
16         for (int x = 0; x < textureSize; ++x)
17         {
18             int x0 = (x - 1);
19             if (x0 < 0) x0 = 0;
20             int x1 = (x + 1);
21             if (x1 == textureSize) x1 = x;
22
23             int index = x + yw;
24             int val = mBuffer1[index].r;
25
26             val += mBuffer1[x0 + yw].r;
27             val += mBuffer1[x1 + yw].r;
28             val += mBuffer1[x + yw0].r;
29             val += mBuffer1[x + yw1].r;
30
31             val += mBuffer1[x0 + yw0].r;
32             val += mBuffer1[x1 + yw0].r;
33             val += mBuffer1[x0 + yw1].r;
34             val += mBuffer1[x1 + yw1].r;
35
36             c = mBuffer2[index];
37             c.r = (byte)(val / 9);
38             mBuffer2[index] = c;
39         }
40     }
41
42     // Swap the buffer so that the blurred one is used
43     Color32[] temp = mBuffer1;
44     mBuffer1 = mBuffer2;
45     mBuffer2 = temp;
46 }
![]()
用周围的8个小正方形进行了加权模糊,这里并没有像高斯模糊那样去分不同的权重。
4.3 Buffer运用到贴图
Buffer一旦处理完毕,就可以生成/刷新贴图供屏幕显示用,不管你使用上述方式中的哪一种,在Shader执行贴图采样时,这张贴图是必须的。
![]()
 1 void UpdateTexture ()
 2 {
 3     if (!enableRender)
 4     {
 5         return;
 6     }
 7
 8     if (mTexture == null)
 9     {
10         // Native ARGB format is the fastest as it involves no data conversion
11         mTexture = new Texture2D(textureSize, textureSize, TextureFormat.ARGB32, false);
12
13         mTexture.wrapMode = TextureWrapMode.Clamp;
14
15         mTexture.SetPixels32(mBuffer0);
16         mTexture.Apply();
17         mState = State.Blending;
18     }
19     else if (mState == State.UpdateTexture)
20     {
21         mTexture.SetPixels32(mBuffer0);
22         mTexture.Apply();
23         mBlendFactor = 0f;
24         mState = State.Blending;
25     }
26 }
![]()
4.4 屏幕渲染
主要是做两件事情:CS测在OnWillRenderObject给Shader传递参数;另外就是Shader中根据最新的战争迷雾贴图和战争迷雾颜色设定执行平滑过渡。
![]()
 1 void OnWillRenderObject()
 2 {
 3     if (mMat != null && FOWSystem.instance.texture != null)
 4     {
 5         mMat.SetTexture("_MainTex", FOWSystem.instance.texture);
 6         mMat.SetFloat("_BlendFactor", FOWSystem.instance.blendFactor);
 7         if (FOWSystem.instance.enableFog)
 8         {
 9             mMat.SetColor("_Unexplored", unexploredColor);
10         }
11         else
12         {
13             mMat.SetColor("_Unexplored", exploredColor);
14         }
15         mMat.SetColor("_Explored", exploredColor);
16     }
17 }
![]()
其中blendFactor是过渡因子,会在Update中根据时间刷新,用于控制Shader的平滑过渡过程。
![]()
1 fixed4 frag(v2f i) : SV_Target
2 {
3     half4 data = tex2D(_MainTex, i.uv);
4     half2 fog = lerp(data.rg, data.ba, _BlendFactor);
5     half4 color = lerp(_Unexplored, _Explored, fog.g);
6     color.a = (1 - fog.r) * color.a;
7     return color;
8 }
9 ENDCG
![]()
data是贴图,rg和ba通道是连续的两个战争迷雾状态的数据,其中r通道表示当前是否可见(是否在视野内),g通道表示是否被探索过(大于0则探索过)。
4.5 多线程
本例当作,贴图Buffer的刷新和模糊处理是在子线程处理的;而Buffer运用到贴图在主线程中;屏幕渲染在GPU当作。所以Unity主线程只是在不停地刷新贴图,而贴图Buffer和模糊处理这两个很耗性能的操作全部由子线程代劳,这就是标题所说的“高性能”原因所在,即使子线程每次的处理周期达到30毫秒,它依旧不会影响到游戏帧率。
多线程编程必然要考虑的一点是线程同步,此处主要的问题有两个:
1)工作子线程输入:刷新贴图Buffer需要Unity主线程(或者游戏逻辑主线程)中游戏中的视野体数据(位置、视野半径)
2)工作子线程输出:由最新的游戏逻辑数据刷新贴图Buffer,以及进行贴图Buffer混合以后,要在Unity主线程将数据运用到贴图
工作子线程的输入同步问题稍后再说,这里说下第二步是怎样去保证同步的,其大致步骤是:
1)设置3个状态用于线程同步:
![]()
1 public enum State
2 {
3     Blending,
4     NeedUpdate,
5     UpdateTexture,
6 }
![]()
2)NeedUpdate表示子线程需要处理贴图Buffer,这个状态的设置是由设定的刷新频率和实际处理时的刷新速度决定的:
![]()
 1 void ThreadUpdate()
 2 {
 3     System.Diagnostics.Stopwatch sw = new System.Diagnostics.Stopwatch();
 4
 5     while (mThreadWork)
 6     {
 7         if (mState == State.NeedUpdate)
 8         {
 9             sw.Reset();
10             sw.Start();
11             UpdateBuffer();
12             sw.Stop();
13             mElapsed = 0.001f * (float)sw.ElapsedMilliseconds;
14             mState = State.UpdateTexture;
15         }
16         Thread.Sleep(1);
17     }
18 #if UNITY_EDITOR
19     Debug.Log("FOW thread exit!");
20 #endif
21 }
![]()
3)子线程会将Unity主线程(或者游戏逻辑线程)提供的最新视野状态数据刷新到贴图Buffer1的R通道,然后使用Buffer2做临时缓存对Buffer1执行模糊,模糊以后交换双缓存,最后将Buffer1的rg通道拷贝到Buffer0,所以Buffer0的ba和rg通道分别存放了上一次刷新和当前本次刷新的战争迷雾状态数据,Buffer0运用到贴图以后由Shader在这两个状态间进行平滑过渡。
![]()
 1 void RevealMap ()
 2 {
 3     for (int index = 0; index < mTextureSizeSqr; ++index)
 4     {
 5         if (mBuffer1[index].g < mBuffer1[index].r)
 6         {
 7             mBuffer1[index].g = mBuffer1[index].r;
 8         }
 9     }
10 }
11
12 void MergeBuffer()
13 {
14     for (int index = 0; index < mTextureSizeSqr; ++index)
15     {
16         mBuffer0[index].b = mBuffer1[index].r;
17         mBuffer0[index].a = mBuffer1[index].g;
18     }
19 }
![]()
4)子线程工作处理完以后设置UpdateTexture状态,通知Unity主线程:“嘿,饭已经做好了,你来吃吧!”,Unity主线程随后将Buffer0缓存运用到贴图。
![]()
 1 void Update ()
 2 {
 3     if (!enableSystem)
 4     {
 5         return;
 6     }
 7
 8     if (textureBlendTime > 0f)
 9     {
10         mBlendFactor = Mathf.Clamp01(mBlendFactor + Time.deltaTime / textureBlendTime);
11     }
12     else mBlendFactor = 1f;
13
14     if (mState == State.Blending)
15     {
16         float time = Time.time;
17
18         if (mNextUpdate < time)
19         {
20             mNextUpdate = time + updateFrequency;
21             mState = State.NeedUpdate;
22         }
23     }
24     else if (mState != State.NeedUpdate)
25     {
26         UpdateTexture();
27     }
28 }
![]()
5)UpdateTexture执行完毕以后,进入Blending状态,此时Unity主线程要等待下一次更新时间,时间到则设置NeedUpdate状态,通知子线程:“嘿,家伙,你该做饭了!”。
4.6 模块分离
上面讲到贴图Buffer刷新子线程和Unity渲染主线程的同步与临界资源的互斥,现在来说说Unity主线程(游戏逻辑主线程)与贴图Buffer刷新子线程的同步。
1)使用互斥锁同步视野体生命周期
![]()
1 // Revealers that the thread is currently working with 2 static BetterListmRevealers = new BetterList (); 3 4 // Revealers that have been added since last update 5 static BetterList mAdded = new BetterList (); 6 7 // Revealers that have been removed since last update 8 static BetterList mRemoved = new BetterList (); 9 10 static public void AddRevealer (IFOWRevealer rev) 11 { 12 if (rev != null) 13 { 14 lock (mAdded) mAdded.Add(rev); 15 } 16 } 17 18 static public void RemoveRevealer (IFOWRevealer rev) 19 { 20 if (rev != null) 21 { 22 lock (mRemoved) mRemoved.Add(rev); 23 } 24 }
![]()
这个应该没啥好说的,子线程在处理这两个列表时同样需要加锁。
2)视野体使用IFOWRevelrs接口,方便模块隔离和扩展。同步问题这里采用了一种简单粗暴的方式,由于战争迷雾属于表现层面的东西,即使用于帧同步也不会有问题。
![]()
 1 public interface IFOWRevealer
 2 {
 3     // 给FOWSystem使用的接口
 4     bool IsValid();
 5     Vector3 GetPosition();
 6     float GetRadius();
 7
 8     // 给FOWLogic使用的接口,维护数据以及其有效性
 9     void Update(int deltaMS);
10     void Release();
11 }
![]()
继承IFOWRevealer接口用来实现各种不同的视野体,本示例中给出了角色视野体与临时视野体的实现,其它视野体自行根据需要扩展。
五 其它说明
其它还有FOWlogic模块用来隔离FOW系统和游戏逻辑,FOWRender用于fow渲染等,不再一一说明,自行阅读代码。
有关六边形地图的战争迷雾实现稍作变通应该做起来问题也不是太大,相关信息可以参考:Hex Map 21 Exploration和Hex Map 22 Advanced Vision。
这一系列文章都有译文,英文不好的同学参考:Unity 六边形地图系列(二十一):探索和Unity 六边形地图系列(二十二) :高级视野效果。
然后,本演示工程的核心算法是由TasharenFogOfWar移植而来的,该插件由NGUI作者发布,不过已经被我大幅修改。
六 工程下载
最后附上本演示工程的GitHub地址:https://github.com/smilehao/fog-of-war。
Hex Map 21
Exploration
- See everything while editing.
- Keep track of explored cells.
- Hide what's yet unknown.
- Have units avoid unexplored regions.
This is part 21 of a tutorial series about hexagon maps. The previous part added fog of war, which we'll now upgrade to support exploration.
We have some exploring to do.
Seeing Everything in Edit Mode
The idea of exploration is that cells that have not yet been seen are unknown, and thus invisible. Instead of darkening those cells, they shouldn't be shown at all. But it's hard to edit invisible cells. So before we add support for exploration, we're going to disable visibility while in edit mode.
Toggling Visibility
We can control whether shaders apply visibility via a keyword, like we do for the grid overlay. Let's use the HEX_MAP_EDIT_MODE keyword to indicated whether we are in edit mode. Because multiple shaders will need to be aware of this keyword, we'll define it globally, via the static Shader.EnableKeyWord and Shader.DisableKeyword methods. Invoke the appropriate one when the edit mode is changed, in HexGameUI.SetEditMode.
	public void SetEditMode (bool toggle) {
		enabled = !toggle;
		grid.ShowUI(!toggle);
		grid.ClearPath();
		if (toggle) {
			Shader.EnableKeyword("HEX_MAP_EDIT_MODE");
		}
		else {
			Shader.DisableKeyword("HEX_MAP_EDIT_MODE");
		}
	}
Edit Mode Shaders
When HEX_MAP_EDIT_MODE is defined, the shaders should ignore visibility. This boils down to always treating the visibility of a cell as 1. Let's add a function to the top of our HexCellData include file to filter cell data based on the keyword.
sampler2D _HexCellData;
float4 _HexCellData_TexelSize;

float4 FilterCellData (float4 data) {
	#if defined(HEX_MAP_EDIT_MODE)
		data.x = 1;
	#endif
	return data;
}
Pass the result of both GetCellData functions through this function before returning it.
float4 GetCellData (appdata_full v, int index) {
	…
	return FilterCellData(data);
}

float4 GetCellData (float2 cellDataCoordinates) {
	…
	return FilterCellData(tex2Dlod(_HexCellData, float4(uv, 0, 0)));
}
To make this work, all relevant shaders should get a multi-compile directive to create variants for when the HEX_MAP_EDIT_MODE keyword is defined. Add the following line to the Estuary, Feature, River, Road, Terrain, Water, and Water Shore shaders, between the target directive and the first include directive.
#pragma multi_compile _ HEX_MAP_EDIT_MODE
Now the fog of war will disappear when we switch to map-editing mode.
unitypackage
Exploring Cells
By default, cells should be unexplored. They become explored as soon as a unit sees them. From then on they remain explored, regardless whether a unit can see them.
Keeping Track of Exploration
To support keeping track of the exploration state, add a public IsExplored property to HexCell.
public bool IsExplored { get; set; }
Whether a cell is explored is determined by the cell itself. So only HexCell should be able to set this property. To enforce this, make the setter private.
public bool IsExplored { get; private set; }
The first time a cell's visibility goes above zero, the cell is explored, and thus IsExplored should be set to true. Actually, we can suffice by simply always marking the cell as explored whenever visibility increases to 1. This should be done before invoking RefreshVisibility.
	public void IncreaseVisibility () {
		visibility += 1;
		if (visibility == 1) {
			IsExplored = true;
			ShaderData.RefreshVisibility(this);
		}
	}
Passing Exploration to Shaders
Like a cell's visibility, we can send its exploration state to the shaders via the shader data. It's another type of visibility, after all. HexCellShaderData.RefreshVisibility stores the visibility state in the data's R channel. Let's store the exploration state in the data's G channel.
	public void RefreshVisibility (HexCell cell) {
		int index = cell.Index;
		cellTextureData[index].r = cell.IsVisible ? (byte)255 : (byte)0;
		cellTextureData[index].g = cell.IsExplored ? (byte)255 : (byte)0;
		enabled = true;
	}
Black Unexplored Terrain
Now we can use the shaders to visualize the exploration state of cells. To verify that it works as intended, we'll simply make unexplored terrain black. But first, to keep edit mode functional, adjust FilterCellData so it also filters the exploration data.
float4 FilterCellData (float4 data) {
	#if defined(HEX_MAP_EDIT_MODE)
		data.xy = 1;
	#endif
	return data;
}
The Terrain shader sends the visibility data of all three potential cells to the fragment program. In the case of exploration state, we'll combine them in the vertex program and send a single value to the fragment program. Add a fourth component to the visibility input data to make room for this.
		struct Input {
			float4 color : COLOR;
			float3 worldPos;
			float3 terrain;
			float4 visibility;
		};
In the vertex program, we now have to explicitly access data.visibility.xyz when adjusting the visibility factor.
		void vert (inout appdata_full v, out Input data) {
			…
			data.visibility.xyz = lerp(0.25, 1, data.visibility.xyz);
		}
After that, combine the exploration states and put the result in data.visibility.w. This is done like combining the visibility in the other shaders, but using the Y component of the cell data.
			data.visibility.xyz = lerp(0.25, 1, data.visibility.xyz);
			data.visibility.w =
				cell0.y * v.color.x + cell1.y * v.color.y + cell2.y * v.color.z;
In the fragment program, the explorations state is now available via IN.visibility.w. Factor it into the albedo.
		void surf (Input IN, inout SurfaceOutputStandard o) {
			…

			float explored = IN.visibility.w;
			o.Albedo = c.rgb * grid * _Color * explored;
			o.Metallic = _Metallic;
			o.Smoothness = _Glossiness;
			o.Alpha = c.a;
		}
Unexplored terrain is black.
The terrain of unexplored cells in now black. Features, roads, and water aren't affected yet. This is enough to verify that exploration works.
Saving and Loading Exploration
Now that we support exploration, we should also make sure that the exploration state of cells is included when saving and loading maps. So we have to increase the map file version to 3. To make these changes more convenient, let's add a constant for this to SaveLoadMenu.
const int mapFileVersion = 3;
Use this constant when writing the file version in Save and to check whether a file is supported in Load.
	void Save (string path) {
		using (
			BinaryWriter writer =
			new BinaryWriter(File.Open(path, FileMode.Create))
		) {
			writer.Write(mapFileVersion);
			hexGrid.Save(writer);
		}
	}

	void Load (string path) {
		if (!File.Exists(path)) {
			Debug.LogError("File does not exist " + path);
			return;
		}
		using (BinaryReader reader = new BinaryReader(File.OpenRead(path))) {
			int header = reader.ReadInt32();
			if (header <= mapFileVersion) {
				hexGrid.Load(reader, header);
				HexMapCamera.ValidatePosition();
			}
			else {
				Debug.LogWarning("Unknown map format " + header);
			}
		}
	}
In HexCell.Save, we'll write the exploration state as the last step.
	public void Save (BinaryWriter writer) {
		…
		writer.Write(IsExplored);
	}
And read it at the end of Load. After that, invoke RefreshVisibility in case the exploration state is now different than before.
	public void Load (BinaryReader reader) {
		…

		IsExplored = reader.ReadBoolean();
		ShaderData.RefreshVisibility(this);
	}
To remain backwards compatible with older save files, we should skip reading the explored state when the file version is less than 3. Let's default to unexplored when that's the case. To be able to do this, we have to add the header data as a parameter to Load.
	public void Load (BinaryReader reader, int header) {
		…

		IsExplored = header >= 3 ? reader.ReadBoolean() : false;
		ShaderData.RefreshVisibility(this);
	}
From now on, HexGrid.Load has to pass the header data on to HexCell.Load.
	public void Load (BinaryReader reader, int header) {
		…

		for (int i = 0; i < cells.Length; i++) {
			cells[i].Load(reader, header);
		}
		…
	}
Whether cells are explored is now included when saving and loading maps.
unitypackage
Hiding Unknown Cells
Currently, unexplored cells are visually indicated by giving them a solid black terrain. What we really want is for those cells to be invisible, because they are unknown. It is possible to make normally opaque geometry transparent, so it can no longer be seen. However, we're using Unity's surface shader framework which is not designed with this effect in mind. Instead of going for actual transparency, we'll adapt our shaders to match the background so they're also unnoticeable.
Making the Terrain Truly Black
Although unexplored terrain is solid black, we can still determine its features because it still has specular lighting. To get rid of the highlights we have to make it perfectly matte black. To do this without messing with other surface properties, it's easiest to simply fade the specular color to black. This is possible when using a surface shader with the specular workflow, but we're currently using the default metallic workflow. So let's begin by switching the Terrain shader to the specular workflow.
Replace the _Metallic property with a _Specular color property. Its default color value should be (0.2, 0.2, 0.2). This makes sure that it matches the appearance of the metallic version.
	Properties {
		_Color ("Color", Color) = (1,1,1,1)
		_MainTex ("Terrain Texture Array", 2DArray) = "white" {}
		_GridTex ("Grid Texture", 2D) = "white" {}
		_Glossiness ("Smoothness", Range(0,1)) = 0.5
//		_Metallic ("Metallic", Range(0,1)) = 0.0
		_Specular ("Specular", Color) = (0.2, 0.2, 0.2)
	}
Change the corresponding shader variables as well. The specular color of surface shaders is defined as a fixed3, so let's use that as well.
		half _Glossiness;
//		half _Metallic;
		fixed3 _Specular;
		fixed4 _Color;
Change the surface surf pragma from Standard to StandardSpecular. This causes Unity to generate shaders using the specular workflow.
#pragma surface surf StandardSpecular fullforwardshadows vertex:vert
The surf function now requires its second parameter to be of the type SurfaceOutputStandardSpecular. Also, we should assign to o.Specular instead of to o.Metallic.
		void surf (Input IN, inout SurfaceOutputStandardSpecular o) {
			…

			float explored = IN.visibility.w;
			o.Albedo = c.rgb * grid * _Color * explored;
//			o.Metallic = _Metallic;
			o.Specular = _Specular;
			o.Smoothness = _Glossiness;
			o.Alpha = c.a;
		}
Now we can fade out the highlights by factoring explored into the specular color.
o.Specular = _Specular * explored;
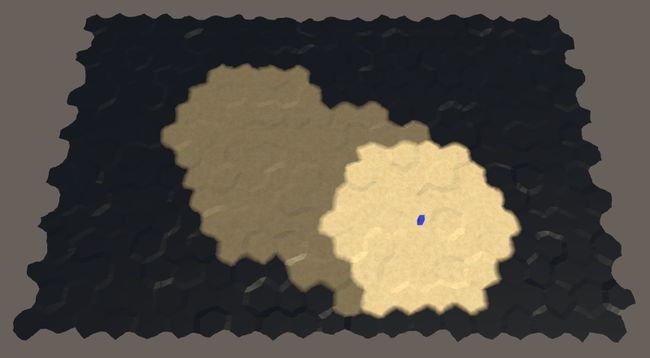
Unexplored without specular lighting.
When seen from above, unexplored terrain now appears matte black. However, when viewed at grazing angles surfaces become mirrors, which causes the terrain to reflect the environment, which is the skybox.
Why do surfaces become mirrors?
Unexplored still reflects the environment.
To get rid of these reflections, treat unexplored terrain as fully occluded. This is done by using exploredas the occlusion value, which acts as a mask for reflections.
			float explored = IN.visibility.w;
			o.Albedo = c.rgb * grid * _Color * explored;
			o.Specular = _Specular * explored;
			o.Smoothness = _Glossiness;
			o.Occlusion = explored;
			o.Alpha = c.a;
Unexplored without reflections.
Matching the Background
Now that unexplored terrain ignores all lighting, the next step is to make it match the background. As our camera is always looking from above, the background is always grey. To tell the Terrain shader which color to use, add a _BackgroundColor property to it, with black as default.
	Properties {
		…
		_BackgroundColor ("Background Color", Color) = (0,0,0)
	}

	…

		half _Glossiness;
		fixed3 _Specular;
		fixed4 _Color;
		half3 _BackgroundColor;
To use this color, we add it as emissive light. This is done by assigning the background color multiplied by one-minus-explored to o.Emission.
			o.Occlusion = explored;
			o.Emission = _BackgroundColor * (1 -  explored);
Because we're using the default skybox, the visible background color isn't actually uniform. Overall the best color is slightly reddish grey. You can use the Hex Color code 68615BFF when adjusting the terrain material.
Terrain material with gray background color.
This mostly works, although you could still perceive very faint silhouettes if you know where to look. To ensure that this is not possible for the player, you can adjust the camera to use 68615BFF as its solid background color, instead of the skybox.
Camera with solid background color.
Why not remove the skybox?
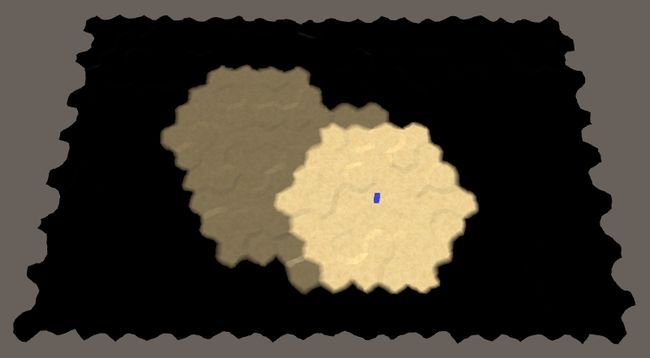
Now we're no longer able to distinguish between the background and unexplored cells. It is still possible for high unexplored terrain to occlude low explored terrain, when using low camera angles. Also, the unexplored parts still cast shadows on the explored parts. These minimal clues are fine.
Unexplored cells no longer visible.
What if I'm not using a solid background color?
Hiding Features
At this point only the terrain mesh is hidden. Everything else is still unaffected by the exploration state.
Only terrain is hidden so far.
Let's adjust the Feature shader next, which is an opaque shader like Terrain. Turn it into a specular shader and add a background color to it. First, the properties.
	Properties {
		_Color ("Color", Color) = (1,1,1,1)
		_MainTex ("Albedo (RGB)", 2D) = "white" {}
		_Glossiness ("Smoothness", Range(0,1)) = 0.5
//		_Metallic ("Metallic", Range(0,1)) = 0.0
		_Specular ("Specular", Color) = (0.2, 0.2, 0.2)
		_BackgroundColor ("Background Color", Color) = (0,0,0)
		[NoScaleOffset] _GridCoordinates ("Grid Coordinates", 2D) = "white" {}
	}
Next, the surface pragma and variables, like before.
		#pragma surface surf StandardSpecular fullforwardshadows vertex:vert

		…

		half _Glossiness;
//		half _Metallic;
		fixed3 _Specular;
		fixed4 _Color;
		half3 _BackgroundColor;
Again, visibility needs another component. Because Feature combines the visibility per vertex, it only needed a single float. Now we need two.
		struct Input {
			float2 uv_MainTex;
			float2 visibility;
		};
Adjust vert so it explicitly uses data.visibility.x for the visibility data, then assign the exploration data to data.visibility.y.
		void vert (inout appdata_full v, out Input data) {
			…

			float4 cellData = GetCellData(cellDataCoordinates);
			data.visibility.x = cellData.x;
			data.visibility.x = lerp(0.25, 1, data.visibility.x);
			data.visibility.y = cellData.y;
		}
Adjust surf so it uses the new data, like Terrain.
		void surf (Input IN, inout SurfaceOutputStandardSpecular o) {
			fixed4 c = tex2D (_MainTex, IN.uv_MainTex) * _Color;
			float explored = IN.visibility.y;
			o.Albedo = c.rgb * (IN.visibility.x * explored);
//			o.Metallic = _Metallic;
			o.Specular = _Specular * explored;
			o.Smoothness = _Glossiness;
			o.Occlusion = explored;
			o.Emission = _BackgroundColor * (1 -  explored);
			o.Alpha = c.a;
		}
Hidden features.
Hiding Water
Next up are the Water and Water Shore shaders. Begin by converting them to specular shaders, to stay consistent. However, they do not need a background color, because they are transparent shaders.
After the conversion, add another component to visibility and adjust vert accordingly. Both shaders combine the data of three cells.
		struct Input {
			…
			float2 visibility;
		};

		…

		void vert (inout appdata_full v, out Input data) {
			…

			data.visibility.x =
				cell0.x * v.color.x + cell1.x * v.color.y + cell2.x * v.color.z;
			data.visibility.x = lerp(0.25, 1, data.visibility.x);
			data.visibility.y =
				cell0.y * v.color.x + cell1.y * v.color.y + cell2.y * v.color.z;
		}
Water and Water Shore do different things in surf, but they set their surface properties in the same way. Because they're transparent, factor explore into alpha instead of setting emission.
		void surf (Input IN, inout SurfaceOutputStandardSpecular o) {
			…

			float explored = IN.visibility.y;
			o.Albedo = c.rgb * IN.visibility.x;
			o.Specular = _Specular * explored;
			o.Smoothness = _Glossiness;
			o.Occlusion = explored;
			o.Alpha = c.a * explored;
		}
Hidden water.
Hiding Estuaries, Rivers, and Roads
The remaining shaders are Estuary, River, and Road. All three are transparent shaders and combine the data of two cells. Switch all of them to the specular workflow. Then add the explored data to visibility.
		struct Input {
			…
			float2 visibility;
		};

		…

		void vert (inout appdata_full v, out Input data) {
			…

			data.visibility.x = cell0.x * v.color.x + cell1.x * v.color.y;
			data.visibility.x = lerp(0.25, 1, data.visibility.x);
			data.visibility.y = cell0.y * v.color.x + cell1.y * v.color.y;
		}
Adjust the surf function of the Estuary and River shaders so it uses the new data. They both require the same changes.
		void surf (Input IN, inout SurfaceOutputStandardSpecular o) {
			…

			float explored = IN.visibility.y;
			fixed4 c = saturate(_Color + water);
			o.Albedo = c.rgb * IN.visibility.x;
			o.Specular = _Specular * explored;
			o.Smoothness = _Glossiness;
			o.Occlusion = explored;
			o.Alpha = c.a * explored;
		}
The Road shader is a little different, because it uses an additional blend factor.
		void surf (Input IN, inout SurfaceOutputStandardSpecular o) {
			float4 noise = tex2D(_MainTex, IN.worldPos.xz * 0.025);
			fixed4 c = _Color * ((noise.y * 0.75 + 0.25) * IN.visibility.x);
			float blend = IN.uv_MainTex.x;
			blend *= noise.x + 0.5;
			blend = smoothstep(0.4, 0.7, blend);

			float explored = IN.visibility.y;
			o.Albedo = c.rgb;
			o.Specular = _Specular * explored;
			o.Smoothness = _Glossiness;
			o.Occlusion = explored;
			o.Alpha = blend * explored;
		}
Everything hidden.
unitypackage
Avoiding Unexplored Cells
Although everything that's yet unknown is visually hidden, pathfinding doesn't take the exploration state into consideration yet. As a result, units can be ordered to move into or through unexplored cells, magically knowing which path to take. We should force units to avoid unexplored cells.
Moving through unexplored cells.
Units Determine Move Cost
Before dealing with the unexplored cells, let's migrate the code to determine the cost of movement from HexGrid to HexUnit. That makes it easier to support units with varying movement rules in the future.
Add a public GetMoveCost method to HexUnit to determine the move cost. It needs to know which cells the movement is between as well as the direction. Copy the relevant move-cost code from HexGrid.Search into this method and adjust the variable names.
	public int GetMoveCost (
		HexCell fromCell, HexCell toCell, HexDirection direction)
	{
		HexEdgeType edgeType = fromCell.GetEdgeType(toCell);
		if (edgeType == HexEdgeType.Cliff) {
			continue;
		}
		int moveCost;
		if (fromCell.HasRoadThroughEdge(direction)) {
			moveCost = 1;
		}
		else if (fromCell.Walled != toCell.Walled) {
			continue;
		}
		else {
			moveCost = edgeType == HexEdgeType.Flat ? 5 : 10;
			moveCost +=
				toCell.UrbanLevel + toCell.FarmLevel + toCell.PlantLevel;
		}
	}
The method should return the move cost. While the old code uses continue to skip invalid moves, we cannot use this approach here. Instead, we'll return a negative move cost to indicate that movement is not possible.
	public int GetMoveCost (
		HexCell fromCell, HexCell toCell, HexDirection direction)
	{
		HexEdgeType edgeType = fromCell.GetEdgeType(toCell);
		if (edgeType == HexEdgeType.Cliff) {
			return -1;
		}
		int moveCost;
		if (fromCell.HasRoadThroughEdge(direction)) {
			moveCost = 1;
		}
		else if (fromCell.Walled != toCell.Walled) {
			return -1;
		}
		else {
			moveCost = edgeType == HexEdgeType.Flat ? 5 : 10;
			moveCost +=
				toCell.UrbanLevel + toCell.FarmLevel + toCell.PlantLevel;
		}
		return moveCost;
	}
Now we need to know the selected unit when finding a path, instead of only a speed. Adjust HexGameUI.DoPathFinding accordingly.
	void DoPathfinding () {
		if (UpdateCurrentCell()) {
			if (currentCell && selectedUnit.IsValidDestination(currentCell)) {
				grid.FindPath(selectedUnit.Location, currentCell, selectedUnit);
			}
			else {
				grid.ClearPath();
			}
		}
	}
As we still need to access the unit's speed, add a Speed property to HexUnit. It just returns the constant value 24 for now.
	public int Speed {
		get {
			return 24;
		}
	}
In HexGrid, adjust FindPath and Search so they work with the new approach.
	public void FindPath (HexCell fromCell, HexCell toCell, HexUnit unit) {
		ClearPath();
		currentPathFrom = fromCell;
		currentPathTo = toCell;
		currentPathExists = Search(fromCell, toCell, unit);
		ShowPath(unit.Speed);
	}

	bool Search (HexCell fromCell, HexCell toCell, HexUnit unit) {
		int speed = unit.Speed;
		…
	}
Finally, remove the old code in Search that determines whether a neighbor can be moved into and what the move cost is. Instead, invoke HexUnit.IsValidDestination and HexUnit.GetMoveCost. Skip the cell if the move cost ends up negative.
			for (HexDirection d = HexDirection.NE; d <= HexDirection.NW; d++) {
				HexCell neighbor = current.GetNeighbor(d);
				if (
					neighbor == null ||
					neighbor.SearchPhase > searchFrontierPhase
				) {
					continue;
				}
//				if (neighbor.IsUnderwater || neighbor.Unit) {
//					continue;
//				}
//				HexEdgeType edgeType = current.GetEdgeType(neighbor);
//				if (edgeType == HexEdgeType.Cliff) {
//					continue;
//				}
//				int moveCost;
//				if (current.HasRoadThroughEdge(d)) {
//					moveCost = 1;
//				}
//				else if (current.Walled != neighbor.Walled) {
//					continue;
//				}
//				else {
//					moveCost = edgeType == HexEdgeType.Flat ? 5 : 10;
//					moveCost += neighbor.UrbanLevel + neighbor.FarmLevel +
//						neighbor.PlantLevel;
//				}
				if (!unit.IsValidDestination(neighbor)) {
					continue;
				}
				int moveCost = unit.GetMoveCost(current, neighbor, d);
				if (moveCost < 0) {
					continue;
				}

				int distance = current.Distance + moveCost;
				int turn = (distance - 1) / speed;
				if (turn > currentTurn) {
					distance = turn * speed + moveCost;
				}

				…
			}
Moving Around Unexplored Areas
To avoid unexplored cells, we just have to make HexUnit.IsValidDestination check whether the cell is explored.
	public bool IsValidDestination (HexCell cell) {
		return cell.IsExplored && !cell.IsUnderwater && !cell.Unit;
	}
Units can no longer enter unexplored cells.
As unexplored cells are no longer valid destinations, units will avoid them when moving to a destination. Unexplored regions thus act as barriers, which can make a path longer or even impossible. You'll have to move units close to unknown terrain to explore the area first.
Inexplorable Cells
One final issue about vision concerns the edge of the map. The terrain suddenly ends, without transition, where cells on the edge lack neighbors.
Obvious map edge.
Ideally, the visuals of unexplored regions and the map edge are identical. We could achieve this by adding special cases for triangulating edges when there are no neighbors, but that requires extra logic, and we have to deal with missing cells. So that's not trivial. An alternative is to force the border cells of the map to remain unexplored, even if they would be in sight range of a unit. That approach is much simpler, so let's go with that. It also makes it possible to mark other cells inexplorable as well, making irregular map edges easier to achieve. Besides that, hidden edge cells make is possible to make rivers and roads appear to enter and leave the map, because their end points are out of sight. You could also have units enter or leave the map this way.
Marking Cells as Explorable
To indicate that a cell is explorable, add an Explorable property to HexCell.
public bool Explorable { get; set; }
Now a cell can only be visible if it is also explorable, so adjust the IsVisible property to take this into account.
	public bool IsVisible {
		get {
			return visibility > 0 && Explorable;
		}
	}
The same is true for IsExplored. However, we used a default property for that. We have to convert it into an explicit property to be able to adjust its getter logic.
	public bool IsExplored {
		get {
			return explored && Explorable;
		}
		private set {
			explored = value;
		}
	}

	…

	bool explored;
Hiding the Map Edge
Hiding the edge of our rectangular map can be done in the HexGrid.CreateCell method. Cells that's aren't at the edge are explorable, while all others are inexplorable.
	void CreateCell (int x, int z, int i) {
		…

		HexCell cell = cells[i] = Instantiate<HexCell>(cellPrefab);
		cell.transform.localPosition = position;
		cell.coordinates = HexCoordinates.FromOffsetCoordinates(x, z);
		cell.Index = i;
		cell.ShaderData = cellShaderData;

		cell.Explorable =
			x > 0 && z > 0 && x < cellCountX - 1 && z < cellCountZ - 1;

		…
	}
Now our maps fade out at their edge, the great beyond being inexplorable. As a result, the explorable size of our maps are reduced by two in each dimension.
inexplorable map edge.
What about making the explorable state editable?
Inexplorable Cells Block Vision
Finally, if a cell cannot be explored then it should also block vision. Adjust HexGrid.GetVisibleCells to take this into account.
				if (
					neighbor == null ||
					neighbor.SearchPhase > searchFrontierPhase ||
					!neighbor.Explorable
				) {
					continue;
				}
The next tutorial is Generating Land.
unitypackage PDF
