Android--各种Drawable介绍
Drawable 是什么
这篇博客我们要讲得是关于 Drawable 的知识。Drawable 是Android给我们的一个抽象类,是对可绘制物体的抽象。与 View 不同的是 Drawable 没有事件和交互方法。Drawable 不是直接面向我们,是看不见的,不能为它添加点击事件。
一个Drawable对象是“那些能够在其上面图画的任意对象”,它也许是一个bitmap对象,也可能是一个solid color、一个其他Drawable对象的集合,亦或是某种结构。 大多数Android UI框架喜欢用Drawable对象,而不是Bitmap对象。一个View可以接受任何Drawable对象作为background,一个Imageview可以显示Drawable前景对象;作为资源的 Images 一般加载为Drawable对象。Drawable并没有实际的宽和高,一般作为 View 的背景时,Drawable就会被拉伸到 View 的大小。
BitmapDrawable
BitmapDrawable:是对 bitmap 的一种包装,可以设置它包装的 bitmap 在 BitmapDrawable 区域内的绘制方式,如平铺填充、拉伸填充或者保持图片原始大小,也可以在 BitmapDrawable 区域内部使用 gravity 指定的对齐方式。
在xml文件中使用 bitmap 作为根节点来定义 BitmapDrawable。
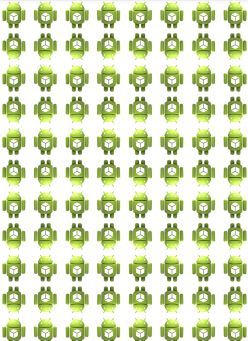
下面的xml代码定义一个BitmapDrawable,同时设置了 BitmapDrawable的tileMode 属性为 mirror,通过这样设置会使得小图片在水平和竖直方向做镜面平铺效果。
<bitmap xmlns:android="http://schemas.android.com/apk/res/android"
    android:src="@drawable/ic_launcher"
    android:tileMode="mirror"
    android:antialias="true"
    android:dither="true">
bitmap>
用 Java 实现同样效果:
Bitmap mBitmap = BitmapFactory.decodeResource(getResources(), R.drawable.ic_launcher);

BitmapDrawable mBitmapDrawable = new BitmapDrawable(mBitmap);

mBitmapDrawable.setTileModeXY(Shader.TileMode.MIRROR,
                Shader.TileMode.MIRROR);
mBitmapDrawable.setAntiAlias(true);
mBitmapDrawable.setDither(true);
如果BitmapDrawable 依附的是 match_parent 的 View,则会像镜子铺满整个控件。
ClipDrawable
ClipDrawable 是对一个Drawable进行剪切操作,可以控制这个drawable的剪切区域,以及相对于容器的对齐方式,android中的进度条就是使用一个ClipDrawable实现效果的,它根据level的属性值,决定剪切区域的大小。
在xml文件中使用clip作为根节点定义ClipDrawable。
需要注意的是ClipDrawable是根据level的大小控制图片剪切操作的,level的大小从0到10000,level为0时完全不显示,为10000时完全显示。是用 Drawable 提供的 setLevel 方法来设置剪切区域。
下面为定义ClipDrawable的代码:
<clip xmlns:android="http://schemas.android.com/apk/res/android"
    android:drawable="@drawable/ic_launcher"
    android:clipOrientation="horizontal"
    android:gravity="left">

clip>
public class ClipDrawableActivity extends Activity {
private ImageView iv;
@Override
protected void onCreate(Bundle savedInstanceState) {
super.onCreate(savedInstanceState);
setContentView(R.layout.activity_clip);
iv = (ImageView) findViewById(R.id.iv);
ClipDrawable drawable = (ClipDrawable) iv.getDrawable();
drawable.setLevel(5000);//0~10000
}
}如图所示,如果 gravity 为right,则从右边开始显示,这个图片显示右半边;如果clipOrientation 为 vertical,则垂直显示,这个图片显示上半边。
ColorDrawable
ColorDrawable 是最简单的Drawable,它实际上是代表了单色可绘制区域,它包装了一种固定的颜色,当ColorDrawable被绘制到画布的时候会使用颜色填充Paint,在画布上绘制一块单色的区域。
在xml文件中使用 color 作为根节点来创建ColorDrawable,它只有一个android:color属性,通过它来决定ColorDrawable的颜色,Android并没有提供修改这个颜色值的Api,所以这个颜色一旦设置之后,就不能直接修改了。
下面的xml文件定义了一个颜色为红色的ColorDrawable:
<color xmlns:android="http://schemas.android.com/apk/res/android"
    android:color="#FF0000" />
当然也可以使用Java代码创建ColorDrawable,需要注意的是Android中使用一个int类型的数据表示颜色值,通常习惯使用十六进制格式的数据表示颜色值。
一个int类型包含四个字节,分别代表颜色的4个组成部分:透明度(Alpha)、红(RED)、绿(GREEN)、蓝(BLUE),每个部分由一个字节(8个bit)表示,取值范围为0~255。
在xml中使用颜色时可以省略透明度(Alpha)部分,如#ff0000表示红色。但是在代码中必须要明确指出透明度(Alpha)代表的数据,如果省略了就表示完全透明的颜色,例如0xFFFF0000表示红色,而0xFF0000虽然也表示红色,但它却是完全透明的,也就是说当绘制到画布上时,看不出有任何效果。
使用Java代码可以创建ColorDrawable,代码如下:
ColorDrawable drawable = new ColorDrawable(0xffff0000);DrawableContainer
StateListDrawable
StateListDrawable管理一组drawable,每一个drawable都对应着一组状态,状态的选择类似于 Java 中的 switch-case 组合,按照顺序比较状态,当遇到匹配的状态后,就返回对应的drawable,因此需要把最精确的匹配放置在最前面,按照从精确到粗略的顺序排列。
StateListDrawable在Android中使用的非常广泛,所有控件的背景基本上都使用了StateListDrawable,比如按钮就具有很多状态,按下状态、选中状态、默认状态、禁用状态等等,像这样在不用的状态下显示效果不一样的时候,就是需要使用StateListDrawable的时候。
在xml文件中使用selector作为根节点来定义StateListDrawable,并使用item定义不同状态下的drawable。
创建StateListDraw的代码如下:
<selector xmlns:android="http://schemas.android.com/apk/res/android">

    <item android:state_pressed="true" android:drawable="@drawable/on"/>
    <item android:drawable="@drawable/off"/>

selector>
LevelListDrawable
管理一组drawable,每一个drawable都对应一个level范围,当它们被绘制的时候,根据level属性值选取对应的一个drawable绘制到画布上。
在xml文件中使用level-list作为根节点来定义LevelListDrawable,通过item子节点定义每一层的drawable,level-list没有属性节点,只包含item子节点。
调用Drawable中的 setLevel() 方法可以加载level-list或代码中定义的某个Drawable资源。
创建LevelListDrawable的代码如下:
<level-list xmlns:android="http://schemas.android.com/apk/res/android" >
    <item
        android:drawable="@drawable/off"
        android:minLevel="6"
        android:maxLevel="10">item>
    <item
        android:drawable="@drawable/on"
        android:minLevel="12"
        android:maxLevel="20">item>

level-list>
public class LevelListDrawableActivity extends Activity {
private ImageView iv;
@Override
protected void onCreate(Bundle savedInstanceState) {
super.onCreate(savedInstanceState);
setContentView(R.layout.activity_level);
iv = (ImageView) findViewById(R.id.iv);
iv.setImageLevel(8);
}
public void lampOn(View v) {
iv.setImageLevel(15);
}
public void lampOff(View v) {
iv.setImageLevel(8);
}
}AnimationDrawable
AnimationDrawable 对应于Android中的帧动画,就是把一系列的drawable按照一定的顺序,一帧一帧的播放,并且可以使用android:oneshot属性设置是否循环播放。
在xml文件中使用animation-list作为根节点定义AnimationDrawable,使用item设置需要播放的每一帧使用的drawable资源,以及每一帧持续的时常。我们为view设置Drawable资源,可以在代码中用setBackgroundResource()或者在xml中设置 Image 的背景。
下面的代码定义了一个包含三帧的AnimationDrawable,帧间隔为1000毫秒,代码如下:
<animation-list xmlns:android="http://schemas.android.com/apk/res/android"
    android:oneshot="false">
    <item
        android:drawable="@drawable/ic_launcher"
        android:duration="1000" />
    <item
        android:drawable="@drawable/gradient"
        android:duration="1000" />
    <item
        android:drawable="@drawable/gradient2"
        android:duration="1000" />
animation-list>
public class AnimationDrawableActivity extends Activity {
private ImageView iv;
@Override
protected void onCreate(Bundle savedInstanceState) {
super.onCreate(savedInstanceState);
setContentView(R.layout.activity_animation);
iv = (ImageView) findViewById(R.id.iv);
AnimationDrawable drawable = (AnimationDrawable) iv.getBackground();
drawable.start();
}
}GradientDrawable
GradientDrawable 表示一个渐变区域,可以实现线性渐变、发散渐变和平铺渐变效果,在Android中可以使用GradientDrawable表示很多复杂而又绚丽的界面效果。
可以使用xml定义GradientDrawable,相对于ColorDrawable类型,GradientDrawable要复杂很多,它有很多的元素组成。在xml文件中使用shape作为根节点来创建GradientDrawable,它包含很多属性和子节点,下面是GradientDrawable的xml文档节点结构。
<shape xmlns:android="http://schemas.android.com/apk/res/android">
    <size />       //定义区域的大小
    <gradient>     //设置区域背景的渐变效果
    <solid/>       //设置区域的背景颜色,如果设置了solid会覆盖gradient的效果
    <stroke />     //设置区域的边框效果
    <padding />    //设置区域的内边距
shape>
线性渐变效果的椭圆:
<shape xmlns:android="http://schemas.android.com/apk/res/android"
    android:shape="oval">

    <gradient
        android:angle="90"
        android:centerColor="#00ff00"
        android:endColor="#0000ff"
        android:startColor="#ff0000" />

    <stroke
        android:width="3dip"
        android:color="#fff"
        android:dashGap="5dip"
        android:dashWidth="4dip" />
shape>
平铺渐变效果的圆环:
<shape xmlns:android="http://schemas.android.com/apk/res/android"
    android:innerRadiusRatio="8"
    android:shape="ring"
    android:thicknessRatio="3"
    android:useLevel="false">

    <gradient
        android:centerColor="#00ff00"
        android:endColor="#0000ff"
        android:startColor="#ff0000"
        android:type="sweep"
        android:useLevel="false" />
shape>
发散渐变效果的圆:
<shape xmlns:android="http://schemas.android.com/apk/res/android"
    android:innerRadius="0dip"
    android:shape="ring"
    android:thickness="70dip"
    android:useLevel="false">

    <gradient
        android:centerColor="#00ff00"
        android:endColor="#0000ff"
        android:gradientRadius="70"
        android:startColor="#ff0000"
        android:type="radial"
        android:useLevel="false" />

shape>
InsetDrawable
InsetDrawable 表示一个drawable嵌入到另外一个drawable内部,并且在内部留一些间距,这一点很像drawable的padding属性,区别在于 padding表示drawable的内容与drawable本身的边距,insetDrawable表示两个drawable和容器之间的边距。当控件需要的背景比实际的边框小的时候比较适合使用InsetDrawable。
在xml文件中使用inset作为根节点定义InsetDrawable。
代码如下:
<inset xmlns:android="http://schemas.android.com/apk/res/android"
    android:drawable="@drawable/brightness"
    android:insetLeft="20dp"
    android:insetRight="20dp"
    android:insetTop="90dp"
    android:insetBottom="90dp">
inset>
在LinearLayout 中设置为背景。
因为模拟器上的宽高不一样,所以如果inse都设置为同一个值,那么这个图形就会变形。
LayerDrawable
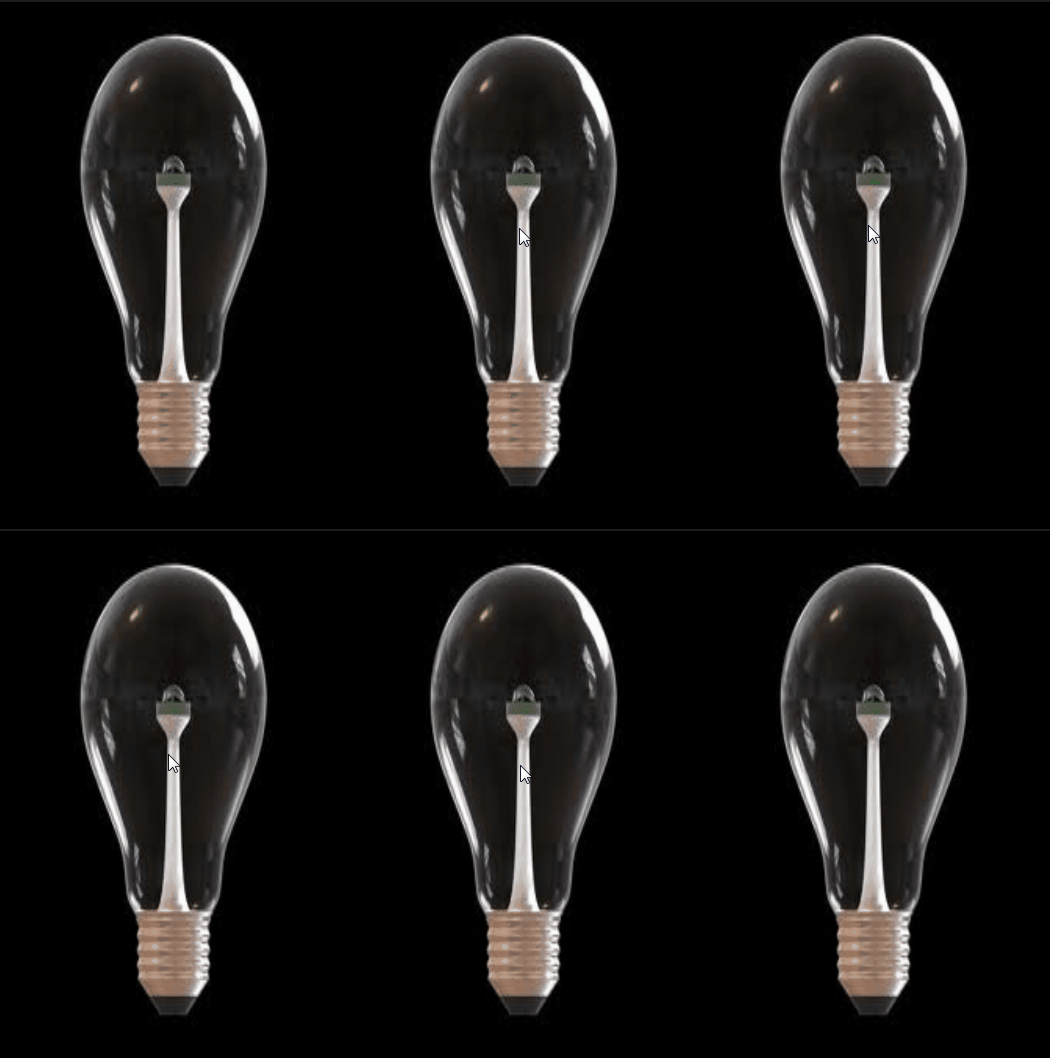
LayerDrawable 管理一组drawable,每个drawable都处于不同的层,当它们被绘制的时候,按照顺序全部都绘制到画布上,列表的最后一个在最上层。虽然这些drawable会有交差或者重叠的区域,但是它们是位于不同的层,彼此之间不会影响。
在xml文件中使用 layer-list 作为根节点来定义LayerDrawable,通过item子节点定义每一层的drawable,layer-list没有属性节点,只包含item子节点。
下面的xml定义了一个两层的LayerDrawable,代码如下:
<layer-list xmlns:android="http://schemas.android.com/apk/res/android" >

    <item
        android:top="50dp"
        android:left="20dp">
        <bitmap android:src="@drawable/ic_launcher"
            android:gravity="center"/>
    item>

    <item
        android:top="30dp"
        android:left="0dp">
        <bitmap android:src="@drawable/ic_launcher"
            android:gravity="center"/>
    item>

layer-list>
可以很清楚的看出第二个item覆盖在第一个item上。
TransitionDrawable
TransitionDrawable 是LayerDrawable的子类,不过它只负责管理两层drawable,并且提供了一个透明度变化的动画,可以控制从一层drawable过度到另外一层drawable的动画效果。
在xml文件中使用transition作为根节点来定义TransitionDrawable,通过item子节点定义两层使用的drawable。第一个item就为默认的资源,startTransition() 就是第一个item到第二个item的过程,endTransition则是反过来。
创建TransitionDrawable的代码如下:
<transition xmlns:android="http://schemas.android.com/apk/res/android" >

    <item android:drawable="@drawable/off">item>
    <item android:drawable="@drawable/on">item>
transition>
public class TransitionDrawableActivity extends Activity {
private ImageView iv;
@Override
protected void onCreate(Bundle savedInstanceState) {
super.onCreate(savedInstanceState);
setContentView(R.layout.activity_transition);
iv = (ImageView) findViewById(R.id.iv);
}
public void lampOn(View v) {
TransitionDrawable drawable = (TransitionDrawable) iv.getDrawable();
drawable.startTransition(3000);
}
public void lampOff(View v) {
TransitionDrawable drawable = (TransitionDrawable) iv.getDrawable();
drawable.reverseTransition(3000);
}
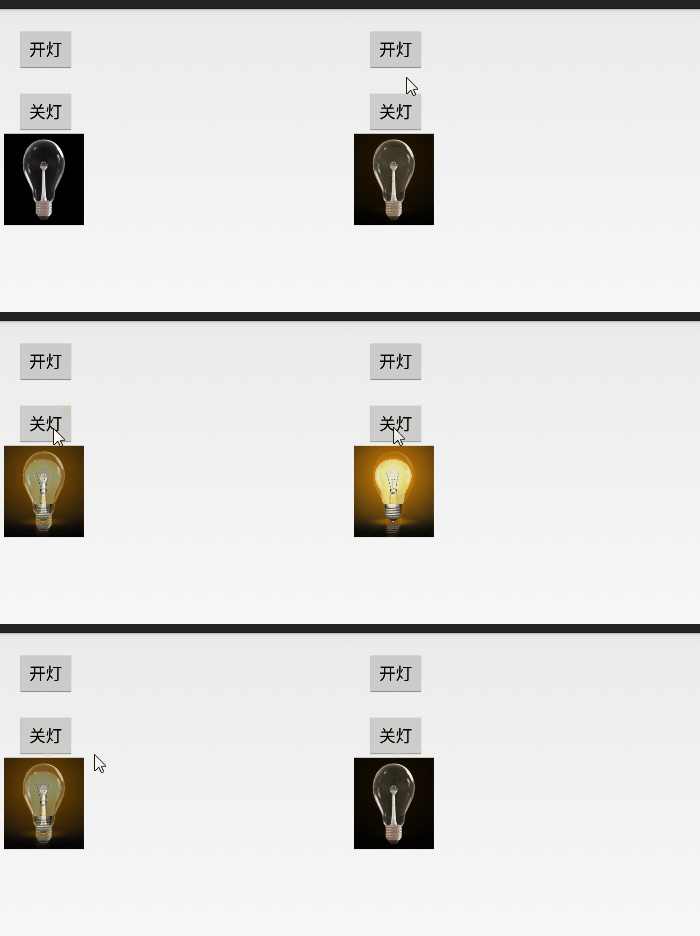
}在使用TransitionDrawable的时,需要主动调用startTransition方法启动两个层之间的切换动画,也可以调用reverseTransition方法启动逆向切换动画,它们都可以接受一个毫秒数,作为动画的持续时间。
NinePatchDrawable
NinePatchDrawable,“点九图”是Andriod平台的一种特殊的图片格式,文件扩展名为:.9.png。支持Android平台的手机类型很多,有多种不同的分辨率,很多控件的切图文件在被放大拉伸后,边角会模糊失真。在android平台下使用“点九”图片处理技术,可以将图片横向和纵向同时进行拉伸,以实现在多分辨率下的完美显示效果。点九图片在拉伸时仍能保留图像的渐变质感和圆角的精细度。
Android 中如何使用 .9图片,我在Android屏幕适配这篇博客中有提,有兴趣的可以去看。
在xml文件中使用使用nine-patch作为根节点创建NinePatchDrawable。同时,也可以使用bitmap包装点九图片,android FrameWork会根据android:src属性设置的图片类型来生成对应的drawable。代码如下:
<nine-patch
    xmlns:android="http://schemas.android.com/apk/res/android"
    android:src="@drawable/red"
    android:dither="true" />
<bitmap
    xmlns:android="http://schemas.android.com/apk/res/android"
    android:src="@drawable/red"
    android:dither="true" />
red 换成你对应的 .9图片即可。
PictureDrawable
RotateDrawable
RotateDrawable 是对一个Drawable进行旋转操作,可以根据level属性控制这个drawable旋转角度,也可以设置相对于它所在容器的对齐方式。
在xml文件中使用rotate作为根节点来定义RotateDrawable.
创建RotateDrawable的代码如下:
<rotate xmlns:android="http://schemas.android.com/apk/res/android"
    android:drawable="@drawable/ic_launcher"
    android:fromDegrees="0"
    android:pivotX="50%"
    android:pivotY="50%"
    android:toDegrees="180" />
将它引用到ImageView里,发现图片根本没有转变。其实,要让它可以旋转,还需要设置level值。level取值范围为0~10000,应用到rotate,则与fromDegrees~toDegrees相对应,如上面例子的角度范围为0~180,那么,level取值0时,则旋转为0度;level为10000时,则旋转180度;level为5000时,则旋转90度。因为level默认值为0,所以图片没有转变。那么,我们想转180度,其实可以将fromDegrees设为180,而不设置toDegrees,这样,不用再在代码里设置level图片就可以旋转180了。
ScaleDrawable
ScaleDrawable是对一个Drawable进行缩放操作,可以根据level属性控制这个drawable的缩放比率,也可以设置它在容器中的对齐方式。
在xml文件中使用scale作为根节点来创建ScaleDrawable。
创建ScaleDrawable的代码如下:
<scale xmlns:android="http://schemas.android.com/apk/res/android"
    android:drawable="@drawable/ic_launcher"
    android:scaleGravity="left"
    android:scaleHeight="50%"
    android:scaleWidth="50%"
    android:useIntrinsicSizeAsMinimum="false" />
public class ScaleDrawableActivity extends Activity {
private ImageView iv;
@Override
protected void onCreate(Bundle savedInstanceState) {
super.onCreate(savedInstanceState);
setContentView(R.layout.activity_scale);
iv = (ImageView) findViewById(R.id.iv);
iv.getDrawable().setLevel(5000);
}
}ShapeDrawable
ShapeDrawable 用于定义一个基本的几何图形(如矩形、圆形、线条等),定义ShapeDrawable的XML文件 的根节点是 shape 元素。
创建ShapeDrawable的代码如下:
<shape xmlns:android="http://schemas.android.com/apk/res/android"
    android:shape="rectangle">


    <solid android:color="#2222" />


    <padding
        android:bottom="7dp"
        android:left="7dp"
        android:right="7dp"
        android:top="7dp" />


    <stroke
        android:width="3dip"
        android:color="#ff0" />
shape>
<shape xmlns:android="http://schemas.android.com/apk/res/android"
    android:shape="rectangle">


    <gradient
        android:angle="45"
        android:endColor="#80FF00FF"
        android:startColor="#FFFF0000" />
    <padding
        android:bottom="7dp"
        android:left="7dp"
        android:right="7dp"
        android:top="7dp" />


    <corners android:radius="20dp" />
shape>
<shape xmlns:android="http://schemas.android.com/apk/res/android"
    android:shape="oval">


    <gradient
        android:angle="45"
        android:endColor="#00f"
        android:startColor="#ff0"
        android:type="sweep" />


    <padding
        android:bottom="7dp"
        android:left="7dp"
        android:right="7dp"
        android:top="7dp" />


    <corners android:radius="8dp" />
shape>
PaintDrawable
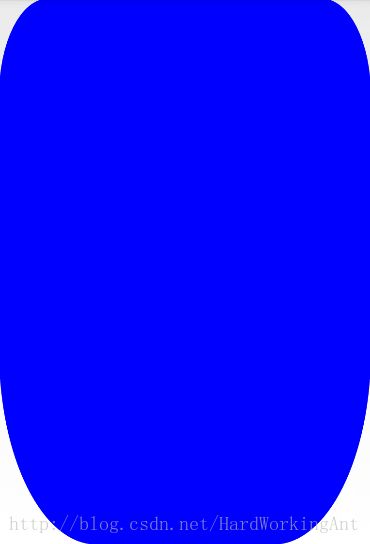
PaintDrawable无法通过xml创建,只能在Java代码中创建。PaintDrawable 是比较简单的 Drawable了,看过 sdk 文档的朋友知道它只有那么几个方法,这里我就写个简单的 UI 背景。
public class PaintDrawableActivity extends Activity {

    private ImageView iv;

    @Override
    protected void onCreate(Bundle savedInstanceState) {
        super.onCreate(savedInstanceState);
        setContentView(R.layout.activity_paint);
        iv = (ImageView) findViewById(R.id.iv);

        PaintDrawable paint = new PaintDrawable(Color.BLUE);
        paint.setCornerRadii(new float[]{100,200, 100,200, 200,400, 200,400});
        iv.setBackground(paint);
    }
}
好了,所有的 Drawable 到此就全部讲完了,但这只是基础的应用,给大家系统的认识一下这些,如果认为知道这个 Drawable 是什么就代表学会了,那是大错特错的。我这个博客只是大致的介绍了一遍它们而已,关于如何去设计 Drawable 还要大家多多练习。
结束语:本文仅用来学习记录,参考查阅。
