微信小程序之弹出框
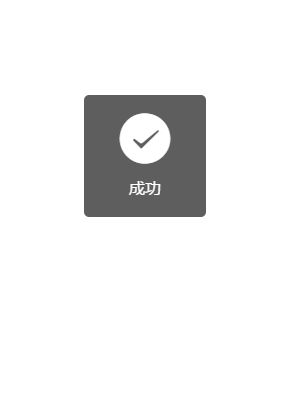
微信小程序中toast消息提示框只有两种显示的效果,就是成功和加载,使用wx.showToast(OBJECT)。
看下有关参数说明: 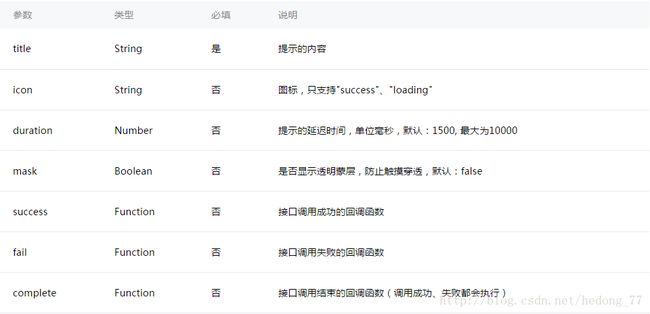
代码很简单:
 wx.showToast({
            title: '成功',
            icon: 'succes',
            duration: 1000,
            mask:true
})mask属性好像并没有起作用。有一点值得注意的是提示的延迟时间是有限制的,最大10000毫秒。
还有一个函数是wx.hideToast(),这个是隐藏toast,主要用于显示加载提示的时候用到,如:
wx.showToast({
  title: '加载中',
  icon: 'loading',
  duration: 10000
})

setTimeout(function(){
  wx.hideToast()
},2000)
本来加载时间是10000毫秒的,然后2000毫秒的时候就隐藏了,这个具体情况而定了哈。
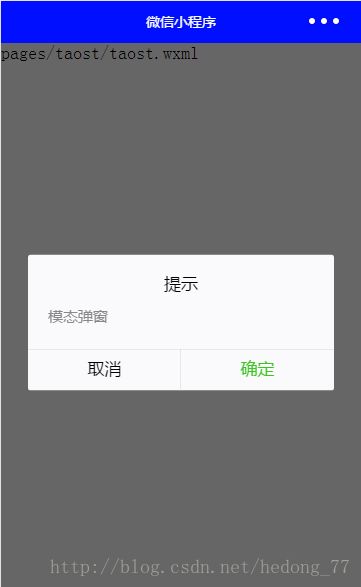
第二个弹窗是模态弹窗:wx.showModal(OBJECT)
参数如下: 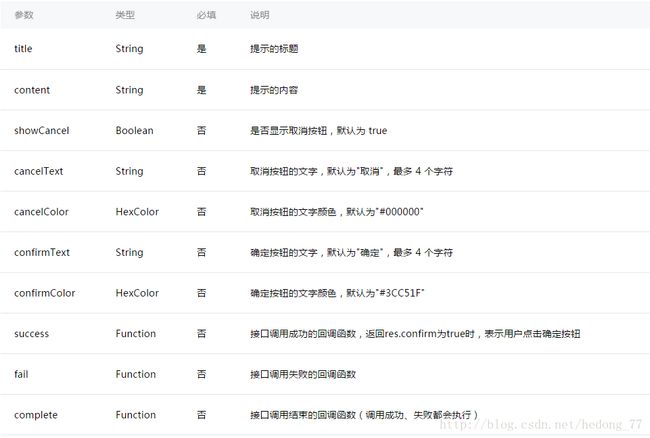
代码如下:
   wx.showModal({
            title: '提示',
            content: '模态弹窗',
            success: function (res) {
                if (res.confirm) {
                    console.log('用户点击确定')
                }else{
                   console.log('用户点击取消')
                }

            }
        })
最后一个是操作菜单:wx.showActionSheet(OBJECT)
这个函数我们在上一篇博文用过,这里说一下也无妨。先看一下参数介绍: 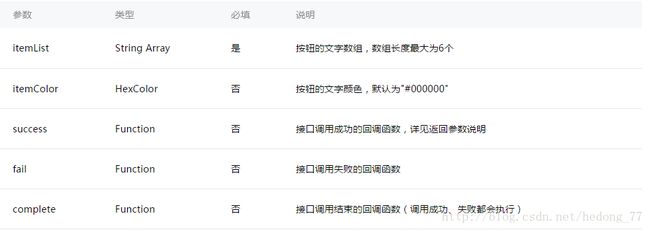
这里直接贴官方实例了:
wx.showActionSheet({
  itemList: ['A', 'B', 'C'],
  success: function(res) {
    console.log(res.tapIndex)
  },
  fail: function(res) {
    console.log(res.errMsg)
  }
})
效果图: 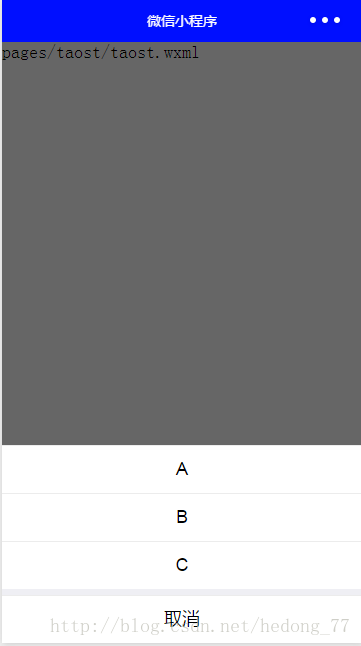
这里有个小问题,弹出showActionSheet之后,点击取消或者阴影处,会执行完fail之后,继续执行success函数,当然了,这里肯定有办法解决的,success其实有两个返回参数,除了tapIndex之外,还有一个就是cancle,cancle就是是否取消,返回一个boolean,在弹出这个框之后在success里面做个判断,if (!res.cancel) {做不取消的操作就行了}。当然了,你也可以自己来定义。下面看个自定义弹窗的:
wxml:
  <view class="commodity_screen" bindtap="hideModal" wx:if="{{showModalStatus}}">view>
  <view animation="{{animationData}}" class="commodity_attr_box" wx:if="{{showModalStatus}}" bindtap="navigate">
    <text class="title">{{title}}text>
  view>
css:
.commodity_screen {
  width: 100%;
  height: 100%;
  position: fixed;
  top: 0;
  left: 0;
  background: #000;
  opacity: 0.2;
  overflow: hidden;
  z-index: 1000;
  color: #fff;
}

.commodity_attr_box {
  width: 100%;
  overflow: hidden;
  position: fixed;
  bottom: 0;
  left: 0;
  z-index: 2000;
  height: 60px;
  background: #fff;

}

.title {
  height: 100%;
  width: 100%;
  position: fixed;
  text-align: center;
  margin-top: 20px;
  margin-bottom: 20px;

}
js:
 showView() {
    // 显示遮罩层
    var animation = wx.createAnimation({
      duration: 200,
      timingFunction: "linear",
      delay: 0
    })
    this.animation = animation
    animation.translateY(300).step()
    this.setData({
      animationData: animation.export(),
      showModalStatus: true
    })
    setTimeout(function () {
      animation.translateY(0).step()
      this.setData({
        animationData: animation.export()
      })
    }.bind(this), 200)
  },

  hideModal: function () {
    this.hideView();
  },

  hideView() {
    // 隐藏遮罩层
    var animation = wx.createAnimation({
      duration: 200,
      timingFunction: "linear",
      delay: 0
    })
    this.animation = animation
    animation.translateY(300).step()
    this.setData({
      animationData: animation.export(),
    })
    setTimeout(function () {
      animation.translateY(0).step()
      this.setData({
        animationData: animation.export(),
        showModalStatus: false
      })
    }.bind(this), 200)
  }
启用动画来做,效果杠杠的,自己动手来试试。
也可以使用action-sheet来布局,如下:
 <action-sheet hidden="{{actionSheetHidden}}" bindchange="actionSheetChange">
    <block wx:for-items="{{actionSheetItems}}">
        <action-sheet-item class="item" bindtap="bind{{item}}">{{item}}action-sheet-item>
    block>
    <action-sheet-cancel class="cancel">取消action-sheet-cancel>
action-sheet>
Page({
data: {
actionSheetHidden: true,
actionSheetItems: items
},
actionSheetTap: function(e) {
this.setData({
actionSheetHidden: !this.data.actionSheetHidden
})
},
actionSheetChange: function(e) {
this.setData({
actionSheetHidden: !this.data.actionSheetHidden
})
}
}
})就是这么简单,赶紧动起来试试吧。
