记使用tui-editor添加自定义toolbar
1.演示地址:https://nhn.github.io/tui.editor/api/latest/#
2.淘宝cnpm 包: http://npm.taobao.org/package/tui-editor#-docs
使用:①
require('codemirror/lib/codemirror.css'); // codemirror
require('tui-editor/dist/tui-editor.css'); // editor ui
require('tui-editor/dist/tui-editor-contents.css'); // editor content
require('highlight.js/styles/github.css'); // code block highlight

var Editor = require('tui-editor');
...
var editor = new Editor({
    el: document.querySelector('#editSection'),
    initialEditType: 'markdown',
    previewStyle: 'vertical',
    height: '300px'
});
②:
$('#editSection').tuiEditor({
    initialEditType: 'markdown',
    previewStyle: 'vertical',
    height: '300px'
});
使用方式GitHub上有详细介绍:请移步:https://github.com/nhn/tui.editor
三:添加toolbar(https://nhn.github.io/tui.editor/api/latest/tutorial-example12-customize-toolbar.html#)
很多同学不知道能添加自定义按钮在此特意提出
      var editor = new tui.Editor({
        el: document.querySelector('#editSection'),
        previewStyle: 'vertical',
        height: '400px',
        initialEditType: 'markdown',
        toolbarItems: [
          'heading',
          'bold',
          'italic',
          'strike',
          'divider',
          'hr',
          'quote',
          'divider',
          'ul',
          'ol',
          'task',
          'indent',
          'outdent',
          'divider',
          'table',
          'image',
          'link',
          'divider',
          'code',
          'codeblock',
          'divider',
          // ADD button method 1
          {
            type: 'button',
            options: {
              $el: $(''),
              name: 'test2',
              className: '',
              command: 'Bold', // you can use "Bold"
              tooltip: 'Bold'
            }
          }
        ]
      });

      // ADD button method 2
      var toolbar = editor.getUI().getToolbar();

      editor.eventManager.addEventType('Event1');
      editor.eventManager.listen('Event1', function() {
        alert('button click!');
        // do some other thing...
      });

      toolbar.addButton({
        name: 'customize',
        className: 'fab fa-accessible-icon',
        event: 'Event1',
        tooltip: 'Apple!!!',
        $el: $('')
      }, 1);
说明:以上两种方式为官方文档写法
addButton(option,index)option 为设置项,index为插入位置,若不加index默认为尾部
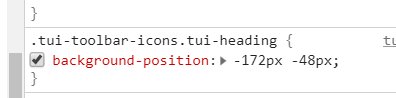
注:自定义的样式要改:因为tui的toolbar使用的是精灵图,要自己使用样式覆盖掉