Android 自定义安全软键盘 SafeKeyboard 开发详细说明 2.0
Android 自定义安全软键盘 SafeKeyboard 开发详细说明 2.0
源码地址:GitHub: https://github.com/SValence/SafeKeyboard
一、Android 安全软键盘开发流程
1. 建立软键盘样式
-
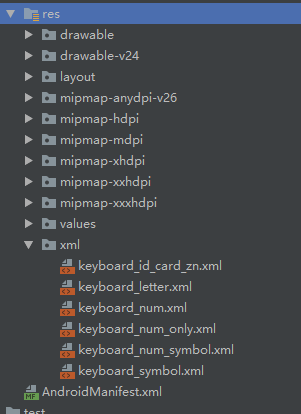
即在项目
res 文件夹下 新建xml 文件夹, 并在该文件夹中创建所需要的各种软键盘的样式(比如说:字母、数字、符号 等) -
如下图所示:
2. 创建 layout 布局文件
- 在布局文件中给软键盘创建container,以便显示软键盘
3. 自定义 KeyboardView
- 自定义一个KeyboardView 并继承自KeyboardView,在自定义的KeyboardView中绘制特殊按键,包括按键的点击背景,图片,文字 等
4. 自定义一个普通 java 类,一般取名为 **Keyboard.java
-
把软键盘加载到container中,即在布局文件里预留的存放软键盘 的container
-
在类的内部实现软键盘的输入控制,键盘转换控制,软键盘的显示与隐藏控制 等
-
在需要用到软键盘的界面中实例化该
Keyboard类,并传入必要的数据和信息
5. 效果图
- 如下图所示:
二、 Android 安全软键盘开发实例解析(仅作参考)
1. 创建项目后, 在 layout 布局文件中设计基本布局,参考如下
<RelativeLayout xmlns:android="http://schemas.android.com/apk/res/android"
    android:id="@+id/main_root"
    android:layout_width="match_parent"
    android:layout_height="match_parent">

    <LinearLayout
        android:layout_width="match_parent"
        android:layout_height="match_parent"
        android:orientation="vertical">

        <EditText
            android:id="@+id/normalEditText"
            android:layout_width="match_parent"
            android:layout_height="50sp"
            android:layout_marginStart="10sp"
            android:layout_marginEnd="10sp"
            android:hint="@string/keyboard_system"
            android:inputType="text" />

        <EditText
            android:id="@+id/safeEditText"
            android:layout_width="match_parent"
            android:layout_height="50sp"
            android:layout_marginStart="10sp"
            android:layout_marginEnd="10sp"
            android:hint="@string/keyboard_demo_new"
            android:inputType="textVisiblePassword" />

        <EditText
            android:id="@+id/safeEditText2"
            android:layout_width="match_parent"
            android:layout_height="50sp"
            android:layout_marginStart="10sp"
            android:layout_marginEnd="10sp"
            android:hint="@string/keyboard_demo_new2"
            android:inputType="number" />

        <EditText
            android:id="@+id/safeEditText3"
            android:layout_width="match_parent"
            android:layout_height="50sp"
            android:layout_marginStart="10sp"
            android:layout_marginEnd="10sp"
            android:hint="@string/keyboard_demo_new3" />

    LinearLayout>

    <LinearLayout
        android:id="@+id/keyboardViewPlace"
        android:layout_width="match_parent"
        android:layout_height="wrap_content"
        android:layout_alignParentBottom="true"
        android:orientation="vertical" />

RelativeLayout>
-
这里使用一个线性布局作为存放自定义软键盘的容器,说明一下:
-
一般使用到自定义软键盘的页面的布局不会很复杂,无非就是想要在输入关键数据比如密码时才使用到软键盘,而软键盘一般都是在手机等移动设备屏幕的最下方显示,以方便输入,所以这里使用了
RelativeLayout方便显示,当然也可以使用现在google推行的ConstraintLayout布局来做,这个根据个人喜好。 -
所以在原有的项目里加入一个存放软键盘的容器,也不会给原有的项目带来很大的麻烦或者影响,所以这种做法,我个人认为还是可取的.
2. 在项目 res 文件夹下创建 xml 文件夹,并创建出自己需要的软键盘布局,比如说:数字,字母,符号等
- 字母键盘布局示例:
<Keyboard xmlns:android="http://schemas.android.com/apk/res/android"
    android:horizontalGap="1%p"
    android:keyHeight="@dimen/key_height"
    android:keyWidth="10%p"
    android:verticalGap="@dimen/key_vertical_gap">
    <Row>
        <Key android:codes="113" android:keyEdgeFlags="left" android:keyLabel="q" android:keyWidth="8.9%p" />
        <Key android:codes="119" android:keyLabel="w" android:keyWidth="8.9%p" />
        <Key android:codes="101" android:keyLabel="e" android:keyWidth="8.9%p" />
        <Key android:codes="114" android:keyLabel="r" android:keyWidth="8.9%p" />
        <Key android:codes="116" android:keyLabel="t" android:keyWidth="8.9%p" />
        <Key android:codes="121" android:keyLabel="y" android:keyWidth="8.9%p" />
        <Key android:codes="117" android:keyLabel="u" android:keyWidth="8.9%p" />
        <Key android:codes="105" android:keyLabel="i" android:keyWidth="8.9%p" />
        <Key android:codes="111" android:keyLabel="o" android:keyWidth="8.9%p" />
        <Key android:codes="112" android:keyEdgeFlags="right" android:keyLabel="p" android:keyWidth="8.9%p" />
    Row>
    <Row>
        <Key android:codes="97" android:horizontalGap="5.5%p" android:keyEdgeFlags="left" android:keyLabel="a" android:keyWidth="9%p" />
        <Key android:codes="115" android:keyLabel="s" android:keyWidth="9%p" />
        <Key android:codes="100" android:keyLabel="d" android:keyWidth="9%p" />
        <Key android:codes="102" android:keyLabel="f" android:keyWidth="9%p" />
        <Key android:codes="103" android:keyLabel="g" android:keyWidth="9%p" />
        <Key android:codes="104" android:keyLabel="h" android:keyWidth="9%p" />
        <Key android:codes="106" android:keyLabel="j" android:keyWidth="9%p" />
        <Key android:codes="107" android:keyLabel="k" android:keyWidth="9%p" />
        <Key android:codes="108" android:keyEdgeFlags="right" android:keyLabel="l" android:keyWidth="9%p" />
    Row>
    <Row>
        <Key android:codes="-1" android:isModifier="true" android:isSticky="true" android:keyEdgeFlags="left" android:keyWidth="13%p" />
        <Key android:codes="122" android:horizontalGap="1.5%p" android:keyLabel="z" android:keyWidth="9%p" />
        <Key android:codes="120" android:keyLabel="x" android:keyWidth="9%p" />
        <Key android:codes="99" android:keyLabel="c" android:keyWidth="9%p" />
        <Key android:codes="118" android:keyLabel="v" android:keyWidth="9%p" />
        <Key android:codes="98" android:keyLabel="b" android:keyWidth="9%p" />
        <Key android:codes="110" android:keyLabel="n" android:keyWidth="9%p" />
        <Key android:codes="109" android:keyLabel="m" android:keyWidth="9%p" />
        <Key android:codes="-5" android:horizontalGap="1.5%p" android:isRepeatable="true" android:keyWidth="13%p" />
    Row>
    <Row android:rowEdgeFlags="bottom">
        <Key android:codes="-2" android:keyLabel="123" android:keyWidth="19%p" />
        <Key android:codes="32" android:isRepeatable="false" android:keyLabel="space" android:keyWidth="58%p" />
        <Key android:codes="100860" android:keyEdgeFlags="right" android:keyLabel="#+=" android:keyWidth="19%p" />
    Row>
Keyboard>
-
简单说明一下, 每个按键代表的字符的
keycode一般来说都是固定的,android系统会预先存储一些keycode并占有这些数据 -
我们在使用的时候直接拿来使用就可以,如果想自己来控制的话,就需要避过这些已经被系统占用的
code -
比如说在符号键盘的最后一个
code为100860的按键,我在测试时曾经用过10086作为code,但是发现它的作用是输出一个图形字符,而不是切换到字母键盘的作用,说明10086这个code已经被系统占用,那code 10086就不能继续使用, 这是开发者在使用的时候要注意的一个问题 -
我甚至觉得, 如果只填写
android:codes属性, 不填写android:keyLabel, 如果系统已经占用的话, 会有个默认的文本输出 (纯猜测, 以后验证) -
以下为
Demo中已有的多种键盘效果图:

3. 整个自定义软键盘布局文件(包括按键布局和点击输入完成隐藏输入法的布局) layout_keyboard_containor.xml
<LinearLayout xmlns:android="http://schemas.android.com/apk/res/android"
    xmlns:app="http://schemas.android.com/apk/res-auto"
    xmlns:tools="http://schemas.android.com/tools"
    android:layout_width="match_parent"
    android:layout_height="wrap_content"
    android:background="@color/keyboardBackColor"
    android:orientation="vertical">

    <RelativeLayout
        android:id="@+id/keyboardHeader"
        android:layout_width="match_parent"
        android:layout_height="@dimen/keyboard_tip_height"
        android:background="@color/keyboardBackColor">

        <LinearLayout
            android:layout_width="wrap_content"
            android:layout_height="match_parent"
            android:layout_centerInParent="true"
            android:orientation="horizontal"
            tools:ignore="RelativeOverlap,UseCompoundDrawables">

            <ImageView
                android:layout_width="25sp"
                android:layout_height="25sp"
                android:layout_gravity="center_vertical"
                android:contentDescription="@string/description"
                android:src="@drawable/shield" />

            <TextView
                android:id="@+id/keyboardTip"
                android:layout_width="wrap_content"
                android:layout_height="wrap_content"
                android:layout_gravity="center_vertical"
                android:text="@string/safe_keyboard"
                android:textColor="@color/lightGray"
                android:textSize="16sp" />
        LinearLayout>

        <FrameLayout
            android:id="@+id/keyboardDone"
            android:layout_width="60sp"
            android:layout_height="match_parent"
            android:layout_alignParentEnd="true"
            android:layout_centerVertical="true"
            android:background="@drawable/bg_keyboard_done">

            <ImageView
                android:layout_width="30sp"
                android:layout_height="30sp"
                android:layout_gravity="center"
                android:contentDescription="@null"
                android:scaleType="centerInside"
                android:src="@drawable/keyboard_done_"
                android:textColor="@color/white"
                android:textSize="16sp" />
        FrameLayout>

    RelativeLayout>

    <FrameLayout
        android:id="@+id/keyboardLayer"
        android:layout_width="match_parent"
        android:layout_height="wrap_content"
        android:layout_marginTop="2sp"
        android:layout_marginBottom="10sp">

        <com.safe.keyboard.SafeKeyboardView
            android:id="@+id/safeKeyboardLetter"
            android:layout_width="match_parent"
            android:layout_height="wrap_content"
            android:animateLayoutChanges="true"
            android:background="@color/keyboardBackColor"
            android:focusable="true"
            android:focusableInTouchMode="true"
            android:keyBackground="@drawable/keyboard_press_bg"
            android:keyPreviewHeight="60dp"
            android:keyPreviewLayout="@layout/keyboard_preview_layout"
            android:keyPreviewOffset="0dp"
            android:keyTextColor="@color/white"
            app:random_digit="false"
            app:remember_last_type="true" />

    FrameLayout>
LinearLayout>
3.1 com.safe.keyboard.SafeKeyboardView 中的属性值得关注的有:
-
background="@color/keyboardBackColor"
background设置了每个按键的点击背景变化, 这个是统一的设置的, 标签不支持单独设置背景, 当然有办法可以实现单独设置背景, 后面会继续介绍 -
keyPreviewLayout="@layout/keyboard_preview_layout"
设置了keyPreviewLayout属性后, 你点击按键时会显示出来当前点击a,以便提示用户是否点错,其内容也是一个布局文件,但是比较简单,一般来说就是一个设置了背景,字体大小和颜色的TextView(下面会贴出样例的布局文件代码) -
与
keyPreview相关的几个属性
需要注意的是keyPreviewOffset这个属性,它决定了这个提示布局的显示位置,值越大显示位置越靠下,有兴趣的可以试一试这个属性,下面是keyboard_preview_layout.xml字符提示预览布局文件<TextView xmlns:android="http://schemas.android.com/apk/res/android" android:layout_width="wrap_content" android:layout_height="match_parent" android:layout_gravity="center" android:background="@drawable/keyboard_preview_bg" android:gravity="center_horizontal" android:textColor="@color/keyboardNormal" android:textSize="35sp" android:textStyle="bold" />
三、 Android 安全软键盘功能的 Java 逻辑 代码实现
- 划重点了
1. SafeKeyboardView.java 实现 (源码请查看 SafeKeyboardView.java 文件)
继承于 KeyboardView ,在这个自定义View中绘制一些特殊的按键,比如说 删除、大小写转换、切换键盘类型等等的按键,从而实现这些特殊按键的点击效果的转变。
-
删除、键盘切换、大小写切换 等按键需要区别于普通按键, 就不能使用统一设置的
background="@color/keyboardBackColor", 那么就需要重新绘制新的背景,同时由于重新绘制背景会覆盖原先设置的keyLabel值, 所以同时需要重新绘制按键本, 即: 文件中的两个方法/** * @param id 背景资源 id * @param canvas Canvas * @param key 需要绘制的按键 */ drawKeyBackground(int id, Canvas canvas, Keyboard.Key key); /** * 该方法在绘制特殊按键图标时实现了: 保留图标原有的宽高比例, 保证图标不会被异常拉伸 * 约定: 最终图标的宽度和高度都需要在按键的宽度和高度的二分之一以内 * 如果: 图标的实际宽度和高度都在按键的宽度和高度的二分之一以内, 那就不需要变换, 否则就需要等比例缩小 * 开发者可根据实际情况及个人喜好修改 此 `二分之一` 的约定 * * @param canvas Canvas * @param key 需要绘制的按键 * @param drawable 按键的图标 * @param color 文字颜色 */ drawTextAndIcon(Canvas canvas, Keyboard.Key key, @Nullable Drawable drawable, int color)
2. SafeKeyboard.java 实现 (源码请查看 SafeKeyboard.java 文件)
SafeKeyboard 类是实现键盘输入等功能的核心,软键盘的输入、删除、显示、隐藏等等都需要在这里完成,其中最重要的有五个部分
-
SafeKeyboardView要设置OnKeyboardActionListener监听
-
- 隐藏系统默认输入法软键盘
-
- 支持多
EditText共用一个SafeKeyboard
- 支持多
-
SafeKeyboard的显示和隐藏动画
-
- 记住每个
EditText上此所显示的键盘类型
- 记住每个
2.1 设置 OnKeyboardActionListener 监听详细介绍
这个地方我主要重写了 onKey(...), onPress(...) 两个方法
-
在
onPress(...)中控制该类型的键盘开启按下按钮预览功能setPreviewEnabled(boolean) -
在
onKey(...)中控制键盘切换、键盘隐藏、英文大小写切换、字符输入等功能 -
注意
正常的输入字符的时候,不能单纯的使用:
editable.insert(start, Character.toString((char) primaryCode));
要使用:
editable.replace(start, end, Character.toString((char) primaryCode));
因为这是默认不选中EditText中文本情况,一旦选中文本就会造成最后的结果和期望的输入结果出现偏差,选中的文本没有被替换,只是纯粹的增加刚刚输入的字符,所以要获取EditText中光标的开始和结束位置,并把输入的字符替换掉选中的文本部分. ( 这就是在效果图中有选中文本输入的原因 )
2.2 隐藏系统默认输入法软键盘
当我们需要显示自定义软键盘时, EditText 获取焦点后会弹出系统默认输入法键盘,这时,我们就需要强制隐藏默认键盘。需调用 private void hideSystemKeyBoard(EditText edit) 方法,(感谢网络上各位开发者的分享)
2.3 支持多 EditText 共用一个 SafeKeyboard
为实现此功能, 需要满足以下两点:
-
- 在
SafeKeyboard中增加一个HashMap, 用于保存每个 需要使用SafeKeyboard的EditText
- 在
-
- 将显示
SafeKeyboard的布局文件根布局 id 传入并保存.
目的为: 设置全局焦点变化监听, 当焦点在页面中来回切换时决定对SafeKeyboard进行适当的操作
详见 变量onGlobalFocusChangeListener实现
- 将显示
2.4 SafeKeyboard 的显示和隐藏动画
如果我们对于输入法的显示和隐藏没有过多的要求,那么可以直接设置软键盘容器的 Visibility 为 GONE 或者 VISIBLE,但是对于我这种有点强迫症的程序猿来说,能够把自己的项目的效果做的比较合情合理并给用户良好的体验,一直是我个人追求的事情。所以在上面的例子中增加了显示和隐藏动画,显示为从屏幕最下方滑动到固定位置,隐藏为从固定位置滑动到屏幕最下方,于是就多了 Animation 的使用。
-
-
当目标
EditText被点击或者获得焦点的时候,如果SafeKeyboard
1 )SafeKeyboard没有显示, 并且不处于正在显示过程 或者:
2 )SafeKeyboard正在隐藏
那么强制隐藏系统默认键盘,显示SafeKeyboard
否则, 说明SafeKeyboard处于显示状态, 这里根据对应的EditText输入类型切换不同的键盘即可/** * 即调用此方法 * @param mEditText 目标输入框 */ private void keyboardPreShow(EditText mEditText)
-
-
-
当目标
EditText失去焦点的时候,如果SafeKeyboard
1 )SafeKeyboard已经显示,并不处于正在隐藏过程 或者:
2 )SafeKeyboard正在显示
那么强制隐藏系统默认键盘,显示SafeKeyboard
否则, 说明SafeKeyboard处于显示状态, 这里根据对应的EditText输入类型切换不同的键盘即可/** * 即调用此方法 */ private void keyboardPreHide()
-
2.5 记住每个 EditText 上此所显示的键盘类型
记住每个 EditText 上此所显示的键盘类型, 并在其重新获得焦点显示 SafeKeyboard 时, 显示上次键盘
此功能可在布局文件中
app:remember_last_type="true"
或者直接调用
public void enableRememberLastKeyboardType(boolean enable)
进行指定
以上逻辑在代码中均有体现,实例项目源代码链接也会在文章结尾处贴出感谢各位开发者的分享,参考项目:
1. https://www.cnblogs.com/liuyu0529/p/7793610.html , 因为本人不善于UI设计,所以键盘布局基本和这个项目区别不大,根据个人喜好作了一些必要的调整
2. https://github.com/StomHong/CustomizeKeyboard
因为一些项目需要,我在网上查了一些资料,参考已有项目,对开发 Android 自定义软键盘重新梳理和编程工作,并且增加和优化一些功能,有需要的开发者可以根据自己的项目需要进行参考或者修改。
源码地址:GitHub: https://github.com/SValence/SafeKeyboard