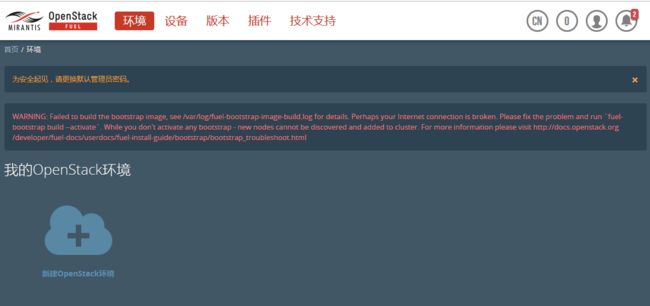
使用Fuel自动化部署Openstack
Openstack自动化部署工具, 主要用于生产环境.
这里用的是Openstack 9.0版本.
Fuel Documentation
下载Fuel for OpenStack镜像文件, 用于安装Feul Master.
安装Xshell, 用于远程连接.
1. 使用脚本安装
(1) 安装
mirantis公司提供了安装脚本并提供了安装指南, 参考How to Install OpenStack.
Download the Mirantis VirtualBox Scripts. 解压后得到文件夹vbox-scripts-9.0, 将之前下载的Fuel for OpenStack镜像文件放置到文件夹中的iso目录下.
打开Cygwin. Cygwin的使用指南可见文章Cygwin安装与使用.
在Cygwin环境下进入到vbox-scripts-9.0目录中, 执行launch.sh脚本.
zzr04@DESKTOP-84DQ2K4 /cygdrive/c/workshop/fuel_openstack/vbox-scripts-9.0/fuel-virtualbox-stable-mitaka
$ ./launch.sh
脚本将自动配置虚拟机环境, 生成虚拟机. 待脚本执行结束后, Openstack部署完成.
通过浏览器访问https://10.20.0.2:8443/#login, 就可以访问到Fuel的主界面了.
(2) 使用Xshell连接虚拟机
创建新连接:
主机: 10.20.0.2
端口号: 20
用户名: root
密码: r00tme

隧道->Forwarding Rule
源主机: localhost
侦听端口: 8443
目标主机: 10.20.0.2
目标端口: 8443
2. 手动配置
VirtualBox网络配置
管理->全局设定->网络->仅主机(Host-Only)网络
新建三张新的网卡:
Host-Only Ethernet Adapter #2
IPv4: 10.20.0.1
Mask: 255.255.255.0
DHCP: Unable

Host-Only Ethernet Adapter #3
IPv4: 172.16.0.1
Mask: 255.255.255.0
DHCP: Unable

Host-Only Ethernet Adapter #4
IPv4: 192.168.4.1
Mask: 255.255.255.0
DHCP: Unable
创建虚拟机fuel_master
(1) 创建配置:
名称: fuel_master
类型: Linux
版本: Red Hat (64-bit)
内存: 2GB
虚拟磁盘: 默认选项. 大小设为60GB(至少50GB).
网络:
网卡1:
Attached to: Host-Only Adapter.
Name: VirtualBox Host-Only Ethernet Adapter #2
Adapter Type: PCnet-PCI II(Am79C970A) 这个网卡才能支持PXE启动.
Promiscuous Mode(混杂模式): All.

网卡2:
Attached to: Host-Only Adapter.
Name: VirtualBox Host-Only Ethernet Adapter #3
其余默认.

网卡3:
Attached to: Host-Only Adapter.
Name: VirtualBox Host-Only Ethernet Adapter #4
其余默认.
光驱:将Fuel for OpenStack镜像文件装入.
开始安装.
安装结束后得到:
Fuel UI: http://10.20.0.2:8443/
Default admin: root
Default admin password: r00tme

Default Fuel UI: admin
Default Fuel UI password: admin
(2) 使用Xshell连接虚拟机
创建新连接:
主机: 10.20.0.2
端口号: 20
用户名: root
密码: r00tme

隧道->Forwarding Rule
源主机: localhost
侦听端口: 8443
目标主机: 10.20.0.2
目标端口: 8443
创建虚拟机fuel_controller
创建配置:
名称: fuel_controller
类型: Linux
版本: Red Hat (64-bit)
内存: 1GB
虚拟磁盘: 默认选项. 大小设为50GB.
网络:
网卡1:
Attached to: Host-Only Adapter.
Name: VirtualBox Host-Only Ethernet Adapter #2
Adapter Type: PCnet-PCI II(Am79C970A) 这个网卡才能支持PXE启动.
Promiscuous Mode(混杂模式): All.

网卡2:
Attached to: Host-Only Adapter.
Name: VirtualBox Host-Only Ethernet Adapter #3
Promiscuous Mode(混杂模式): All.
其余默认.

网卡3:
Attached to: Host-Only Adapter.
Name: VirtualBox Host-Only Ethernet Adapter #4
Promiscuous Mode(混杂模式): All.
其余默认.
设置->系统->网络启动->启动顺序: 将网络启动调为第一个.
创建虚拟机fuel_computer
直接clone虚拟机fuel_controller.
选择重新初始化所有网卡的MAC地址.
选择完全复制.
参考文献
- 怎么将 Atom 配置成 Markdown 编辑器?
