Android实战项目:第一行代码CoolWeather
Android实战项目:<<第一行代码>>
项目地址WeatherDemo:https://github.com/Tian-Zhen-Yin/WeatherDemo
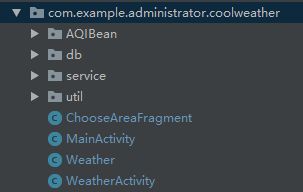
项目分包:
dependencies {
    implementation fileTree(dir: 'libs', include: ['*.jar'])
    implementation 'com.android.support:appcompat-v7:28.0.0'
    implementation 'com.android.support.constraint:constraint-layout:1.1.3'
    testImplementation 'junit:junit:4.12'
    androidTestImplementation 'com.android.support.test:runner:1.0.2'
    androidTestImplementation 'com.android.support.test.espresso:espresso-core:3.0.2'
    implementation 'org.litepal.android:core:1.4.1'
    implementation 'com.squareup.okhttp3:okhttp:3.11.0'
    implementation 'com.google.code.gson:gson:2.7'
    implementation 'com.github.bumptech.glide:glide:3.7.0'
}
基本结构
- Bean类为数据类,set,get操作
- db为数据库操作,这里主要是查询操作,查询城市id
- service,服务,主要是涉及到后台的实时更新数据
- util为工具类,这里是网络请求工具,使用的是OkHttp,还有json数据得解析
- ChooseAreaFragment 就是选择城市相关的操作
- MainActivity 省略
- Weather 天气的实体类
- WeatherActivity 天气相关的活动类
注意的是: 书中天气的接口已经过期,最新的版本已经到s6,你在注册开发者的时候要仔细看它的开发文档,对于之前版本的接口,现在已经不再支持.所以你现在照着书敲代码的话,网络请求返回的数据是没办法解析的
最后成果展示:
直接上图吧:

在这里插入图片描述在这里插入图片描述
在书上的基础上我添加了一个可以输入城市查询的操作,其实很简单,只需要填两个控件即可.
你一定会遇到的坑:
1.强调过书上的天气接口有问题了,但是我跟换了最新的接口后,发现还是没有用,因为我其他的代码都是照着书上敲的.相信刚入门的你也是这样吧.(大神可以不要在我这浪费时间了,当然,不嫌麻烦的话,能提点一二最好不过了) .
后面打码部分为你自己申请的key.我就是将和风天气开发文档上的代码copy下来的.后来看了文档上接口返回的数据,发现Bean类也要改,因为数据类应该和json数据对应,我也懵懂的改了,
![]()
如下:去掉了原来的suggestion,因为LifeStyle取代了它.

但是还是没什么用:debug的时候还是发现接口返回的数据没有被解析.
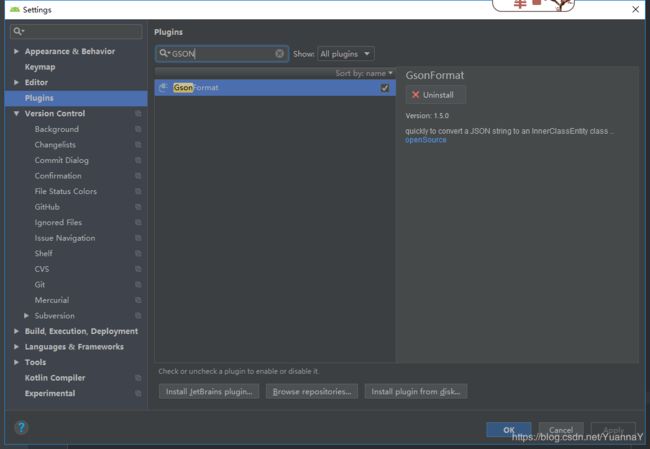
这个问题困扰了我很久,我还是一直用着书上的json解析,就是gson,(我至今未能解决这个问题),但是我觉得书上的不适合我,虽然我觉的他的这个思想是很牛的.但是适合自己的才是最好的.因而我了解了as有一个插件,GsonFormat,在setting中的Plugins中,搜索,然后安装,挺方便的.
GsonFormat是一个快速格式化json数据,自动生成实体类参数的插件。

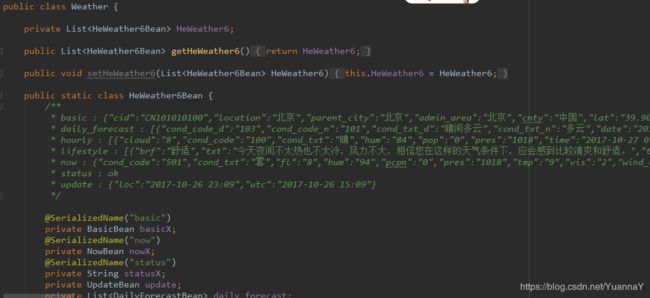
接下来将json数据导入GsonFormat,会自动生成实体类,就是我项目中的Weather类,传入的json数据可以精简点,不是所有的都要. 所有Bean类除了AOI,其他的都是用不到的.为什么AOI例外,因为这个AOI类也是插件生成的.
代码可以去我的git上下,代码还是有点多的.
这样一来,WeatherActivity中对天气数据的调用的得下番功夫了.
贴个代码:
private void showWeatherInfo(Weather weather) {

        String cityName=weather.getHeWeather6().get(0).getBasicX().getLocation();
        String updateTime=weather.getHeWeather6().get(0).getUpdate().getLoc();
        String degree=weather.getHeWeather6().get(0).getNowX().getTmp()+"℃";
        String weatherInfo=weather.getHeWeather6().get(0).getNowX().getCond_txt();
        titleCity.setText(cityName);
        titleUpdateTime.setText(updateTime);
        degreeText.setText(degree);
        weatherInfoText.setText(weatherInfo);
        forecastLayout.removeAllViews();

        for(int i=0;i<3;i++ )
        {View view = LayoutInflater.from(this).inflate(R.layout.forecast_item,forecastLayout,false);
        TextView dataText=(TextView) view.findViewById(R.id.data_text);
        TextView infoText=(TextView) view.findViewById(R.id.info_text);
        TextView maxText=(TextView)view.findViewById(R.id.max_text);
        TextView minText=(TextView)view.findViewById(R.id.min_text);

        dataText.setText(weather.getHeWeather6().get(0).getDaily_forecast().get(i).getDate());
        infoText.setText(weather.getHeWeather6().get(0).getDaily_forecast().get(i).getCond_txt_n());
        maxText.setText(weather.getHeWeather6().get(0).getDaily_forecast().get(i).getTmp_max());
        minText.setText(weather.getHeWeather6().get(0).getDaily_forecast().get(i).getTmp_min());
        forecastLayout.addView(view);
        }


            comfortText.setText("舒适度:"+weather.getHeWeather6().get(0).getLifestyle().get(0).getTxt());
            carWashText.setText("洗车指数:"+weather.getHeWeather6().get(0).getLifestyle().get(6).getTxt());
            sportText.setText("运动指数:"+weather.getHeWeather6().get(0).getLifestyle().get(3).getTxt());

        weatherLayout.setVisibility(View.VISIBLE);
        Intent intent=new Intent(this, AutoUpdateService.class);
        startService(intent);
    }
其实这段代码很好理解,就是UI显示数据,数据通过get得到,至于是get(0)还是get(1),得看你解析的json数据,因为可以理解为这是一个嵌套的集合,具体的大家可以自己去尝试.
2. 第二个坑是AQI,我通过以上的json解析后,可以显示部分天气数据了,未显示的部分是AQI,郁闷.又回去看Weather中的代码,发现没什么问题,而且这是插件生成的.因而我又去和风天气的开发文档,发现aqi在weather中没有单独写数据,但是文档上显示aqi在air类中.说不清,贴个代码
final String aqiUrl="https://free-api.heweather.com/s6/air/now?location="+weatherId+"&key=你的key";

