01 idea下快速搭建项目(SSH框架)
1创建项目:
这个就不用讲了,本人创建的是名为bigdata工程
2:配置tomcat服务器:
3:添加名为eshop名称的模块并添加Web application的支持:
4:运行时配置:
添加tomcat服务:
另外在deployment添加:
5:创建index.html运行。即刻
6:给eshop模块中添加maven支持:
修改工件名称:
点击右侧的刷新
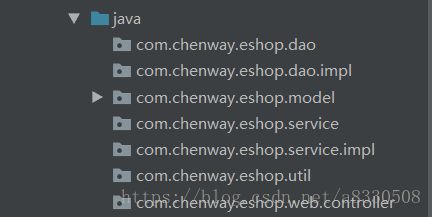
7:创建相关包:
8:添加测试依赖,运行测试。
9:在win10mysql中创建eshop数据库和users表:
a)创建数据库eshop
登录mysql
$mysql>create database eshop ;
b)创建users表
$mysql>create table eshop.users(id int primary key auto_increment,name varchar(20),password varchar(20),regdate datetime) ;
c)显式表结构
$mysql>desc users;
10:采用c3p0数据源,添加依赖。
11:创建User类:
/**
* User类
*/
public class User {
private Integer id ;
private String name ;
private String password ;
private Date regDate ;
//getXxx/setXxx
}
12:引入新的maven依赖,hibernate.
13:在User类同包下创建User.hbm.xml文件:
xml version='1.0' encoding='UTF-8'?>
hibernate-mapping PUBLIC
        "-//Hibernate/Hibernate Mapping DTD 3.0//EN"
        "http://hibernate.sourceforge.net/hibernate-mapping-3.0.dtd">

    name="com.chenway.eshop.model.User" table="users">
        name="id" column="id" type="integer">
            class="identity">

        name="name" column="name" type="string">
        name="password" column="password" type="string">
        name="regDate" column="regdate" type="date">
14:引入springframework、mysql依赖:
xml version="1.0" encoding="UTF-8"?>
xmlns="http://maven.apache.org/POM/4.0.0"
xmlns:xsi="http://www.w3.org/2001/XMLSchema-instance"
xsi:schemaLocation="http://maven.apache.org/POM/4.0.0 http://maven.apache.org/xsd/maven-4.0.0.xsd">
15:创建spring配置文件beans.xml 注:采用配置文件外部化,方便维护:
jdbc.properties配置文件:
jdbc.driverclass=com.mysql.jdbc.Driver
jdbc.url=jdbc:mysql://localhost:3306/eshop
jdbc.username=root
jdbc.password=123456

c3p0.pool.size.max=10
c3p0.pool.size.min=2
c3p0.pool.size.ini=3
c3p0.pool.size.increment=2
beans.xml:
xml version="1.0" encoding="UTF-8"?>
xmlns="http://www.springframework.org/schema/beans"
       xmlns:xsi="http://www.w3.org/2001/XMLSchema-instance"
       xsi:schemaLocation="http://www.springframework.org/schema/beans http://www.springframework.org/schema/beans/spring-beans.xsd">

    class="org.springframework.beans.factory.config.PropertyPlaceholderConfigurer">
       name="location" value="classpath:jdbc.properties">


    id="dataSource" class="com.mchange.v2.c3p0.ComboPooledDataSource">
        name="driverClass" value="${jdbc.driverclass}">
        name="jdbcUrl" value="${jdbc.url}">
        name="user" value="${jdbc.username}">
        name="password" value="${jdbc.password}">
        name="maxPoolSize" value="${c3p0.pool.size.max}">
        name="minPoolSize" value="${c3p0.pool.size.min}">
        name="initialPoolSize" value="${c3p0.pool.size.ini}">
        name="acquireIncrement" value="${c3p0.pool.size.increment}">
16:创建测试数据源类:
public class TestDataSource {
    @Test
    public void getConn() throws Exception {
        ApplicationContext applicationContext = new ClassPathXmlApplicationContext("beans.xml");
        DataSource dataSource = (DataSource) applicationContext.getBean("dataSource");
        Connection connection = dataSource.getConnection();
        System.out.println(connection);
    }
}
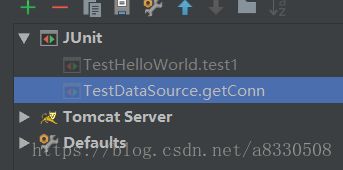
运行输出:
到现在为止,javaee的项目已搭建


