九、Spring Cloud 之旅 -- Config 集群配置中心
这节演示一个简单好用的家伙。
什么是Spring Cloud Config?
在之前的博客中,我都是通过项目根目录的application.properties来对Spring Cloud微服务进行配置的,这样确实比较方便,但是不利于维护,尤其是到了生产环境,发布一次包是需要走流程的,我们总比不能为了改一个配置发布一次吧?所以,贴心的Spring Cloud为我们解决了这个不是问题又必须要解决的问题。
Spring Cloud Config为分布式系统提供了配置服务器和配置客户端,通过他们的配置可以很好的管理集群中的配置文件。在实际应用中,我们会将配置文件存到一个外部系统:Git或者SVN,当调用刷新接口时,Spring Cloud会从这个里面去读取最新的配置信息,然后刷新Bean。
配置服务器(Config-Server)主要有以下功能:
1)提供访问配置的服务接口
2)对属性进行加密和解密
3)可以简单的嵌入Spring Boot的应用中
配置客户端(Config-Client)主要有以下功能:
1)绑定配置服务器,使用远程的属性来初始化Spring容器
2)对属性进行加密和解密
3)属性改变是,可以对他们进行重新加载
4)提供了与配置相关的几个管理端点
5)在初始化引导程序的上下文时,进行绑定配置服务器和属性解密等工作,当然,也可以实现其他工作
代码演示:
我们先建一个Spring Cloud Config Server (我用之前演示用的eureka-server进行改造)
确保以下依赖存在于POM.xml或者build.gradle:
<dependencyManagement>
<dependencies>
<dependency>
<groupId>org.springframework.cloudgroupId>
<artifactId>spring-cloud-dependenciesartifactId>
<version>Dalston.SR1version>
<type>pomtype>
<scope>importscope>
dependency>
dependencies>
dependencyManagement>
<dependencies>
<dependency>
<groupId>org.springframework.bootgroupId>
<artifactId>spring-boot-starter-webartifactId>
<version>1.5.4.RELEASEversion>
dependency>
<dependency>
<groupId>org.springframework.bootgroupId>
<artifactId>spring-boot-starter-actuatorartifactId>
<version>1.5.4.RELEASEversion>
dependency>
<dependency>
<groupId>org.springframework.cloudgroupId>
<artifactId>spring-cloud-config-serverartifactId>
dependency>
dependencies>
在application.properties或者yml文件中添加以下配置:
NOTE:也可以用SSH key的方式配置git登录认证,可以网上搜搜ssh配置方式。如果不需要登录认证的,git.uri不管是https协议还是ssh协议都阔以。上面配的这是我的测试仓库,换成https就是:https://github.com/aharddreamer/config.git
如果必须用用户名密码登录的,git uri请用HTTPS格式的
如果必须用SSH KEY登录的,git uri请用ssh格式的
如果不需要认证(公开的),无所谓哪种
在启动类加上Config Server的注解:
OK,可以启动项目了。
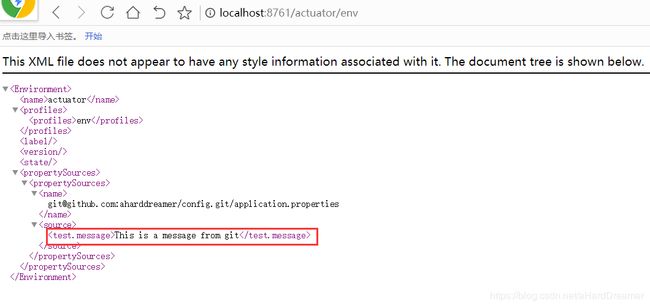
启动好了之后,在浏览器访问:http://localhost:8761/actuator/env
返回了xml格式的配置信息(当然应该也可以设置返回json格式的):
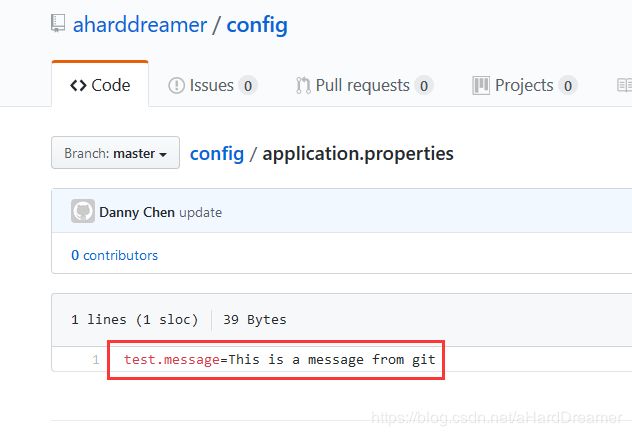
这里面的test.message是我在Git上配的:
Spring Cloud Config Client中的改动:
POM加入这些依赖:
<dependency>

   <groupId>org.springframework.bootgroupId>

   <artifactId>spring-boot-starter-webartifactId>

   <version>1.5.4.RELEASEversion>

dependency>


<dependency>

   <groupId>org.springframework.bootgroupId>

   <artifactId>spring-boot-starter-actuatorartifactId>

   <version>1.5.4.RELEASEversion>

dependency>


<dependency>

   <groupId>org.springframework.cloudgroupId>

   <artifactId>spring-cloud-starter-configartifactId>

dependency>
application.properties不需要了,因为从远程读取,本地的换成bootstrap.properties或者yml
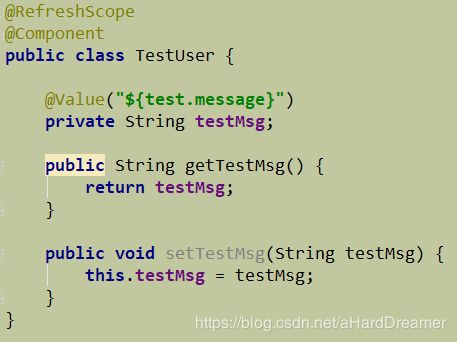
定义一个Bean,上面加上@RefreshScope可以在运行时动态刷新:
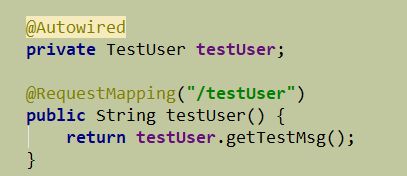
添加接口返回这个Bean的值:
OK,启动测试下吧。
然后还需要在配置文件中启用actuator的管理端点,然后通过访问http://{serviceName}/actuator/env查看当前的各种配置信息,用http://{serviceName}/actuator/refresh 刷新Bean。
配置也可以是加密的,如果需要加密的话需要配置秘钥。
对称加密:
很简单,就在配置文件中加入encrypt.key=xxxxx (对称秘钥)
非对称加密:
需要先生成RSA的公钥和私钥,然后配置一下key文件的路径:
下面这四个配置一般只需要配置第一个,后面如果没用到应该不需要。
encrypt.key-store.location=classpath:/myTest.keystore

encrypt.key-store.password=xxx

encrypt.key-store.alias=xxx

encrypt.key-store.secret=xxx
配置好秘钥之后,启动服务,可以通过http://{serviceName}/encrypt 来加密属性,将这个接口返回的密文填在配置文件中。配置文件的值应该是这样的:
jdbc.password=”${cipher}密文xxxxxxxx”
可以通过http://{serviceName}/decrypt 来测试解密,测得解密没错误说明秘钥是配置成功的。程序会自动根据cipher前缀去解密。


