CAS单点登录(十)——通过Restful协议请求认证和退出
前面我们讲解了一些列的CAS文章,对CAS有了很多了解。今天我们讲解一个现在服务常用的REST协议来完成CAS的登录、认证,不需要我们手动登录跳转到CAS的登录页面就可以完成CAS的一些列操作。
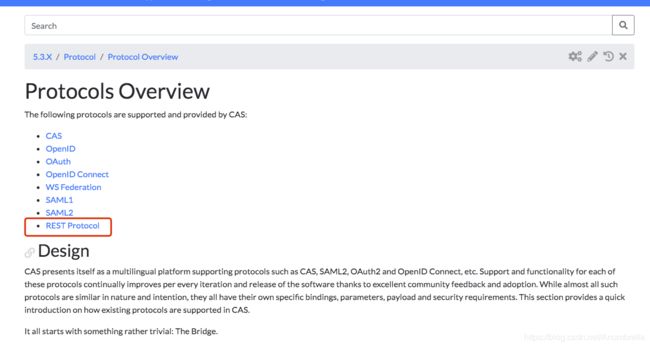
我们知道CAS认证支持包括多种协议去认证,包括CAS、OAuth、SAML1、SAML2、REST Protocol等协议,这里我们采用REST协议去获取TGT,然后获取到TGT后获取到ST,最后拿到ST后再去访问服务。
一、认证服务
首先我们加入Rest服务依赖:
            org.apereo.cas
            cas-server-support-rest
            ${cas.version}
开启Rest认证方式,我们在前面的文章介也绍过CAS单点登录(三)——多种认证方式。
在application.properties中,我们配置restful的链接。
##
# Rest配置
#
cas.authn.rest.uri=http://localhost:8088/login
cas.authn.rest.name=
这里需要注意,这个是自定义Rest认证配置的相关参数,与这里是通过公开方法RESTful来获取票证授予票证然后使用它来获取服务票证来实现的是不一样的。
所以这里我们可以不用配置Rest认证配置的参数,这里提出来为了区分一下区别。
注意:这里通过REST协议去获取TGT,暂时支持用户名和密码,我们在前面demo应用中加入了验证码的,因此继续使用该demo时,需要在CustomAuthenticationConfiguration配置中启用CustomUsernamePasswordAuthentication来实现认证。如下:
/**
 * @author anumbrella
 */
@Configuration("customAuthenticationConfiguration")
@EnableConfigurationProperties(CasConfigurationProperties.class)
public class CustomAuthenticationConfiguration implements AuthenticationEventExecutionPlanConfigurer {

    @Autowired
    private CasConfigurationProperties casProperties;

    @Autowired
    @Qualifier("servicesManager")
    private ServicesManager servicesManager;

    @Bean
    public AuthenticationHandler myAuthenticationHandler() {
        // 参数: name, servicesManager, principalFactory, order
        // 定义为优先使用它进行认证
        return new CustomUsernamePasswordAuthentication(CustomUsernamePasswordAuthentication.class.getName(),
                servicesManager, new DefaultPrincipalFactory(), 1);

//        return new CustomerHandlerAuthentication(CustomerHandlerAuthentication.class.getName(),
//                servicesManager, new DefaultPrincipalFactory(), 1);
    }

    @Override
    public void configureAuthenticationExecutionPlan(final AuthenticationEventExecutionPlan plan) {
        plan.registerAuthenticationHandler(myAuthenticationHandler());
    }
}
其他操作呢?没了,就是如此简单,启动服务,接下来就是Restful操作。
1、获取TGT票据
官方文档给的操作如下:
POST /cas/v1/tickets HTTP/1.0
'Content-type': 'Application/x-www-form-urlencoded'
username=battags&password=password&additionalParam1=paramvalue
除了用户名和密码外,当然还可以传递其他参数,这里我们原有验证码的,也可以通过该方式传递进去。
这里我们使用POSTMAN来模拟一下:
这里的service参数就是其他参数,不是必填的。是一个可选的参数,因此不用必须传过去,如果像我们之前像服务认证有验证码一样,可以自己实现通过这里传递过去。
2、用TGT申请ST票据
我们在上面获取到TGT后,然后通过https://sso.anumbrella.net:8443/cas/v1/tickets/TGT-2-CbkNRl2u4WS3-WVbtGhJCYBoxbVwzC2SPEj9DEAN5Gbd2f4YWaBkJrFTdBcivytGGcoanumbrelladeiMac,就是上面获取的路径去获取ST票据。
POST /cas/v1/tickets/{TGT id} HTTP/1.0

service={form encoded parameter for the service url}
这里有一个参数,service就是客户端地址,为POST请求。
我们拿到ST = ST-5-0bAcjZ92h6QjLYx7WJ8MFtenXakanumbrelladeiMac后,再通过它去访问具体服务。
3、通过ST票据去访问服务
CAS默认的ST过期策略是使用一次或者超过10秒,这个对咱们做测试来说有点短所以在application.properties中更改如下。
##
# Ticket过期设置
#
cas.ticket.st.numberOfUses=1
cas.ticket.st.timeToKillInSeconds=60
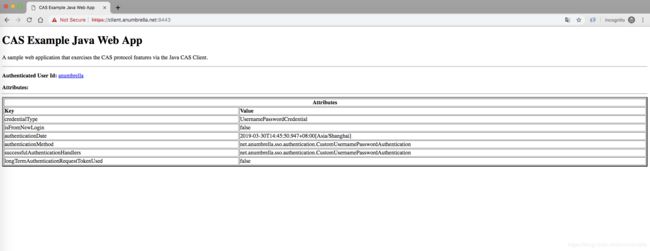
使用浏览器访问https://client.anumbrella.net:9443/?ticket=ST-5-0bAcjZ92h6QjLYx7WJ8MFtenXakanumbrelladeiMac路径,可以发现不用登录直接进入应用。
二、票据验证以及销毁
1、验证
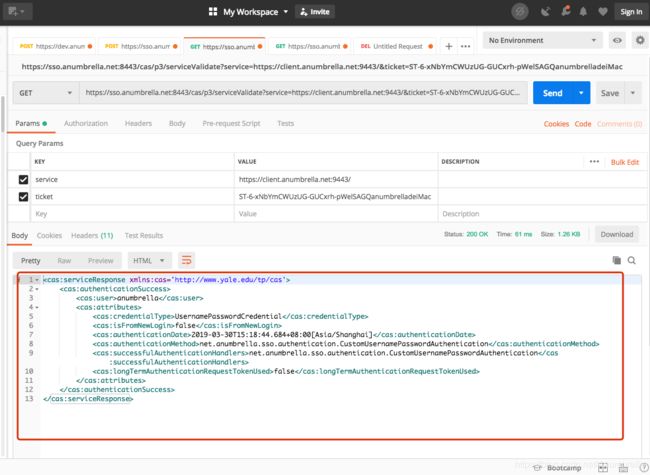
官方提供restful接口来验证票据,这里是通过cas协议来验证,路径为/p3/serviceValidate,具体详情,如下。
GET /cas/p3/serviceValidate?service={service url}&ticket={service ticket}
因为票据是一次性使用的,所以我们再申请一个ticket,并进行验证。
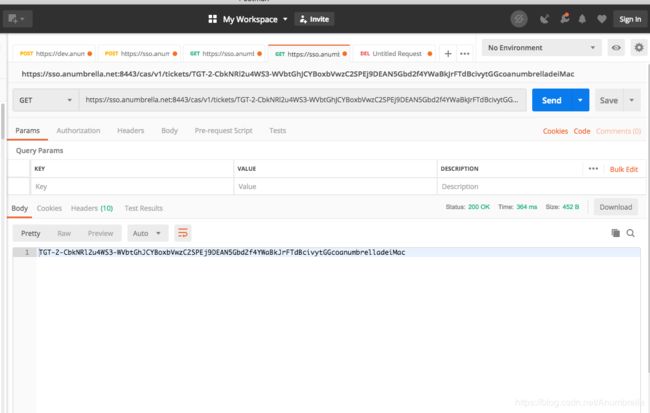
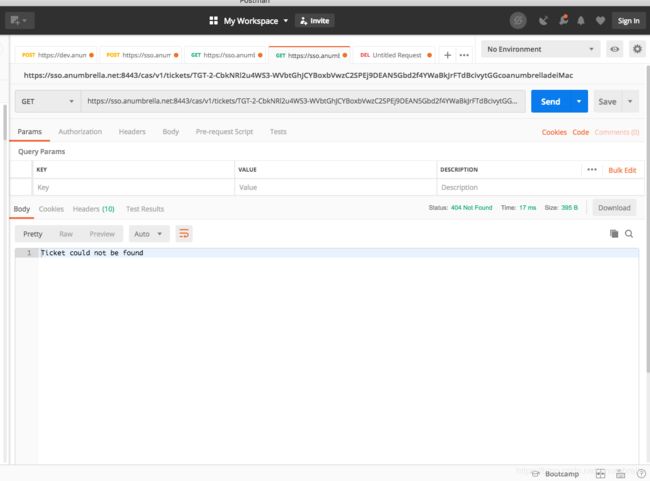
除了票据的验证,还有TGT的有效性验证。
GET /cas/v1/tickets/TGT-fdsjfsdfjkalfewrihfdhfaie HTTP/1.0
比如TGT为:TGT-2-CbkNRl2u4WS3-WVbtGhJCYBoxbVwzC2SPEj9DEAN5Gbd2f4YWaBkJrFTdBcivytGGcoanumbrelladeiMac;
访问路径https://sso.anumbrella.net:8443/cas/v1/tickets/TGT-2-CbkNRl2u4WS3-WVbtGhJCYBoxbVwzC2SPEj9DEAN5Gbd2f4YWaBkJrFTdBcivytGGcoanumbrelladeiMac来进行验证
2、退出
在CAS中还提供了销毁TGT的请求,发起一个DELETE请求即可。
DELETE /cas/v1/tickets/TGT-fdsjfsdfjkalfewrihfdhfaie HTTP/1.0
比如,刚才的票据TGT-2-CbkNRl2u4WS3-WVbtGhJCYBoxbVwzC2SPEj9DEAN5Gbd2f4YWaBkJrFTdBcivytGGcoanumbrelladeiMac,我们想退出使它无效,发起一个DELETE请求即可。
然后我们再去验证,可以发现TGT无效,不在了,刷新刚才登录的应用,也会自动退出。
代码实例:Chapter9
参考
- 手把手教Apereo CAS5.2.3 Server端开启restful验证
- https://apereo.github.io/cas/5.3.x/installation/Configuration-Properties.html#service-tickets-behavior
- https://apereo.github.io/cas/5.3.x/protocol/Protocol-Overview.html
