springMVC原理及项目代码

一、首先创建个web项目
1.建立web项目
2.向WebRoot---->WebINF---->lib文件夹中导入(springMVC)
jar包
3.
在项目名上右键——myeclipse——Generate...添加web.xml配置文件(WebRoot---->WebINF下)
4.修改web.xml配置文件
xml version="1.0" encoding="UTF-8"?>
<web-app xmlns:xsi="http://www.w3.org/2001/XMLSchema-instance" xmlns="http://xmlns.jcp.org/xml/ns/javaee" xsi:schemaLocation="http://xmlns.jcp.org/xml/ns/javaee http://xmlns.jcp.org/xml/ns/javaee/web-app_3_1.xsd" version="3.1">
<servlet>
<servlet-name>springMVCservlet-name>
<servlet-class>org.springframework.web.servlet.DispatcherServletservlet-class>
<init-param>
<param-name>ContextConfigLocationparam-name>
<param-value>classpath:applicationContext.xmlparam-value>
init-param>
<load-on-startup>1load-on-startup>
servlet>
<servlet-mapping>
<servlet-name>springMVCservlet-name>
<url-pattern>*.dourl-pattern>
servlet-mapping>
<welcome-file-list>
<welcome-file>/jsp/login.jspwelcome-file>
welcome-file-list>
web-app>
5.通过DispatcherServlet,找到applicationContext.xml即spring的配置文件,
即进入Spring。控制权交给Spring框架。
6.进入applicationContext.xml修改urlMapping,通过urlMapping实现分发请求。
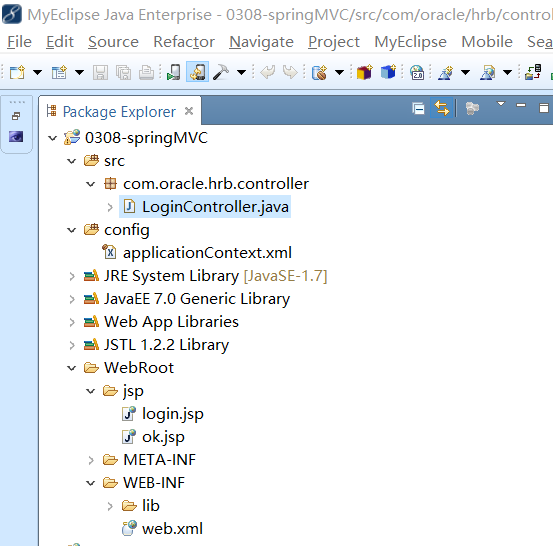
项目结构图:
applicationContext.xml
xml version="1.0" encoding="UTF-8"?>
<beans xmlns="http://www.springframework.org/schema/beans"
xmlns:context="http://www.springframework.org/schema/context"
xmlns:xsi="http://www.w3.org/2001/XMLSchema-instance" xmlns:aop="http://www.springframework.org/schema/aop"
xmlns:tx="http://www.springframework.org/schema/tx" xmlns:p="http://www.springframework.org/schema/p"
xmlns:util="http://www.springframework.org/schema/util" xmlns:jdbc="http://www.springframework.org/schema/jdbc"
xmlns:cache="http://www.springframework.org/schema/cache"
xsi:schemaLocation="
http://www.springframework.org/schema/context
http://www.springframework.org/schema/context/spring-context.xsd
http://www.springframework.org/schema/beans
http://www.springframework.org/schema/beans/spring-beans.xsd
http://www.springframework.org/schema/tx
http://www.springframework.org/schema/tx/spring-tx.xsd
http://www.springframework.org/schema/jdbc
http://www.springframework.org/schema/jdbc/spring-jdbc-3.1.xsd
http://www.springframework.org/schema/cache
http://www.springframework.org/schema/cache/spring-cache-3.1.xsd
http://www.springframework.org/schema/aop
http://www.springframework.org/schema/aop/spring-aop.xsd
http://www.springframework.org/schema/util
http://www.springframework.org/schema/util/spring-util.xsd">
<bean id="urlMapping" class="org.springframework.web.servlet.handler.SimpleUrlHandlerMapping">
<property name="mappings">
<props>
<prop key="login.do">loginprop>
props>
property>
bean>
<bean id="login" class="com.oracle.hrb.controller.LoginController">bean>
<bean id="viewResolver" class="org.springframework.web.servlet.view.InternalResourceViewResolver">
<property name="viewClass" value="org.springframework.web.servlet.view.JstlView">property>
<property name="prefix" value="/jsp/">property>
<property name="suffix" value=".jsp">property>
bean>
beans>
注:此时中的 id (urlMapping )可以修改,springIOC中有个注解的注入,注入到
DispatcherServlet类中,首先匹配类型,
因为此时只有一个bean,所以id修改可以。
7.创建com.oracle.hrb.Controller包、LoginController类
8.controller调用ModelAndView类中的handleRequest方法,返回一个ModelAndView类对象(带字符串参数),字符串即要跳转的页面的名字,某jsp。
package com.oracle.hrb.controller;
import javax.servlet.http.HttpServletRequest;
import javax.servlet.http.HttpServletResponse;
import org.springframework.web.servlet.ModelAndView;
import org.springframework.web.servlet.mvc.Controller;
public class LoginController implements Controller{//实现Controller接口
//继承其ModelAndView handleRequest方法,参数改成request,response
public ModelAndView handleRequest(HttpServletRequest request,
HttpServletResponse response) throws Exception {
System.out.println("访问了LoginController");
//获取数据
request.setCharacterEncoding("utf-8");//设置编码格式
String userName = request.getParameter("username");
//创建一个userName变量来存通过request.getParameter()方法来获取浏览器传给login.jsp的"username"
String passWord = request.getParameter("password");
//创建一个userName变量来存通过request.getParameter()方法来获取浏览器传给login.jsp的"username"
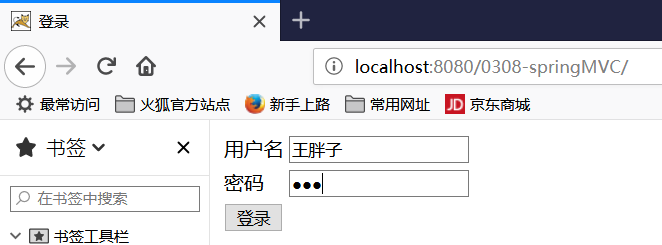
if("王胖子".equals(userName)&&"tom".equals(passWord)){//判断用户输入的信息
return new ModelAndView("ok");//登录成功跳转到ok.jsp
}else{
return new ModelAndView("login");//登录失败跳转到login.jsp
}
}
}
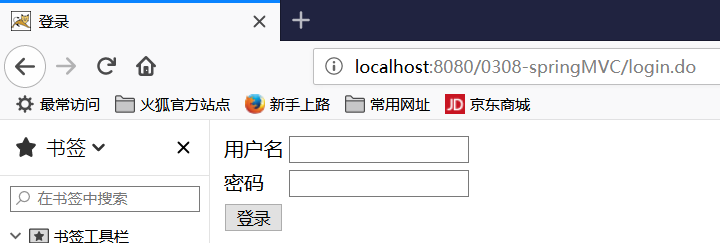
9.在WebRoot文件夹下的jsp文件夹中创建login.jsp和ok.jsp
login.jsp
<% page language="java" import="java.util.*" pageEncoding="utf-8"%>
DOCTYPE HTML>
<html>
<head>
<title>登录title>
<meta charset="utf-8">
head>
<body>
<form action="login.do" method="post">
<table>
<tr><td>用户名td><td><input type="text" name="username">td>tr>
<tr><td>密码td><td><input type="password" name="password">td>tr>
<tr><td><input type="submit" value="登录">td>tr>
table>
form>
body>
html>
ok.jsp
<% page language="java" import="java.util.*" pageEncoding="utf-8"%>
DOCTYPE HTML>
<html>
<head>
<title>登录成功title>
<meta charset = "utf-8">
head>
<body>
<h1>登录成功!h1>
body>
html>
10.修改applicationContext.xml文件,配置viewResolver,设置属性,通过规定前后缀格式,由
ViewResolver
来
筛选
决定跳转到哪个jsp来显示。
xml version="1.0" encoding="UTF-8"?>
<beans xmlns="http://www.springframework.org/schema/beans"
xmlns:context="http://www.springframework.org/schema/context"
xmlns:xsi="http://www.w3.org/2001/XMLSchema-instance" xmlns:aop="http://www.springframework.org/schema/aop"
xmlns:tx="http://www.springframework.org/schema/tx" xmlns:p="http://www.springframework.org/schema/p"
xmlns:util="http://www.springframework.org/schema/util" xmlns:jdbc="http://www.springframework.org/schema/jdbc"
xmlns:cache="http://www.springframework.org/schema/cache"
xsi:schemaLocation="
http://www.springframework.org/schema/context
http://www.springframework.org/schema/context/spring-context.xsd
http://www.springframework.org/schema/beans
http://www.springframework.org/schema/beans/spring-beans.xsd
http://www.springframework.org/schema/tx
http://www.springframework.org/schema/tx/spring-tx.xsd
http://www.springframework.org/schema/jdbc
http://www.springframework.org/schema/jdbc/spring-jdbc-3.1.xsd
http://www.springframework.org/schema/cache
http://www.springframework.org/schema/cache/spring-cache-3.1.xsd
http://www.springframework.org/schema/aop
http://www.springframework.org/schema/aop/spring-aop.xsd
http://www.springframework.org/schema/util
http://www.springframework.org/schema/util/spring-util.xsd">
<bean id="urlMapping" class="org.springframework.web.servlet.handler.SimpleUrlHandlerMapping">
<property name="mappings">
<props>
<prop key="login.do">loginprop>
props>
property>
bean>
<bean id="viewResolver" class="org.springframework.web.servlet.view.InternalResourceViewResolver">
<property name="viewClass" value="org.springframework.web.servlet.view.JstlView">property>
<property name="prefix" value="/jsp/">property>
<property name="suffix" value=".jsp">property>
bean>
<bean id="login" class="com.oracle.hrb.controller.LoginController">bean>
beans>
测试:空跳转
springMVC的数据转发:
1.修改controller,声明个ModelMap对象来传值
package com.oracle.hrb.controller;
import javax.servlet.http.HttpServletRequest;
import javax.servlet.http.HttpServletResponse;
import org.springframework.ui.ModelMap;
import org.springframework.web.servlet.ModelAndView;
import org.springframework.web.servlet.mvc.Controller;
public class LoginController implements Controller{
public ModelAndView handleRequest(HttpServletRequest request,
HttpServletResponse response) throws Exception {
System.out.println("访问了LoginController");
//获取数据
request.setCharacterEncoding("utf-8");
String userName = request.getParameter("username");
String passWord = request.getParameter("password");
System.out.println(userName+","+passWord);//测试LoginController是否正确
ModelMap model = new ModelMap();//声明个ModelMap对象来传值
if("王胖子".equals(userName)&&"tom".equals(passWord)){
return new ModelAndView("ok",model);//登录成功跳转到ok.jsp,并带上model对象
}
model.put("error","用户名或密码错误");//model对象绑定并传递信息
return new ModelAndView("login",model);//登录失败跳转到login.jsp,显示错误提示信息
}
}
2.在登录页面的输入用户名的input标签后添加${error==null?"":error } 的EL表达式,
用来获取并显示错误提示信息。
<% page language="java" import="java.util.*" pageEncoding="utf-8"%>
DOCTYPE HTML>
<html>
<head>
<title>登录title>
<meta charset="utf-8">
head>
<body>
<form action="login.do" method="post">
<table>
<tr><td>用户名td><td><input type="text" name="username">td>
<td><span style="color: red;">${error==null?"":error }span>td>
tr>
<tr><td>密码td><td><input type="password" name="password">td>tr>
<tr><td><input type="submit" value="登录">td>tr>
table>
form>
body>
html>
3.在ok.jsp即登录成功页面用EL表达式${name}来获取并显示用户名。
<% page language="java" import="java.util.*" pageEncoding="utf-8"%>
DOCTYPE HTML>
<html>
<head>
<title>登录成功title>
<meta charset = "utf-8">
head>
<body>
<h1>登录成功!欢迎${name}回家h1>
body>
html>

