Tkinter教程-布局管理器
Tkinter教程-布局管理器 目录树
- Pack布局管理器
- Grid布局管理器
- Place布局管理器
Tk布局管理器
来自http://tpleina.com/2019/06/1134936693.html
TKinter布局管理器能够控制组件位置摆放,当调整窗口的大小,布局管理器会自动调整窗口中各组件的大小和位置
TKinter布局管理器提供三种布局方式:
- Pack布局
- Grid布局
- Place布局
Pack布局管理器
一个复杂的界面,其实都可以分解为水平排列和垂直排列,Pack 布局既可实现水平排列,也可实现垂直排列,然后再通过多个容器进行组合,就可以开发出更复杂的界面
# -*- coding:utf-8 -*-
from tkinter import *

if __name__ == "__main__":
    mw = Tk()
    # 设置窗口标题
    mw.title('Pack布局')
    for i in range(3):
        lab = Label(mw, text="第%d个Label" % (i + 1), bg='#326191')
        # 调用pack进行布局
        lab.pack()
    mw.mainloop()
上面程序创建了一个窗口,在窗口内添加了三个 Label,并使用Pack 布局
组件支持pack方法,其常用参数:
- anchor:指定组件摆放容器内位置,前提是可用空间大于组件大小,参数取值:
- N(北,代表上)
- E(东,代表右)
- S(南,代表下)
- W(西,代表左)
- NW(西北,代表左上)
- NE(东北,代表右上)
- SW(西南,代表左下)
- SE(东南,代表右下)
- CENTER(中,默认值)
- expand:是否拉伸,bool值,当父容器大于子组件时
- fill:设置组件是否沿水平或垂直方向填充,参数取值:
- NONE 表示不填充
- X
- Y
- BOTH 表示沿着两个方向填充
- ipadx:指定组件在 x 方向(水平)上的内部留白大小
- ipady:指定组件在 y 方向(水平)上的内部留白大小
- padx:指定组件在 x 方向(水平)上与其他组件的间距大小
- pady:指定组件在 y 方向(水平)上与其他组件的间距大小
- side:设置组件的添加位置,参数取值:
- TOP
- BOTTOM
- LEFT
- RIGHT
使用Pack布局更复杂例子
# -*- coding:utf-8 -*-
from tkinter import *

class App(object):
    def __init__(self, mw):
        self.mw = mw
        self.initWidgets()

    def initWidgets(self):
        # 创建第一个容器
        fm1 = Frame(self.mw)
        # 该容器放在左边排列
        fm1.pack(side=LEFT, fill=BOTH, expand=YES)
        # 向fm1中添加3个按钮
        # 设置按钮从顶部开始排列,且按钮只能在垂直(X)方向填充
        Button(fm1, text='左一').pack(side=TOP, fill=X, expand=YES)
        Button(fm1, text='左二').pack(side=TOP, fill=X, expand=YES)
        Button(fm1, text='左三').pack(side=TOP,  fill=X, expand=YES)
        # 创建第二个容器
        fm2 = Frame(self.mw)
        # 该容器放在左边排列,就会挨着fm1
        fm2.pack(side=LEFT, padx=10, expand=YES)
        fm2.pack(side=LEFT, padx=10, fill=BOTH, expand=YES)
        # 向fm2中添加3个按钮
        # 设置按钮从右边开始排列
        Button(fm2, text='中一').pack(side=LEFT, fill=Y, expand=YES)
        Button(fm2, text='中二').pack(side=LEFT, fill=Y, expand=YES)
        Button(fm2, text='中三').pack(side=LEFT, fill=Y, expand=YES)
        # 创建第三个容器
        fm3 = Frame(self.mw)
        # 该容器放在右边排列,就会挨着fm1
        fm3.pack(side=RIGHT, padx=10, fill=BOTH, expand=YES)
        # 向fm3中添加3个按钮
        # 设置按钮从底部开始排列,且按钮只能在垂直(Y)方向填充
        Button(fm3, text='右一').pack(side=BOTTOM, fill=Y, expand=YES)
        Button(fm3, text='右二').pack(side=BOTTOM, fill=Y, expand=YES)
        Button(fm3, text='右三').pack(side=BOTTOM, fill=Y, expand=YES)


if __name__ == "__main__":
    mw = Tk()
    mw.title("Pack布局")
    display = App(mw)
    mw.mainloop()
总结:对于使用 Pack 布局来说,首先要做的事情是将程序界面进行分解,分解成水平排列的容器和垂直排列的容器(有时候甚至要容器嵌套容器),
然后使用多个 Pack 布局的容器将它们组合在一起
Grid布局管理器
Grid布局把组件空间分解成一个网格,即按照行、列的方式摆放组件,组件位置由其所在的行号和列号决定
行号相同而列号不同的几个组件会被依次上下排列,列号相同而行号不同的几个组件会被依次左右排列
组件支持grid()方法,其常用参数:
- 支持 ipadx、ipady、padx、pady参数,用法与pack()方法一致
- column:指定将组件放入哪列,第一列的索引为 0
- columnspan:指定组件横跨多少列
- row:指定组件放入哪行,第一行的索引为 0
- rowspan:指定组件横跨多少行
- sticky:类似于pack()方法的anchor选项
- N(北,代表上)
- E(东,代表右)
- S(南,代表下)
- W(西,代表左)
- NW(西北,代表左上)
- NE(东北,代表右上)
- SW(西南,代表左下)
- SE(东南,代表右下)
- CENTER(中,默认值)
使用 Grid 布局来实现一个计算器界面
# -*- coding:utf-8 -*-
from tkinter import *

class App(object):
    def __init__(self, mw):
        self.mw = mw
        self.initWidgets()

    def initWidgets(self):
        # 创建一个输入组件
        e = Entry(relief=SUNKEN, font=('Courier New', 24), width=25, bg='gray')
        # 对该输入组件使用Pack布局,放在容器顶部
        e.pack(side=TOP, pady=10)
        p = Frame(self.mw)
        p.pack(side=TOP)
        # 定义字符串的元组
        names = ("0" , "1" , "2" , "3"
            , "4" , "5" , "6" , "7" , "8" , "9"
            , "+" , "-" , "*" , "/" , ".", "=")
        # 遍历字符串元组
        for i in range(len(names)):
            # 创建Button,将Button放入p组件中
            b = Button(p, text=names[i], font=('Verdana', 20), width=6)
            b.grid(row=i // 4, column=i % 4)


if __name__ == "__main__":
    mw = Tk()
    mw.title("Grid布局")
    App(mw)
    mw.mainloop()
上面示例代码使用了两种布局方式,先使用 Pack 布局管理两个组件:Entry(输入组件)和 Frame(容器);排列方式从上到下,接着在Frame中采用Grid布局对16个按钮进行相应位置摆放
Place布局管理器
Place 布局就是绝对定位,这种布局方式要求指定组件的绝对位置或相对于其他组件的位置
组件支持Place()方法,其常用参数:
- x:指定组件的 X 坐标。x 为 0 代表位于最左边
- y:指定组件的 Y 坐标。y 为 0 代表位于最右边
- relx:指定组件的 X 坐标,以父容器总宽度为单位 1,该值应该在 0.0~1.0 之间,其中 0.0 代表位于窗口最左边,1.0 代表位于窗口最右边,0.5 代表位于窗口中间
- rely:指定组件的 Y 坐标,以父容器总高度为单位 1,该值应该在 0.0~1.0 之间,其中 0.0 代表位于窗口最上边,1.0 代表位于窗口最下边,0.5 代表位于窗口中间
- width:指定组件的宽度,以 pixel 为单位
- height:指定组件的高度,以 pixel 为单位
- relwidth:指定组件的宽度,以父容器总宽度为单位 1,该值应该在 0.0~1.0 之间,其中 1.0 代表整个窗口宽度,0.5 代表窗口的一半宽度
- relheight:指定组件的高度,以父容器总高度为单位 1,该值应该在 0.0~1.0 之间,其中 1.0 代表整个窗口高度,0.5 代表窗口的一半高度
- bordermode:该属性支持“inside”或“outside” 属性值,用于指定当设置组件的宽度、高度时是否计算该组件的边框宽度
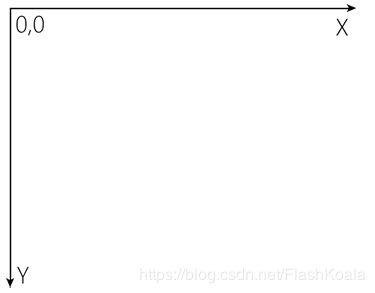
当使用 Place 布局管理容器中的组件时,需要设置组件的 x、y 或 relx、rely 选项,Tkinter 容器内的坐标系统的原点 (0,0) 在左上角,其中 X 轴向右延伸,Y 轴向下延伸:
- 通过 x、y 指定坐标,单位就是 pixel(像素)
- 通过 relx、rely 指定坐标,则以整个父容器的宽度、高度为 1
- 通过 x 指定的坐标值越大,该组件就越靠右
- 通过 y 指定的坐标值越大,该组件就越靠下
# -*- coding:utf-8 -*-
from tkinter import *
import random

class App(object):
    def __init__(self, mw):
        self.mw = mw
        self.initWidgets()

    def initWidgets(self):
        kc = ['Python','Java', 'JavaScript','Golang', 'Ruby']
        bgs = ['red','yellow','green','blue','gray']
        for i in range(len(kc)):
            lb = Label(self.mw,text=kc[i], bg=bgs[i])
            # 使用place()设置该Label的大小和位置
            lb.place(x = 20, y = 36 + i*36, width=180, height=30)

if __name__ == "__main__":
    mw = Tk()
    mw.title("Place布局")
    # 设置窗口的大小和位置
    # width x height + x_offset + y_offset
    mw.geometry("250x250+30+30")
    App(mw)
    mw.mainloop()