Swift - 实现图片全屏展示功能(可左右滑动切换图片)

1,效果图

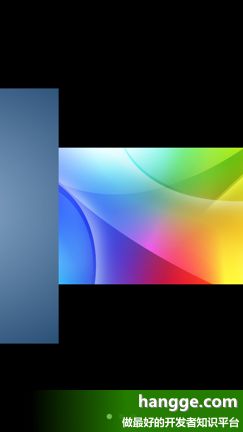
(1)作为演示,我们首先在页面上创建各个图片的缩略图。

Swift - 实现图片全屏展示功能(可左右滑动切换图片)_第1张图片


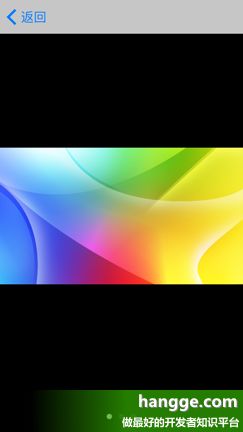
(2)点击任意一张缩略图,则进行全屏展示。如果有多张图片,还可以左右滑动进行切换。同时为了让展示效果更好,这时默认会将导航栏隐藏,点击图片又会显示出导航栏。

  Swift - 实现图片全屏展示功能(可左右滑动切换图片)_第2张图片    Swift - 实现图片全屏展示功能(可左右滑动切换图片)_第3张图片    Swift - 实现图片全屏展示功能(可左右滑动切换图片)_第4张图片


(3)全屏浏览时,照片默认会自动缩放以便完整显示。双击则会放大3倍显示。同时使用手势还可以对图片进行拖动、以及放大缩小。

  Swift - 实现图片全屏展示功能(可左右滑动切换图片)_第5张图片    Swift - 实现图片全屏展示功能(可左右滑动切换图片)_第6张图片    Swift - 实现图片全屏展示功能(可左右滑动切换图片)_第7张图片


2,组件实现

  • 我们创建一个视图控制器(ImagePreviewVC)进行图片全屏展示。点击缩略图时,将图片数组以及默认起始图片索引传入 ImagePreviewVC,并弹出显示。
  • ImagePreviewVC 内使用 UICollectionView 来放置图片,这里将 UICollectionView 设为横向滚动并分页,这样就可以左右滑动切换图片。


(1)ImagePreviewVC.swift(图片浏览控制器)

1

2

3

4

5

6

7

8

9

10

11

12

13

14

15

16

17

18

19

20

21

22

23

24

25

26

27

28

29

30

31

32

33

34

35

36

37

38

39

40

41

42

43

44

45

46

47

48

49

50

51

52

53

54

55

56

57

58

59

60

61

62

63

64

65

66

67

68

69

70

71

72

73

74

75

76

77

78

79

80

81

82

83

84

85

86

87

88

89

90

91

92

93

94

95

96

97

98

99

100

101

102

103

104

105

106

107

108

109

110

111

112

113

114

115

116

117

118

119

120

121

122

123

124

125

126

127

128

129

130

131

132

133

134

135

136

137

138

139

140

141

142

143

144

145

146

147

148

149

150

151

152

153

154

155

156

157

158

159

160

161

162

163

164

import UIKit


//图片浏览控制器

class ImagePreviewVCUIViewController {


    //存储图片数组

    var images:[String]


    //默认显示的图片索引

    var index:Int


    //用来放置各个图片单元

    var collectionView:UICollectionView!


    //collectionView的布局

    var collectionViewLayout: UICollectionViewFlowLayout!


    //页控制器(小圆点)

    var pageControl : UIPageControl!


    //初始化

    init(images:[String], index:Int = 0){

        self.images = images

        self.index = index


        super.init(nibName: nil, bundle: nil)

    }


    required init?(coder aDecoder: NSCoder) {

        fatalError("init(coder:) has not been implemented")

    }


    //初始化

    override func viewDidLoad() {

        super.viewDidLoad()

        //背景设为黑色

        self.view.backgroundColor = UIColor.black


        //collectionView尺寸样式设置

        collectionViewLayout = UICollectionViewFlowLayout()

        collectionViewLayout.minimumLineSpacing = 0

        collectionViewLayout.minimumInteritemSpacing = 0

        //横向滚动

        collectionViewLayout.scrollDirection = .horizontal


        //collectionView初始化

        collectionView = UICollectionView(frame: self.view.bounds,

                                          collectionViewLayout: collectionViewLayout)

        collectionView.backgroundColor = UIColor.black

        collectionView.register(ImagePreviewCell.self, forCellWithReuseIdentifier: "cell")

        collectionView.delegate = self

        collectionView.dataSource = self

        collectionView.isPagingEnabled = true

        //不自动调整内边距,确保全屏

        if #available(iOS 11.0, *) {

            collectionView.contentInsetAdjustmentBehavior = .never

        else {

            self.automaticallyAdjustsScrollViewInsets = false

        }

        self.view.addSubview(collectionView)


        //将视图滚动到默认图片上

        let indexPath = IndexPath(item: index, section: 0)

        collectionView.scrollToItem(at: indexPath, at: .left, animated: false)


        //设置页控制器

        pageControl = UIPageControl()

        pageControl.center = CGPoint(x: UIScreen.main.bounds.width/2,

                                     y: UIScreen.main.bounds.height - 20)

        pageControl.numberOfPages = images.count

        pageControl.isUserInteractionEnabled = false

        pageControl.currentPage = index

        view.addSubview(self.pageControl)

    }


    //视图显示时

    override func viewWillAppear(_ animated: Bool) {

        super.viewWillAppear(animated)

        //隐藏导航栏

        self.navigationController?.setNavigationBarHidden(true, animated: false)

    }


    //视图消失时

    override func viewWillDisappear(_ animated: Bool) {

        super.viewWillDisappear(animated)

        //显示导航栏

        self.navigationController?.setNavigationBarHidden(false, animated: false)

    }


    //隐藏状态栏

    override var prefersStatusBarHidden: Bool {

        return true

    }


    //将要对子视图布局时调用(横竖屏切换时)

    override func viewWillLayoutSubviews() {

        super.viewWillLayoutSubviews()


        //重新设置collectionView的尺寸

        collectionView.frame.size = self.view.bounds.size

        collectionView.collectionViewLayout.invalidateLayout()


        //将视图滚动到当前图片上

        let indexPath = IndexPath(item: self.pageControl.currentPage, section: 0)

        collectionView.scrollToItem(at: indexPath, at: .left, animated: false)


        //重新设置页控制器的位置

        pageControl.center = CGPoint(x: UIScreen.main.bounds.width/2,

                                     y: UIScreen.main.bounds.height - 20)

    }


    override func didReceiveMemoryWarning() {

        super.didReceiveMemoryWarning()

    }

}


//ImagePreviewVC的CollectionView相关协议方法实现

extension ImagePreviewVC:UICollectionViewDelegateUICollectionViewDataSource,

    UICollectionViewDelegateFlowLayout{


    //collectionView单元格创建

    func collectionView(_ collectionView: UICollectionView,

                        cellForItemAt indexPath: IndexPath)

        -> UICollectionViewCell {

        let cell = collectionView.dequeueReusableCell(withReuseIdentifier: "cell",

                                            for: indexPath) asImagePreviewCell

        let image = UIImage(named: self.images[indexPath.row])

        cell.imageView.image = image

        return cell

    }


    //collectionView单元格数量

    func collectionView(_ collectionView: UICollectionView,

                        numberOfItemsInSection section: Int) -> Int {

        return self.images.count

    }


    //collectionView单元格尺寸

    func collectionView(_ collectionView: UICollectionView,

                        layout collectionViewLayout: UICollectionViewLayout,

                        sizeForItemAt indexPath: IndexPath) -> CGSize {

        return self.view.bounds.size

    }


    //collectionView里某个cell将要显示

    func collectionView(_ collectionView: UICollectionView,

                        willDisplay cell: UICollectionViewCell,

                        forItemAt indexPath: IndexPath) {

        if let cell = cell asImagePreviewCell{

            //由于单元格是复用的,所以要重置内部元素尺寸

            cell.resetSize()

        }

    }


    //collectionView里某个cell显示完毕

    func collectionView(_ collectionView: UICollectionView,

                        didEndDisplaying cell: UICollectionViewCell,

                        forItemAt indexPath: IndexPath) {

        //当前显示的单元格

        let visibleCell = collectionView.visibleCells[0]

        //设置页控制器当前页

        self.pageControl.currentPage = collectionView.indexPath(for: visibleCell)!.item

    }

}


(2)ImagePreviewCell.swift(图片浏览控制器中使用的单元格)

1

2

3

4

5

6

7

8

9

10

11

12

13

14

15

16

17

18

19

20

21

22

23

24

25

26

27

28

29

30

31

32

33

34

35

36

37

38

39

40

41

42

43

44

45

46

47

48

49

50

51

52

53

54

55

56

57

58

59

60

61

62

63

64

65

66

67

68

69

70

71

72

73

74

75

76

77

78

79

80

81

82

83

84

85

86

87

88

89

90

91

92

93

94

95

96

97

98

99

100

101

102

103

104

105

106

107

108

109

110

111

112

113

114

115

116

117

118

119

120

121

122

123

124

125

126

127

128

129

130

131

132

133

134

135

136

137

import UIKit


class ImagePreviewCellUICollectionViewCell {


    //滚动视图

    var scrollView:UIScrollView!


    //用于显示图片的imageView

    var imageView:UIImageView!


    override init(frame: CGRect) {

        super.init(frame: frame)


        //scrollView初始化

        scrollView = UIScrollView(frame: self.contentView.bounds)

        self.contentView.addSubview(scrollView)

        scrollView.delegate = self

        //scrollView缩放范围 1~3

        scrollView.maximumZoomScale = 3.0

        scrollView.minimumZoomScale = 1.0


        //imageView初始化

        imageView = UIImageView()

        imageView.frame = scrollView.bounds

        imageView.isUserInteractionEnabled = true

        imageView.contentMode = .scaleAspectFit

        scrollView.addSubview(imageView)


        //单击监听

        let tapSingle=UITapGestureRecognizer(target:self,

                                             action:#selector(tapSingleDid))

        tapSingle.numberOfTapsRequired = 1

        tapSingle.numberOfTouchesRequired = 1

        //双击监听

        let tapDouble=UITapGestureRecognizer(target:self,

                                             action:#selector(tapDoubleDid(_:)))

        tapDouble.numberOfTapsRequired = 2

        tapDouble.numberOfTouchesRequired = 1

        //声明点击事件需要双击事件检测失败后才会执行

        tapSingle.require(toFail: tapDouble)

        self.imageView.addGestureRecognizer(tapSingle)

        self.imageView.addGestureRecognizer(tapDouble)

    }


    //重置单元格内元素尺寸

    func resetSize(){

        //scrollView重置,不缩放

        scrollView.frame = self.contentView.bounds

        scrollView.zoomScale = 1.0

        //imageView重置

        if let image = self.imageView.image {

            //设置imageView的尺寸确保一屏能显示的下

            imageView.frame.size = scaleSize(size: image.size)

            //imageView居中

            imageView.center = scrollView.center

        }

    }


    //视图布局改变时(横竖屏切换时cell尺寸也会变化)

    override func layoutSubviews() {

        super.layoutSubviews()

        //重置单元格内元素尺寸

        resetSize()

    }


    //获取imageView的缩放尺寸(确保首次显示是可以完整显示整张图片)

    func scaleSize(size:CGSize) -> CGSize {

        let width = size.width

        let height = size.height

        let widthRatio = width/UIScreen.main.bounds.width

        let heightRatio = height/UIScreen.main.bounds.height

        let ratio = max(heightRatio, widthRatio)

        return CGSize(width: width/ratio, height: height/ratio)

    }


    //图片单击事件响应

    @objc func tapSingleDid(_ ges:UITapGestureRecognizer){

        //显示或隐藏导航栏

        if let nav = self.responderViewController()?.navigationController{

            nav.setNavigationBarHidden(!nav.isNavigationBarHidden, animated: true)

        }

    }


    //图片双击事件响应

    @objc func tapDoubleDid(_ ges:UITapGestureRecognizer){

        //隐藏导航栏

        if let nav = self.responderViewController()?.navigationController{

            nav.setNavigationBarHidden(true, animated: true)

        }

        //缩放视图(带有动画效果)

        UIView.animate(withDuration: 0.5, animations: {

            //如果当前不缩放,则放大到3倍。否则就还原

            if self.scrollView.zoomScale == 1.0 {

                self.scrollView.zoomScale = 3.0

            }else{

                self.scrollView.zoomScale = 1.0

            }

        })

    }


    //查找所在的ViewController

    func responderViewController() -> UIViewController? {

        for view in sequence(first: self.superview, next: { $0?.superview }) {

            if let responder = view?.next {

                if responder.isKind(of: UIViewController.self){

                    return responder asUIViewController

                }

            }

        }

        return nil

    }


    required init?(coder aDecoder: NSCoder) {

        super.init(coder:aDecoder)

    }

}


//ImagePreviewCell的UIScrollViewDelegate代理实现

extension ImagePreviewCell:UIScrollViewDelegate{


    //缩放视图

    func viewForZooming(in scrollView: UIScrollView) -> UIView? {

        return self.imageView

    }


    //缩放响应,设置imageView的中心位置

    func scrollViewDidZoom(_ scrollView: UIScrollView) {

        var centerX = scrollView.center.x

        var centerY = scrollView.center.y

        centerX = scrollView.contentSize.width > scrollView.frame.size.width ?

            scrollView.contentSize.width/2:centerX

        centerY = scrollView.contentSize.height > scrollView.frame.size.height ?

            scrollView.contentSize.height/2:centerY

        print(centerX,centerY)

        imageView.center = CGPoint(x: centerX, y: centerY)

    }

}


3,使用样例

1

2

3

4

5

6

7

8

9

10

11

12

13

14

15

16

17

18

19

20

21

22

23

24

25

26

27

28

29

30

31

32

33

34

35

36

37

38

39

40

41

42

43

44

45

46

47

import UIKit


class ViewControllerUIViewController {


    let images = ["image1.jpg","image2.jpg","image3.jpg"]


    override func viewDidLoad() {

        super.viewDidLoad()


        //修改导航栏返回按钮文字

        let item = UIBarButtonItem(title: "返回", style: .plain, target: self, action: nil)

        self.navigationItem.backBarButtonItem = item;


        //生成缩略图

        for in 0..

            //创建ImageView

            let imageView = UIImageView()

            imageView.frame = CGRect(x:20+i*70, y:80, width:60, height:60)

            imageView.tag = i

            imageView.contentMode = .scaleAspectFill

            imageView.clipsToBounds = true

            imageView.image = UIImage(named: images[i])

            //设置允许交互(后面要添加点击)

            imageView.isUserInteractionEnabled = true

            self.view.addSubview(imageView)

            //添加单击监听

            let tapSingle=UITapGestureRecognizer(target:self,

                                                 action:#selector(imageViewTap(_:)))

            tapSingle.numberOfTapsRequired = 1

            tapSingle.numberOfTouchesRequired = 1

            imageView.addGestureRecognizer(tapSingle)

        }

    }


    //缩略图imageView点击

    func imageViewTap(_ recognizer:UITapGestureRecognizer){

        //图片索引

        let index = recognizer.view!.tag

        //进入图片全屏展示

        let previewVC = ImagePreviewVC(images: images, index: index)

        self.navigationController?.pushViewController(previewVC, animated: true)

    }


    override func didReceiveMemoryWarning() {

        super.didReceiveMemoryWarning()

    }

}

源码下载:hangge_1513.zip


功能改进:双击时以点击位置为中心放大图片

上面的样例中,当我们双击放大图片时,无论点击的位置是哪里,总是以图片中心为起点放大3倍。
如果想要实现点击哪个部分就放大哪个部分,只需要修改 ImagePreviewCell 中的双击响应事件代码即可。(下面高亮的为修改的部分)

1

2

3

4

5

6

7

8

9

10

11

12

13

14

15

16

17

18

19

20

21

22

23

24

25

//图片双击事件响应

@objc func tapDoubleDid(_ ges:UITapGestureRecognizer){

    //隐藏导航栏

    if let nav = self.responderViewController()?.navigationController{

        nav.setNavigationBarHidden(true, animated: true)

    }

    //缩放视图(带有动画效果)

    UIView.animate(withDuration: 0.5, animations: {

        //如果当前不缩放,则放大到3倍。否则就还原

        if self.scrollView.zoomScale == 1.0 {

            //以点击的位置为中心,放大3倍

            let pointInView = ges.location(inself.imageView)

            let newZoomScale:CGFloat = 3

            let scrollViewSize = self.scrollView.bounds.size

            let w = scrollViewSize.width / newZoomScale

            let h = scrollViewSize.height / newZoomScale

            let x = pointInView.x - (w / 2.0)

            let y = pointInView.y - (h / 2.0)

            let rectToZoomTo = CGRect(x:x, y:y, width:w, height:h)

            self.scrollView.zoom(to: rectToZoomTo, animated: true)

        }else{

            self.scrollView.zoomScale = 1.0

        }

    })

}

本文转载自航歌:  原文链接:http://www.hangge.com/blog/cache/detail_1513.html

你可能感兴趣的:(照片查看,照片查看)