详解Vue Native
译者按: 一家叫GeekyAnts的印度公司开发了Vue Native,基于React Native实现。
- 原文: Introducing Vue Native
- 译者: Fundebug
为了保证可读性,本文采用意译而非直译。另外,本文版权归原作者所有,翻译仅用于学习。
尽管整个JavaScript社区对Vue的情感是比较微妙的(不懂为啥),但也不能阻止我尝试用Vue Native来开发移动App。
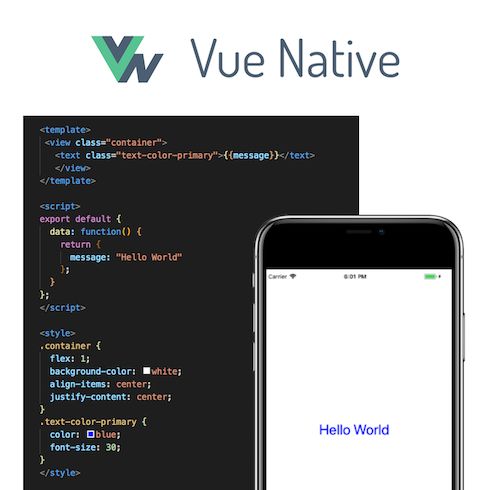
Hello World
这是一个很简单的例子,仅仅将“Hello World”在页面上展示出来。
动机
作为一个前端开发,我很喜欢HTML的简洁。直接编写代码,辅以CSS来定制样式。Vue的.vue文件提供了类似的体验。
Vue有丰富的功能:支持模板化、样式定义、基于Vuex的状态管理和路由。这使得它不失为一个完美的选择。
使用Vue Native,我们在开发中也有着类似的体验。
初次尝试
在网上简单的搜索,就可以发现SmallComfort开发的react-vue项目。react-vue将Vue文件翻译到React和React Native组件。感谢react-vue的作者解决了很多问题。 Vue Native是同样的。
Vue Native编译到React Native
Vue Native依赖React Native。当你使用vue-native-cli初始化一个新的app,入口文件是App.vue。
就像.js文件一样,你可以用很多.vue文件来组合一个.vue文件。实际上,所有的.vue文件到翻译到以.js后缀的React Native组件。如果想了解更多,请参考此处。
双向绑定的例子
Vue Native同样支持使用v-model来做数据双向绑定。
<template>
   <text-input v-model=”name” />
template>
<script>
export default {
 data: function() {
   return {
     name: "John Doe"
   };
 }
};
script>
循环
你可以使用v-for指令来写循环,和JavaScript的map类似。
<template>
   <view>
	<text v-for=”name in names” v-bind:key="name">{{name}}text>
   view>
template>
<script>
export default {
 data: function() {
   return {
     names: [“Gaurav”, “Neeraj”, “Sanket”, “Neeraj”]
   };
 }
};
script>
App示例
KitchenSink应用
我们使用Vue Native重写了KitchenSink应用,你可以去这里下载源码:GeekyAnts/KitchenSink-Vue-Native。
Todo应用
我们GeekyAnts的高级软件工程师Ankit Singhania使用Vue Native写了一个简单的ToDo应用。
如何开始
为了使用Vue Native,你首先需要安装React Native。根据这里的步骤来安装。
下一步,使用npm安装Vue Native CLI。
npm install -g vue-native-cli
之后,你就可以初始化一个Vue-Native项目了:
vue-native init <projectName>
cd <projectName>
你可以直接使用npm run来在IOS/Andriod模拟器上运行这个Vue Native应用了。
指令
在Vue中,指令是可以说是一种特殊的属性,他们都以v-作为前缀。下面是几个常用的指令。
v-if和v-else
v-if和v-else用来编写条件语句。
<template>
 <view class="container">
   <view class="btn-container">
     <button title="show A" :on-press="() => handleBtnClick('A')"/>
     <button title="show B" :on-press="() => handleBtnClick('B')"/>
     <button title="show C" :on-press="() => handleBtnClick('C')"/>
   view>
   <view>
     <text v-if="type === 'A'">
       A
     text>
     <text v-else-if="type === 'B'">
       B
     text>
     <text v-else-if="type === 'C'">
       C
     text>
     <text v-else>
       Not A/B/C
     text>
   view>
 view>
template>
执行结果如下:
v-for
v-for类似于JavaScript的map。
<template>
 <view class="container">
   <text
       class="text-container"
       v-for="todo in todos"
       :key="todo.text"
   >
     {{ todo.text }}
   </text>
 </view>
</template>
<script>
export default {
 data: function() {
   return {
     todos: [
       { text: "Learn JavaScript" },
       { text: "Learn Vue" },
       { text: "Build something awesome" }
     ]
   };
 }
};
</script>
执行结果如下:
v-model
v-model指令用来创建一个双向绑定的元素,可以基于一个input元素或则一个组件。它内部是将value和onChangeText绑定到React Native的TextInput。
<template>
 <view class="container">
     <text-input
       class="text-input-container"
       placeholder="Type here"
       v-model="textContent"
     />
     <text
       class="text-container"
     >
       {{textContent}}
     text>
 view>
template>
<script>
export default {
 data: function() {
   return {
     textContent: ""
   };
 }
};
script>
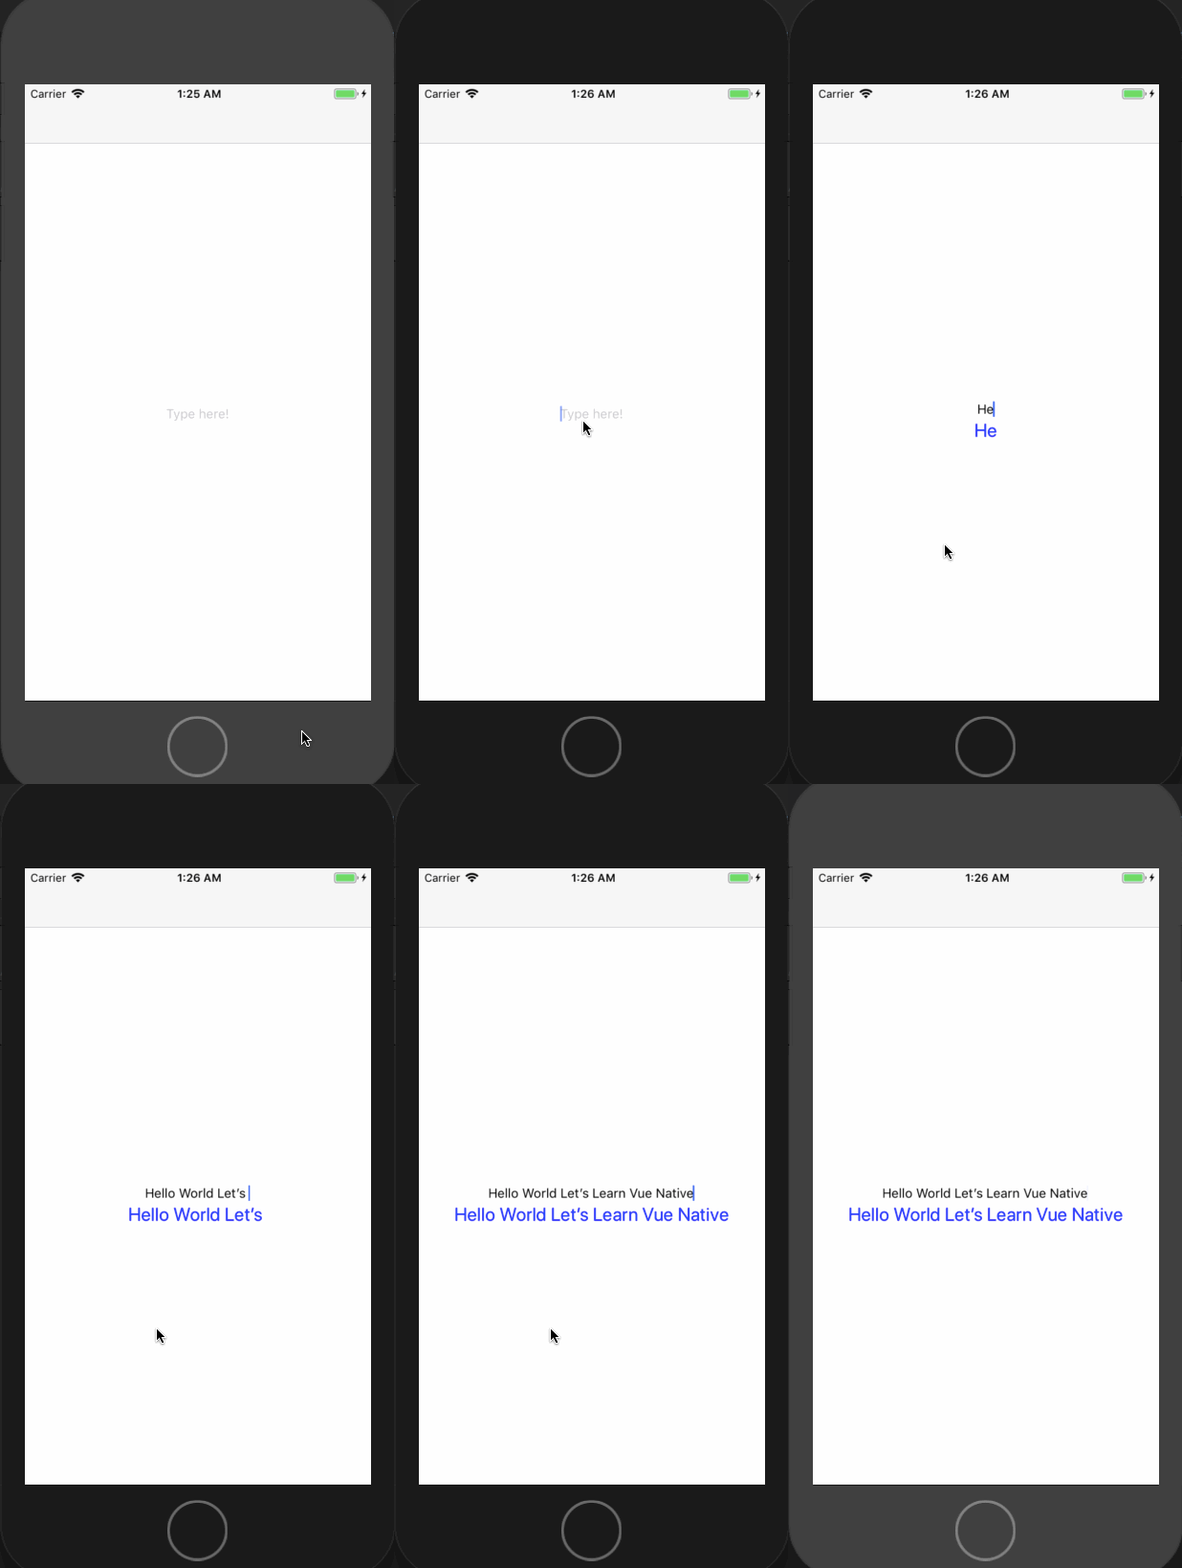
上面的代码对textContent做了双向绑定,如果在text-input输入内容,它会被存储到textContent中,然后会直接显示到text-input的下方。
执行结果如下:
Vue Native路由
Vue Native使用vue-router来实现导航逻辑。我们来看看下面的实现:
使用Vuex做状态管理
你可以使用Vuex来管理状态,详情查看:Vuex。
局限性和已知问题
- 有时候对于一个组件,你需要创建一个返回JSX代码的函数;比如在FlatList中的renderItem函数就必须返回JSX。
- 报错是在React Native层面的,并没有映射到Vue Native代码。我们正在优化这个问题。
可以用在生产环境吗?
我们已经使用Vue Native将整个KitchenSink重写,你可以在生产环境使用它。不过你要记得它有局限性。
Vue-Native是完全开源的,可以在Github找到源代码:vue-native-core。
博客结尾
关于Fundebug
Fundebug专注于JavaScript、微信小程序、微信小游戏、支付宝小程序、React Native、Node.js和Java线上应用实时BUG监控。 自从2016年双十一正式上线,Fundebug累计处理了10亿+错误事件,付费客户有Google、360、金山软件、百姓网等众多品牌企业。欢迎大家免费试用!
版权声明
转载时请注明作者Fundebug以及本文地址:
https://blog.fundebug.com/2018/07/23/vue-native/


