Elasticsearch配置及head插件安装
ElasticSearch是一个基于Lucene的搜索服务器。它提供了一个分布式多用户能力的全文搜索引擎,基于RESTful web接口。Elasticsearch是用Java开发的,并作为Apache许可条款下的开放源码发布,是当前流行的企业级搜索引擎。设计用于云计算中,能够达到实时搜索,稳定,可靠,快速,安装使用方便。
一、安装配置
ElasticSearch 需要 Java 8 环境,如果不是Java8请升级。
然后安装官网文档进行安装
下载
wget https://artifacts.elastic.co/downloads/elasticsearch/elasticsearch-6.0.0.tar.gz

解压
tar -xzf elasticsearch-5.4.0.tar.gz

进入目录
cd elasticsearch-6.0.0

创建两个文件夹,配置时使用
mkdir data logs

进入config目录
cd config/

编辑配置文件
vi elasticsearch.yml

cluster.name: UniqueChunClusters
node.name: node-81
path.data: /data/app/elk/elasticsearch-6.0.0/data
path.logs: /data/app/elk/elasticsearch-6.0.0/logs

# ----------------------------------- Memory -------------#
# Lock the memory on startup:
#
bootstrap.memory_lock: false
bootstrap.system_call_filter: false

http.cors.enabled: true
http.cors.allow-origin: "*"

# ---------------------------------- Network -----------#
# Set the bind address to a specific IP (IPv4 or IPv6):
#
network.host: 172.16.15.81
二、启动
Elasticsearch默认不允许使用root启动的,所以需要新建用户
创建用户
useradd elk

修改elk的家目录为es解压后的目录
vi /etc/passwd
elk:x:521:521::/data/app/elk/elasticsearch-6.0.0:/bin/bash

拷贝elk用户的环境变量到家目录
cp -a /etc/skel/. /data/app/elk/elasticsearch-6.0.0
使用一下命令启动
bin/elasticsearch如果你的机器之前没有修改过最大文件数、最大线程之类的会报错。
2017-11-25T13:58:31,795][ERROR][o.e.b.Bootstrap          ] [node131] node validation exception
[1]: max file descriptors [4096] for elasticsearch process is too low, increase to at least [65536]
[2]: max number of threads [1024] for user [elk] is too low, increase to at least [4096]
[3]: max virtual memory areas vm.max_map_count [65530] is too low, increase to at least [262144]
报错解决办法:
nofile 不低于 65536
nofile 表示进程允许打开的最大文件数。elasticsearch 进程要求可以打开的最大文件数不低于 65536。
[root@hadoop001 ~]# echo "* soft nofile 65536" >> /etc/security/limits.conf
[root@hadoop001 ~]# echo "* hard nofile 131072" >> /etc/security/limits.conf
-----------------------------------------------------------
nproc 不低于 4096
nproc 表示最大线程数。elasticsearch 要求最大线程数不低于 4096。
[root@hadoop001 ~]# echo "elk soft nproc 4096" >> /etc/security/limits.conf
[root@hadoop001 ~]# echo "elk hard nproc 4096" >> /etc/security/limits.conf
[elkuser@hadoop001 elasticsearch-6.0.0]$ ulimit -u  4096
需重启生效
[root@hadoop001 ~]# reboot
---------------------------------------------------------
m.max_map_count 表示虚拟内存大小,它是一个内核参数。elasticsearch 默认要求  vm.max_map_count 不低于 262144。
[root@hadoop001 ~]# sysctl -w vm.max_map_count=262144
[root@hadoop001 ~]# echo "vm.max_map_count=262144" >> /etc/sysctl.conf
[root@hadoop001 ~]# sysctl -p
再次启动
成功后浏览器访问htpp://172.16.15.81:9200,返回如下信息就说明配置没有问题。
{
  "name" : "node-81",
  "cluster_name" : "UniqueChunClusters",
  "cluster_uuid" : "O2JrXzc8Slup-TfVlJBcAA",
  "version" : {
    "number" : "6.0.0",
    "build_hash" : "8f0685b",
    "build_date" : "2017-11-10T18:41:22.859Z",
    "build_snapshot" : false,
    "lucene_version" : "7.0.1",
    "minimum_wire_compatibility_version" : "5.6.0",
    "minimum_index_compatibility_version" : "5.0.0"
  },
  "tagline" : "You Know, for Search"
}
三、为了后续查看数据方便这里我们为es搭建一个web界面,使用插件head
在5.0版本之后不支持直接安装head插件,需依赖npm来安装。
1.下载插件安装
下载npm
wget https://nodejs.org/dist/v4.6.1/node-v4.6.1-linux-x64.tar.gz
tar -zxvf node-v4.6.1-linux-x64.tar.gz
配置node.js环境变量
vi /etc/profile:
export NODE_HOME=/opt/software/elk/node-v8.9.1-linux-x64
export PATH=$NODE_HOME/bin:$PATH
----------------------------------------
source /etc/profile

下载es
git clone git://github.com/mobz/elasticsearch-head.git
在elasticsearch-head目录下node_modules/grunt下如果没有grunt二进制程序,需要执行
cd elasticsearch-head

npm install grunt --save
2.修改配置
修改Gruntfile.js文件里面的服务器监听地址(第93行)
hostname:’*’修改_site/app.js里面的url
this.base_uri = this.config.base_uri ||this.prefs.get("app-base_uri") || "http://172.16.15.81:9200"3、安装grunt:
grunt是基于Node.js的项目构建工具,可以进行打包压缩、测试、执行等等的工作,head插件就是通过grunt启动
npm install -g grunt-cli4、head安装
cd elasticsearch-head
npm install
5、启动head
cd elasticsearch-head
grunt server &
浏览器:http://172.16.15.81:9100
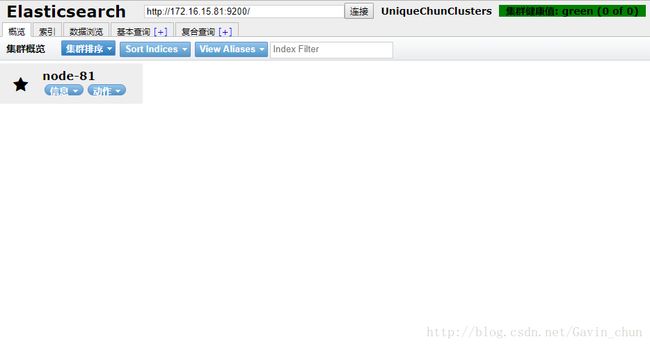
head已可以监控ES了。