使用Maven搭建Spring3开发环境
上一篇讲述搭建Maven与创建Maven工程,这篇来使用Maven搭建Spring3开发环境。
1.下载Spring3需要的jar包
   1.spring-core

  2.spring-context

  3.spring-jdbc

  4.spring-beans

  5.spring-web

  6.spring-expression

  7.spring-orm
在pom.xml中编写Spring3需要的包,maven会自动下载相关依赖的jar包。
pom.xml文件spring3编写
        <dependency>
            <groupId>org.springframeworkgroupId>
            <artifactId>spring-coreartifactId>
            <version>3.1.2.RELEASEversion>
        dependency>
        <dependency>
            <groupId>org.springframeworkgroupId>
            <artifactId>spring-contextartifactId>
            <version>3.1.2.RELEASEversion>
        dependency>
        <dependency>
            <groupId>org.springframeworkgroupId>
            <artifactId>spring-jdbcartifactId>
            <version>3.1.2.RELEASEversion>
        dependency>
        <dependency>
            <groupId>org.springframeworkgroupId>
            <artifactId>spring-beansartifactId>
            <version>3.1.2.RELEASEversion>
        dependency>
        <dependency>
            <groupId>org.springframeworkgroupId>
            <artifactId>spring-webartifactId>
            <version>3.1.2.RELEASEversion>
        dependency>
        <dependency>
            <groupId>org.springframeworkgroupId>
            <artifactId>spring-expressionartifactId>
            <version>3.1.2.RELEASEversion>
        dependency>
        <dependency>
            <groupId>org.springframeworkgroupId>
            <artifactId>spring-ormartifactId>
            <version>3.1.2.RELEASEversion>
        dependency>
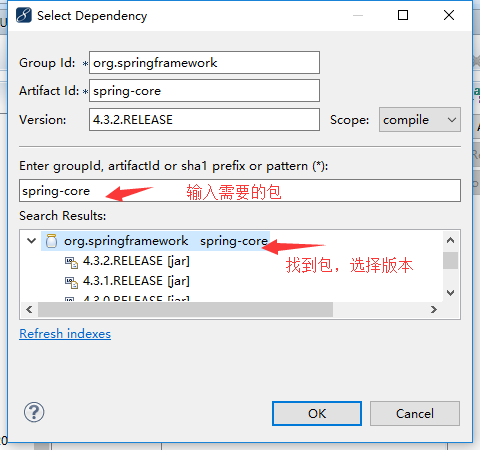
如果你不想手动编写,可以这样:
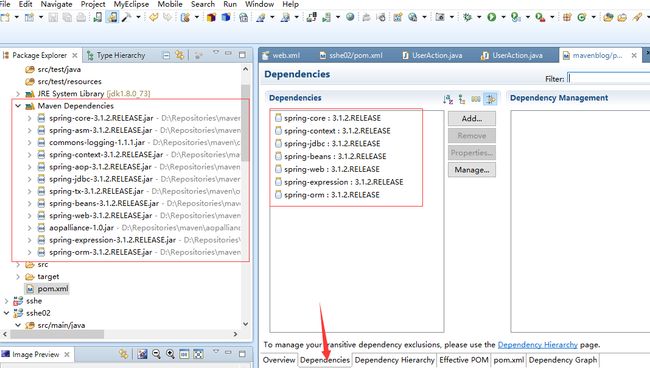
在pom.xml文件,点击Dependencies->Add
比如第一个jar包spring-core
myeclipse会帮你搜索出相关jar包,找到你需要的点击ok。然后点击保存。这样你需要的包和依赖包会自动导入到maven Dependencies下
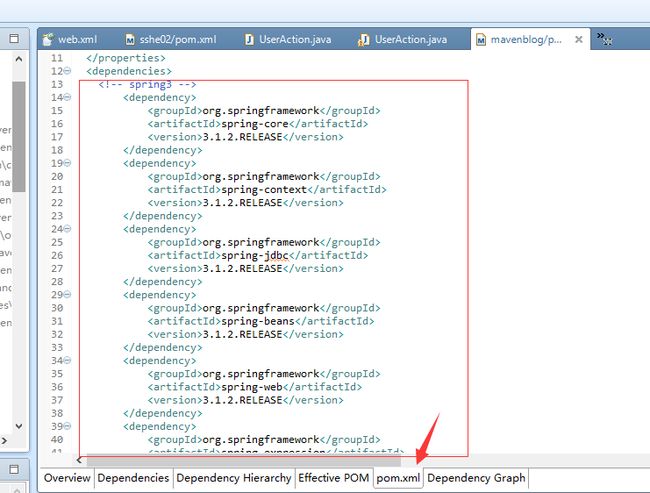
在pom.xml里,也会自动注入。
下载完相关jar包后。
2.编写spring配置文件
内容:
<beans xmlns="http://www.springframework.org/schema/beans" xmlns:xsi="http://www.w3.org/2001/XMLSchema-instance" xmlns:context="http://www.springframework.org/schema/context" xsi:schemaLocation="
http://www.springframework.org/schema/beans
http://www.springframework.org/schema/beans/spring-beans-3.0.xsd
http://www.springframework.org/schema/context
http://www.springframework.org/schema/context/spring-context-3.0.xsd
">


    <context:property-placeholder location="classpath:config.properties" />


    <context:component-scan base-package="sy.dao,sy.service" />

beans>
在src/main/resources目录下创建一个config.properties文件,如下图所示:
config.properties文件主要是用来编写一些系统的配置信息,例如数据库连接信息,config.properties文件中的内容暂时先不编写,等整合到Hibernate时再编写具体的数据库连接信息。
3.编写测试
首先,在src/main/java中创建sy.service包,在包中编写一个 UserServiceI 接口,如下图所示:
UserServiceI 接口内容:
public interface UserserviceI {

    public void test1();

}
然后,在src/main/java中创建sy.service.impl包,在包中编写UserServiceImpl实现类,如下图所示:
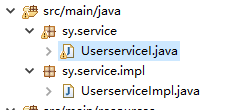
内容如下:
package sy.service.impl;

import org.springframework.stereotype.Service;

import sy.service.UserserviceI;


//使用Spring提供的@Service注解将UserServiceImpl标注为一个Service
@Service("userService")
public class UserserviceImpl implements UserserviceI {

    public void test1() {
        System.out.print("ssss");

    }

}
进行单元测试时需要使用到Junit,所以需要在pom.xml文件中添加Junit的jar包描述,如下:
<dependency>
    <groupId>junitgroupId>
    <artifactId>junitartifactId>
    <version>4.10version>
    <scope>testscope>
  dependency>
在src/main/test中创建sy.test包,在包中编写 TestSpring类,如下图所示:
内容如下:
package sy.test;

import org.junit.Test;
import org.springframework.context.ApplicationContext;
import org.springframework.context.support.ClassPathXmlApplicationContext;

import sy.service.UserserviceI;

public class TestSpring {
    @Test
    public void test(){
        //通过spring.xml配置文件创建Spring的应用程序上下文环境
        ApplicationContext ac = new ClassPathXmlApplicationContext(new String[]{"classpath:spring.xml"});
         //从Spring的IOC容器中获取bean对象
        UserserviceI user = (UserserviceI) ac.getBean("userService");
        //执行测试方法
        user.test1();

    }

}
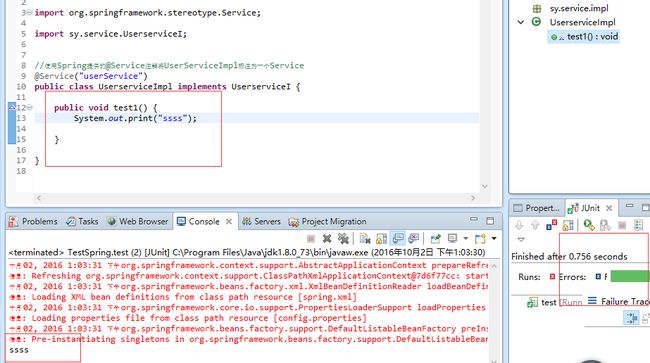
JUnit Test运行,结果如图所示:
junit运行通过。
4.在web.xml中配置Spring监听器
 <-- spring配置文件位置 -->
    <context-param>
        <param-name>contextConfigLocationparam-name>
        <param-value>classpath:spring.xmlparam-value>
    context-param>

    <listener>
        <listener-class>org.springframework.web.context.ContextLoaderListenerlistener-class>
    listener>
在tomcat服务器中进行测试,先执行【Maven install】命令发布项目,然后将项目部署到tomcat服务器,最后启动tomcat服务器
输入地址:http://localhost:8080/项目名 , 能够正常进行访问,就说明Spring3的开发环境搭建成功,如下图所示:
Spring3开发环境搭建成功!
