利用图像内插法放大缩小图像 Matlab
利用图像内插法放大缩小图像 Matlab
内插是利用已知数据来估计未知位置的数值进行处理,基础的内插法有最近邻内插法,双线性内插法。本文将对灰度图并利用Matlab来仿真一下这两种方法。
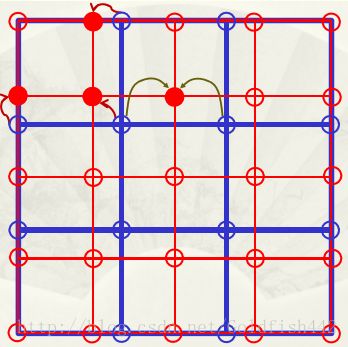
图像放大或缩小的原理是像素点的增多或减少。换句话说,每个像素的大小是一定的,图像的大小是由像素点的数量决定的。以图像放大为例,如下图,蓝色框上每个点代表原图对应位置的灰度值,红色为放大后。在此图中,我们把放大的图像缩放在原图中,通过原图的灰度值去映射出变换后的灰度值。注意:这里变换前后大小相同是为了方便做映射,实际上图像是被放大了。
最近邻内插法

最近邻内插法如字面意思,就是利用距离最近的点去代替要变换的点,如上图。代码如下,为了方便首先将原图扩展了一圈方便后面的映射。
function [output_image]=InterpolationNearest11410442(input_file,dim)
% Step 1:Read input image and interpolation dimension
A=imread(input_file);
[i,j]=size(A);
x=round(dim(1));
y=round(dim(2));
% Step 2: Extend the input image edge and creat the output_image matrix
[h,w,d]=size(A);
B=zeros(h+2,w+2,d);
% Extend  the matrix A to I, besides adding 2 both in row and column
B(2:h+1,2:w+1,:)=A;
% Inside I equal to A
B(1,1,:)=A(1,1,:);
B(1,w+2,:)=A(1,w,:);
B(h+2,1,:)=A(h,1,:);
B(h+2,w+2,:)=A(h,w,:);
% Set the 4 vertex of I equal to A
B(1,2:w+1,:)=A(1,1:w,:);
B(2:h+1,1,:)=A(1:h,1,:);
B(h+2,2:w+1,:)=A(h,1:w,:);
B(2:h+1,w+2,:)=A(1:h,w,:);
% Set the 4 border of I equal to A
output_image=zeros(x,y);
for a=1:x
    for b=1:y
        m=round(a*i/x);
        n=round(b*j/y);
        % Find the nearest point of (x,y)
        output_image(a,b)=B(m+1,n+1);
        % Because the matrix has extended, the nearest point in matrix B is
        % (m+1,n+1)
    end
end
% Step 3: Output the origin image and the image being Interpolated
figure
imshow(A);
axis on
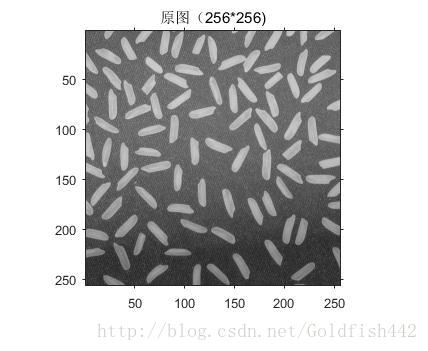
title(['原图(',num2str(i),'*',num2str(j),')']);
figure
imshow(uint8(output_image));
axis on
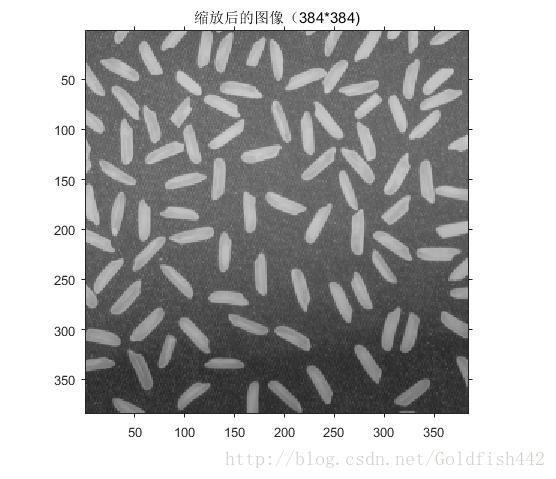
title(['缩放后的图像(',num2str(x),'*',num2str(y),')']);
end双线性内插法
function [output_image]=InterpolationBilinear11410442(input_file,dim)
% Step 1:Read input image and interpolation dimension
A=imread(input_file);
[i,j]=size(A);
x=round(dim(1));
y=round(dim(2));
% Step 2: Extend the input image edge and creat the output_image matrix
[h,w,d]=size(A);
B=zeros(h+2,w+2,d);
% Extend  the matrix A to I, besides adding 2 both in row and column
B(2:h+1,2:w+1,:)=A;
% Inside I equal to A
B(1,1,:)=A(1,1,:);
B(1,w+2,:)=A(1,w,:);
B(h+2,1,:)=A(h,1,:);
B(h+2,w+2,:)=A(h,w,:);
% Set the 4 vertex of I equal to A
B(1,2:w+1,:)=A(1,1:w,:);
B(2:h+1,1,:)=A(1:h,1,:);
B(h+2,2:w+1,:)=A(h,1:w,:);
B(2:h+1,w+2,:)=A(1:h,w,:);
% Set the 4 border of I equal to A
output_image=zeros(x,y);
for a=1:x
    for b=1:y
        r=a*i/x;
        c=b*j/y;
        m=ceil(r);
        n=ceil(c);
        % Find the up nearest point of (x,y)
        u=m-r;
        v=n-c;
        % Calculate the linear rate
        output_image(a,b,d)=u*v*B(m,n,d)+u*(1-v)*B(m,n+1,d)+(1-u)*v*B(m+1,n,d)+(1-u)*(1-v)*B(m+1,n+1,d);
        % Calculate the output_image matrix
    end
end
% Step 3: Output the origin image and the image being Interpolated
figure
imshow(A);
axis on
title(['原图(',num2str(i),'*',num2str(j),')']);
figure
imshow(uint8(output_image));
axis on
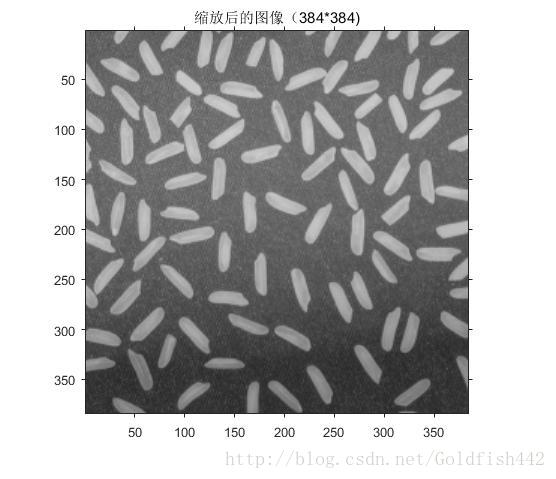
title(['缩放后的图像(',num2str(x),'*',num2str(y),')']);
end


