关于Centos7.3安装Ambari2.4.2+HDP2.5.3搭建大数据集群的笔记(上)
主机环境:
Centos7.3(一台)
Ambari2.4.2
HDP2.5.3
正常安装Centos7.3操作系统,相关教程很多,在此不多作描述。
1.安装后登录root用户,进行权限认证:
vim /etc/gdm/custom.conf
在[daemon]下方进行添加:
AutomaticLoginEnable=true
AutomaticLogin=root #你想自动登录的用户名
Ps:删除用户方法
userdel danyl:只删除用户,不删除相关文件及目录
userdel –rf danyl:删除danyl用户的所有文件与目录
2.ifconfig获取自己的IP地址,并修改主机映射:
vim /etc/hosts
在下方进行添加:
自己的IP地址 master
修改hostname:
vim /etc/hostname
添加自己的主机名
3.关机重启,如果主机名还未进行修改,使用下面指令强制更改:
hostname master
4.重启后已经登录到root账户,ssh并免认证:
ssh localhost
exit
cd ~/.ssh
ssh-keygen –t rsa
cat id_rsa.pub >> authorized_keys
5.开启ntp服务,设置时间同步:
yum –y install ntp
systemctl is-enabled ntpd
systemctl enable ntpd
systemctl start ntpd
6.关闭防火墙和SELinux
systemctl disable firewalld
systemctl stop firewalld
setenforce 0
修改配置文件让机器重启也生效:
vim /etc/sysconfig/selinux
SELINUX=disabled
7.安装JDK1.8.0:
拷贝并解压安装包,配置环境变量:
vim ~/.bash_profile
export JAVA_HOME=/usr/jvm/jdk1.8.0
export JRE_HOME=$JAVA_HOME/jre
export PATH=$JAVA_HOME/bin:$JAVA_HOME:$PATH
export CLASSPATH=.:$JAVA_HOME/lib/dt.jar:$JAVA_HOME/lib/tool.jar
8.安装http服务器,允许http服务永久能通过防火墙:
yum install httpd
firewall-cmd --add-service=http
firewall-cmd --permanent --add-service=http
添加Apache服务到系统层使其随系统自动启动:
systemctl start httpd.service
systemctl enable httpd.service
9.安装本地源相关文件:
yum install yum-utils createrepo
10.下载安装资源:
下载Ambari:
wget http://public-repo-1.hortonworks.com/ambari/centos7/2.x/updates/2.4.2.0/ambari.repo
wget http://public-repo-1.hortonworks.com/ambari/centos7/2.x/updates/2.4.2.0/ambari-2.4.2.0-centos7.tar.gz
下载HDP:
wget http://public-repo-1.hortonworks.com/HDP/centos7/2.x/updates/2.5.3.0/hdp.repo
wget http://public-repo-1.hortonworks.com/HDP/centos7/2.x/updates/2.5.3.0/HDP-2.5.3.0-centos7-rpm.tar.gz
wget http://public-repo-1.hortonworks.com/HDP-UTILS-1.1.0.21/repos/centos7/HDP-UTILS-1.1.0.21-centos7.tar.gz
11.在httpd根目录,也就是:/var/www/html,创建文件夹ambari,并将安装包进行解压:
1 tar xf ambari-2.4.2.0-centos7.tar.gz -C /var/www/html/ambari/
2 tar xf HDP-2.5.3.0-centos7-rpm.tar.gz -C /var/www/html/ambari/
3 tar xf HDP-UTILS-1.1.0.21-centos7.tar.gz –C /var/www/html/ambari/HDP-UTILS-1.1.0.21
(注意:在这个ambari文件夹中需要再加入一个新的文件夹名字为:HDP-UTILS-1.1.0.21)
12.验证http网站是否可用,使用links或者直接登录:
links http://127.0.0.1/ambari
http://master/ambari
13.配置ambari、HDP、HDP-UTILS的本地源:
1) vim /app/ambari.repo:
#VERSION_NUMBER=2.4.2.0-136
[Updates-ambari-2.4.2.0]
name=ambari-2.4.2.0 - Updates
baseurl=http://ambari01/ambari/AMBARI-2.4.2.0/centos7/2.4.2.0-136/
gpgcheck=1
gpgkey=http:// ambari01/ambari/AMBARI-2.4.2.0/centos7/2.4.2.0-136/RPM-GPG-KEY/RPM-GPG-KEY-Jenkins
enabled=1
priority=1
2) vim hdp.repo:
#VERSION_NUMBER=2.5.3.0-37
[HDP-2.5.3.0]
name=HDP Version - HDP-2.5.3.0
baseurl=http:// ambari01/ambari/HDP/centos7
gpgcheck=1
gpgkey=http:// ambari01/ambari/HDP/centos7/RPM-GPG-KEY/RPM-GPG-KEY-Jenkins
enabled=1
priority=1
[HDP-UTILS-1.1.0.21]
name=HDP-UTILS Version - HDP-UTILS-1.1.0.21
baseurl=http:// ambari01/ambari/HDP-UTILS-1.1.0.21/
gpgcheck=1
gpgkey=http:// ambari01/ambari/HDP-UTILS-1.1.0.21/RPM-GPG-KEY/RPM-GPG-KEY-Jenkins
enabled=1
priority=1
14.将源文件,放到/etc/yum.repos.d/文件夹中:
mv ambary.repo /etc/yum.repos.d/
mv hdp.repo /etc/yum.repos.d/
15.更新yum:
yum clean all
yum list update
yum makecache
yum repolist
16.安装MySQL数据库
1)下载mysql的repo源:
wget http://repo.mysql.com/mysql57-community-release-el7-8.noarch.rpm
2)安装mysql57-community-release-el7-8.noarch.rpm包:
rpm -ivh mysql57-community-release-el7-8.noarch.rpm --nodeps --force
3)安装这个包之后,会在/etc/yum.repos.d/目录下多两个yum.repo源:
/etc/yum.repos.d/mysql-community.repo
/etc/yum.repos.d/mysql-community-source.repo
4)安装mysql:
yum install mysql-server
17.启动MySQL服务:
1)查看MySQL是否启动:
service mysqld status
2)启动MySQL:
systemctl start mysqld
3)查看MySQL初始密码:
MySQL5.7在安装的时候,会为root用户随机生成一个初始密码,而不是以往版本的空密码。可以在安全模式进行修改root登录密码,或者使用初始密码进行登录之后进行密码修改,此处先使用后面的方式进行修改:
MySQL为root用户生成的初始密码可以在mysqld.log文件中找到:
#grep 'temporary password' /var/log/mysqld.log
登录mysql:
mysql -u root -p
mysql>Enter password: (此处输入初始密码)
mysql>SET PASSWORD FOR 'root'@'localhost' = "Linyiluo36593@#!";
(注意:5.7之后的版本密码策略要求比较复杂,需要同时有大小写字母,数字和符号!)
然后介绍安全模式修改root登录密码:(在上面的方式不能修改的情况下可用):
a)先停止mysql服务:
systemctl stop mysqld.service
b)修改文件:
vim /etc/my.cnf
在[mysqld]下面添加:
skip-grant-tables
保存并重新启动mysql服务:
systemctl start mysqld.service
c)再次登录mysql:
mysql –u root #不需要输入密码
use mysql
update user set authentication_string=password('Linyiluo36593@#!') where User='root' and Host='localhost'; #注意此处的!会在命令行变动
flush privileges;
exit;
vi /etc/my.cnf #把 skip-grant-tables 一句删除保存退出重启mysql服务
systemctl restart mysqld.service
d)再次登录即可,如果出现:
You must reset your password using ALTER USER statement before executing this statement.
再次进行密码设置即可:
set password = password('Zgw-123');
18.开放3306端口:
1)允许使用用户名root密码Root-123456从任何主机连接到mysql服务器。
mysql> GRANT ALL PRIVILEGES ON *.* TO 'root'@'%' IDENTIFIED BY 'Linyiluo36593@#!' WITH GRANT OPTION;
mysql> FLUSH PRIVILEGES;
mysql> exit;
2)开启防火墙mysql3306端口的外部访问:
firewall-cmd --zone=public --add-port=3306/tcp --permanent
firewall-cmd --reload
3)安装完成后创建Ambari数据库及用户,登录root用户执行:
1 create database ambari character set utf8 ;
2 CREATE USER 'ambari'@'%'IDENTIFIED BY 'Ambari-36593';
3 GRANT ALL PRIVILEGES ON *.* TO 'ambari'@'%';
4 FLUSH PRIVILEGES;
如果要安装Hive,再创建Hive数据库和用户再执行下面的语句:
1 create database hive character set utf8 ;
2 CREATE USER 'hive'@'%'IDENTIFIED BY 'Hive-36593';
3 GRANT ALL PRIVILEGES ON *.* TO 'hive'@'%';
4 FLUSH PRIVILEGES;
如果要安装Oozie,再创建Oozie数据库和用户再执行下面的语句:
1 create database oozie character set utf8 ;
2 CREATE USER 'oozie'@'%'IDENTIFIED BY 'Oozie-36593';
3 GRANT ALL PRIVILEGES ON *.* TO 'oozie'@'%';
4 FLUSH PRIVILEGES;
退出并安装mysql jdbc驱动:
yum install mysql-connector-java
19.安装Ambari:
1)安装ambari2.4.2:
yum install ambari-server
(如果提示找不到KEY,则执行如下命令:rpm --import /var/www/html/ambari/AMBARI-2.4.2.0/centos7/2.4.2.0-460/RPM-GPG-KEY/RPM-GPG-KEY-Jenkins)
2)配置ambari:
ambari-server setup
下面是配置执行流程,按照提示进行操作:
1——检查SELinux是否关闭,如果已关闭则不用操作:
1 Using python /usr/bin/python
2 Setup ambari-server
3 Checking SELinux...
4 SELinux status is 'disabled'
2——提示是否自定义设置。输入:y
1 Customize user account for ambari-server daemon [y/n] (n)? y
3——ambari-server账号。输入:ambari
1 Enter user account for ambari-server daemon (root):ambariAdjusting ambari-server permissions and ownership...
4——检查防火墙是否关闭,如果已关闭则不用操作:
1 Checking firewall status...
2 Redirecting to /bin/systemctl status iptables.service
5——设置JDK。输入:3
2 Checking JDK...Do you want to change Oracle JDK [y/n] (n)? y
3 [] Oracle JDK 1.8 + Java Cryptography Extension (JCE) Policy Files 8
4 [] Oracle JDK 1.7 + Java Cryptography Extension (JCE) Policy Files 7
5 [] Custom JDK
6 ==========================================================================
7 Enter choice (1): 3
6——如果上一步设置自定义JDK,则要输入JAVA_HOME:
1 /usr/jvm/jdk1.8.0
1 WARNING: JDK must be installed on all hosts and JAVA_HOME must be valid on all hosts.WARNING: JCE Policy files are required for configuring Kerberos security. If you plan to use Kerberos,please make sure JCE Unlimited Strength Jurisdiction Policy Files are valid on all hosts.Path to JAVA_HOME: /opt/java/jdk1.8.0_121Validating JDK on Ambari Server...done.Completing setup...
7——数据库配置。选择:y
1 Configuring database...Enter advanced database configuration [y/n] (n)? y
8——选择数据库类型。输入:3
1 Configuring database...===================================================
2 Choose one of the following options:
3 [1] - PostgreSQL (Embedded)
4 [2] - Oracle
5 [3] - MySQL
6 [4] - PostgreSQL
7 [5] - Microsoft SQL Server (Tech Preview)
8 [6] – SQL Anywhere========================================================
9 Enter choice (3): 3
9——设置数据库的具体配置信息,根据自己情况输入,和括号内相同直接回车
1 Hostname (localhost):
2 Port ():
3 Database name (ambari):
4 Username (ambari):
5 Enter Database Password (Ambari-123):
10——提示必须安装MYSQL JDBC,回车结束ambari配置:
1 WARNING: Before starting Ambari Server, you must copy the MySQL JDBC driver JAR file to /usr/share/java.
2 Press to continue.
11——将Ambari数据库脚本导入到数据库:
如果使用自己定义的数据库,必须在启动Ambari服务之前导入Ambari的sql脚本。用Ambari用户(上面设置的用户)登录mysql
1 mysql -uambari -p
2 use ambari;
3source /var/lib/ambari-server/resources/Ambari-DDL-MySQL-CREATE.sql
20.启动Ambari:
ambari-server start
成功启动后在浏览器输入Ambari地址:
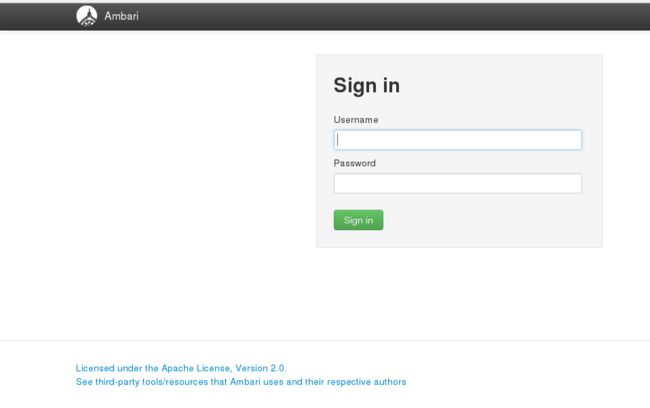
http://master:8080/
显示界面:
