- PHP环境搭建详细教程
好看资源平台
前端php
PHP是一个流行的服务器端脚本语言,广泛用于Web开发。为了使PHP能够在本地或服务器上运行,我们需要搭建一个合适的PHP环境。本教程将结合最新资料,介绍在不同操作系统上搭建PHP开发环境的多种方法,包括Windows、macOS和Linux系统的安装步骤,以及本地和Docker环境的配置。1.PHP环境搭建概述PHP环境的搭建主要分为以下几类:集成开发环境:例如XAMPP、WAMP、MAMP,这
- SpringBlade dict-biz/list 接口 SQL 注入漏洞
文章永久免费只为良心
oracle数据库
SpringBladedict-biz/list接口SQL注入漏洞POC:构造请求包查看返回包你的网址/api/blade-system/dict-biz/list?updatexml(1,concat(0x7e,md5(1),0x7e),1)=1漏洞概述在SpringBlade框架中,如果dict-biz/list接口的后台处理逻辑没有正确地对用户输入进行过滤或参数化查询(PreparedSta
- insert into select 主键自增_mybatis拦截器实现主键自动生成
weixin_39521651
insertintoselect主键自增mybatisdelete返回值mybatisinsert返回主键mybatisinsert返回对象mybatisplusinsert返回主键mybatisplus插入生成id
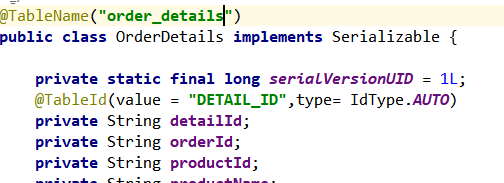
前言前阵子和朋友聊天,他说他们项目有个需求,要实现主键自动生成,不想每次新增的时候,都手动设置主键。于是我就问他,那你们数据库表设置主键自动递增不就得了。他的回答是他们项目目前的id都是采用雪花算法来生成,因此为了项目稳定性,不会切换id的生成方式。朋友问我有没有什么实现思路,他们公司的orm框架是mybatis,我就建议他说,不然让你老大把mybatis切换成mybatis-plus。mybat
- 【六】阿伟开始搭建Kafka学习环境
能源恒观
中间件学习kafkaspring
阿伟开始搭建Kafka学习环境概述上一篇文章阿伟学习了Kafka的核心概念,并且把市面上流行的消息中间件特性进行了梳理和对比,方便大家在学习过程中进行对比学习,最后梳理了一些Kafka使用中经常遇到的Kafka难题以及解决思路,经过上一篇的学习我相信大家对Kafka有了初步的认识,本篇将继续学习Kafka。一、安装和配置学习一项技术首先要搭建一套服务,而Kafka的运行主要需要部署jdk、zook
- Python实现简单的机器学习算法
master_chenchengg
pythonpython办公效率python开发IT
Python实现简单的机器学习算法开篇:初探机器学习的奇妙之旅搭建环境:一切从安装开始必备工具箱第一步:安装Anaconda和JupyterNotebook小贴士:如何配置Python环境变量算法初体验:从零开始的Python机器学习线性回归:让数据说话数据准备:从哪里找数据编码实战:Python实现线性回归模型评估:如何判断模型好坏逻辑回归:从分类开始理论入门:什么是逻辑回归代码实现:使用skl
- spring如何整合druid连接池?
惜.己
springspringjunit数据库javaidea后端xml
目录spring整合druid连接池1.新建maven项目2.新建mavenModule3.导入相关依赖4.配置log4j2.xml5.配置druid.xml1)xml中如何引入properties2)下面是配置文件6.准备jdbc.propertiesJDBC配置项解释7.配置druid8.测试spring整合druid连接池1.新建maven项目打开IDE(比如IntelliJIDEA,Ecl
- SpringCloudAlibaba—Sentinel(限流)
菜鸟爪哇
前言:自己在学习过程的记录,借鉴别人文章,记录自己实现的步骤。借鉴文章:https://blog.csdn.net/u014494148/article/details/105484410Sentinel介绍Sentinel诞生于阿里巴巴,其主要目标是流量控制和服务熔断。Sentinel是通过限制并发线程的数量(即信号隔离)来减少不稳定资源的影响,而不是使用线程池,省去了线程切换的性能开销。当资源
- springboot+vue项目实战一-创建SpringBoot简单项目
苹果酱0567
面试题汇总与解析springboot后端java中间件开发语言
这段时间抽空给女朋友搭建一个个人博客,想着记录一下建站的过程,就当做笔记吧。虽然复制zjblog只要一个小时就可以搞定一个网站,或者用cms系统,三四个小时就可以做出一个前后台都有的网站,而且想做成啥样也都行。但是就是要从新做,自己做的意义不一样,更何况,俺就是专门干这个的,嘿嘿嘿要做一个网站,而且从零开始,首先呢就是技术选型了,经过一番思量决定选择-SpringBoot做后端,前端使用Vue做一
- Vue( ElementUI入门、vue-cli安装)
m0_l5z
elementuivue.js
一.ElementUI入门目录:1.ElementUI入门1.1ElementUI简介1.2Vue+ElementUI安装1.3开发示例2.搭建nodejs环境2.1nodejs介绍2.2npm是什么2.3nodejs环境搭建2.3.1下载2.3.2解压2.3.3配置环境变量2.3.4配置npm全局模块路径和cache默认安装位置2.3.5修改npm镜像提高下载速度2.3.6验证安装结果3.运行n
- Spring MVC 全面指南:从入门到精通的详细解析
一杯梅子酱
技术栈学习springmvcjava
引言:SpringMVC,作为Spring框架的一个重要模块,为构建Web应用提供了强大的功能和灵活性。无论是初学者还是有一定经验的开发者,掌握SpringMVC都将显著提升你的Web开发技能。本文旨在为初学者提供一个全面且易于理解的学习路径,通过详细的知识点分析和实际案例,帮助你快速上手SpringMVC,让学习过程既深刻又高效。一、SpringMVC简介1.1什么是SpringMVC?Spri
- Spring Boot中实现跨域请求
BABA8891
springboot后端java
在SpringBoot中实现跨域请求(CORS,Cross-OriginResourceSharing)可以通过多种方式,以下是几种常见的方法:1.使用@CrossOrigin注解在SpringBoot中,你可以在控制器或者具体的请求处理方法上使用@CrossOrigin注解来允许跨域请求。在控制器上应用:importorg.springframework.web.bind.annotation.
- 博客网站制作教程
2401_85194651
javamaven
首先就是技术框架:后端:Java+SpringBoot数据库:MySQL前端:Vue.js数据库连接:JPA(JavaPersistenceAPI)1.项目结构blog-app/├──backend/│├──src/main/java/com/example/blogapp/││├──BlogApplication.java││├──config/│││└──DatabaseConfig.java
- 【Python搞定车载自动化测试】——Python实现车载以太网DoIP刷写(含Python源码)
疯狂的机器人
Python搞定车载自动化pythonDoIPUDSISO142291SO13400Bootloadertcp/ip
系列文章目录【Python搞定车载自动化测试】系列文章目录汇总文章目录系列文章目录前言一、环境搭建1.软件环境2.硬件环境二、目录结构三、源码展示1.DoIP诊断基础函数方法2.DoIP诊断业务函数方法3.27服务安全解锁4.DoIP自动化刷写四、测试日志1.测试日志五、完整源码链接前言随着智能电动汽车行业的发展,汽车=智能终端+四个轮子,各家车企都推出了各自的OTA升级方案,本章节主要介绍如何使
- 进销存小程序源码 PHP网络版ERP进销存管理系统 全开源可二开
摸鱼小号
php
可直接源码搭建部署发布后使用:一、功能模块介绍该系统模板主要有进,销,存三个主要模板功能组成,下面将介绍各模块所对应的功能;进:需要将产品采购入库,自动生成采购明细台账同时关联财务生成付款账单;销:是指对客户的销售订单记录,汇总生成产品销售明细及回款计划;存:库存的日常盘点与统计,库存下限预警、出入库台账、库存位置等。1.进购管理采购订单:采购下单审批→由上级审批通过采购入库;采购入库:货品到货>
- RabbitMQ生产者重复机制与确认机制
java炒饭小能手
java-rabbitmqrabbitmqjava
重复机制生产者发送消息时,出现了网络故障,导致与MQ的连接中断。为了解决这个问题,SpringAMQP提供的消息发送时的重试机制。即:当RabbitTemplate与MQ连接超时后,多次重试。需要修该发送端模块的application.yaml文件,添加下面的内容:spring:rabbitmq:connection-timeout:1s#设置MQ的连接超时时间template:retry:ena
- 最简单将静态网页挂载到服务器上(不用nginx)
全能全知者
服务器nginx运维前端html笔记
最简单将静态网页挂载到服务器上(不用nginx)如果随便弄个静态网页挂在服务器都要用nignx就太麻烦了,所以直接使用Apache来搭建一些简单前端静态网页会相对方便很多检查Web服务器服务状态:sudosystemctlstatushttpd#ApacheWeb服务器如果发现没有安装web服务器:安装Apache:sudoyuminstallhttpd启动Apache:sudosystemctl
- 绝招曝光!3小时高效利用ChatGPT写出精彩论文
kkai人工智能
chatgpt人工智能ai学习媒体
在这份指南中,我将深入解析如何利用ChatGPT4.0的高级功能,指导整个学术研究和写作过程。从初步探索研究主题,到撰写结构严谨的学术论文,我将一步步展示如何在每个环节中有效运用ChatGPT。如果您还未使用PLUS版本,可以参考相关教程。**初步探索与主题的确定**起初,我处于庞大的知识领域中,寻找一个可深入研究的领域。ChatGPT如同灯塔,通过深入分析最新研究趋势和领域热点,帮助我在广阔的学
- MyBatis 详解
阿贾克斯的黎明
javamybatis
目录目录一、MyBatis是什么二、为什么使用MyBatis(一)灵活性高(二)性能优化(三)易于维护三、怎么用MyBatis(一)添加依赖(二)配置MyBatis(三)创建实体类和接口(四)使用MyBatis一、MyBatis是什么MyBatis是一个优秀的持久层框架,它支持自定义SQL、存储过程以及高级映射。MyBatis免除了几乎所有的JDBC代码以及设置参数和获取结果集的工作。它可以通过简
- NPM私库搭建-verdaccio(Linux)
Beam007
npmlinux前端
1、安装nodelinux服务器安装nodea)、官网下载所需的node版本https://nodejs.org/dist/v14.21.0/b)、解压安装包若下载的是xxx.tar.xz文件,解压命令为tar-xvfxxx.tar.xzc)、修改环境变量修改:/etc/profile文件#SETPATHFORNODEJSexportNODE_HOME=NODEJS解压安装的路径exportPAT
- 【2023年】云计算金砖牛刀小试6
geekgold
云计算服务器网络kubernetes容器
第一套【任务1】私有云服务搭建[10分]【题目1】基础环境配置[0.5分]使用提供的用户名密码,登录提供的OpenStack私有云平台,在当前租户下,使用CentOS7.9镜像,创建两台云主机,云主机类型使用4vCPU/12G/100G_50G类型。当前租户下默认存在一张网卡,自行创建第二张网卡并连接至controller和compute节点(第二张网卡的网段为10.10.X.0/24,X为工位号
- 前端代码上传文件
余生逆风飞翔
前端javascript开发语言
点击上传文件import{ElNotification}from'element-plus'import{API_CONFIG}from'../config/index.js'import{UploadFilled}from'@element-plus/icons-vue'import{reactive}from'vue'import{BASE_URL}from'../config/index'i
- 【Java】已解决:org.springframework.jdbc.datasource.lookup.DataSourceLookupFailureException
屿小夏
java开发语言
文章目录一、分析问题背景问题背景描述出现问题的场景二、可能出错的原因三、错误代码示例四、正确代码示例五、注意事项已解决:org.springframework.jdbc.datasource.lookup.DataSourceLookupFailureException在使用Spring框架进行开发时,数据源的配置和使用是非常关键的一环。然而,有时候我们可能会遇到org.springframewo
- SpringBoot和SpringMVC是什么关系?SpringBoot替代SpringMVC了吗?
瑞金彭于晏
springboot后端javaMVCspring数据库
SpringBoot和SpringMVC都是SpringFramework生态系统中的一部分,但它们各自扮演着不同的角色和提供不同的功能集。理解它们之间的关系,首先需要了解SpringFramework本身。SpringFrameworkSpringFramework是一个全面的、开源的应用程序开发框架,它提供了广泛的功能来支持企业应用开发的几乎所有方面。SpringFramework的核心特性之
- spring mvc @RequestBody String类型参数
zoyation
spring-mvcspringmvc
通过如下配置:text/html;charset=UTF-8application/json;charset=UTF-8在springmvc的Controller层使用@RequestBody接收Content-Type为application/json的数据时,默认支持Map方式和对象方式参数@RequestMapping(value="/{code}/saveUser",method=Requ
- Java -jar 如何在后台运行项目
vincent_hahaha
撸了今年阿里、头条和美团的面试,我有一个重要发现.......>>>说到运行jar包通常我们都会以下面的方式运行:java-jarspringboot-0.0.1-SNAPSHOT.jar这样运行的话会有一个问题,就是我们一关闭当前窗口就会停止运行项目,要想解决这个问题,就需要在后台运行。nohupjava-jarbabyshark-0.0.1-SNAPSHOT.jar >log.file 2>&
- spring security中几大组件的作用和执行顺序
阿信在这里
javaspring
springsecurity中几大组件的作用和执行顺序在SpringSecurity中,AuthenticationProvider、GroupPermissionEvaluator、PermissionEvaluator、AbstractAuthenticationProcessingFilter、DefaultMethodSecurityExpressionHandler和ManageSecu
- 探索Zebra4J:构建高效企业级Web应用的微服务框架
叶准鑫Natalie
探索Zebra4J:构建高效企业级Web应用的微服务框架ZebraZebra4J/Zebra4Js基于SpringBoot的JavaWeb/Nodejs框架项目地址:https://gitcode.com/gh_mirrors/zebra/Zebra项目介绍在当今快速发展的技术环境中,构建高效、可扩展的企业级Web应用是每个开发团队的追求。Zebra4J作为一款基于SpringBoot的全新微服务
- mybatis 二级缓存失效_Mybatis 缓存原理及失效情况解析
weixin_39844942
mybatis二级缓存失效
这篇文章主要介绍了Mybatis缓存原理及失效情况解析,文中通过示例代码介绍的非常详细,对大家的学习或者工作具有一定的参考学习价值,需要的朋友可以参考下1、什么是缓存[Cache]存在内存中的临时数据。将用户经常查询的数据放在缓存(内存)中,用户去查询数据就不用从磁盘上(关系型数据库数据文件)查询,从缓存中查询,从而提高查询效率,解决了高并发系统的性能问题。2、为什么要使用缓存减少和数据库的交互次
- 基于JavaWeb开发的Java+SpringMvc+vue+element实现上海汽车博物馆平台
网顺技术团队
成品程序项目javavue.js汽车课程设计springboot
基于JavaWeb开发的Java+SpringMvc+vue+element实现上海汽车博物馆平台作者主页网顺技术团队欢迎点赞收藏⭐留言文末获取源码联系方式查看下方微信号获取联系方式承接各种定制系统精彩系列推荐精彩专栏推荐订阅不然下次找不到哟Java毕设项目精品实战案例《1000套》感兴趣的可以先收藏起来,还有大家在毕设选题,项目以及论文编写等相关问题都可以给我留言咨询,希望帮助更多的人文章目录基
- 用kubedam搭建的k8s证书过期处理方法
我滴鬼鬼呀wks
k8s1024程序员节
kubeadm部署的k8s证书过期1、查看证书过期时间kubeadmalphacertscheck-expiration若证书已经过期无法试用kubectl命令建议修改服务器时间到未过期的时间段2、配置kube-controller-manager.yaml文件cat/etc/kubernetes/manifests/kube-controller-manager.yamlapiVersion:v
- 对于规范和实现,你会混淆吗?
yangshangchuan
HotSpot
昨晚和朋友聊天,喝了点咖啡,由于我经常喝茶,很长时间没喝咖啡了,所以失眠了,于是起床读JVM规范,读完后在朋友圈发了一条信息:
JVM Run-Time Data Areas:The Java Virtual Machine defines various run-time data areas that are used during execution of a program. So
- android 网络
百合不是茶
网络
android的网络编程和java的一样没什么好分析的都是一些死的照着写就可以了,所以记录下来 方便查找 , 服务器使用的是TomCat
服务器代码; servlet的使用需要在xml中注册
package servlet;
import java.io.IOException;
import java.util.Arr
- [读书笔记]读法拉第传
comsci
读书笔记
1831年的时候,一年可以赚到1000英镑的人..应该很少的...
要成为一个科学家,没有足够的资金支持,很多实验都无法完成
但是当钱赚够了以后....就不能够一直在商业和市场中徘徊......
- 随机数的产生
沐刃青蛟
随机数
c++中阐述随机数的方法有两种:
一是产生假随机数(不管操作多少次,所产生的数都不会改变)
这类随机数是使用了默认的种子值产生的,所以每次都是一样的。
//默认种子
for (int i = 0; i < 5; i++)
{
cout<<
- PHP检测函数所在的文件名
IT独行者
PHP函数
很简单的功能,用到PHP中的反射机制,具体使用的是ReflectionFunction类,可以获取指定函数所在PHP脚本中的具体位置。 创建引用脚本。
代码:
[php]
view plain
copy
// Filename: functions.php
<?php&nbs
- 银行各系统功能简介
文强chu
金融
银行各系统功能简介 业务系统 核心业务系统 业务功能包括:总账管理、卡系统管理、客户信息管理、额度控管、存款、贷款、资金业务、国际结算、支付结算、对外接口等 清分清算系统 以清算日期为准,将账务类交易、非账务类交易的手续费、代理费、网络服务费等相关费用,按费用类型计算应收、应付金额,经过清算人员确认后上送核心系统完成结算的过程 国际结算系
- Python学习1(pip django 安装以及第一个project)
小桔子
pythondjangopip
最近开始学习python,要安装个pip的工具。听说这个工具很强大,安装了它,在安装第三方工具的话so easy!然后也下载了,按照别人给的教程开始安装,奶奶的怎么也安装不上!
第一步:官方下载pip-1.5.6.tar.gz, https://pypi.python.org/pypi/pip easy!
第二部:解压这个压缩文件,会看到一个setup.p
- php 数组
aichenglong
PHP排序数组循环多维数组
1 php中的创建数组
$product = array('tires','oil','spark');//array()实际上是语言结构而不 是函数
2 如果需要创建一个升序的排列的数字保存在一个数组中,可以使用range()函数来自动创建数组
$numbers=range(1,10)//1 2 3 4 5 6 7 8 9 10
$numbers=range(1,10,
- 安装python2.7
AILIKES
python
安装python2.7
1、下载可从 http://www.python.org/进行下载#wget https://www.python.org/ftp/python/2.7.10/Python-2.7.10.tgz
2、复制解压
#mkdir -p /opt/usr/python
#cp /opt/soft/Python-2
- java异常的处理探讨
百合不是茶
JAVA异常
//java异常
/*
1,了解java 中的异常处理机制,有三种操作
a,声明异常
b,抛出异常
c,捕获异常
2,学会使用try-catch-finally来处理异常
3,学会如何声明异常和抛出异常
4,学会创建自己的异常
*/
//2,学会使用try-catch-finally来处理异常
- getElementsByName实例
bijian1013
element
实例1:
<!DOCTYPE html PUBLIC "-//W3C//DTD XHTML 1.0 Transitional//EN" "http://www.w3.org/TR/xhtml1/DTD/xhtml1-transitional.dtd">
<html xmlns="http://www.w3.org/1999/x
- 探索JUnit4扩展:Runner
bijian1013
java单元测试JUnit
参加敏捷培训时,教练提到Junit4的Runner和Rule,于是特上网查一下,发现很多都讲的太理论,或者是举的例子实在是太牵强。多搜索了几下,搜索到两篇我觉得写的非常好的文章。
文章地址:http://www.blogjava.net/jiangshachina/archive/20
- [MongoDB学习笔记二]MongoDB副本集
bit1129
mongodb
1. 副本集的特性
1)一台主服务器(Primary),多台从服务器(Secondary)
2)Primary挂了之后,从服务器自动完成从它们之中选举一台服务器作为主服务器,继续工作,这就解决了单点故障,因此,在这种情况下,MongoDB集群能够继续工作
3)挂了的主服务器恢复到集群中只能以Secondary服务器的角色加入进来
2
- 【Spark八十一】Hive in the spark assembly
bit1129
assembly
Spark SQL supports most commonly used features of HiveQL. However, different HiveQL statements are executed in different manners:
1. DDL statements (e.g. CREATE TABLE, DROP TABLE, etc.)
- Nginx问题定位之监控进程异常退出
ronin47
nginx在运行过程中是否稳定,是否有异常退出过?这里总结几项平时会用到的小技巧。
1. 在error.log中查看是否有signal项,如果有,看看signal是多少。
比如,这是一个异常退出的情况:
$grep signal error.log
2012/12/24 16:39:56 [alert] 13661#0: worker process 13666 exited on s
- No grammar constraints (DTD or XML schema).....两种解决方法
byalias
xml
方法一:常用方法 关闭XML验证
工具栏:windows => preferences => xml => xml files => validation => Indicate when no grammar is specified:选择Ignore即可。
方法二:(个人推荐)
添加 内容如下
<?xml version=
- Netty源码学习-DefaultChannelPipeline
bylijinnan
netty
package com.ljn.channel;
/**
* ChannelPipeline采用的是Intercepting Filter 模式
* 但由于用到两个双向链表和内部类,这个模式看起来不是那么明显,需要仔细查看调用过程才发现
*
* 下面对ChannelPipeline作一个模拟,只模拟关键代码:
*/
public class Pipeline {
- MYSQL数据库常用备份及恢复语句
chicony
mysql
备份MySQL数据库的命令,可以加选不同的参数选项来实现不同格式的要求。
mysqldump -h主机 -u用户名 -p密码 数据库名 > 文件
备份MySQL数据库为带删除表的格式,能够让该备份覆盖已有数据库而不需要手动删除原有数据库。
mysqldump -–add-drop-table -uusername -ppassword databasename > ba
- 小白谈谈云计算--基于Google三大论文
CrazyMizzz
Google云计算GFS
之前在没有接触到云计算之前,只是对云计算有一点点模糊的概念,觉得这是一个很高大上的东西,似乎离我们大一的还很远。后来有机会上了一节云计算的普及课程吧,并且在之前的一周里拜读了谷歌三大论文。不敢说理解,至少囫囵吞枣啃下了一大堆看不明白的理论。现在就简单聊聊我对于云计算的了解。
我先说说GFS
&n
- hadoop 平衡空间设置方法
daizj
hadoopbalancer
在hdfs-site.xml中增加设置balance的带宽,默认只有1M:
<property>
<name>dfs.balance.bandwidthPerSec</name>
<value>10485760</value>
<description&g
- Eclipse程序员要掌握的常用快捷键
dcj3sjt126com
编程
判断一个人的编程水平,就看他用键盘多,还是鼠标多。用键盘一是为了输入代码(当然了,也包括注释),再有就是熟练使用快捷键。 曾有人在豆瓣评
《卓有成效的程序员》:“人有多大懒,才有多大闲”。之前我整理了一个
程序员图书列表,目的也就是通过读书,让程序员变懒。 程序员作为特殊的群体,有的人可以这么懒,懒到事情都交给机器去做,而有的人又可以那么勤奋,每天都孜孜不倦得
- Android学习之路
dcj3sjt126com
Android学习
转自:http://blog.csdn.net/ryantang03/article/details/6901459
以前有J2EE基础,接触JAVA也有两三年的时间了,上手Android并不困难,思维上稍微转变一下就可以很快适应。以前做的都是WEB项目,现今体验移动终端项目,让我越来越觉得移动互联网应用是未来的主宰。
下面说说我学习Android的感受,我学Android首先是看MARS的视
- java 遍历Map的四种方法
eksliang
javaHashMapjava 遍历Map的四种方法
转载请出自出处:
http://eksliang.iteye.com/blog/2059996
package com.ickes;
import java.util.HashMap;
import java.util.Iterator;
import java.util.Map;
import java.util.Map.Entry;
/**
* 遍历Map的四种方式
- 【精典】数据库相关相关
gengzg
数据库
package C3P0;
import java.sql.Connection;
import java.sql.SQLException;
import java.beans.PropertyVetoException;
import com.mchange.v2.c3p0.ComboPooledDataSource;
public class DBPool{
- 自动补全
huyana_town
自动补全
<!DOCTYPE html PUBLIC "-//W3C//DTD XHTML 1.0 Transitional//EN" "http://www.w3.org/TR/xhtml1/DTD/xhtml1-transitional.dtd"><html xmlns="http://www.w3.org/1999/xhtml&quo
- jquery在线预览PDF文件,打开PDF文件
天梯梦
jquery
最主要的是使用到了一个jquery的插件jquery.media.js,使用这个插件就很容易实现了。
核心代码
<!DOCTYPE html PUBLIC "-//W3C//DTD XHTML 1.0 Transitional//EN" "http://www.w3.org/TR/xhtml1/DTD/xhtml1-transitional.
- ViewPager刷新单个页面的方法
lovelease
androidviewpagertag刷新
使用ViewPager做滑动切换图片的效果时,如果图片是从网络下载的,那么再子线程中下载完图片时我们会使用handler通知UI线程,然后UI线程就可以调用mViewPager.getAdapter().notifyDataSetChanged()进行页面的刷新,但是viewpager不同于listview,你会发现单纯的调用notifyDataSetChanged()并不能刷新页面
- 利用按位取反(~)从复合枚举值里清除枚举值
草料场
enum
以 C# 中的 System.Drawing.FontStyle 为例。
如果需要同时有多种效果,
如:“粗体”和“下划线”的效果,可以用按位或(|)
FontStyle style = FontStyle.Bold | FontStyle.Underline;
如果需要去除 style 里的某一种效果,
- Linux系统新手学习的11点建议
刘星宇
编程工作linux脚本
随着Linux应用的扩展许多朋友开始接触Linux,根据学习Windwos的经验往往有一些茫然的感觉:不知从何处开始学起。这里介绍学习Linux的一些建议。
一、从基础开始:常常有些朋友在Linux论坛问一些问题,不过,其中大多数的问题都是很基础的。例如:为什么我使用一个命令的时候,系统告诉我找不到该目录,我要如何限制使用者的权限等问题,这些问题其实都不是很难的,只要了解了 Linu
- hibernate dao层应用之HibernateDaoSupport二次封装
wangzhezichuan
DAOHibernate
/**
* <p>方法描述:sql语句查询 返回List<Class> </p>
* <p>方法备注: Class 只能是自定义类 </p>
* @param calzz
* @param sql
* @return
* <p>创建人:王川</p>
* <p>创建时间:Jul


