Saltstack自动化运维工具 ---- Salt一键部署 、一键部署源码安装ngixn
Salt,,一种全新的基础设施管理方式,部署轻松,在几分钟内可运行起来,扩展性好,很容易管理上万台服务器,速度够快,服务器之间秒级通讯。
salt底层采用动态的连接总线, 使其可以用于编配, 远程执行, 配置管理等等.
1、安装配置
[root@server1 ~]# cd /etc/yum.repos.d
[root@server1 yum.repos.d]# ls
rhel-source.repo
[root@server1 yum.repos.d]# vim rhel-source.repo
[salt]
name=salt
baseurl=http://172.25.50.250/rhel6
gpgcheck=0
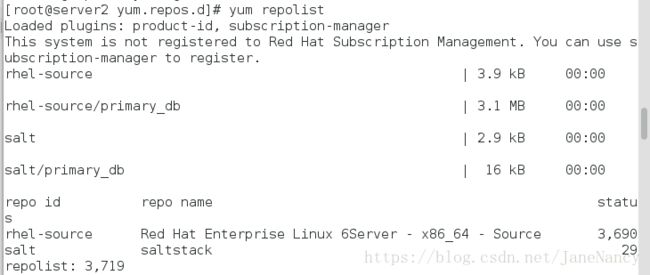
[root@server1 yum.repos.d]# yum repolist[root@server1 yum.repos.d]# yum install salt-master在server2中,同样擦作,配置 yum 源
[root@server2 yum.repos.d]# yum install -y salt-minion2、配置 minion server2 的配置文件
[root@server2 yum.repos.d]# cd /etc/salt/
[root@server2 salt]# ls
cloud           cloud.maps.d       master    minion.d  proxy.d
cloud.conf.d    cloud.profiles.d   master.d  pki       roster
cloud.deploy.d  cloud.providers.d  minion    proxy
[root@server2 salt]# vim minion[root@server2 salt]# /etc/init.d/salt-minion start
Starting salt-minion:root:server2 daemon: OK
[root@server2 salt]# vim /etc/hosts3、配置 master server1
master端使用 salt-key -L 命令查看到已经签名的客户端
[root@server1 yum.repos.d]# cd /etc/salt
[root@server1 salt]# /etc/init.d/salt-master start
[root@server1 salt]# salt-key -L
[root@server1 salt]# salt-key -A  ##salt-key -A添加所有
[root@server1 salt]# salt-key -L[root@server1 salt]# vim /etc/hosts
[root@server1 salt]# salt server2 test.ping ##test.ping检测通讯是否正常
[root@server1 salt]# salt server2 cmd.run hostname
[root@server1 salt]# salt server2 cmd.run 'df -h'
说明 master 和 minion 连接成功
4、更写 salt 的配置文件,使master 可以控制 minion 。
[root@server1 salt]# cd /etc/salt/
[root@server1 salt]# cd pki/
[root@server1 pki]# ls
master  minion
[root@server1 pki]# ll
total 8
drwx------ 7 root root 4096 8月  16 21:30 master
drwxr-xr-x 2 root root 4096 2月  23 2017 minion
[root@server1 pki]# cd master/
[root@server1 master]# ls
master.pem  minions           minions_denied  minions_rejected
master.pub  minions_autosign  minions_pre
[root@server1 master]# md5sum master.pub
aa5b833250bbb850762298fb8e931d96  master.pub
在minion端的 /etc/salt/pki/minion 目录下面会多出一个minion_master.pub 文件[root@server2 salt]# cd /etc/salt/
[root@server2 salt]# cd pki/
[root@server2 pki]# cd minion/
[root@server2 minion]# ll
total 12
-rw-r--r-- 1 root root 450 8月 16 21:42 minion_master.pub
-r-------- 1 root root 1674 8月 16 21:37 minion.pem
-rw-r--r-- 1 root root 450 8月 16 21:37 minion.pub
[root@server2 minion]# md5sum minion.pub ##私钥
efaaca917f3e388ba5b5bb04d3c4bf62 minion.pub
[root@server2 minion]# md5sum minion_master.pub ##公钥,与master 公钥一一样
aa5b833250bbb850762298fb8e931d96 minion_master.pub
与master端的 master.pub一致
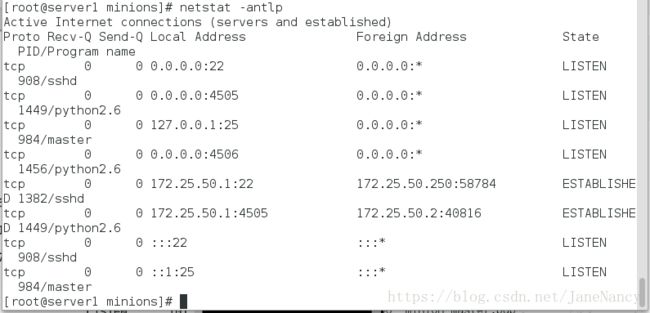
5、在master server1 查看端口:
[root@server1 minions]# netstat -antlp 4505 :master 端有长链接
[root@server1 salt]# yum install -y python-setproctitle.x86_64 [root@server1 salt]# pwd
/etc/salt
[root@server1 salt]# ls
cloud cloud.deploy.d cloud.profiles.d master minion pki proxy.d
cloud.conf.d cloud.maps.d cloud.providers.d master.d minion.d proxy roster
[root@server1 salt]# vim master
[root@server1 salt]# /etc/init.d/salt-master restart
Stopping salt-master daemon: [ OK ]
Starting salt-master daemon: [ OK ]
[root@server1 salt]# mkdir /srv/salt
6、一键部署httpd
[root@server1 salt]# cd /srv/salt/
[root@server1 salt]# ls
[root@server1 salt]# mkdir httpd
[root@server1 salt]# cd httpd/
[root@server1 httpd]# ls
[root@server1 httpd]# vim install.sls
运行,在minion端自动安装了httpd服务,将httpd的配置文件放到master的base/httpd/files下
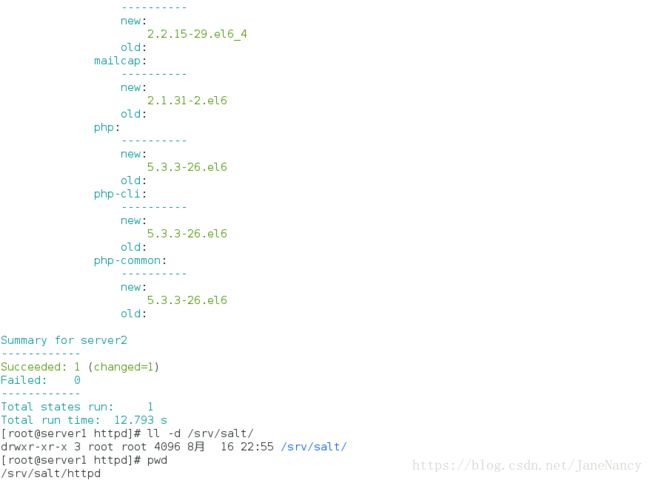
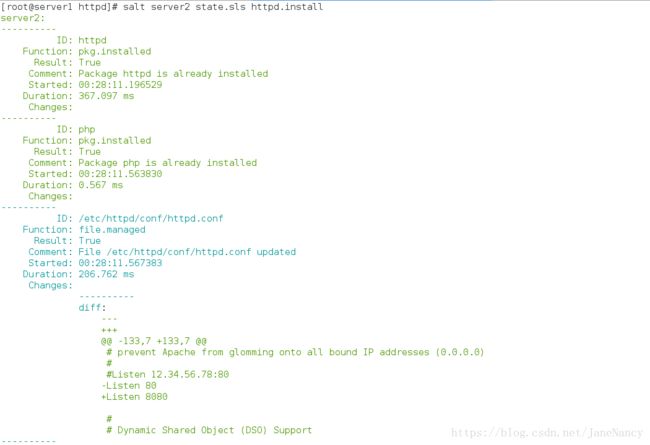
[root@server1 httpd]# salt server2 state.sls httpd.install
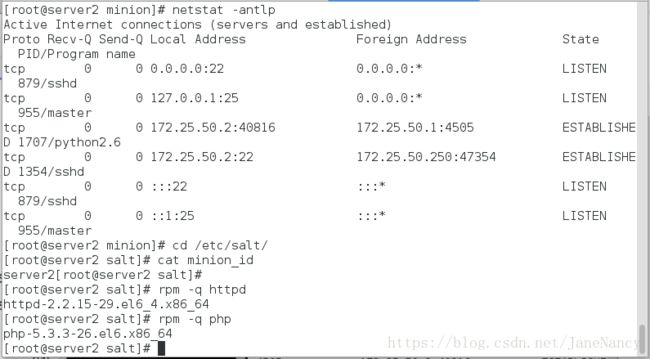
这时,我们去server2查看,http和php是否下载成功
[root@server1 salt]# cd /srv/salt/httpd/
[root@server1 httpd]# ls
install.sls
[root@server1 httpd]# vim install.sls
[root@server1 httpd]# salt server2 state.sls httpd.install
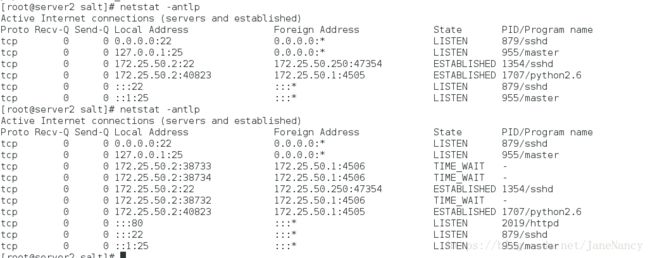
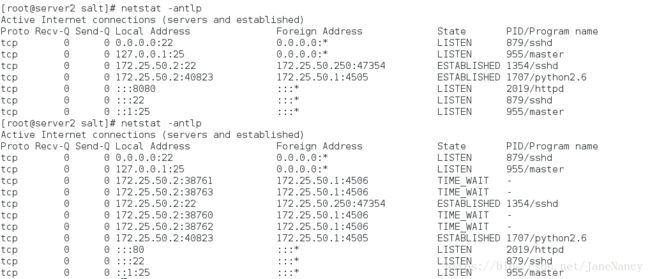
之前我们在server2查看的时侯,并没有httpd的80端口。在server1执行后,现在我们再次查看
[root@server1 httpd]# vim install.sls
[root@server1 httpd]# salt server2 state.sls httpd.install
再次更改:
首先我们要在server1建立一个目录来放置httpd的配置文件;
[root@server1 httpd]# pwd
/srv/salt/httpd
[root@server1 httpd]# ls
install.sls
[root@server1 httpd]# mkdir files
[root@server1 httpd]# ls
files  install.sls
[root@server1 httpd]# cd files/
[root@server1 files]# ls
其次我们需要将server2 的httpd的配置文件发送给server1。
[root@server2 salt]# ll /etc/httpd/conf/httpd.conf
-rw-r--r-- 1 root root 34418 8月   2 2013 /etc/httpd/conf/httpd.conf
[root@server2 salt]# scp /etc/httpd/conf/httpd.conf server1:/srv/salt/httpd/files/
The authenticity of host 'server1 (172.25.50.1)' can't be established.
RSA key fingerprint is 52:35:3e:8a:7b:70:bf:05:cb:6f:84:bc:a0:cf:4e:42.
Are you sure you want to continue connecting (yes/no)? yes
Warning: Permanently added 'server1,172.25.50.1' (RSA) to the list of known hosts.
root@server1's password:
此时在master端更改配置,在minion端生效,这里我们来改变端口进行测试
现在httpd服务是80端口
在master端更改httpd的配置文件,将端口改为8080
[root@server1 files]# ls
httpd.conf
[root@server1 files]# ll
total 36
-rw-r--r-- 1 root root 34418 8月  16 23:56 httpd.conf
[root@server1 files]# vim httpd.conf
[root@server1 files]# md5sum httpd.conf
b7ca7a0e786418ba7b5ad84efac70265  httpd.conf
[root@server2 salt]#  md5sum /etc/httpd/conf/httpd.conf
27a5c8d9e75351b08b8ca1171e8a0bbd  /etc/httpd/conf/httpd.conf
这时,我们将更改端口的程序写入文件,并执行
方法一:
[root@server1 httpd]# vim install.sls
[root@server1 httpd]# salt server2 state.sls httpd.install
方法二:
[root@server1 httpd]# vim files/httpd.conf
将刚才的8080改为80
[root@server1 httpd]# vim install.sls

apache-install:
  pkg.installed:
    - pkgs:
      - httpd
      - php

  service.running:
    - name: httpd
    - enable: True
    - reload: True
    - watch:
      - file: /etc/httpd/conf/httpd.conf


/etc/httpd/conf/httpd.conf:
  file.managed:
    - source: salt://httpd/files/httpd.conf
    - mode: 644
    - user: root
[root@server1 httpd]# salt server2 state.sls httpd.install
我们再去server2 查看:
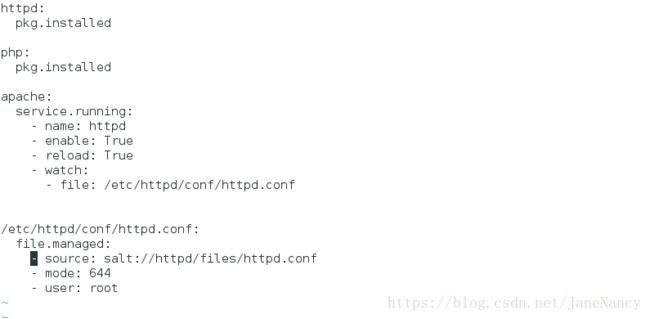
方法三:
[root@server1 httpd]# vim files/httpd.conf
将刚才的80改为8080
[root@server1 httpd]# vim install.sls

httpd:
  pkg.installed

php:
  pkg.installed

apache:
  service.running:
    - name: httpd
    - enable: True
    - reload: True
    - watch:
      - file: /etc/httpd/conf/httpd.conf


/etc/httpd/conf/httpd.conf:
  file.managed:
    - source: salt://httpd/files/httpd.conf
    - mode: 644
    - user: root
 [root@server1 httpd]# salt server2 state.sls httpd.install
再去server2 查看:
一键部署源码安装ngixn
1、我们编写一个安装nginx的文件
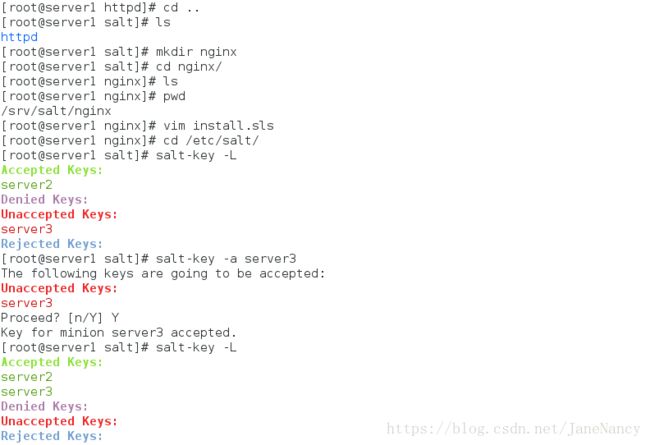
先要准备nginx源码安装的依赖性,在base目录下建立pkgs目录,编辑install.sls
在准备一台机器,server3做minion来安装部署ngxin
[root@server1 salt]# ls
httpd
[root@server1 salt]# mkdir nginx
[root@server1 salt]# cd nginx/
[root@server1 nginx]# ls
[root@server1 nginx]# pwd
/srv/salt/nginx
[root@server1 nginx]# vim install.sls
[root@server1 nginx]# cd /etc/salt/
[root@server1 salt]# salt-key -L
[root@server1 salt]# salt-key -a server3
[root@server1 salt]# salt-key -L
[root@server1 ~]# cd /srv/salt/
[root@server1 salt]# ls
httpd  nginx
[root@server1 salt]# cd nginx/
[root@server1 nginx]# ls
install.sls
[root@server1 nginx]# vim install.sls
[root@server1 nginx]# mkdir files
[root@server1 nginx]# ls
files  install.sls
[root@server1 nginx]# cd files/
[root@server1 files]# ls
nginx-1.14.0.tar.gz
[root@server1 salt]# cd nginx/
[root@server1 nginx]# ls
files  install.sls
[root@server1 nginx]# vim install.sls

nginx-install:
  pkg.installed:
    - pkgs:
      - pcre-devel
      - openssl-devel
      - gcc

  file.managed:
    - name: /mnt/nginx-1.14.0.tar.gz
    - source: salt://nginx/files/nginx-1.14.0.tar.gz

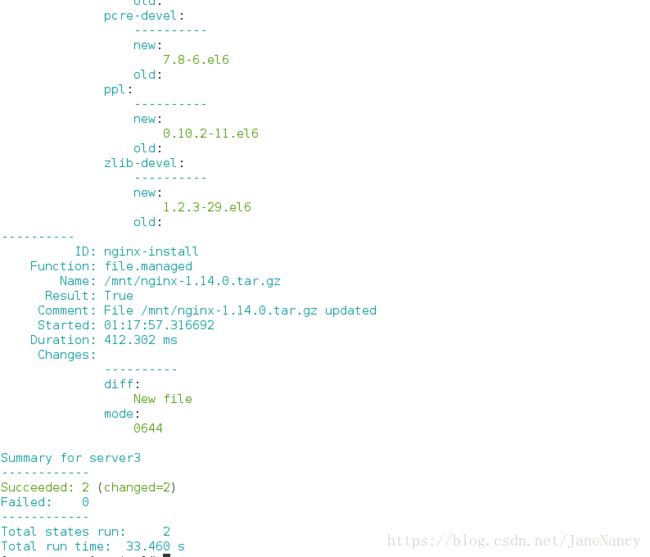
[root@server1 nginx]# salt server3 state.sls nginx.install
我们去server3查看
[root@server3 salt]# ps ax说明我们的文件编写没有问题,那么就继续编写。
还原操作环境:
[root@server3 nginx-1.14.0]# cd
[root@server3 ~]# cd /mnt
[root@server3 mnt]# ls
nginx-1.14.0  nginx-1.14.0.tar.gz
[root@server3 mnt]# rm -fr nginx-1.14.0
[root@server3 mnt]# ls
nginx-1.14.0.tar.gz
server1:
[root@server1 nginx]# vim install.sls
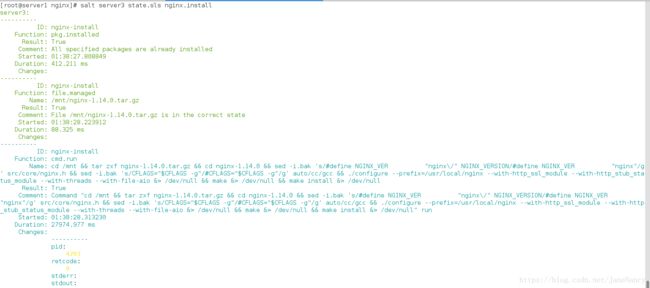
[root@server1 nginx]# salt server3 state.sls nginx.install

nginx-install:
  pkg.installed:
    - pkgs:
      - pcre-devel
      - openssl-devel
      - gcc

  file.managed:
    - name: /mnt/nginx-1.14.0.tar.gz
    - source: salt://nginx/files/nginx-1.14.0.tar.gz

  cmd.run:
    - name: cd /mnt && tar zxf nginx-1.14.0.tar.gz && cd nginx-1.14.0 && sed -i.bak 's/#define NGINX_VER          "nginx\/" NGINX_VERSION/#define NGINX_VER          "nginx"/g' src/core/nginx.h && sed -i.bak 's/CFLAGS="$CFLAGS -g"/#CFLAGS="$CFLAGS -g"/g' auto/cc/gcc && ./configure --prefix=/usr/local/nginx --with-http_ssl_module --with-http_stub_status_module --with-threads --with-file-aio &> /dev/null && make &> /dev/null && make install &> /dev/null
[root@server1 nginx]# salt server3 state.sls nginx.install
再去server3查看:
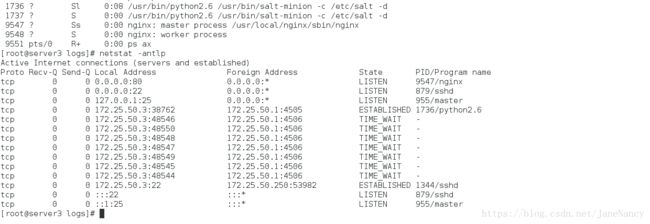
[root@server3 mnt]# ps ax2、写一个开启nginx的文件:
[root@server1 nginx]# vim service.sls
[root@server1 nginx]# ls
files  install.sls  service.sls
[root@server1 nginx]# vim service.sls

include:
  - nginx.install

nginx-service:
  cmd.run:
    - name: /usr/local/nginx/sbin/nginx
~
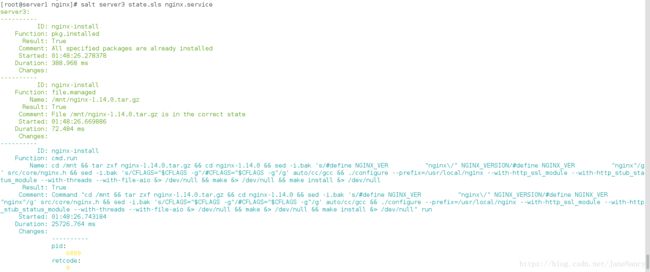
[root@server1 nginx]# salt server3 state.sls nginx.service
去server3 查看:出现了80端口
3、编写文件 用脚本来安装并开启 nginx
在files里有配置文件和写好的启动ngixn脚本
[root@server1 nginx]# ls
files  install.sls  service.sls
[root@server1 nginx]# cd files
[root@server1 files]# ls
nginx  nginx-1.14.0.tar.gz  nginx.conf
[root@server1 files]# vim nginx        ##这个就是nginx脚本
[root@server1 nginx]# vim service.sls

include:
  - nginx.install

/usr/local/nginx/conf/nginx.conf:
  file.managed:
    - source: salt://nginx/files/nginx.conf


nginx-service:
  file.managed:
    - name: /etc/init.d/nginx
    - source: salt://nginx/files/nginx
    - mode: 755
  service.running:
    - name: nginx
    - reload: True
    - watch:
      - file: /usr/local/nginx/conf/nginx.conf

[root@server1 nginx]# salt server3 state.sls nginx.service
再去server3查看:nginx 安装,并开启。
4、修改 nginx 的配置文件
在server3 minion端将nginx.conf配置放到server1在server6 minion端将nginx.conf配置放到server4 master的指定目录下 master的指定目录下
[root@server1 nginx]# vim files/nginx.conf [root@server1 nginx]# cd ..
[root@server1 salt]# ls
httpd nginx
[root@server1 salt]# mkdir users
[root@server1 salt]# cd users/
[root@server1 users]# ls
[root@server1 users]# vim nginx.sls
nginx-group:
group.present:
- name: nginx
- gid: 800
nginx-user:
user.present:
- name: nginx
- uid: 800
- gid: 800
- shell: /sbin/nologin
- createhome: False
- home: /usr/local/nginx
[root@server1 users]# cd ..
[root@server1 salt]# ls
httpd  nginx  users
[root@server1 salt]# cd nginx/
[root@server1 nginx]# ls
files  install.sls  service.sls
[root@server1 nginx]# vim service.sls [root@server1 nginx]# salt server3 state.sls nginx.service再去 server3 查看是否建立用户成功
5、将建立用户加入 nginx.install 一步到位
[root@server1 salt]# ls
httpd  nginx  users
[root@server1 salt]# mkdir pkgs
[root@server1 salt]# cd pkgs/
[root@server1 pkgs]# vim make.sls

make-gcc:
  pkg.installed:
    - pkgs:
      - pcre-devel
      - openssl-devel
      - gcc

[root@server1 pkgs]# cd ..
[root@server1 salt]# ls
httpd  nginx  pkgs  users
[root@server1 salt]# cd nginx/
[root@server1 nginx]# vim install.sls[root@server1 nginx]# salt server3 state.sls nginx.install
