Redis Lua脚本大学教程
前面我们已经把Redis Lua相关的基础都介绍过了,如果你可以编写一些简单的Lua脚本,恭喜你已经可以从Lua中学毕业了。
在大学课程中,我们主要学习Lua脚本调试和Redis中Lua执行原理两部分内容两部分。
Lua脚本调试
Redis从3.2版本开始支持Lua脚本调试,调试器的名字叫做LDB。它有一些重要的特性:
- 它使用的是服务器-客户端模式,所以是远程调试。Redis服务器就是调试服务器,默认的客户端是redis-cli。也可以开发遵循服务器协议的其他客户端。
- 默认情况下,每个debugging session都是一个新的session。也就是说在调试的过程中,服务器不会被阻塞。仍然可以被其他客户端使用或开启新的session。同时也意味着在调试过程中所有的修改在结束时都会回滚。
- 如果需要,可以把debugging模式调成同步,这样就可以保留对数据集的更改。在这种模式下,调试时服务器会处于阻塞状态。
- 支持步进式执行
- 支持静态和动态断点
- 支持从脚本中向调试控制台打印调试日志
- 检查Lua变量
- 追踪Redis命令的执行
- 很好的支持打印Redis和Lua的值
- 无限循环和长执行检测,模拟断点
Lua脚本调试实战
在开始调试之前,首先编写一个简单的Lua脚本script.lua:
local src = KEYS[1]
local dst = KEYS[2]
local count = tonumber(ARGV[1])
while count > 0 do
    local item = redis.call('rpop',src)
    if item ~= false then
        redis.call('lpush',dst,item)
    end
    count = count - 1
end
return redis.call('llen',dst)
这个脚本是把src中的元素依次插入到dst元素的头部。
有了这个脚本之后我们就可以开始调试工作了。
我们可以使用redis-cli —eval命令来运行这个脚本,而要调试的话,可以加上—ldb参数,因此我们先执行下面的命令:
redis-cli --ldb --eval script.lua foo bar , 10
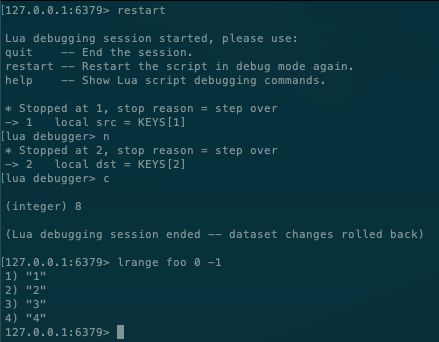
页面会出现一些帮助信息,并进入到调试模式
可以看到帮助页告诉我们
- 执行quit可以退出调试模式
- 执行restart可以重新调试
- 执行help可以查看更多帮助信息
这里我们执行help命令,查看一下帮助信息,打印出很多可以在调试模式下执行的命令,中括号"[]"内到内容表示命令的简写。
其中常用的有:
- step/next:执行一行
- continue:执行到西一个断点
- list:展示源码
- print:打印一些值
- break:打断点
另外在脚本中还可以使用redis.breakpoint()添加动态断点。
下面来简单演示一下
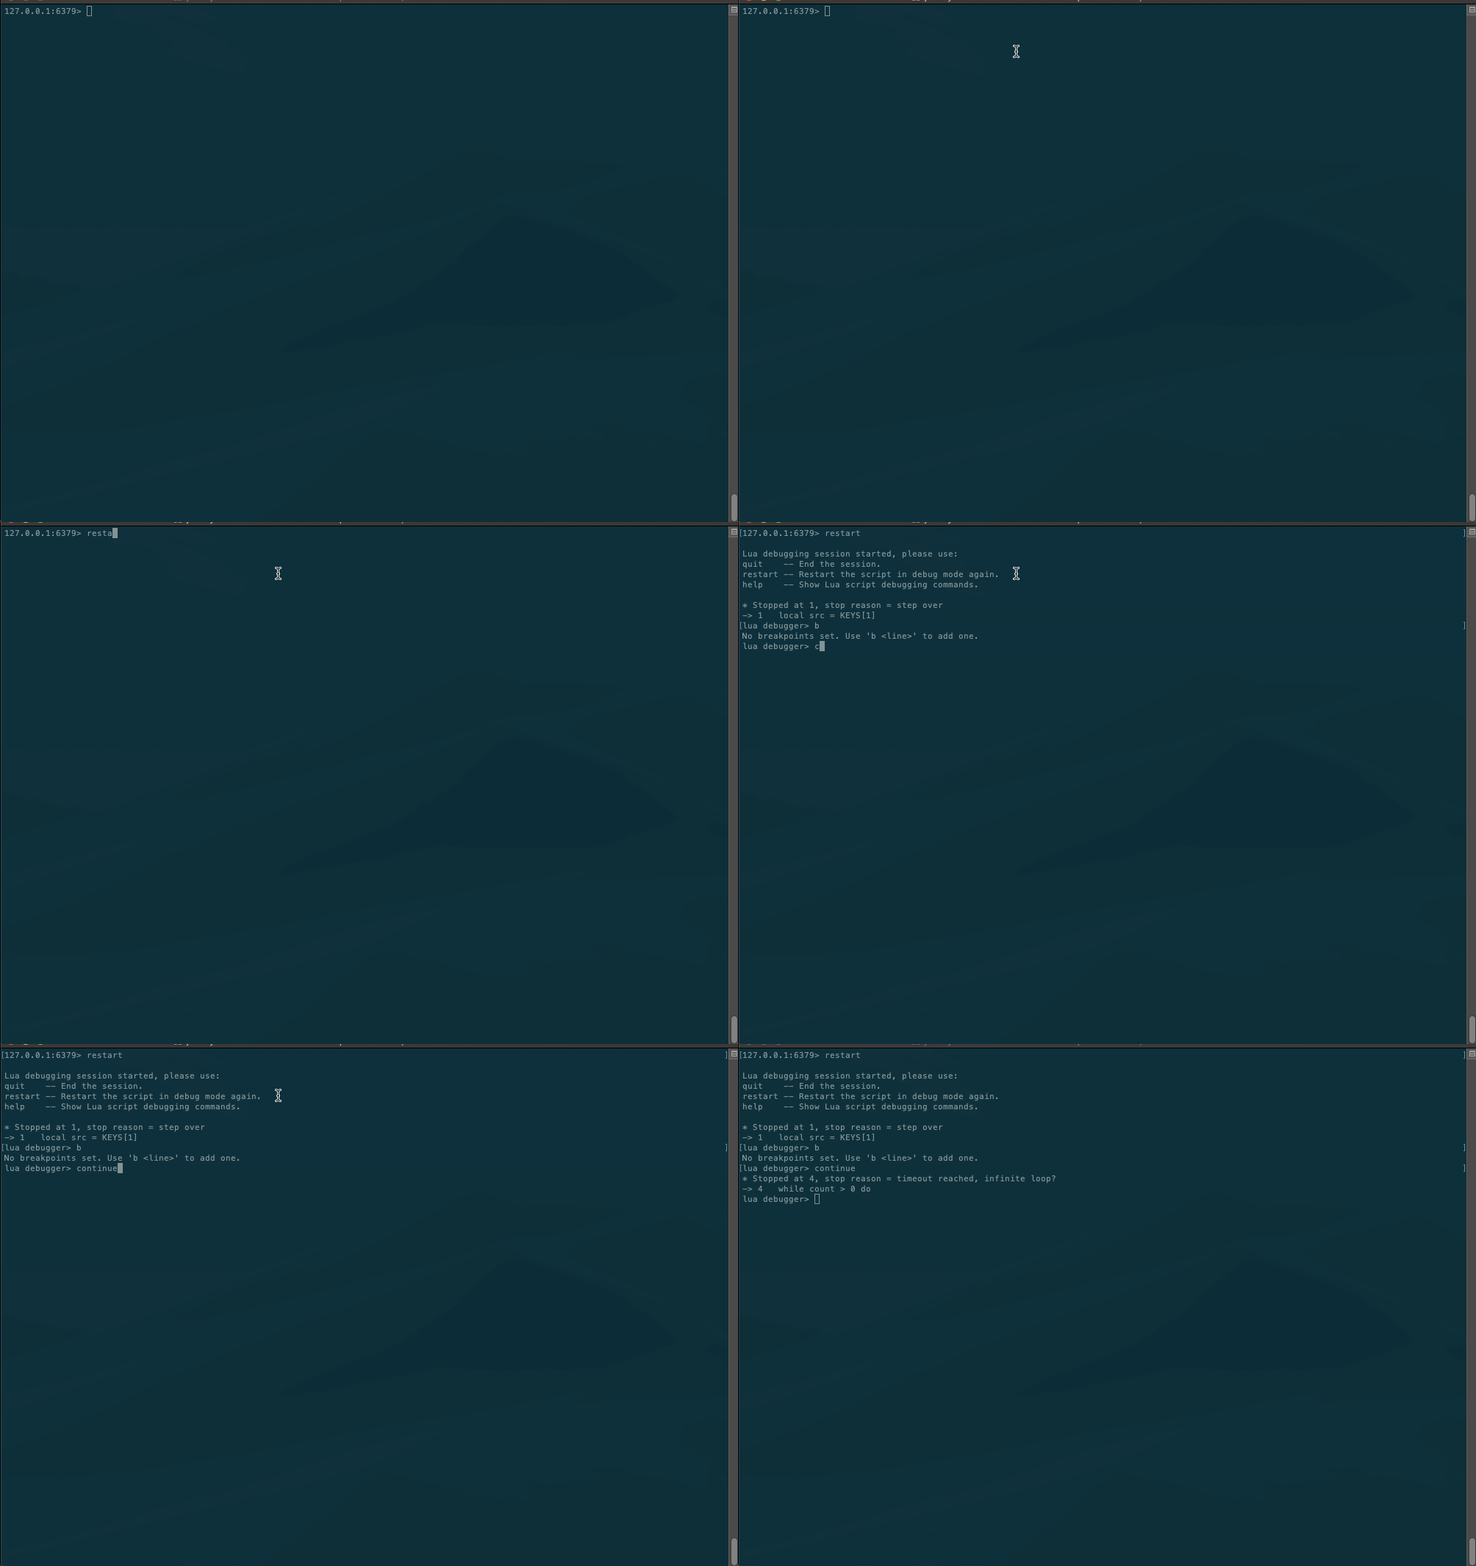
现在我把代码中count = count - 1这一行删除,使程序死循环,再来调试一下
可以看到我们并没有打断点,但是程序仍然会停止,这是因为执行超时,调试器模拟了一个断点使程序停止。从源码中可以看出,这里的超时时间是5s。
/* Check if a timeout occurred. */
if (ar->event == LUA_HOOKCOUNT && ldb.step == 0 && bp == 0) {
  mstime_t elapsed = mstime() - server.lua_time_start;
  mstime_t timelimit = server.lua_time_limit ?
    server.lua_time_limit : 5000;
  if (elapsed >= timelimit) {
    timeout = 1;
    ldb.step = 1;
  } else {
    return; /* No timeout, ignore the COUNT event. */
  }
}
由于Redis默认的debug模式是异步的,所以在调试结束后不会改变redis中的数据。
当然,你也可以选择以同步模式执行,只需要把执行命令中的**—ldb参数改成–ldb-sync-mode**就可以了。
解读EVAL命令
前文我们已经详细介绍过EVAL命令了,不了解的同学可以再回顾一下Redis Lua脚本中学教程(上)。今天我们结合源码继续探究EVAL命令。
在server.c文件中,我们知道了eval命令执行的是evalCommand函数。这个函数的实现在scripting.c文件中。
函数调用栈是
evalCommand
	(evalGenericCommandWithDebugging)
    evalGenericCommand
      lua_pcall  //Lua函数
evalCommand函数很简单,只是简单的判断是否是调试模式,如果是调试模式,调用evalGenericCommandWithDebugging函数,如果不是,直接调用evalGenericCommand函数。
在evalGenericCommand函数中,先判断了key的数量是否正确
/* Get the number of arguments that are keys */
if (getLongLongFromObjectOrReply(c,c->argv[2],&numkeys,NULL) != C_OK)
    return;
if (numkeys > (c->argc - 3)) {
    addReplyError(c,"Number of keys can't be greater than number of args");
    return;
} else if (numkeys < 0) {
    addReplyError(c,"Number of keys can't be negative");
    return;
}
接着查看脚本是否已经在缓存中,如果没有,计算脚本的SHA1校验和,如果已经存在,将SHA1校验和转换为小写
 /* We obtain the script SHA1, then check if this function is already
     * defined into the Lua state */
funcname[0] = 'f';
funcname[1] = '_';
if (!evalsha) {
    /* Hash the code if this is an EVAL call */
    sha1hex(funcname+2,c->argv[1]->ptr,sdslen(c->argv[1]->ptr));
} else {
    /* We already have the SHA if it is a EVALSHA */
    int j;
    char *sha = c->argv[1]->ptr;

    /* Convert to lowercase. We don't use tolower since the function
         * managed to always show up in the profiler output consuming
         * a non trivial amount of time. */
    for (j = 0; j < 40; j++)
        funcname[j+2] = (sha[j] >= 'A' && sha[j] <= 'Z') ?
        sha[j]+('a'-'A') : sha[j];
    funcname[42] = '\0';
}
这里funcname变量存储的是f_ +SHA1校验和,Redis会将脚本定义为一个Lua函数,funcname是函数名。函数体是脚本本身。
sds luaCreateFunction(client *c, lua_State *lua, robj *body) {
    char funcname[43];
    dictEntry *de;

    funcname[0] = 'f';
    funcname[1] = '_';
    sha1hex(funcname+2,body->ptr,sdslen(body->ptr));

    sds sha = sdsnewlen(funcname+2,40);
    if ((de = dictFind(server.lua_scripts,sha)) != NULL) {
        sdsfree(sha);
        return dictGetKey(de);
    }

    sds funcdef = sdsempty();
    funcdef = sdscat(funcdef,"function ");
    funcdef = sdscatlen(funcdef,funcname,42);
    funcdef = sdscatlen(funcdef,"() ",3);
    funcdef = sdscatlen(funcdef,body->ptr,sdslen(body->ptr));
    funcdef = sdscatlen(funcdef,"\nend",4);

    if (luaL_loadbuffer(lua,funcdef,sdslen(funcdef),"@user_script")) {
        if (c != NULL) {
            addReplyErrorFormat(c,
                "Error compiling script (new function): %s\n",
                lua_tostring(lua,-1));
        }
        lua_pop(lua,1);
        sdsfree(sha);
        sdsfree(funcdef);
        return NULL;
    }
    sdsfree(funcdef);

    if (lua_pcall(lua,0,0,0)) {
        if (c != NULL) {
            addReplyErrorFormat(c,"Error running script (new function): %s\n",
                lua_tostring(lua,-1));
        }
        lua_pop(lua,1);
        sdsfree(sha);
        return NULL;
    }

    /* We also save a SHA1 -> Original script map in a dictionary
     * so that we can replicate / write in the AOF all the
     * EVALSHA commands as EVAL using the original script. */
    int retval = dictAdd(server.lua_scripts,sha,body);
    serverAssertWithInfo(c ? c : server.lua_client,NULL,retval == DICT_OK);
    server.lua_scripts_mem += sdsZmallocSize(sha) + getStringObjectSdsUsedMemory(body);
    incrRefCount(body);
    return sha;
}
在执行脚本之前,还要保存传入的参数,选择正确的数据库。
/* Populate the argv and keys table accordingly to the arguments that
 * EVAL received. */
luaSetGlobalArray(lua,"KEYS",c->argv+3,numkeys);
luaSetGlobalArray(lua,"ARGV",c->argv+3+numkeys,c->argc-3-numkeys);

/* Select the right DB in the context of the Lua client */
selectDb(server.lua_client,c->db->id);
然后还需要设置钩子,我们之前提过的脚本执行超时自动打断点以及可以执行SCRPIT KILL命令停止脚本和通过SHUTDOWN命令停止服务器,都是通过钩子来实现的。
/* Set a hook in order to be able to stop the script execution if it
     * is running for too much time.
     * We set the hook only if the time limit is enabled as the hook will
     * make the Lua script execution slower.
     *
     * If we are debugging, we set instead a "line" hook so that the
     * debugger is call-back at every line executed by the script. */
server.lua_caller = c;
server.lua_time_start = mstime();
server.lua_kill = 0;
if (server.lua_time_limit > 0 && ldb.active == 0) {
    lua_sethook(lua,luaMaskCountHook,LUA_MASKCOUNT,100000);
    delhook = 1;
} else if (ldb.active) {
    lua_sethook(server.lua,luaLdbLineHook,LUA_MASKLINE|LUA_MASKCOUNT,100000);
    delhook = 1;
}
到这里已经万事俱备了,就可以直接调用lua_pcall函数来执行脚本了。执行完之后,还要删除钩子并把结果保存到缓冲中。
上面就是脚本执行的整个过程,这个过程之后,Redis还会处理一些脚本同步的问题。这个前文我们也介绍过了《Redis Lua脚本中学教程(上)》
总结
到这里,Redis Lua脚本系列就全部结束了。文章虽然结束了,但是学习还远远没有结束。大家有问题的话欢迎和我一起探讨。共同学习,共同进步~
对Lua感兴趣的同学可以读一下《Programming in Lua》,有条件的尽量支持正版,想先看看质量的可以在我公众号代码洁癖患者后台回复Lua获取电子书。


