iOS 动画篇-Core Animation
声明
该篇文章的内容参考自 iOS核心动画高级技巧 一文,非常感谢其作者和中文版的作者,让我能够相对系统的学习 CoreAnimation 的知识,我受益匪浅,再次感谢。
如果有兴趣的小伙伴可以访问其网站,详细的,完整的学习 CoreAnimation。
CAAnimation 篇
CAAnimation 是一个抽象动画类。 遵循着 CAMediaTiming 和 CAAciotn 两个协议。 要为 Core Animation 图层或 Scene Kit 对象设置动画,请创建其子类 CABasicAnimation,CAKeyframeAnimation,CAAnimationGroup 或 CATransition 的实例。Core Animation 可以用在 Mac OS X 和 iOS 平台。Core Animation 的动画执行过程都是在后台操作的,不会阻塞主线程。
隐式动画
当你改变 CALayer 的一个可做动画的属性,它并不会立刻在屏幕上呈现出来,而是从先前的值平滑过渡到新值。典型的例子就是改变图层的背景填充色。
示例:
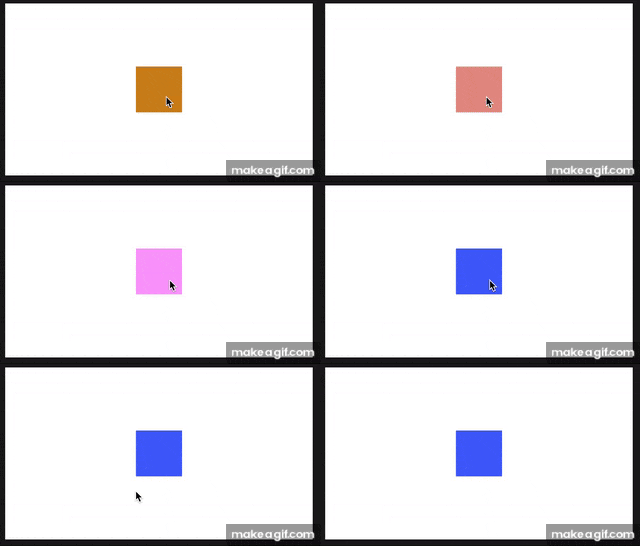
假如我们现在有一个图层,那我们在点击屏幕时尝试去改变此图层的背景填充色。
-(void)touchesEnded:(NSSet *)touches withEvent:(UIEvent *)event{
    // 生成随机颜色
    CGFloat red = arc4random() / (CGFloat)INT_MAX;
    CGFloat green = arc4random() / (CGFloat)INT_MAX;
    CGFloat blue = arc4random() / (CGFloat)INT_MAX;
    self.colorLayer.backgroundColor = [UIColor colorWithRed:red green:green blue:blue alpha:1.0].CGColor;
}
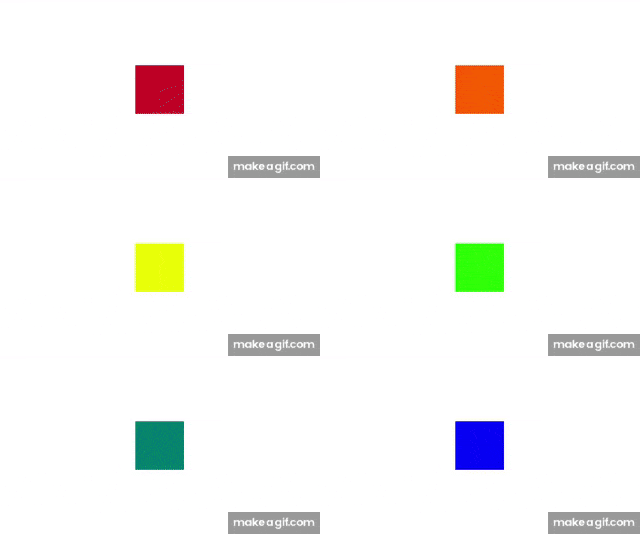
我们可以看到,但我们点击屏幕以改变图层的背景时,视图从旧的背景逐渐地过度到了新值。在这过程中,我们没有做其他额外的操作,这种自行完成的平滑过渡动画就是隐式动画。
事务
那么这一过程时如何完成的呢?实际上动画是由当前事务来完成的,事务是什么?事务是 Core Animation 用来包含一系列属性动画集合的机制,你可以设置动画的执行时间等,这些动画的图层属性新值的设置都不会立刻发生变化,而是当事务提交时由 run loop 自动开始。
事务是通过 CATransaction 类来管理。该类没有属性或者实例方法,因此你不能创建它,但是你可以通过 +begin 和 commit 来将当前属性设置分别进行入栈和出栈操作。
任何可以做动画的图层属性都会添加到栈顶的事务,你可以通过 +setAnimationDuration: 方法来设置当前事务的动画时间,如果不进行设置,默认的时间是0.25s。
我们现在来显示的完成上一个例子中的动画,并将动画时间延长。
-(void)touchesEnded:(NSSet *)touches withEvent:(UIEvent *)event{
    // 开始一个动画事务
    [CATransaction begin];
    // 设置动画的执行时间
    [CATransaction setAnimationDuration:1.0];
    // 生成颜色,作为动画的变化新值
    CGFloat red = arc4random() / (CGFloat)INT_MAX;
    CGFloat green = arc4random() / (CGFloat)INT_MAX;
    CGFloat blue = arc4random() / (CGFloat)INT_MAX;
    self.colorLayer.backgroundColor = [UIColor colorWithRed:red green:green blue:blue alpha:1.0].CGColor;
    // 提交动画事务
    [CATransaction commit];
}
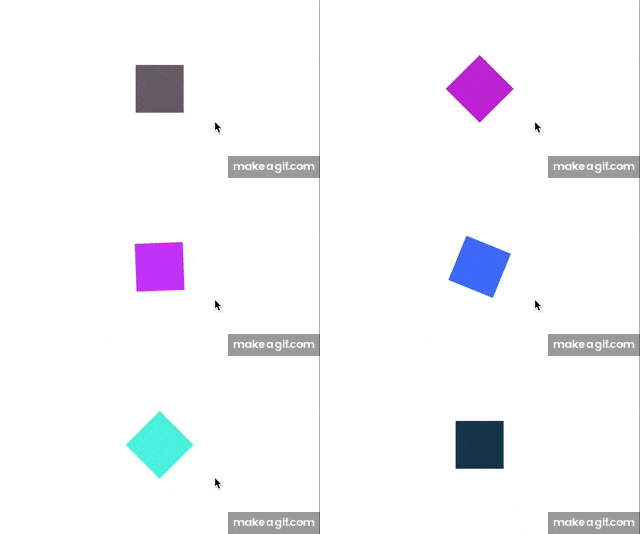
我们可以看到图层的动画效果依旧没变,但是渐变的时间明显变长了很多。从代码上看,我们仅仅将图层需要改变的属性加到 +begin 和 commit 之间,并为此事务设置了一个时间。
如果你使用过 UIView 的动画,那么应该使用过 +beginAnimations:context: 和 +commitAnimations,实际上这两个都是对 CATransaction 的封装,其所做动画都是由 CATransaction 完成的。
完成回调
CATranscation 的 API 除了提供设置动画时间 +setAnimationDuration: 还提供了动画完成的回调方法:+ setCompletionBlock:。你可以在该方法中接着完成一些事情。
修改一下代码:
-(void)touchesEnded:(NSSet *)touches withEvent:(UIEvent *)event{
    // 开始一个动画事务
    [CATransaction begin];
    // 设置动画的执行时间
    [CATransaction setAnimationDuration:1.0];
    // 生成颜色,作为动画的变化新值
    CGFloat red = arc4random() / (CGFloat)INT_MAX;
    CGFloat green = arc4random() / (CGFloat)INT_MAX;
    CGFloat blue = arc4random() / (CGFloat)INT_MAX;
    self.colorLayer.backgroundColor = [UIColor colorWithRed:red green:green blue:blue alpha:1.0].CGColor;
    // 提交动画事务
    [CATransaction commit];
    // 动画完成回调,可以写在 commit 后面
    [CATransaction setCompletionBlock:^{
        self.colorLayer.affineTransform = CGAffineTransformRotate(self.colorLayer.affineTransform, M_PI_4);
    }];
}
图层动画的过程
当我们给对 CALayer 的属性设新值时,图层经过以下几个过程来检测应该如何呈现新值。
- 图层首先检测它是否有委托者,并且是否实现了协议
CALayerDelegate中的方法-actionForLayer:forKey:,如果有,直接调用并返回结果。 - 如果没有委托者,或者委托没有实现上述方法,图层会检查属性
actions字典,试图找到对应的属性名。 - 如果依旧没有,图层还是检查属性
style字典,再次尝试搜索对应的属性名。 - 最后,如果都未能找到,那么图层直接会调用默认的行为
defaultActionForKey:方法来展现对应属性的新值。
那么,既然我们知道了图层的行为过程,我们是否可以以此做些什么?实际上,我们可以参与图层的行为过程来改变隐式动画的行为。
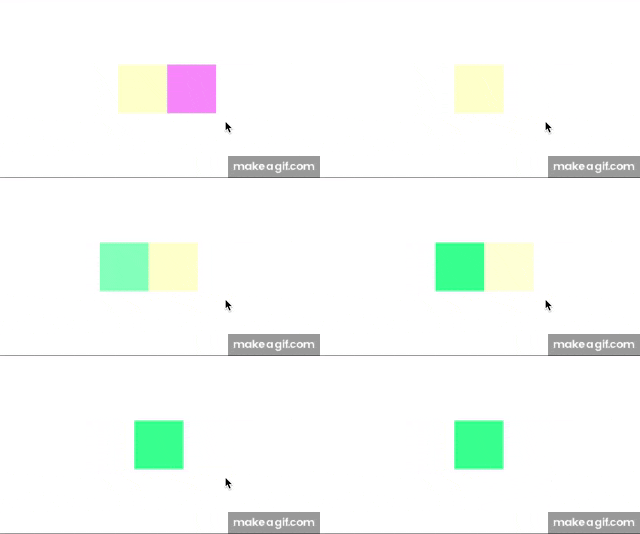
我们首先通过图层的委托代理完成新的动画过程。
@interface ViewController ()
<
    CALayerDelegate
>
@property (strong, nonatomic)CALayer* colorLayer;
@end

@implementation ViewController

- (void)viewDidLoad {
    [super viewDidLoad];

    self.colorLayer = [CALayer layer];
    self.colorLayer.frame = CGRectMake(50.0f, 50.0f, 100.0f, 100.0f);
    self.colorLayer.backgroundColor = [UIColor blueColor].CGColor;
    [self.view.layer addSublayer:self.colorLayer];
    // 设置图层的委托代理
    self.colorLayer.delegate = self;
}

// 完成图层行为协议
-(id)actionForLayer:(CALayer *)layer forKey:(NSString *)event{
    // 设置新的动画
    CATransition *transition = [CATransition animation];
    transition.type = kCATransitionReveal;
    transition.subtype = kCATransitionFromLeft;
    return transition;
}

-(void)touchesEnded:(NSSet *)touches withEvent:(UIEvent *)event{
    // 生成随机颜色.
    CGFloat red = arc4random() / (CGFloat)INT_MAX;
    CGFloat green = arc4random() / (CGFloat)INT_MAX;
    CGFloat blue = arc4random() / (CGFloat)INT_MAX;
    self.colorLayer.backgroundColor = [UIColor colorWithRed:red green:green blue:blue alpha:1.0].CGColor;
}
我们也可以通过 actions 字典来完成:
@interface ViewController ()
<
    CALayerDelegate
>
@property (strong, nonatomic)CALayer* colorLayer;
@end

@implementation ViewController

- (void)viewDidLoad {
    [super viewDidLoad];

    self.colorLayer = [CALayer layer];
    self.colorLayer.frame = CGRectMake(50.0f, 50.0f, 100.0f, 100.0f);
    self.colorLayer.backgroundColor = [UIColor blueColor].CGColor;
    [self.view.layer addSublayer:self.colorLayer];

    // 设置 actions 字典
    CATransition *transition = [CATransition animation];
    transition.type = kCATransitionPush;
    transition.subtype = kCATransitionFromLeft;
    transition.duration = 1.0;  // 动画时间设置稍长
    self.colorLayer.actions = @{@"backgroundColor": transition};
}

-(void)touchesEnded:(NSSet *)touches withEvent:(UIEvent *)event{
    // 生成随机颜色
    CGFloat red = arc4random() / (CGFloat)INT_MAX;
    CGFloat green = arc4random() / (CGFloat)INT_MAX;
    CGFloat blue = arc4random() / (CGFloat)INT_MAX;
    self.colorLayer.backgroundColor = [UIColor colorWithRed:red green:green blue:blue alpha:1.0].CGColor;
}
显示动画
和隐式动画相对的,显示动画一般是开发者们主动去实现的动画效果,完成图层从旧状态到新状态到过渡切换。和隐式动画不通,显示动画需要开发者关心动画从产生到消失的每一个细节,如变化的状态、执行的时长、动画的次数等等,相比系统提供的简单的过渡动画效果,显示动画可以完成图层的各种各样的酷炫效果。
属性动画
顾名思义,属性动画(CAPropertyAnimation)类的是针对图层的一些可作动画的属性而言的,该类不能直接拿来使用,开发中通常使用其子类(这一点类似手势),如:CABasicAnimation 经典动画、CAKeyframeAnimation 关键帧动画、CASpringAnimation 弹性动画,基础动画的子类。
- CABasicAnimation
CABasicAnimation 动画,需要我们为其提供两个状态值,一个是初始状态值,一个是终止状态值。一般来说,初始值都是图层最初的状态,当然,你也可以指定从初始状态到非终止状态的之间的任意时刻。
示例:
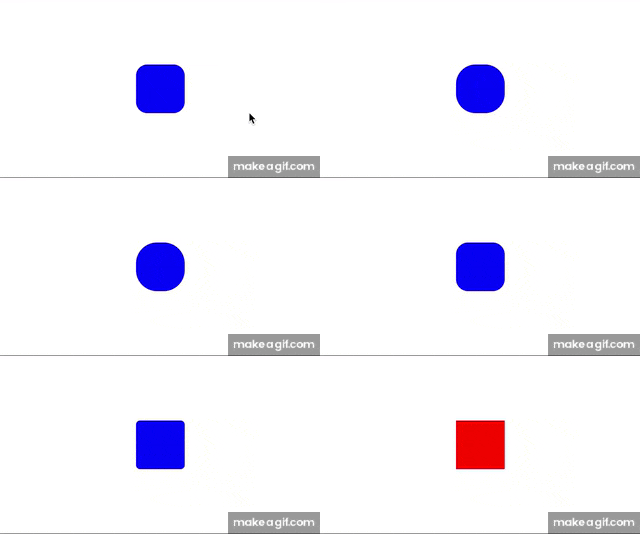
我们接着上面的例子,将图层的圆角值做一些改变。
@interface ViewController ()
@property (strong, nonatomic)CALayer* colorLayer;
@end

@implementation ViewController

- (void)viewDidLoad {
    [super viewDidLoad];

    self.colorLayer = [CALayer layer];
    self.colorLayer.frame = CGRectMake(50.0f, 50.0f, 100.0f, 100.0f);
    self.colorLayer.backgroundColor = [UIColor blueColor].CGColor;
    [self.view.layer addSublayer:self.colorLayer];
}

-(void)touchesEnded:(NSSet *)touches withEvent:(UIEvent *)event{
	// 修改圆角属性
	CABasicAnimation* animation = [CABasicAnimation animationWithKeyPath:@"cornerRadius"];
   animation.toValue = @(self.colorLayer.bounds.size.height/2.0);
   animation.duration = 2;
   animation.autoreverses = YES;   // 执行逆动画
   [self.colorLayer addAnimation:animation forKey:@"cornerRadius_animation"];
}
注:animationWithKeyPath: 所带的字符串表示需要修改的 layer 可动画的属性,不是随便写的字符串,一般常用的可动画属性如下:
| key | 说明 | 使用样例 |
|---|---|---|
| transform.scale | 缩放 | @(0.5) |
| transform.scale.x | 宽的比例 | @(0.5) |
| transform.scale.y | 高的比例 | @(0.5) |
| opacity | 透明度 | @(0.5) |
| cornerRadius | 圆角的设置 | @(50) |
| transform.rotation.x | 围绕x轴旋转 | @(M_PI) |
| transform.rotation.y | 围绕y轴旋转 | @(M_PI) |
| transform.rotation.z | 围绕z轴旋转 | @(M_PI) |
| strokeStart | 结合CAShapeLayer使用 | 赋值多变 |
| strokeEnd | 结合CAShapeLayer使用 | 赋值都变 |
| bounds | 大小,中心不变 | [NSValue valueWithCGRect:CGRectMake(0, 0, 100, 100)]; |
| position | 位置(中心点的改变) | [NSValue valueWithCGPoint:CGPointMake(100, 100)]; |
| contents | 内容, | 比如UIImageView的图片 imageAnima.toValue = (id)[UIImage imageNamed:@”imageName”].CGImage; |
| …… |
动画开始和完成事件
和隐式动画中的完成回调不同,CAAnimation 采用了委托模式,因此你如果需要处理动画的开始和完成事件时,你需要完成 CAAnimationDelegate 的代理方法:
- (void)animationDidStart:(CAAnimation *)anim;
- (void)animationDidStop:(CAAnimation *)anim finished:(BOOL)flag;
其中 flag 标识了动画是否是正常结束。另外,事件传递不是完成block块,而是采用委托模式会带来一个问题,就是你有多个动画时,你需要判断当前是那个图层的动画事件。
这里提供两个用来区别的方案。一种就是在添加动画时,-addAnimation:forKey: 设置每个动画对应不同的key值,然后通过 animationKeys 获取到图层上所有的动画key,然后对每个图层循环所有建,通过 -animationForKey: 找到结果。显然这种是非常的麻烦的方式。好在 CAAnimation 实现了 KVC 协议,我们可以像使用字典一样,随意的存取属性。
示例:
我们将图层在完成动画之后,进行背景色的更改。
@interface ViewController ()
<
    CAAnimationDelegate
>
@property (strong, nonatomic)CALayer* colorLayer;
@end

@implementation ViewController

- (void)viewDidLoad {
    [super viewDidLoad];

    self.colorLayer = [CALayer layer];
    self.colorLayer.frame = CGRectMake(50.0f, 50.0f, 100.0f, 100.0f);
    self.colorLayer.backgroundColor = [UIColor blueColor].CGColor;
    [self.view.layer addSublayer:self.colorLayer];
}

-(void)touchesEnded:(NSSet *)touches withEvent:(UIEvent *)event{

   CABasicAnimation* animation = [CABasicAnimation animationWithKeyPath:@"cornerRadius"];
   animation.toValue = @(self.colorLayer.bounds.size.height/2.0);
   animation.duration = 2;
   animation.autoreverses = YES;   // 执行逆动画
   animation.delegate = self;
   // 将视图附加到动画上
   [animation setValue:self.colorLayer forKey:@"colorLayer"];
   [self.colorLayer addAnimation:animation forKey:@"cornerRadius_animation"];
}

// 动画结束事件
-(void)animationDidStop:(CAAnimation *)anim finished:(BOOL)flag{
	// 通过key值,取回附加的视图
   CALayer* layer = [anim valueForKey:@"colorLayer"];
   layer.backgroundColor = UIColor.redColor.CGColor;
}
- CAKeyframeAnimation
相比于经典动画关注于起始和终止的状态值,关键帧动画更注重整个动画过程中多个关键点的状态,因此关键帧动画需要一连串的值来做动画,你甚至可以说,经典动画是关键动画的一种。
-(void)touchesEnded:(NSSet *)touches withEvent:(UIEvent *)event{
    CAKeyframeAnimation* animation = [CAKeyframeAnimation animationWithKeyPath:@"backgroundColor"];
    animation.duration = 4;
    animation.values = @[
                         (__bridge id)UIColor.blueColor.CGColor,
                         (__bridge id)UIColor.redColor.CGColor,
                         (__bridge id)UIColor.yellowColor.CGColor,
                         (__bridge id)UIColor.greenColor.CGColor,
                         (__bridge id)UIColor.blueColor.CGColor
                         ];
    [self.colorLayer addAnimation:animation forKey:nil];
}
上述例子演示了给予关键帧动画的关键位置的数组值,实际上,关键帧还可以是无数个位置,如果此时的动画属性是针对位置一类的,我们就可以将这些关键帧看作是路径,这就演变出了另一种方式做动画,即 path。
下面通过移动图层来演示这种方式的关键帧动画:
-(void)touchesEnded:(NSSet *)touches withEvent:(UIEvent *)event{
	CAKeyframeAnimation* animation = [CAKeyframeAnimation animationWithKeyPath:@"position"];
   animation.duration = 4.0;
   // 关键帧路径
   animation.path = self.path.CGPath;
   [self.imageLayer addAnimation:animation forKey:nil];
}
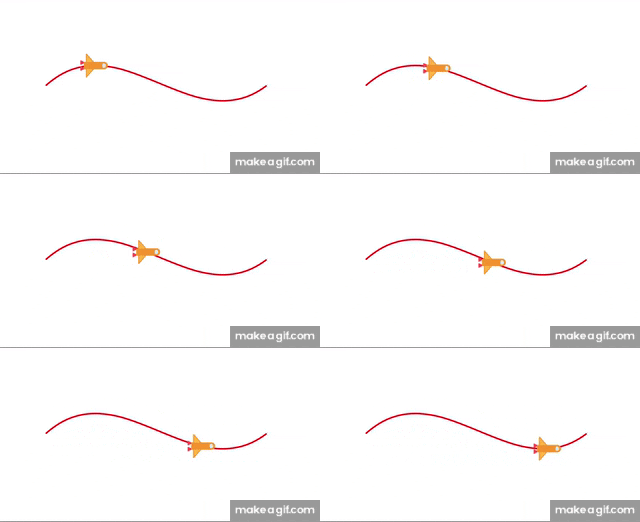
我们的飞船可以沿着关键路径进行移动,但是我们发现飞船的方向一直是横向的,就如最初设置的方向,而不是指向曲线切线的方向。好在苹果发现了这一点,并且给 CAKeyFrameAnimation 添加了一个 rotationMode 的属性,设置它为常量 kCAAnimationRotateAuto,图层将会根据曲线的切线自动旋转。
-(void)touchesEnded:(NSSet *)touches withEvent:(UIEvent *)event{
   CAKeyframeAnimation* animation = [CAKeyframeAnimation animationWithKeyPath:@"position"];
   animation.duration = 4.0;
   animation.path = self.path.CGPath;
   animation.rotationMode = kCAAnimationRotateAuto;
   [self.imageLayer addAnimation:animation forKey:nil];
}
- CASpringAnimation
CABasicAnimation 动画的子类,可以实现弹性动画。这个动画是在 iOS9 之后才出现的,UIView 有其对应的动画块。
CASpringAnimation 通过几个物理相关属性来计算出图层执行的动画效果。这些属性如下:
mass:质量,影响惯性、拉伸幅度
stiffness:刚度系数,刚度系数越大,形变产生的力就越大,运动越快
damping:阻尼系数,阻止弹簧伸缩的系数,阻尼系数越大,停止越快
initialVelocity:初始速率
settlingDuration:(只读)结算时间,根据当前的动画参数估算弹簧动画到停止时的时间
-(void)touchesEnded:(NSSet *)touches withEvent:(UIEvent *)event{
    CASpringAnimation *animation = [CASpringAnimation animationWithKeyPath:@"position.y"];
    animation.damping = 5;                 // 阻尼系数
    animation.stiffness = 100;             // 刚度系数
    animation.mass = 1;                    // 质量
    animation.initialVelocity = 0;         // 初始速率
    animation.duration = animation.settlingDuration;  //结束时间
    animation.fromValue = @(self.subLayer.position.y);
    animation.toValue = @(self.subLayer.position.y+100);
    animation.removedOnCompletion = NO;
    animation.fillMode = kCAFillModeForwards;
    [self.subLayer addAnimation:animation forKey:nil];
}
注:动画并没会改变图层和视图的 frame,因此在执行完动画后,都默认被重置到最初的位置。如果你需要动画执行完之后保持当前的位置状态,可以设置 removedOnCompletion 为 NO,并设置 fillMode 模式为 kCAFillModeForwards。
动画组
之前提到的几个属性动画,都仅仅是作用于单一属性,但是如果我们需要几个动画一起作用到图层上,该怎么办呢?苹果为我们提供了一个组合动画 CAAnimationGroup,他是另一个继承 CAAnimation 的子类,和几个属性动画的父类同级,它只有一个属性 animations 数组,就是用来存放多个动画的。
-(void)touchesEnded:(NSSet *)touches withEvent:(UIEvent *)event{
    // 动画1
    CABasicAnimation* animation1 = [CABasicAnimation animationWithKeyPath:@"transform.scale"];
    animation1.toValue = @(0.5);
    // 动画2
    CABasicAnimation* animation2 = [CABasicAnimation animationWithKeyPath:@"transform.rotation.z"];
    animation2.toValue = @(M_PI*2);
    // 动画组
    CAAnimationGroup* group = [CAAnimationGroup animation];
    // 设置所有的动画的执行时间
    group.duration = 1.5;
    group.removedOnCompletion = NO;
    group.fillMode = kCAFillModeForwards;
    // 将所有动画都添加到组中
    group.animations = @[animation1,animation2];
    [self.subLayer addAnimation:group forKey:nil];
}
需要注意的是,动画组的动画时间取所有动画最短时间,超出时间的部分会立刻被停止,因此使用动画组的时候,最好是一些动画时间统一的组合,比如上面例子中,动画时间并非由某个动画来决定,而是由动画组来设置。
过渡动画
属性动画只会对图层的一些可动画的属性起到作用,当我们想要改变一个不能动画的属性(比如图片),或者从层级关系中添加或者移除图层(过场效果),属性动画将不起作用。因此,苹果又提供了一个用来做过渡动画的类 CATransition,注意这个类和上面提到的事物 CATransaction 不是同一个东西。
CATransition是 CAAnimation 的子类,它由两个过渡类型来控制变换效果,一个是 type:用来控制过渡效果,一个是 subtype:用来控制过渡的方向。
type 的几种类型:
kCATransitionFade       // 默认,渐变消失
kCATransitionMoveIn     // 从当前图层上面划入
kCATransitionPush       // 当前图层被推出,用新值替换
kCATransitionReveal     // 从当前图层上面划出,效果和 kCATransitionMoveIn 相反
除了系统开放出来的四种类型,还有几种私有API,可以通过字符串来设置:
cube                    //立方体翻滚效果
oglFlip                 //上下左右翻转效果
suckEffect              //收缩效果,如一块布被抽走(不支持过渡方向)
rippleEffect            //滴水效果(不支持过渡方向)
pageCurl                //向上翻页效果
pageUnCurl              //向下翻页效果
cameraIrisHollowOpen    //相机镜头打开效果(不支持过渡方向)
cameraIrisHollowClose   //相机镜头关上效果(不支持过渡方向)
subtype 的几种类型:
kCATransitionFromRight
kCATransitionFromLeft
kCATransitionFromTop
kCATransitionFromBottom
示例:
我们来使用过渡动画来切换几张图片
// 获取随机整数
#define randomFromAtoB(A,B) (int)(A+(arc4random()%(B-A+1)))

@interface ViewController ()
{
    NSInteger currentIndex;
}
@property (strong, nonatomic) CALayer* subLayer;
@property (strong,nonatomic) NSArray *images;       // 图片数组

@property (strong,nonatomic) NSArray *animations;   // 动画类型数组

@end

@implementation ViewController

- (void)viewDidLoad {
    [super viewDidLoad];
    [self.view.layer addSublayer:self.subLayer];
}

-(void)touchesEnded:(NSSet *)touches withEvent:(UIEvent *)event{
    CATransition *transition = [CATransition new];
    // 设置动画类型,注意对于苹果官方没公开的动画类型只能使用字符串,并没有对应的常量定义
    transition.type = self.animations[randomFromAtoB(0, self.animations.count-1)];
    // 设置子类型,方向
    transition.subtype = @[kCATransitionFromRight,
                           kCATransitionFromLeft,
                           kCATransitionFromTop,
                           kCATransitionFromBottom][randomFromAtoB(0, 3)];
    // 设置动画时间
    transition.duration = 1.0;
    // 添加新的视图
    currentIndex = (currentIndex+1)%self.images.count;
    NSString *imageName = self.images[currentIndex];
    self.subLayer.contents = (__bridge id)[UIImage imageNamed:imageName].CGImage;
    [self.subLayer addAnimation:transition forKey:@"KCATransitionAnimation"];
}

-(CALayer *)subLayer{
    if (_subLayer==nil) {
        _subLayer = [CALayer new];
        _subLayer.frame = self.view.bounds;
        _subLayer.backgroundColor = UIColor.blueColor.CGColor;
        _subLayer.contents = (__bridge id)[UIImage imageNamed:@"0.jpg"].CGImage;
    }
    return _subLayer;
}

-(NSArray *)animations{
    if (_animations == nil) {
        _animations = @[@"fade",          		// 淡出效果
                        @"movein",            			// 新视图移动到旧视图
                        @"push",            				// 新视图推出到旧视图
                        @"reveal",    				// 移开旧视图现实新视图
                        @"cube",             				// 立方体翻转效果
                        @"oglFlip",      				// 翻转效果
                        @"suckEffect",     			// 吸收效果
                        @"rippleEffect",   				// 水滴效果
                        @"pageCurl",     				// 向上翻页
                        @"pageUnCurl",        			// 向下翻页
                        @"cameralIrisHollowOpen",   	// 摄像头打开
                        @"cameraIrisHollowClose",    	// 摄像头关闭
                        ];
    }
    return _animations;
}

-(NSArray *)images{
    if (_images==nil) {
        _images = @[@"0.jpg",
                    @"1.jpg",
                    @"2.jpg",
                    @"3.jpg",
                    @"4.jpg",
                    @"5.jpg"];
    }
    return _images;
}
CATransition 并不作用于指定的图层属性,这就是说你可以在即使不能准确得知改变了什么的情况下对图层做动画,例如,在不知道 UITableView 哪一行被添加或者删除的情况下,直接就可以平滑地刷新它,又如在 UITabBarController 切换视图时添加上过渡动画,可以比如淡入淡出的效果,又或者在不知道 UIViewController 内部的视图层级的情况下对两个不同的实例做过渡动画。
这些例子和我们之前所讨论的情况完全不同,因为它们不仅涉及到图层的属性,而且是整个图层树的改变–我们在这种动画的过程中手动在层级关系中添加或者移除图层。
自定义过渡动画
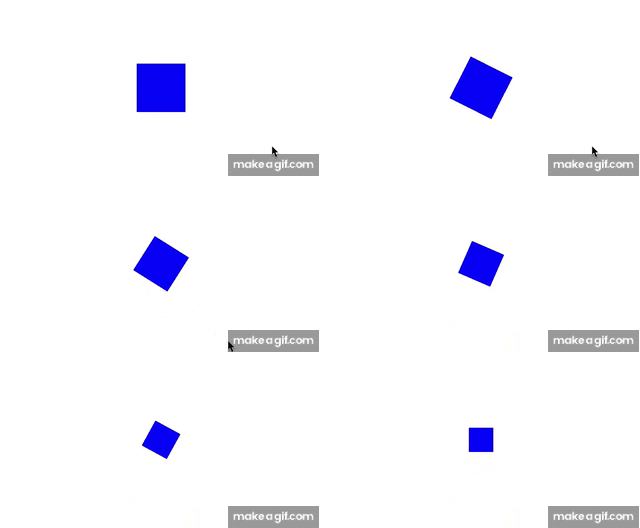
过渡动画做基础的原则就是对原始的图层外观截图,然后添加一段动画,平滑过渡到图层改变之后那个截图的效果。如果我们对图层截图,就可以使用属性动画来代替 CATransition 或者是 UIKit 的过渡方法来实现动画。
CALayer 有一个 -renderInContext: 方法,可以通过把它绘制到 Core Graphics 的上下文中捕获当前内容的图片,然后在另外的视图中显示出来。如果我们把这个截屏视图置于原始视图之上,就可以遮住真实视图的所有变化,于是重新创建了一个简单的过渡效果。
-(void)touchesEnded:(NSSet *)touches withEvent:(UIEvent *)event{
    // 获取当前屏幕的截图
    UIGraphicsBeginImageContextWithOptions(self.view.bounds.size, YES, 0.0);
    [self.view.layer renderInContext:UIGraphicsGetCurrentContext()];
    UIImage *coverImage = UIGraphicsGetImageFromCurrentImageContext();
    //insert snapshot view in front of this one
    UIView *coverView = [[UIImageView alloc] initWithImage:coverImage];
    coverView.frame = self.view.bounds;
    // 将截图覆盖到当前视图上
    [self.view addSubview:coverView];
    // 为了演示过渡效果,我们修改一下当前视图的背景色,以区分之前的视图
    CGFloat red = arc4random() / (CGFloat)INT_MAX;
    CGFloat green = arc4random() / (CGFloat)INT_MAX;
    CGFloat blue = arc4random() / (CGFloat)INT_MAX;
    self.view.backgroundColor = [UIColor colorWithRed:red green:green blue:blue alpha:1.0];
    // 执行过渡动画
    [UIView animateWithDuration:0.75 animations:^{
        CGAffineTransform transform = CGAffineTransformMakeScale(0.01, 1);
        coverView.transform = transform;
    } completion:^(BOOL finished) {
        // 最后移除掉障眼法的图层
        [coverView removeFromSuperview];
    }];
}
取消动画
在我们使用-addAnimation:forKey:方法中的key参数来在添加动画之后检索一个动画,使用如下方法:
- (CAAnimation *)animationForKey:(NSString *)key;
但并不支持在动画运行过程中修改动画,所以这个方法主要用来检测动画的属性,或者判断它是否被添加到当前图层中。
为了终止一个指定的动画,你可以用如下方法把它从图层移除掉:
- (void)removeAnimationForKey:(NSString *)key;
也可以根据需要移除所有动画:
- (void)removeAllAnimations;
动画一旦被移除,图层的外观就立刻更新到当前的模型图层的值。一般说来,动画在结束之后被自动移除,除非设置 removedOnCompletion 为NO,如果你设置动画在结束之后不被自动移除,那么当它不需要的时候你要手动移除它;否则它会一直存在于内存中,直到图层被销毁。
时间相关
CAMediaTiming 协议
CAMediaTiming 协议定义了在一段动画内用来控制逝去时间的属性的集合, CALayer 和 CAAnimation 都实现了这个协议,所以时间可以被任意基于一个图层或者一段动画的类控制。
CAAnimation 中几个常用的属性:
duration:
duration(CAMediaTiming的属性之一),duration是一个 CFTimeInterval 的类型(类似于 NSTimeInterval 的一种双精度浮点类型),对将要进行的动画的一次迭代指定了时间。
repeatCount:
代表动画重复的迭代次数。
repeatDuration:
它让动画重复一个指定的时间,而不是指定次数。
autoreverses:
在每次间隔交替循环过程中自动回放。在设置此值为 YES 时,duration 的一半时间会用来做自动回放。
相对时间的几个属性:
在 Core Animation 中,时间都是相对的,每个动画都有它自己描述的时间,可以独立地加速,延时或者偏移。
beginTime:
指定了动画开始之前的的延迟时间。这里的延迟从动画添加到可见图层的那一刻开始测量,默认是0(就是说动画会立刻执行)。
speed:
是一个时间的倍数,默认1.0,减少它会减慢图层/动画的时间,增加它会加快速度。如果2.0的速度,那么对于一个 duration 为1的动画,实际上在0.5秒的时候就已经完成了。
特别的,前面提到到 CALayer 也实现了 CAMediaTiming 协议,如果把图层的 speed 的值设置为0,它会暂停任何添加到图层上的动画,如果 speed 的值大于1.0则变现为快进,如果设置成一个负值则变为倒回的动画。
如果设置主 window 图层的 speed 为0时,可以将整个应用程序的动画暂停。同样的,如果我们将其设置为快进,就可以完成加速多有的视图动画来进行自动化测试。设置代码如下:
self.window.layer.speed = 100;
timeOffset:
和 beginTime 类似,但是和增加 beginTime 导致的延迟动画不同,增加 timeOffset 只是让动画快进到某一点,例如,对于一个持续1秒的动画来说,设置 timeOffset 为0.5意味着动画将从一半的地方开始。
timeOffset 一个很有用的功能在于你可以它可以让你手动控制动画进程,通过设置 speed 为0,可以禁用动画的自动播放,然后来使用 timeOffset 来来回显示动画序列。这可以使得运用手势来手动控制复杂动画或者多个图层的动画组变得很简单。
动画结束后的填充模式:
fillMode:
kCAFillModeForwards
kCAFillModeBackwards
kCAFillModeBoth
kCAFillModeRemoved
这个属性表示动画结束之后,是保持动画最开始的那一帧还是保持动画结束之后的那一帧。默认情况是kCAFillModeRemoved。
缓冲过渡
动画的速度
动画时间决定了图层变换的时长,而动画的速度表示动画执行的“速率”,通常是变化量和时间的比值。这里的变化量可以是图层移动的距离,缩放的大小,也可以是图层的透明度、填充色等。实际上,任意的可以做动画的属性的变化差值都可以称作变化量。
默认情况下,我们的动画都是线性变化的,即速率是恒定不变的,就如前面的那些示例,但是有时候,我们并不希望动画的速度一层不变,那么该怎么做呢?幸运的事,Core Animation 已经为我们设计了一系列标准函数提供给我们使用。
timingFunction:
CAAnimation 的 timingFunction 属性,是 CAMediaTimingFunction 类的一个对象。(如果想改变隐式动画的计时函数,同样也可以使用CATransaction的+setAnimationTimingFunction:方法)
我们可以通过下面的构造函数来创建缓冲对象:
+ (instancetype)functionWithName:(CAMediaTimingFunctionName)name;
传入如下几个常量之一:
kCAMediaTimingFunctionLinear  	// 线性
kCAMediaTimingFunctionEaseIn 		// 缓慢起步
kCAMediaTimingFunctionEaseOut 	// 缓慢停止
kCAMediaTimingFunctionEaseInEaseOut	// 先慢起步后快最后慢停止
kCAMediaTimingFunctionDefault		// 类似于上面
示例:
-(void)touchesEnded:(NSSet *)touches withEvent:(UIEvent *)event{
    CABasicAnimation* animation = [CABasicAnimation animationWithKeyPath:@"position.x"];
    animation.duration = 2.0;
    animation.toValue = @(self.subLayer.frame.origin.y+400);
    animation.removedOnCompletion = NO;
    animation.fillMode = kCAFillModeForwards;
    animation.timingFunction = [CAMediaTimingFunction functionWithName:kCAMediaTimingFunctionEaseInEaseOut];
    [self.subLayer addAnimation:animation forKey:nil];
}
上图的缓冲模式分别为:
kCAMediaTimingFunctionLinear
kCAMediaTimingFunctionEaseIn
kCAMediaTimingFunctionEaseOut
kCAMediaTimingFunctionEaseInEaseOut
CAKeyframeAnimation 有一个NSArray类型的 timingFunctions 属性,我们可以用它来对每次动画的步骤指定不同的计时函数。但是指定函数的个数一定要等于 keyframes 数组的元素个数减一,因为它是描述每一帧之间动画速度的函数。
自定义缓冲函数
在上一节中,介绍了几个系统为我们定义好的缓冲函数,能适用于大部分的应用环境。我们注意到,除了 +functionWithName: 之外,CAMediaTimingFunction 同样有另一个构造函数,一个有四个浮点参数的 +functionWithControlPoints::::,使用这个方法,我们可以创建一个自定义的缓冲函数,来匹配我们的动画。
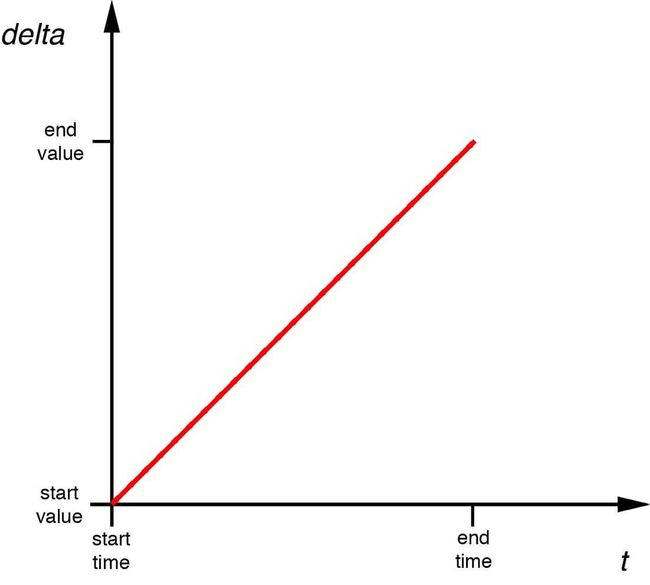
CAMediaTimingFunction 函数的主要原则在于它把输入的时间转换成起点和终点之间成比例的改变。我们可以用一个简单的图标来解释,横轴代表时间,纵轴代表改变的量,于是线性的缓冲就是一条从起点开始的简单的斜线。
这条曲线的斜率代表了速度,斜率的改变代表了加速度,原则上来说,任何加速的曲线都可以用这种图像来表示,但是 CAMediaTimingFunction 使用了一个叫做三次贝塞尔曲线的函数,它只可以产出指定缓冲函数的子集。
三次贝塞尔缓冲函数表达出先加速,然后减速,最后快到达终点的时候又加速的情况,那么标准的缓冲函数又该如何用图像来表示呢?
CAMediaTimingFunction 有一个叫做-getControlPointAtIndex:values:的方法,可以用来检索曲线的点,使用它我们可以找到标准缓冲函数的点,然后用 UIBezierPath 和 CAShapeLayer 来把它画出来。
曲线的起始和终点始终是{0, 0}和{1, 1},于是我们只需要检索曲线的第二个和第三个点(控制点)。
- (void)viewDidLoad{
    [super viewDidLoad];
    CAMediaTimingFunction *function = [CAMediaTimingFunction functionWithName: kCAMediaTimingFunctionEaseOut];
    // 获取到两个控制点
    CGPoint controlPoint1, controlPoint2;
    [function getControlPointAtIndex:1 values:(float *)&controlPoint1];
    [function getControlPointAtIndex:2 values:(float *)&controlPoint2];
    // 创建曲线
    UIBezierPath *path = [[UIBezierPath alloc] init];
    [path moveToPoint:CGPointZero];
    [path addCurveToPoint:CGPointMake(1, 1)
            controlPoint1:controlPoint1 controlPoint2:controlPoint2];
    // 转换点,让其可见
    [path applyTransform:CGAffineTransformMakeScale(200, 200)];
    CAShapeLayer *shapeLayer = [CAShapeLayer layer];
    shapeLayer.strokeColor = [UIColor redColor].CGColor;
    shapeLayer.fillColor = [UIColor clearColor].CGColor;
    shapeLayer.lineWidth = 4.0f;
    shapeLayer.path = path.CGPath;
    [self.layerView.layer addSublayer:shapeLayer];
    self.layerView.layer.geometryFlipped = YES;
}
所有的标准缓冲函数的图像如下:
相关阅读
-
iOS 动画篇 - Core Animation
-
iOS 动画篇 - UIKit动画(一)
-
iOS 动画篇 - UIKit动画(二)
-
iOS动画篇 - pop动画库
2018-11-15 新编。
个人博客地址,该文章同步发布地址。
