Android AIDL实例
  AIDL(Android 接口定义语言),可以利用它定义客户端与服务使用进程间通信 (IPC) 进行相互通信时都认可的编程接口。 在 Android 上,一个进程通常无法访问另一个进程的内存。 尽管如此,进程需要将其对象分解成操作系统能够识别的原语,并将对象编组成跨越边界的对象。 编写执行这一编组操作的代码是一项繁琐的工作,因此 Android 会使用 AIDL 来处理。
  接下来会新建两个Android Project,client和service通过AIDL进行通信。

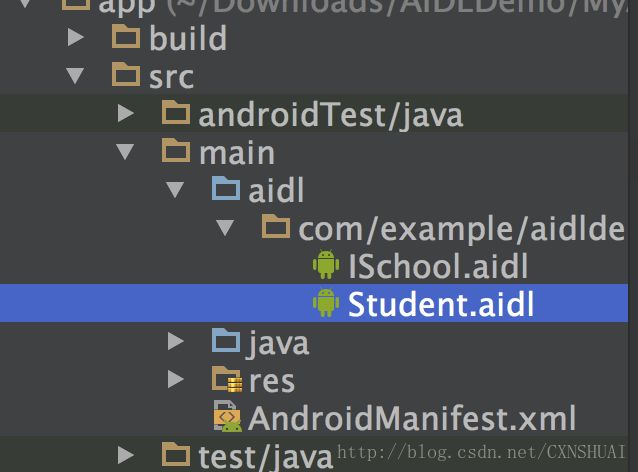
  首先新建service端project MyAidlService,我们首先创建一个aidl文件,android studio已经提供了新建aidl文件,可以直接生成对应的Binder类。提供可调用的方法,假设我们以下有三个方法:
// ISchool.aidl
package com.example.aidldemo.myaidlservice;

// Declare any non-default types here with import statements
import com.example.aidldemo.myaidlservice.Student;

interface ISchool {
   String getSchoolName();
   int getStudentNum();

   Student getStudent();
}
String、int是java的原始数据类型,可以直接引用,但Student是引用数据类型,我们必须自己定义。想通过AIDL传递Student类,必须定义一个Student类的aidl文件:
// Student.aidl
package com.example.aidldemo.myaidlservice;

parcelable Student;
这里直接写parcelable加类名。
这样aidl文件已经生成。
接下来新建我们将要传递的Student类并实现Parcelable接口,确保Student通过IPC通道另一端可用,必须实现Parcelable接口。
public class Student implements Parcelable {
    public String name;

    public int age ;

    public String getName() {
        return name;
    }

    public void setName(String name) {
        this.name = name;
    }

    public int getAge() {
        return age;
    }

    public void setAge(int age) {
        this.age = age;
    }

    @Override
    public String toString() {
        return "Student{" +
                "name='" + name + '\'' +
                ", age=" + age +
                '}';
    }

    @Override
    public int describeContents() {
        return 0;
    }

    @Override
    public void writeToParcel(Parcel dest, int flags) {
        dest.writeString(this.name);
        dest.writeInt(this.age);
    }

    public Student() {
    }

    protected Student(Parcel in) {
        this.name = in.readString();
        this.age = in.readInt();
    }

    public static final Parcelable.Creator CREATOR = new Parcelable.Creator() {
        @Override
        public Student createFromParcel(Parcel source) {
            return new Student(source);
        }

        @Override
        public Student[] newArray(int size) {
            return new Student[size];
        }
    };
}
rebuild project,生成aidl文件可链接的类,供其它类引用。
新建service文件,在service文件中新建内部类继承ISchool.Stub,实现三个方法,并通过onBind方法返回:
public class MyService extends Service {
    private MySchoolBinder mySchoolBinder;

    public MyService() {
    }

    @Override
    public IBinder onBind(Intent intent) {
        return mySchoolBinder;
    }

    @Override
    public void onCreate() {
        super.onCreate();
        mySchoolBinder = new MySchoolBinder();
    }


    private class MySchoolBinder extends ISchool.Stub {
        @Override
        public String getSchoolName() throws RemoteException {
            return "第一高级中学";
        }

        @Override
        public int getStudentNum() throws RemoteException {
            return 3000;
        }

        @Override
        public Student getStudent() throws RemoteException {
            Student student = new Student();
            student.setName("xiaohong");
            student.setAge(18);
            return student;
        }
    }
}
最后在AndroidManifest.xml文件中为service添加action
<service
            android:name=".MyService"
            android:enabled="true"
            android:exported="true">
            <intent-filter>
                <action android:name="com.example.aidldemo.myaidlservice.school" />
            intent-filter>
        service>
这样service端的代码就结束了,运行到真机。
下面是client代码,新建工程MyAidlClient,将MyAidlService工程中的aidl目录整体copy到MyAidlClient工程的main目录下,同时将Student.java类也copy到aidl目录下。
在build.gradle中android{}下添加代码:
sourceSets {
        main {
            java.srcDirs = ['src/main/java', 'src/main/aidl']
        }
    }
这样设置会到aidl目录下找java文件,也就是Student.java文件。
最后是MainActivity文件:
package com.example.aidldemo.myaidlclient;


import android.app.Service;
import android.content.ComponentName;
import android.content.Intent;
import android.content.ServiceConnection;
import android.os.Bundle;
import android.os.IBinder;
import android.os.RemoteException;
import android.support.v7.app.AppCompatActivity;
import android.view.View;
import android.widget.TextView;

import com.example.aidldemo.myaidlservice.ISchool;

public class MainActivity extends AppCompatActivity {
    private ISchool iSchool;

    private Intent intent;

    private TextView schoolText;

    private boolean isBind = false;

    private ServiceConnection connection = new ServiceConnection() {
        @Override
        public void onServiceConnected(ComponentName name, IBinder service) {
            iSchool = ISchool.Stub.asInterface(service);
            isBind = true;
        }

        @Override
        public void onServiceDisconnected(ComponentName name) {
            isBind = false;
        }
    };

    @Override
    protected void onCreate(Bundle savedInstanceState) {
        super.onCreate(savedInstanceState);
        setContentView(R.layout.activity_main);
        schoolText = (TextView) findViewById(R.id.tv_school);
        intent = new Intent();
        intent.setAction("com.example.aidldemo.myaidlservice.school");
        intent.setPackage("com.example.aidldemo.myaidlservice");
        bind();
    }

    private void bind() {

        bindService(intent, connection, Service.BIND_AUTO_CREATE);
    }

    public void getSchool(View view) {
        try {
            if (!isBind) {
                bind();
            }
            schoolText.setText("schoolName:" + iSchool.getSchoolName() + "schoolNum:" + iSchool.getStudentNum() + "  student:" + iSchool.getStudent());
        } catch (RemoteException e) {
            e.printStackTrace();
        }
    }
}
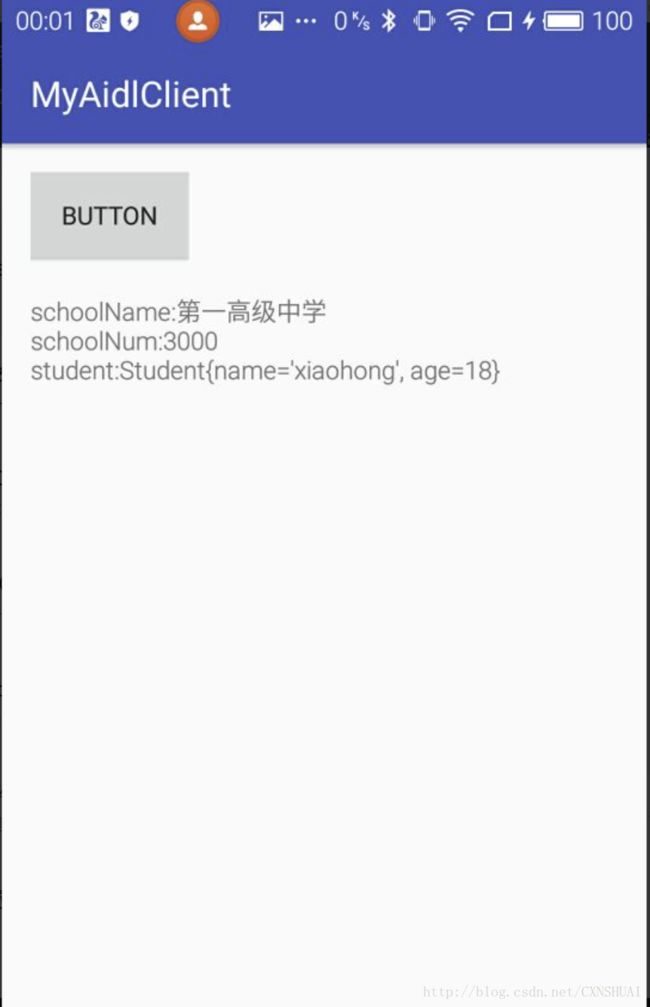
初始化绑定service,拿到ISchool对象就可以取到我们service端设置的值了。运行结果:

github MyAidlService
github MyAidlClient
csdn aidlDemo.zip
