最近在公司遇到一个问题,进入公司的游戏产品官网注册一个普通用户账号,登录官网
然后点击进入该游戏产品的论坛,不能自动跳转到论坛实现自动登录
于是自己去官网注册了一个普通用户账号,登录官网,测试看看,发现确实不能自动跳转到论坛
登录论坛的服务器数据库,查看到数据库里已经有刚刚注册的用户数据了,但密码没有同步过来
经过和开发的一起分析和故障排查,发现一个报错程序
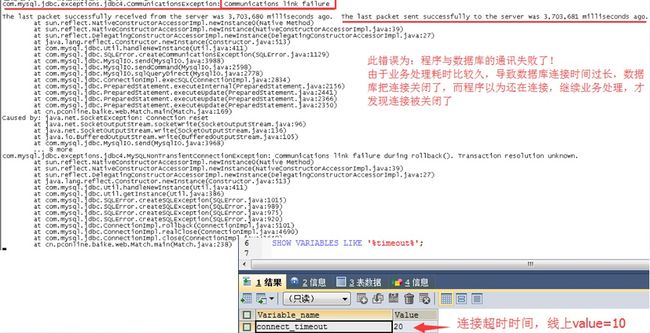
com.mysql.jdbc.exceptions.jdbc4.CommunicationsException: Communications link failure
一.异常信息以及解决办法
      com.mysql.jdbc.exceptions.jdbc4.CommunicationsException:Communications link failure org.springframework.transaction.CannotCreateTransactionException:
    Could not open JDBC Connection for transaction;
    nested exception iscom.mysql.jdbc.exceptions.jdbc4.CommunicationsException:
    Communications link failureThe last packet successfully received from the server was 6,388 milliseconds ago.  The last packet sent successfully to the server was 1,504 milliseconds ago.at org.springframework.jdbc.datasource.DataSourceTransactionManager.doBegin(DataSourceTransactionManager.java:240)
异常分析:程序与MySQL通讯失败了,即连接失败了。
此为程序打开数据库连接后,等到做数据库操作时,发现连接被MySQL关闭掉了
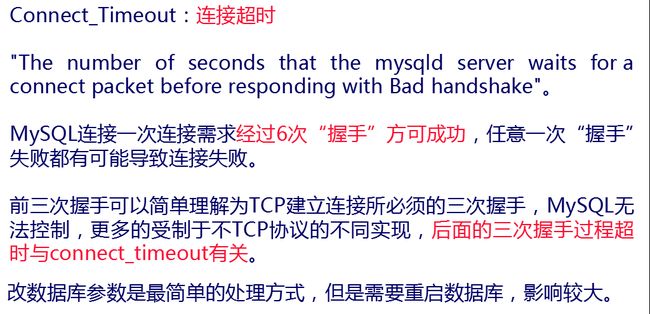
而在MySQL这一层,MySQL5配置上默认将连接的等待时间(wait_timeout)缺省为8小时
连接超过8小时,会导致mysql认为这个连接超时无效,然后进行关闭。
mysql﹥
mysql﹥ show global variables like 'wait_timeout';
+---------------+---------+ | Variable_name | Value |
+---------------+---------+ | wait_timeout | 28800 |
+---------------+---------+ 1 row in set (0.00 sec) 28800 seconds,也就是8小时。
解决办法(尝试方案顺序可为:(1)(3)(2)):
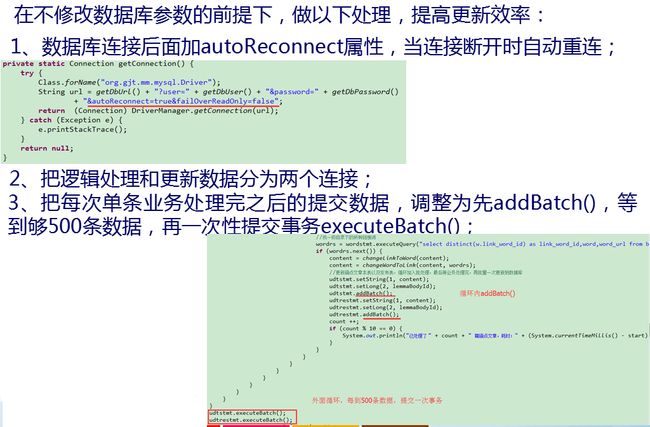
(1)在jdbc连接url的配置中,你可以附上“autoReconnect=true”,但这仅对mysql5以前的版本起作用。
(2)既然问题是由mysql5的全局变量wait_timeout的缺省值太小引起的,我们将其改大就好了。
查看mysql5的手册,发现对wait_timeout的最大值分别是24天/365天(windows/linux)
以windows为 例,假设我们要将其设为21天,我们只要修改mysql5的配置文件“my.ini”(mysql5 installation dir)
增加一行:wait_timeout=1814400 ,需要重新启动mysql5。
linux系统配置文件:/etc/my.cnf
(3)我们可以将数据库连接池的 validateQuery、testOnBorrow(testOnReturn)打开,这样在 每次从连接池中取出且准备使用之前(或者使用完且在放入连接池之前)先测试下当前使用是否好用,如果不好用,系统就会自动destory掉
或者testWhileIdle项是设置是否让后台线程定时检查连接池中连接的可用性。
二.根本解决办法:代码优化
最终发现是服务器的IP没有漂白,需要添加IP白名单就可以了
[root@localhost ~]# cat /etc/sysconfig/iptables
################################ db #####################################
-A INPUT -s server IP1/32 -p tcp -m state --state NEW -m tcp --dport 3306 -j ACCEPT
-A INPUT -s server IP2/32 -p tcp -m state --state NEW -m tcp --dport 3306 -j ACCEPT
通过这个公司网站跳转登录的问题,下面介绍一下Linux如何设置 IP 白名单黑名单
防***可以增加IP白名单/etc/hosts.allow和黑名单/etc/hosts.deny
配置文件格式参考:
修改/etc/hosts.allow文件
#
# hosts.allow This file describes the names of the hosts which are
# allowed to use the local INET services, as decided
# by the ‘/usr/sbin/tcpd’ server.
#
sshd:210.13.218.*:allow
sshd:222.77.15.*:allow
以上写法表示允许210和222两个ip段连接sshd服务(这必然需要hosts.deny这个文件配合使用)
当然:allow完全可以省略的。www.111cn.net
当然如果管理员集中在一个IP那么这样写是比较省事的
all:218.24.129.110//他表示接受110这个ip的所有请求!
/etc/hosts.deny文件,此文件是拒绝服务列表,文件内容如下:
#
# hosts.deny This file describes the names of the hosts which are
# *not* allowed to use the local INET services, as decided
# by the ‘/usr/sbin/tcpd’ server.
#
# The portmap line is redundant, but it is left to remind you that
# the new secure portmap uses hosts.deny and hosts.allow. In particular
# you should know that NFS uses portmap!
sshd:all:deny
注意看:sshd:all:deny表示拒绝了所有sshd远程连接。:deny可以省略
所以:当hosts.allow和 host.deny相冲突时,以hosts.allow设置为准
注意修改完后:www.111Cn.net
service xinetd restart 才能让刚才的更改生效
/etc/hosts.allow(允许)和/etc/hosts.deny(禁止)这两个文件是tcpd服务器的配置文件
tcpd服务器可以控制外部IP对本机服务的访问
linux 系统会先检查/etc/hosts.deny规则,再检查/etc/hosts.allow规则,如果有冲突 按/etc/hosts.allow规则处理
比如:
1.禁止所有ip访问linux 的ssh功能
可以在/etc/hosts.deny添加一行 sshd:all:deny
2.禁止某一个ip(192.168.11.112)访问ssh功能
可以在/etc/hosts.deny添加一行sshd:192.168.11.112
3.如果在/etc/hosts.deny和/etc/hosts.allow同时 有sshd:192.168.11.112 规则,则192.168.11.112可以访问主机的ssh服务
总结:通过这种方法可以控制部分非授权访问,但不是一劳永逸的方法!我们在看服务日志的时候或许会看到很多扫描记录,不是还是直接针对root用户的,这时控制你的访问列表就非常有作用了!
Linux下防火墙增加白名单
在Linux系统中安装yum install iptables-services
然后 vim /etc/sysconfig/iptables
# Generated by iptables-save v1.4.7 on Sun Aug 28 12:14:02 2016
*filter
:INPUT ACCEPT [0:0]
:FORWARD ACCEPT [0:0]
:OUTPUT ACCEPT [0:0]
-N whitelist
-A whitelist -s 8.8.8.8 -j ACCEPT
-A whitelist -s x.x.x.x -j ACCEPT
-A whitelist -s x.x.x.x -j ACCEPT
-A whitelist -s x.x.x.x -j ACCEPT
-A whitelist -s x.x.x.x -j ACCEPT
-A whitelist -s x.x.x.x -j ACCEPT
-A INPUT -m state --state RELATED,ESTABLISHED -j ACCEPT
-A INPUT -p icmp -j ACCEPT
-A INPUT -i lo -j ACCEPT
-A INPUT -m state --state NEW -m tcp -p tcp --dport 22 -j whitelist
-A INPUT -m state --state NEW -m tcp -p tcp --dport 80 -j whitelist
-A INPUT -m state --state NEW -m tcp -p tcp --dport 443 -j whitelist
-A INPUT -m state --state NEW -m tcp -p tcp --dport 25 -j whitelist
-A INPUT -j REJECT --reject-with icmp-host-prohibited
-A FORWARD -j REJECT --reject-with icmp-host-prohibited
COMMIT
上边是白名单的IP列表
下边是针对白名单里的内容开启的一些端口
要把ACCEPT的写在上边
把REJECT的内容写在下边
这样白名单里的IP就可以访问我们限制的端口及服务了,而没有在白名单里的IP则会被拒绝
-A INPUT -m state --state NEW -m tcp -p tcp --dport 22 -j whitelist 这种是针对白名单里的端口开启,即只能白名单里的IP能够通过这个端口访问
-A INPUT -m state --state NEW -m tcp -p tcp --dport 22 -j ACCEPT这种是全白的开启,即任何机器都能通过这个端口访问


