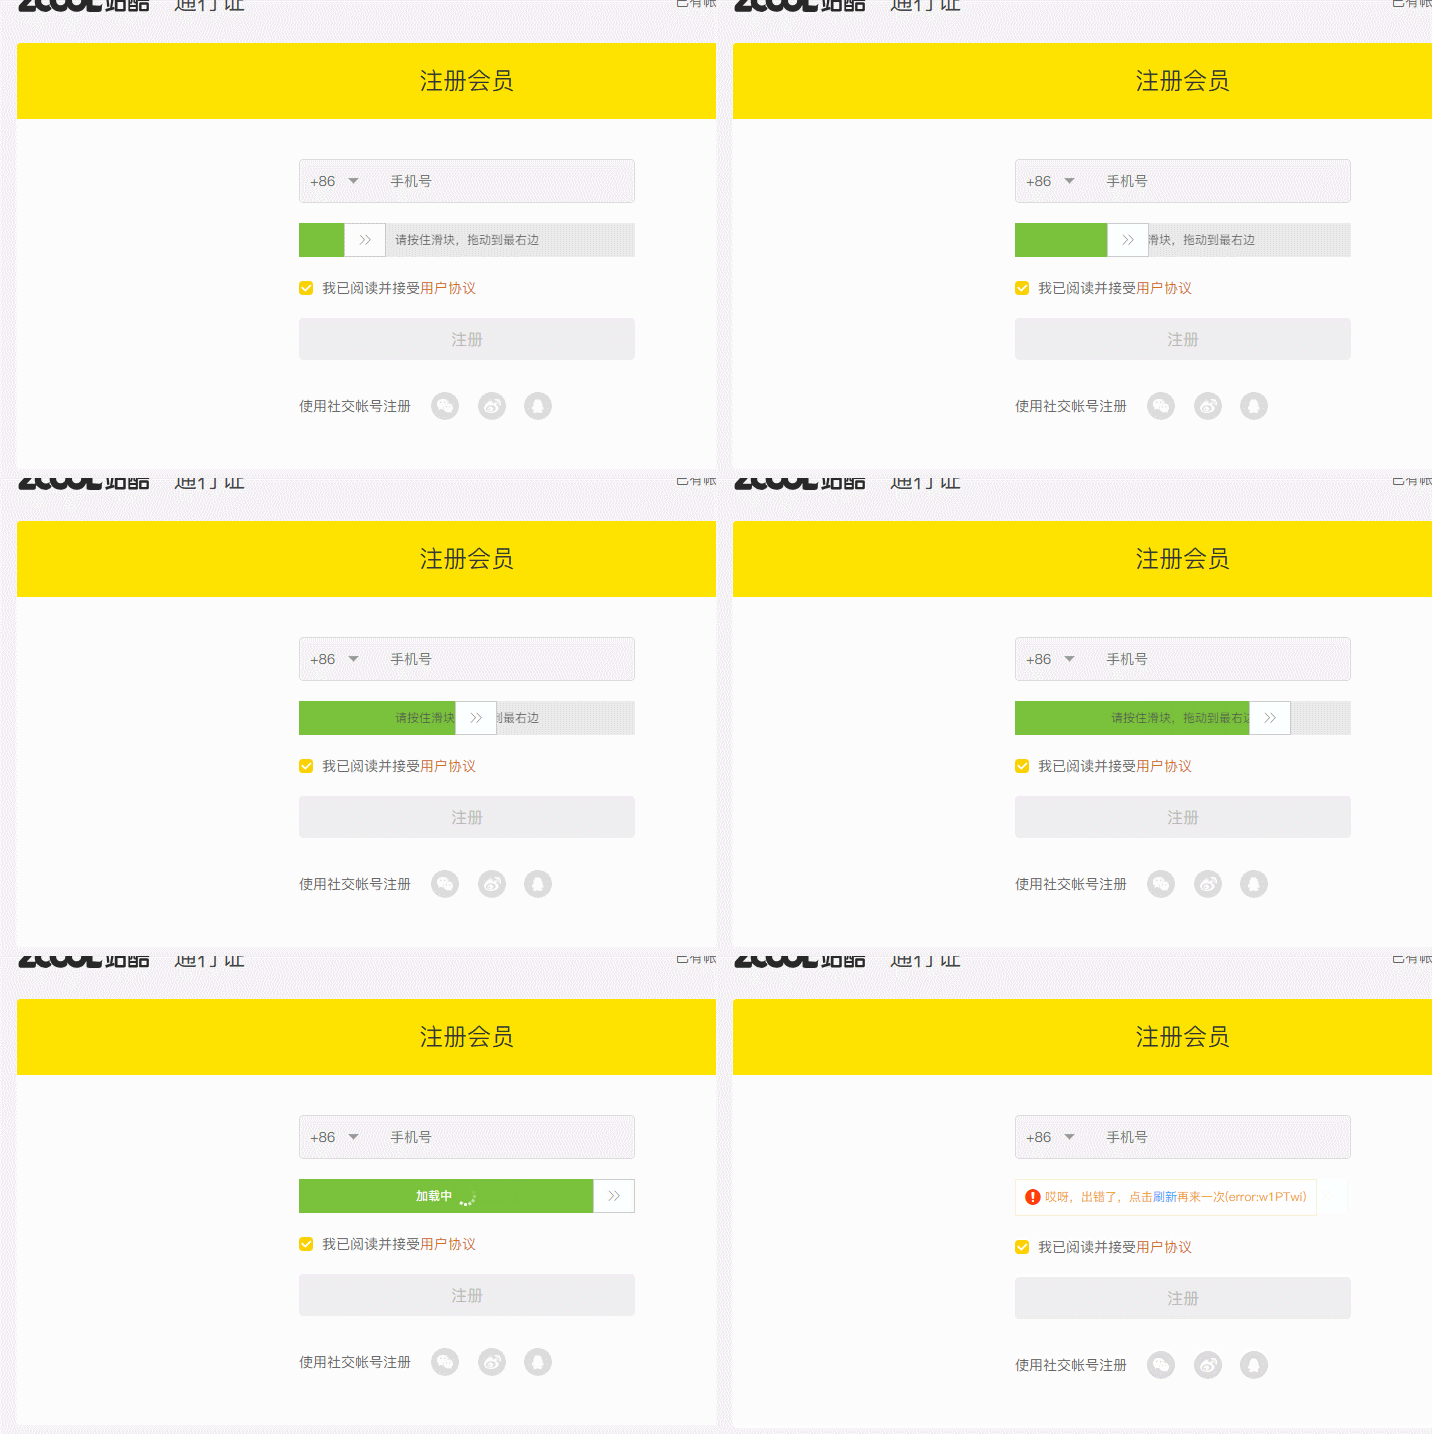
滑动验证码介绍
本篇涉及到的验证码为滑动验证码,不同于极验证,本验证码难度略低,需要的将滑块拖动到矩形区域右侧即可完成。
这类验证码不常见了,官方介绍地址为:https://promotion.aliyun.com/ntms/act/captchaIntroAndDemo.html
使用起来肯定是非常安全的了,不是很好通过机器检测
如何判断验证码类型
这个验证码的标识一般比较明显,在页面源码中一般存在一个 nc.js 基本可以判定是阿里云的验证码了
识别套路
截止到2019年3月18日,本验证码加入了大量的selenium关键字验证,所以单纯的模拟拖拽被反爬的概率满高的,你也知道一般情况爬虫具备时效性 不确保这种手段过一段时间还可以使用!
导入selenium必备的一些模块与方法


from selenium import webdriver
from selenium.webdriver.support.wait import WebDriverWait
# from selenium.webdriver.support import expected_conditions as EC
# from selenium.webdriver.common.by import By
from selenium.webdriver.chrome.options import Options
from selenium.webdriver import ActionChains
import time
import random
在启动selenium之前必须要设置一个本机的代理,进行基本的反[反爬] 处理,很多爬虫在获取用户指纹的时候,都比较喜欢selenium,因为使用selenium模拟浏览器进行数据抓取,能够绕过客户JS加密,绕过爬虫检测,绕过签名机制
但是selenium越来越多的被各种网站进行了相关屏蔽,因为selenium在运行的时候会暴露出一些预定义的Javascript变量(特征字符串),例如"window.navigator.webdriver",在非selenium环境下其值为undefined,而在selenium环境下,其值为true
下图所示为selenium驱动下Chrome控制台打印出的值
细致的绕过去的方法,可能需要单独的一篇博客进行赘述了,这里我只对上面的参数进行屏蔽,使用到的是之前博客中涉及的mitmdump进行代理
https://docs.mitmproxy.org/stable/concepts-certificates/
mitmdump进行代理
技术参考来源:https://zhuanlan.zhihu.com/p/43581988
关于这个模块的基本使用,参考我前面的博客即可,这里核心使用了如下代码
indject_js_proxy.py
from mitmproxy import ctx
injected_javascript = '''
// overwrite the `languages` property to use a custom getter
Object.defineProperty(navigator, "languages", {
get: function() {
return ["zh-CN","zh","zh-TW","en-US","en"];
}
});
// Overwrite the `plugins` property to use a custom getter.
Object.defineProperty(navigator, 'plugins', {
get: () => [1, 2, 3, 4, 5],
});
// Pass the Webdriver test
Object.defineProperty(navigator, 'webdriver', {
get: () => false,
});
// Pass the Chrome Test.
// We can mock this in as much depth as we need for the test.
window.navigator.chrome = {
runtime: {},
// etc.
};
// Pass the Permissions Test.
const originalQuery = window.navigator.permissions.query;
window.navigator.permissions.query = (parameters) => (
parameters.name === 'notifications' ?
Promise.resolve({ state: Notification.permission }) :
originalQuery(parameters)
);
'''
def response(flow):
# Only process 200 responses of HTML content.
if not flow.response.status_code == 200:
return
# Inject a script tag containing the JavaScript.
html = flow.response.text
html = html.replace('', '' % injected_javascript)
flow.response.text = str(html)
ctx.log.info('>>>> js代码插入成功 <<<<')
# 只要url链接以target开头,则将网页内容替换为目前网址
# target = 'https://target-url.com'
# if flow.url.startswith(target):
# flow.response.text = flow.url
上述脚本放置任意目录,之后进行mitmdump的启动即可
C:\user>mitmdump -s indject_js_proxy.py
Loading script indject_js_proxy.py
Proxy server listening at http://*:8080
启动之后,通过webdriver访问
测试网站:https://intoli.com/blog/not-possible-to-block-chrome-headless/chrome-headless-test.html
如果webDriver是绿色,也说明代理起作用了
selenium爬取
接下来就是通过selenium进行一些模拟行为的操作了,这部分代码比较简单,编写的时候参考一下注释即可。
# 实例化一个启动参数对象
chrome_options = Options()
# 添加启动参数
chrome_options.add_argument('--proxy-server=127.0.0.1:8080')
# 将参数对象传入Chrome,则启动了一个设置了窗口大小的Chrome
driver = webdriver.Chrome(chrome_options=chrome_options)
关键函数
def move_to_gap(tracks):
  driver.get("https://passport.zcool.com.cn/regPhone.do?appId=1006&cback=https://my.zcool.com.cn/focus/activity")
  # 找到滑块span
  need_move_span = driver.find_element_by_xpath('//*[@id="nc_1_n1t"]/span')
  # 模拟按住鼠标左键
  ActionChains(driver).click_and_hold(need_move_span).perform()
  for x in tracks: # 模拟人的拖动轨迹
    print(x)
    ActionChains(driver).move_by_offset(xoffset=x,yoffset=random.randint(1,3)).perform()
  time.sleep(1)
  ActionChains(driver).release().perform() # 释放左键
注意看到上述代码中有何核心的点 --- 拖拽距离的 列表tracks
if __name__ == '__main__':
  move_to_gap(get_track(295))
这个地方可以借鉴网上的方案即可
def get_track(distance):
  '''
  拿到移动轨迹,模仿人的滑动行为,先匀加速后匀减速
  匀变速运动基本公式:
  ①v=v0+at
  ②s=v0t+(1/2)at²
  ③v²-v0²=2as

  :param distance: 需要移动的距离
  :return: 存放每0.2秒移动的距离
  '''
  # 初速度
  v=0
  # 单位时间为0.2s来统计轨迹,轨迹即0.2内的位移
  t=0.1
  # 位移/轨迹列表,列表内的一个元素代表0.2s的位移
  tracks=[]
  # 当前的位移
  current=0
  # 到达mid值开始减速
  mid=distance * 4/5

  distance += 10 # 先滑过一点,最后再反着滑动回来

  while current < distance:
    if current < mid:
      # 加速度越小,单位时间的位移越小,模拟的轨迹就越多越详细
      a = 2 # 加速运动
    else:
      a = -3 # 减速运动

    # 初速度
    v0 = v
    # 0.2秒时间内的位移
    s = v0*t+0.5*a*(t**2)
    # 当前的位置
    current += s
    # 添加到轨迹列表
    tracks.append(round(s))

    # 速度已经达到v,该速度作为下次的初速度
    v= v0+a*t

  # 反着滑动到大概准确位置
  for i in range(3):
    tracks.append(-2)
  for i in range(4):
    tracks.append(-1)
  return tracks
代码注释已经添加好,可以自行查阅,临摹一下即可明白
最后开始进行尝试,实测中,发现可以自动拖动,但是,出现一个问题是最后被识别为机器,这个地方,我进行了多次的修改与调整,最终从代码层面发现实现确实有些复杂,所以改变策略,找一下chromedriver.exe是否有修改过的版本,中间去除了selenium的一些关键字,运气不错,被我找到了。
目前只有windows10版本和linux16.04版本
gitee地址:https://gitee.com/bobozhangyx/java-crawler/tree/master/file/%E7%BC%96%E8%AF%91%E5%90%8E%E7%9A%84chromedriver
下载之后,替换你的 chromedriver.exe
再次运行,成功验证
总结
以上所述是小编给大家介绍的python爬虫之验证码篇3-滑动验证码识别技术,希望对大家有所帮助,如果大家有任何疑问请给我留言,小编会及时回复大家的。在此也非常感谢大家对脚本之家网站的支持!
如果你觉得本文对你有帮助,欢迎转载,烦请注明出处,谢谢!


