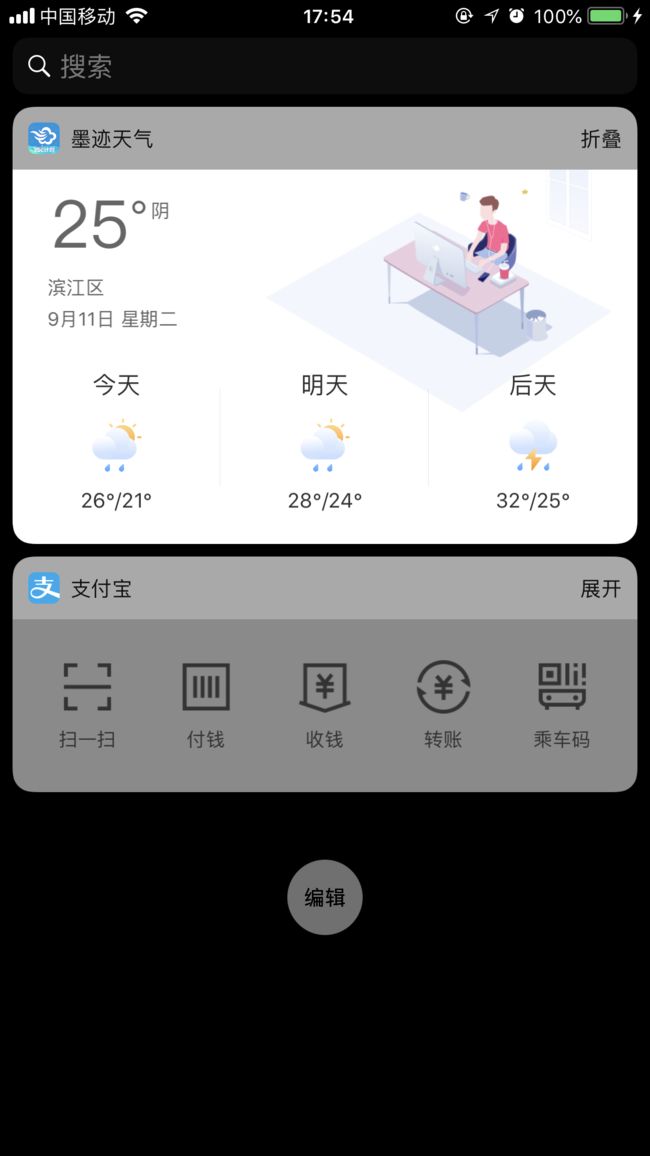
一、 什么是Extension ?
    扩展 (Extension) 是 iOS 8 和 OSX 10.10 加.入的.一个.非常.大的功能点,开发者可以通过系统提供给我们的扩展接.入点 (Extension point) 来为系统特定的服务提供某些附加的功能。
    Extension并不是独立的,它有一个包含在app bundle中的独立bundle,extension的bundle后缀名是.appex;需要依赖于containning app。
    调试主App则运行主App;调试扩展则运行扩展,扩展App想要使用的图片资源等,需要引入到扩展文件夹下。
    创建一个Extension之前,需要有一个承载扩展的应用,称为containing app。Extension 不能单独存在和发布,随containing app 的安装而安装,随containing app的发布而发布,一个containing app 可以添加多个Extension。
    最后用一个话回答,Widget是什么呢?
    Widget就是一个依赖于Container App的另外一个小App,它有自己Bundle Id,有自己的生命周期.
二、 添加Widget
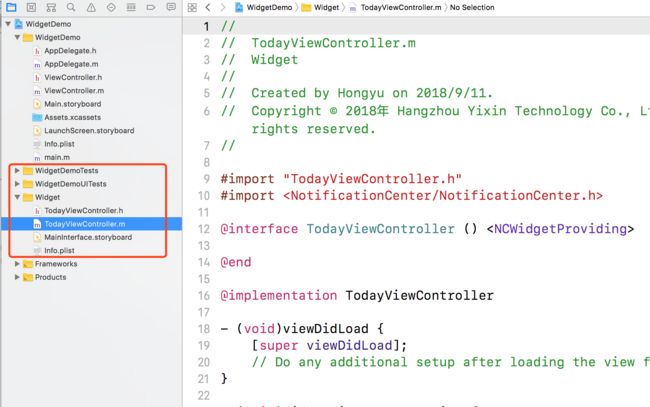
1. 添加Today Extension
Xcode菜单 => File => New => Target.. => 选择 Today Extension
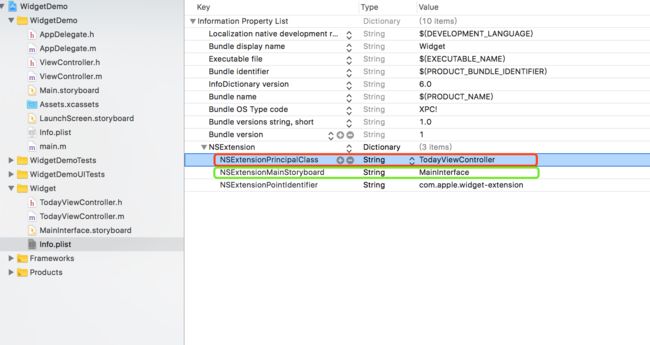
2. 查看Widget生成的Info.plist
Bundle display name:Widget在通知栏显示的名称
NSExtension
如果你是使用纯代码进行开发,请按照下面进行操作:
(1)请删除绿色区域代码
(2)请添加红色区域代码
三、 开发Widget
iOS 8
- iOS8下没有折叠和展开功能,默认的Widget高度为self.preferredContentSize设置的高度。
self.preferredContentSize = CGSizeMake(kScreenW, 100);
- iOS8下所有组件默认右移30单位,可以通过下面的方法修改上下左右的距离。
- (UIEdgeInsets)widgetMarginInsetsForProposedMarginInsets:(UIEdgeInsets)defaultMarginInsets {

    return UIEdgeInsetsMake(0, 0, 0, 0);
}
iOS 10
iOS 10以后,Widget可玩性更高,有了两种显示模式
NCWidgetDisplayModeCompact, // Fixed height,高度固定,最低高度为110
NCWidgetDisplayModeExpanded, // Variable height,高度可变
注意:设定显示模式,需要在设定Size前设定这个属性!
if ([[UIDevice currentDevice] systemVersion].intValue >= 10) {

    self.extensionContext.widgetLargestAvailableDisplayMode = NCWidgetDisplayModeCompact;

    // self.extensionContext.widgetLargestAvailableDisplayMode = NCWidgetDisplayModeExpanded;
}
TodayViewController.m viewDidLoad的代码如下:
- (void)viewDidLoad {
    [super viewDidLoad];

    if ([[UIDevice currentDevice] systemVersion].intValue >= 10) {

        self.extensionContext.widgetLargestAvailableDisplayMode = NCWidgetDisplayModeCompact;
    }

    self.preferredContentSize = CGSizeMake(kScreenW, 100);

    [self setupUI];
}

- (UIEdgeInsets)widgetMarginInsetsForProposedMarginInsets:(UIEdgeInsets)defaultMarginInsets {

    return UIEdgeInsetsMake(0, 0, 0, 0);
}
当显示模式设置为NCWidgetDisplayModeExpanded时,点击折叠和打开时,会触发下面这个方法,在这个方法中可以修改对应状态的高度
- (void)widgetActiveDisplayModeDidChange:(NCWidgetDisplayMode)activeDisplayMode withMaximumSize:(CGSize)maxSize {

    if (activeDisplayMode == NCWidgetDisplayModeCompact) {

        self.preferredContentSize = CGSizeMake(maxSize.width, 110);
    }
    else {

        self.preferredContentSize = CGSizeMake(maxSize.width, 200);
    }
}
在下面的方法中更新视图
-(void)widgetPerformUpdateWithCompletionHandler:(void (^)(NCUpdateResult))completionHandler {
//    NCUpdateResultNewData   新的内容需要重新绘制视图
//    NCUpdateResultNoData    部件不需要更新
//    NCUpdateResultFailed    更新过程中发生错误
  completionHandler(NCUpdateResultNoData);
}
注意:iOS9版本差异,每次进入today页面都会调用这个方法刷新数据,但是iOS9却不会。所以iOS9我们要自己手动调用一下
- (void)viewWillAppear:(BOOL)animated{
    [super viewWillAppear:animated];
    if ([[[UIDevice currentDevice] systemVersion] floatValue] < 9.9
        && [[[UIDevice currentDevice] systemVersion] floatValue] > 8.9) {
        [self widgetPerformUpdateWithCompletionHandler:^(NCUpdateResult result) {}];
    }
}
四、 共享数据
通过App Groups提供的同一group内app共同读写区域,可以用NSUserDefaults和NSFileManager两种方式实现extension和containing app之间的数据共享。
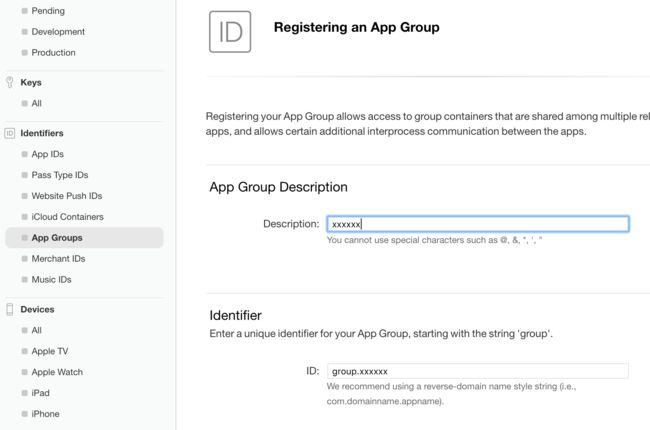
1. 创建App Groups
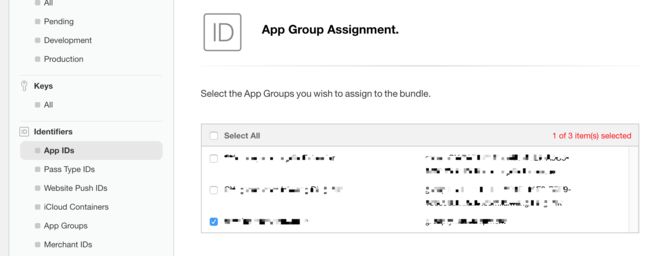
2. 修改主App的App ID
1.勾选App Groups -> Edit
2.选择刚创建的App Groups -> Continue
3. 同上修改Widget的App ID
注意:需给Widget创建新的AppID,Bundle ID 需要以主App的Bundle ID为前缀!
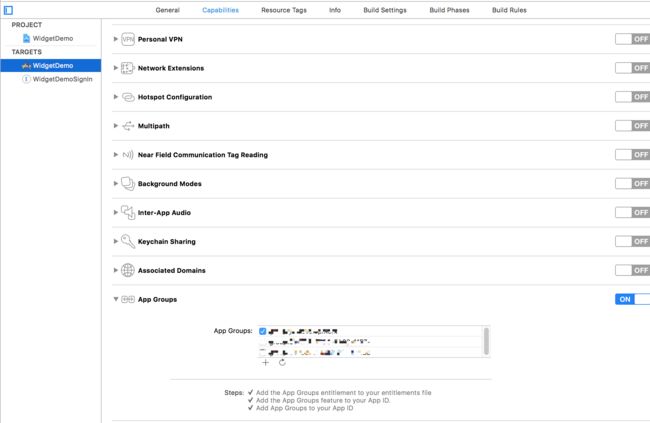
4. 添加App Groups
分别为主App和Widget添加App Groups
五、 两种数据存储方式
1.使用NSUserDefault
这里不能使用[NSUserDefaults standardUserDefaults];方法来初始化NSUserDefault对象,正像之前所说,由于沙盒机制,拓展应用是不允许访问宿主应用的沙盒路径的,因此上述用法是不对的,需要搭配app group完成实例化UserDefaults。正确的使用方式如下:
//存
NSUserDefaults *userDefaults = [[NSUserDefaults alloc] initWithSuiteName:@"申请的AppGroups的ID"];
    [userDefaults setObject:self.textField.text forKey:@"widget"];
    [userDefaults synchronize];
//取
NSUserDefaults *userDefaults = [[NSUserDefaults alloc] initWithSuiteName:@"申请的AppGroups的ID"];
    self.contentStr = [userDefaults objectForKey:@"widget"];
2.使用NSFileManager共享数据
//存
-(BOOL)saveDataByNSFileManager
{
    NSError *err = nil;
    NSURL *containerURL = [[NSFileManager defaultManager] containerURLForSecurityApplicationGroupIdentifier:@"申请的AppGroups的ID"];
    containerURL = [containerURL URLByAppendingPathComponent:@"Library/Caches/ widget"];
    NSString *value = @"asdfasdfasf";
    BOOL result = [value writeToURL:containerURL atomically:YES encoding:NSUTF8StringEncoding error:&err];
    if (!result)
    {
        NSLog(@"%@",err);
    }
    else
    {
        NSLog(@"save value:%@ success.",value);
    }
    return result;
}

//取
-(NSString *)readDataByNSFileManager
{
    NSError *err = nil;
    NSURL *containerURL = [[NSFileManager defaultManager] containerURLForSecurityApplicationGroupIdentifier:@"申请的AppGroups的ID"];
    containerURL = [containerURL URLByAppendingPathComponent:@"Library/Caches/ widget"];
    NSString *value = [NSString stringWithContentsOfURL:containerURL encoding: NSUTF8StringEncoding error:&err];
    return value;
}
六、 应用唤醒
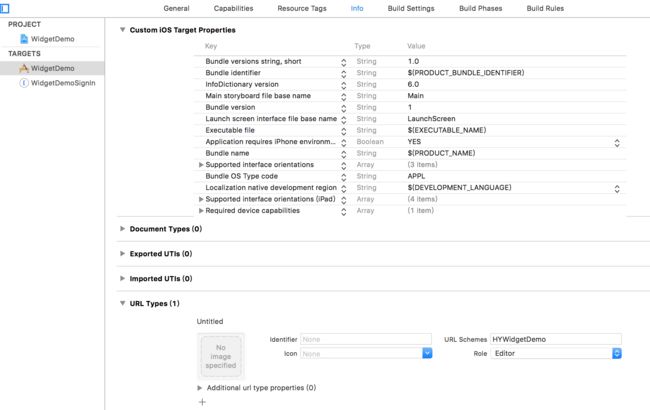
1.配置主App URL Scheme
2.唤醒主程序
- (void)openURLContainingAPP
{
    [self.extensionContext openURL:[NSURL URLWithString:@"HYWidgetDemo://hello"]
                 completionHandler:^(BOOL success) {
                     NSLog(@"open url result:%d",success);
                 }];
}
3.接收数据
- (BOOL)application:(UIApplication *)application openURL:(NSURL *)url sourceApplication:(NSString *)sourceApplication annotation:(id)annotation
{
    [self handleOpenFromWidgetWithUrl:url];
    return YES;
}


#if __IPHONE_OS_VERSION_MAX_ALLOWED >= __IPHONE_9_0
- (BOOL)application:(UIApplication *)app openURL:(NSURL *)url options:(NSDictionary *)options
{
    [self handleOpenFromWidgetWithUrl:url];
    return YES;
}
#endif

- (void)handleOpenFromWidgetWithUrl:(NSURL *)url {
    if ([[url absoluteString] hasPrefix:@"HYWidgetDemo"])
    {
        UIAlertController *alertController = [UIAlertController alertControllerWithTitle:@"提示" message:[NSString stringWithFormat:@"你点击了%@",[url host]] preferredStyle:UIAlertControllerStyleAlert];
        UIAlertAction *cancel = [UIAlertAction actionWithTitle:@"取消" style:UIAlertActionStyleCancel handler:^(UIAlertAction * _Nonnull action) {

        }];
        UIAlertAction *shure = [UIAlertAction actionWithTitle:@"确定" style:UIAlertActionStyleDefault handler:^(UIAlertAction * _Nonnull action) {

        }];
        [alertController addAction:cancel];
        [alertController addAction:shure];

        UIWindow *alertWindow = [[UIWindow alloc] initWithFrame:[UIScreen mainScreen].bounds];
        alertWindow.rootViewController = [[UIViewController alloc] init];
        alertWindow.windowLevel = UIWindowLevelAlert + 1;
        [alertWindow makeKeyAndVisible];
        [alertWindow.rootViewController presentViewController:alertController animated:YES completion:nil];
    }
}
