2.11手动制作镜像
2.11.1制作支持ssh远程登陆的docker镜像
1:启动容器安装软件服务
[root@m03 my_dir]# docker run -it -p 1022:22 --name my_ssh centos:6.9
##进入了容器中
[root@26d39f3470fc /]# yum install openssh-server
## 生成秘钥对
[root@26d39f3470fc /]# /etc/init.d/sshd start
Generating SSH2 RSA host key:                              [  OK  ]
Generating SSH1 RSA host key:                              [  OK  ]
Generating SSH2 DSA host key:                              [  OK  ]
Starting sshd:                                             [  OK  ]

## 查看端口
[root@26d39f3470fc /]# netstat -antlp
Active Internet connections (servers and established)
Proto Recv-Q Send-Q Local Address               Foreign Address             State       PID/Program name
tcp        0      0 0.0.0.0:22                  0.0.0.0:*                   LISTEN      116/sshd
tcp        0      0 :::22                       :::*                        LISTEN      116/sshd
[root@26d39f3470fc /]#

## 设置root密码
[root@26d39f3470fc /]# passwd
Changing password for user root.
New password:
BAD PASSWORD: it is too simplistic/systematic
BAD PASSWORD: is too simple
Retype new password:
passwd: all authentication tokens updated successfully.

测试ssh服务
[root@m02 /]# ssh [email protected] -p 1022
Warning: Permanently added '[10.0.0.63]:1022' (RSA) to the list of known hosts.
[email protected] password:
[root@26d39f3470fc ~]#
[root@26d39f3470fc /]# exit
exit

2:将安装好服务的容器commit提交为镜像

[root@m03 my_dir]# docker commit my_ssh centos6-ssh:v1
sha256:620176578b795ce542ea7e458d87b6f53f963ae6fad0ece05c084e4b5d5230f3
[root@m03 my_dir]# docker images
REPOSITORY               TAG                 IMAGE ID            CREATED             SIZE
centos6-ssh              v1                  620176578b79        46 seconds ago      312 MB
docker.io/httpd          2.4                 7d85cc3b2d80        5 days ago          154 MB
docker.io/centos         latest              67fa590cfc1c        6 days ago          202 MB
docker.io/nginx          latest              5a3221f0137b        11 days ago         126 MB
docker.io/centos         6.8                 82f3b5f3c58f        5 months ago        195 MB
docker.io/centos         6.9                 2199b8eb8390        5 months ago        195 MB
docker.io/centos/httpd   latest              2cc07fbb5000        8 months ago        258 MB

3:   启动新容器来测试新提交的镜像
/usr/sbin/sshd -D需要让该命令在前端一直处于运行状态,否则容器的状态就是Exit。
[root@m03 my_dir]# docker run -d -p 2022:22 centos6-ssh:v1 /usr/sbin/sshd -D
0aa77ba112dfdf5261da559ae71d006ccf216edcd335ca02d2371b6fb048c579
测试新的容器
[root@m02 /]# ssh [email protected] -p 2022
Warning: Permanently added '[10.0.0.63]:2022' (RSA) to the list of known hosts.
[email protected] s password:
Last login: Tue Aug 27 09:15:48 2019 from 10.0.0.62
[root@0aa77ba112df ~]# ls
anaconda-ks.cfg  install.log  install.log.syslog
2.11.2制作支持ssh+httpd双服务的镜像
1:启动容器安装软件服务
docker run -it --name oldgirl centos:6.9
yum install httpd
yum install openssh-server
/etc/init.d/sshd start
passwd

###容器启动脚本
vi /init.sh
#!/bin/bash
/etc/init.d/httpd start
/etc/init.d/sshd start
tail -F /var/log/messages
#只要让脚本一直处于运行中就可以,否则容器就是Exit退出状态。

2:将安装好服务的容器commit提交为镜像
docker commit oldgirl centos6-ssh-httpd:v1

3:启动新容器来测试新提交的镜像
docker run -d -p 8080:80 -p 1122:22 centos6-ssh-httpd:v1 /bin/bash /init.sh
测试ssh服务
[root@m02 /]# ssh 10.0.0.63 -p 1122
Warning: Permanently added '[10.0.0.63]:1122' (RSA) to the list of known hosts.
[email protected]'s password:
[root@9ac3d33f5abc ~]# 2.12Dockerfile自动构建镜像
2.12.1手动docker镜像的缺点
相对于手动制作的docker镜像,使用dockerfile构建的镜像有以下优点:
1:dockerfile只有几kb,便于传输

2:使用dockerfile构建出来的镜像,在运行容器的时候,不用指定容器的初始命令

3:支持更多的自定义操作
2.12.2dockerfile常用命令
dockerfile常用指令:
    FROM 这个镜像的妈妈是谁?(指定基础镜像)
    MAINTAINER 告诉别人,谁负责养它?(指定维护者信息,可以没有)
    RUN 你想让它干啥(在命令前面加上RUN即可)
    ADD 给它点创业资金(COPY文件,会自动解压)
    WORKDIR 我是cd,今天刚化了妆(设置当前工作目录)
    VOLUME 给它一个存放行李的地方(设置卷,挂载主机目录)
    EXPOSE 它要打开的门是啥(指定对外的端口)(-P 随机端口)
    CMD 奔跑吧,兄弟!(指定容器启动后的要干的事情)(容易被替换)

dockerfile其他指令:
    COPY 复制文件
    ENV  环境变量
    ENTRYPOINT  容器启动后执行的命令(无法被替换,启容器的时候指定的命令,会被当成参数)
2.12.3dockerfile实战1
dockerfile制作docker镜像步骤:
1:编写dockerfile
vi  dockerfile
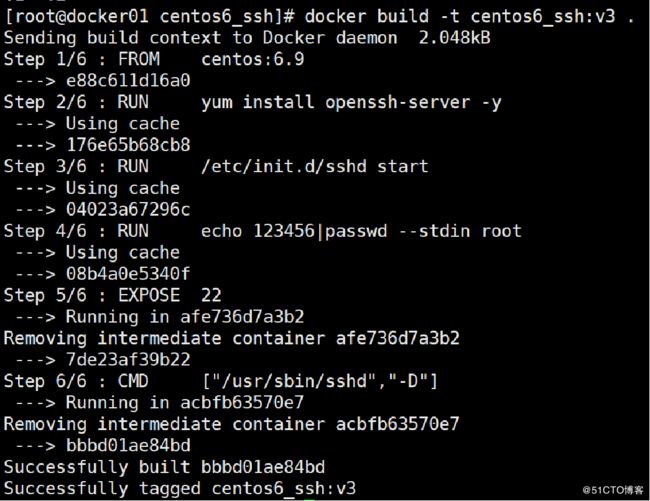
FROM  centos:6.9
RUN     yum install openssh-server -y
RUN     /etc/init.d/sshd start
RUN     echo 123456|passwd --stdin root
CMD     ["/usr/sbin/sshd","-D"]

2:docker build构建镜像
docker build -t centos6-ssh:v2  .

3:   启动新容器来测试新构建的镜像
docker run -d -p 1322:22 centos6-ssh:v2
2.13.4dockerfile实战2
dockerfile制作docker镜像步骤:
1:编写dockerfile
FROM  centos:6.9
RUN     yum install openssh-server httpd -y
RUN     /etc/init.d/sshd start
ADD      init.sh   /init.sh
# 两个服务的端口,用于做端口映射
EXPOSE  22 80
#设置登录进容器后,当前的工作目录
WORKDIR /root
# 创建容器的时候,可以指定该变量的值,也可以不指定,就使用这里的默认值
ENV     SSH_PASSWD=123456
CMD     ["/bin/bash","/init.sh"]

###容器启动脚本
vi /init.sh
#!/bin/bash
echo $SSH_PASSWD|passwd --stdin root
/etc/init.d/httpd start
/usr/sbin/sshd -D

2:docker build构建镜像
docker build -t centos6-ssh-httpd:v5

3:启动新容器来测试新提交的镜像
[root@m03 opt]# docker run -d -p 1222:22 -p 8880:80 --env "SSH_PASSWD=123456" centos6-ssh:v5
005341d6fb11a0207384e77afcb9ed026a41ee4fe3306734f94c82dc80e9da6b
[root@m03 opt]# docker ps -a
CONTAINER ID        IMAGE               COMMAND                CREATED             STATUS              PORTS                                        NAMES
005341d6fb11        centos6-ssh:v5      "/bin/bash /init.sh"   8 seconds ago       Up 7 seconds        0.0.0.0:1222->22/tcp, 0.0.0.0:8880->80/tcp   elated_goldstine
2.13.5dockerfile部署
把项目封装成docker镜像的步骤:
1:先运行一个基础容器,手动制作docker镜像,把操作命令复制出来,用于书写dockerfile
[root@fbf9f4df96d1 html]# history
    1  yum install -y httpd php php-cli -y
    2  cd /var/www/html/
    3  curl -o http://static.kodcloud.com/update/download/kodexplorer4.37.zip
    4  curl -o kodexplorer4.37.zip http://static.kodcloud.com/update/download/kodexplorer4.37.zip
    5  ll
    6  yum install unzip
    7  unzip kodexplorer4.37.zip
    8  ll
    9  yum install php-gd php-mbstring
   10  service httpd start
   11  chmod -R 777 /var/www/html/
   12  history

2:编写dockerfile,构建镜像

3:测试运行
[root@m03 opt]# cat dockerfile
FROM centos:6.9
RUN yum install -y httpd php php-cli php-gd php-mbstring  unzip
WORKDIR /var/www/html/
COPY  kodexplorer4.37.zip .
RUN unzip kodexplorer4.37.zip
RUN chmod -R 777 /var/www/html/
ADD init.sh /init.sh
EXPOSE 80
CMD ["/bin/bash", "/init.sh"]

[root@m03 opt]# cat init.sh
#!/bin/bash
/etc/init.d/httpd start
tail -F /var/log/messages
[root@m03 opt]#

构建镜像
[root@m03 opt]# docker build -t kodyun:v1 .

创建容器
[root@m03 opt]# docker run -d -p 80:80 kodyun:v1
04e02985a4db2a5674c227c6fc7fb56609c98aa12f0c49739ccb7452b61a8352
[root@m03 opt]# docker ps -a
CONTAINER ID        IMAGE               COMMAND                CREATED             STATUS              PORTS                NAMES
04e02985a4db        kodyun:v1           "/bin/bash /init.sh"   5 seconds ago       Up 4 seconds        0.0.0.0:80->80/tcp   upbeat_cori
[
2.14docker镜像的分层
2.14.1分层的好处
分层的好处:共享资源,节省资源
有多个镜像都从相同的 base 镜像构建而来,那么 Docker Host 只需在磁盘上保存一份 base 镜像;同时内存中也只需加载一份 base 镜像,就可以为所有容器服务了
2.14.2dockerfile run的原理
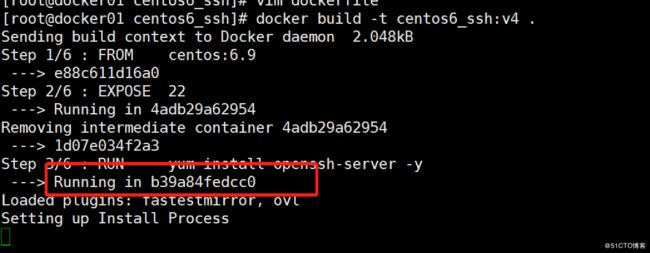
在运行过程中,会创建临时容器
--no-trunc可以看到完整的命令
2.14.3docker简单总结
2.15容器间的互联
2.15.1--link完成荣期间的互联
容器间互联的方法:--link  单方向的创建Link的容器能连接之前创建的容器
docker run -d --name my_httpd  httpd:latest
docker run -it --link my_httpd:web01 centos:6.8
测试:
curl   my_httpd
curl  web01

原理:
cat /etc/hosts
[root@m03 lib]# docker run -d --name my_httpd  httpd:latest
Unable to find image 'httpd:latest' locally
Trying to pull repository docker.io/library/httpd ...
latest: Pulling from docker.io/library/httpd
Digest: sha256:98caed3e3a90ed9db8d25dcbb98eebe0ce56358a9dbbc940d7eb66a8e2b88252
Status: Downloaded newer image for docker.io/httpd:latest
db023fbf798d872cbbb5303f6899635bc550a5a35e4b7d1bb2246ea0dc8a8a2f

[root@m03 lib]# docker run -it --link my_httpd:web01 centos:6.9
#访问容器的name也可以
[root@37811b332ce4 /]# curl my_httpd
It works!

#访问主机名也可以
[root@37811b332ce4 /]# curl web01
It works!

#原理是--link添加了主机名映射
[root@37811b332ce4 /]# cat /etc/hosts
127.0.0.1   localhost
::1 localhost ip6-localhost ip6-loopback
fe00::0 ip6-localnet
ff00::0 ip6-mcastprefix
ff02::1 ip6-allnodes
ff02::2 ip6-allrouters
172.17.0.3  web01 db023fbf798d my_httpd
172.17.0.4  37811b332ce4
[root@37811b332ce4 /]# ^C
[root@37811b332ce4 /]#
2.15.2容器间互联的应用-zabbix安装
体验一下即可,不要再生产环境中把zabbix搭建在容器中,由于容器精简,在配置邮件告警的时候,不能配置。
docker run --name mysql-server -t \
      -e MYSQL_DATABASE="zabbix" \
      -e MYSQL_USER="zabbix" \
      -e MYSQL_PASSWORD="zabbix_pwd" \
      -e MYSQL_ROOT_PASSWORD="root_pwd" \
      -d mysql:5.7 \
      --character-set-server=utf8 --collation-server=utf8_bin

docker run --name zabbix-java-gateway -t \
      -d zabbix/zabbix-java-gateway:latest

docker run --name zabbix-server-mysql -t \
      -e DB_SERVER_HOST="mysql-server" \
      -e MYSQL_DATABASE="zabbix" \
      -e MYSQL_USER="zabbix" \
      -e MYSQL_PASSWORD="zabbix_pwd" \
      -e MYSQL_ROOT_PASSWORD="root_pwd" \
      -e ZBX_JAVAGATEWAY="zabbix-java-gateway" \
      --link mysql-server:mysql \
      --link zabbix-java-gateway:zabbix-java-gateway \
      -p 10051:10051 \
      -d zabbix/zabbix-server-mysql:latest

docker run --name zabbix-web-nginx-mysql -t \
      -e DB_SERVER_HOST="mysql-server" \
      -e MYSQL_DATABASE="zabbix" \
      -e MYSQL_USER="zabbix" \
      -e MYSQL_PASSWORD="zabbix_pwd" \
      -e MYSQL_ROOT_PASSWORD="root_pwd" \
      --link mysql-server:mysql \
      --link zabbix-server-mysql:zabbix-server \
      -p 80:80 \
      -d zabbix/zabbix-web-nginx-mysql:latest
2.16私有仓库registry
2.16.1没有认证的私有仓库
m02服务器10.0.0.62
m03服务器10.0.0.63

m02服务器上
运行docker私有仓库:
[root@m02 /]# mkdir /opt/myregistry
[root@m02 /]# docker run -d -p 5000:5000 --restart=always  -v /opt/myregistry:/var/lib/registry  registry
5258714d435c133670d04c00784c8f10b018224525a522770a1a88a7d3155237
当容器启动完成,私有仓库就可以使用了

m03服务器上
a:给要上传的镜像打tag
[root@m03 opt]# docker image tag httpd:latest 10.0.0.62:5000/httpd:latest
[root@m03 opt]# docker images
REPOSITORY               TAG                 IMAGE ID            CREATED             SIZE
docker.io/httpd          2.4                 7d85cc3b2d80        5 days ago          154 MB
docker.io/httpd          latest              7d85cc3b2d80        5 days ago          154 MB
10.0.0.62:5000/httpd     latest              7d85cc3b2d80        5 days ago          154 MB

b:上传
[root@m03 opt]# docker push 10.0.0.62:5000/httpd:latest
The push refers to a repository [10.0.0.62:5000/httpd]
Get https://10.0.0.62:5000/v1/_ping: http: server gave HTTP response to HTTPS client

报错解决方法,在m03服务器上:
[root@m03 opt]# vi /etc/docker/daemon.json
{
  "registry-mirrors": ["https://registry.docker-cn.com"],
  "insecure-registries": ["10.0.0.62:5000"]
}
[root@m03 opt]# systemctl restart docker

[root@m03 opt]# docker push 10.0.0.62:5000/httpd:latest
The push refers to a repository [10.0.0.62:5000/httpd]
9e0ab3afff15: Pushed
7a0960d9b679: Pushed
8b16516271d6: Pushed
5bcb93651a74: Pushed
1c95c77433e8: Pushed
latest: digest: sha256:90cca2f9c32ad25afa180da6b14f35de9990cb02b9007350a5bccef4cac1e1c9 size: 1367
[root@m03 opt]#

#再上传一个
[root@m03 opt]# docker tag centos:6.8 10.0.0.62:5000/centos:6.8
[root@m03 opt]# docker push 10.0.0.62:5000/centos:6.8
The push refers to a repository [10.0.0.62:5000/centos]
ad337ac82f03: Pushed
6.8: digest: sha256:3e472cabf40e9beee56affc1fdce0e897dadc4e6063c00cd16bcbdbd3ba96864 size: 529
[root@m03 opt]#

#在m02端查看push的镜像
[root@m02 repositories]# ll
total 0
drwxr-xr-x 5 root root 55 Aug 27 22:53 centos
drwxr-xr-x 5 root root 55 Aug 27 22:48 httpd
[root@m02 repositories]# pwd
/opt/myregistry/docker/registry/v2/repositories
[root@m02 repositories]#
[root@m02 repositories]# tree centos
centos
├── _layers
│   └── sha256
│       ├── 7ce0cebb9dca298e1b098715615f8acb6bb6ccc449e765e6448dd2120cdf9fd2
│       │   └── link
│       └── 82f3b5f3c58f22e50d6b05f227c675af504cffc9dff7e318df5fc40faee6410e
│           └── link
├── _manifests
│   ├── revisions
│   │   └── sha256
│   │       └── 3e472cabf40e9beee56affc1fdce0e897dadc4e6063c00cd16bcbdbd3ba96864
│   │           └── link
│   └── tags
│       └── 6.8
│           ├── current
│           │   └── link
│           └── index
│               └── sha256
│                   └── 3e472cabf40e9beee56affc1fdce0e897dadc4e6063c00cd16bcbdbd3ba96864
│                       └── link
└── _uploads

15 directories, 5 files
[root@m02 repositories]#
2.16.2有认证的私有仓库
a:base认证密码文件准备
[root@m02 repositories]# yum install httpd-tools -y
[root@m02 repositories]# mkdir /opt/registry-var/auth/ -p
[root@m02 repositories]# htpasswd  -Bbn vita 123456  >> /opt/registry-var/auth/htpasswd

b:启动docker私有仓库
[root@m02 repositories]# docker run -d -p 5000:5000 -v /opt/registry-var/auth/:/auth/ -v /opt/myregistry:/var/lib/registry -e "REGISTRY_AUTH=htpasswd" -e "REGISTRY_AUTH_HTPASSWD_REALM=Registry Realm" -e REGISTRY_AUTH_HTPASSWD_PATH=/auth/htpasswd registry

[root@m03 opt]# docker pull 10.0.0.62:5000/centos:6.8
Trying to pull repository 10.0.0.62:5000/centos ...
Pulling repository 10.0.0.62:5000/centos
Error: image centos:6.8 not found
#登录
[root@m03 opt]# docker login 10.0.0.62:5000
#输入用户名和密码
Username: vita
Password:
Login Succeeded
[root@m03 opt]# docker pull 10.0.0.62:5000/centos:6.8
Trying to pull repository 10.0.0.62:5000/centos ...
6.8: Pulling from 10.0.0.62:5000/centos
7ce0cebb9dca: Pull complete
Digest: sha256:3e472cabf40e9beee56affc1fdce0e897dadc4e6063c00cd16bcbdbd3ba96864
Status: Downloaded newer image for 10.0.0.62:5000/centos:6.8
[root@m03 opt]#
2.17容器编排工具docker-compose
安装:
curl -o /etc/yum.repos.d/epel.repo http://mirrors.aliyun.com/repo/epel-7.repo
yum install -y python2-pip
pip install docker-compose

检查是否安装成功
docker-compose -v
#名字只能是这个
vi docker-compose.yml
version: '3'
services:
   db:
     image: mysql:5.7
     volumes:
       - db_data:/var/lib/mysql
     restart: always
     environment:
       MYSQL_ROOT_PASSWORD: somewordpress
       MYSQL_DATABASE: wordpress
       MYSQL_USER: wordpress
       MYSQL_PASSWORD: wordpress
   wordpress:
     depends_on:
       - db
     image: wordpress:latest
     volumes:
       - web_data:/var/www/html
     ports:
       - "80"
     restart: always
     environment:
       WORDPRESS_DB_HOST: db:3306
       WORDPRESS_DB_USER: wordpress
       WORDPRESS_DB_PASSWORD: wordpress
volumes:
    db_data:
    web_data:
2.18docker容器的四种网络类型
None:不为容器配置任何网络功能,--net=none

Container:与另一个运行中的容器共享Network Namespace,--net=container:containerID

Host:与主机共享Network Namespace,--net=host

Bridge:Docker设计的NAT网络模型
None:不为容器配置任何网络功能,--net=none
[root@m02 ~]# docker run -it --network none busybox:latest
/ # ifconfig
lo        Link encap:Local Loopback
          inet addr:127.0.0.1  Mask:255.0.0.0
          inet6 addr: ::1/128 Scope:Host
          UP LOOPBACK RUNNING  MTU:65536  Metric:1
          RX packets:0 errors:0 dropped:0 overruns:0 frame:0
          TX packets:0 errors:0 dropped:0 overruns:0 carrier:0
          collisions:0 txqueuelen:1
          RX bytes:0 (0.0 B)  TX bytes:0 (0.0 B)

[root@m02 ~]# docker ps -a
CONTAINER ID        IMAGE               COMMAND                  CREATED             STATUS              PORTS                    NAMES
1081758c9f32        busybox:latest      "sh"                     2 minutes ago       Up 2 minutes                                 awesome_albattani
bc7598d59d99        registry            "/entrypoint.sh /e..."   9 hours ago         Up 9 hours          0.0.0.0:5000->5000/tcp   practical_meninsky
[root@m02 ~]# docker inspect 1081758c9f32
.......................
 "Networks": {
                "none": {
                    "IPAMConfig": null,
                    "Links": null,
                    "Aliases": null,
                    "NetworkID": "7c8ca554183c5fb6e2d60ec953d10f535512cc1c8a2634ecd22001a4e72b62f6",
                    "EndpointID": "4305ad25bfb7cfc603e29e7abc2a3c18b29e944b879d30ecf9016995afe7fb7d",
                    "Gateway": "",
                    "IPAddress": "",
                    "IPPrefixLen": 0,
                    "IPv6Gateway": "",
                    "GlobalIPv6Address": "",
                    "GlobalIPv6PrefixLen": 0,
                    "MacAddress": ""
                }
Container:与另一个运行中的容器共享Network Namespace,--net=container:containerID
[root@m02 ~]# docker run -d httpd:latest
27e313f7f1faee636791efba8b3e07043b8a2aa654b16858f59204883f152575
[root@m02 ~]# docker ps -a
CONTAINER ID        IMAGE               COMMAND              CREATED             STATUS              PORTS               NAMES
27e313f7f1fa        httpd:latest        "httpd-foreground"   13 seconds ago      Up 12 seconds       80/tcp              agitated_wescoff
[root@m02 ~]# docker inspect 27e313f7f1fa
[
    {
        "Id": "27e313f7f1faee636791efba8b3e07043b8a2aa654b16858f59204883f152575",
        "Created": "2019-08-28T00:21:11.762275464Z",
        "Path": "httpd-foreground",
        "Args": [],
        "State": {
            "Status": "running",
            "Running": true,
            "Paused": false,
            "Restarting": false,
            "OOMKilled": false,
            "Dead": false,
            "Pid": 3168,
            "ExitCode": 0,
            "Error": "",
            "StartedAt": "2019-08-28T00:21:12.169841859Z",
            "FinishedAt": "0001-01-01T00:00:00Z"
        },
"Networks": {
                "bridge": {
                    "IPAMConfig": null,
                    "Links": null,
                    "Aliases": null,
                    "NetworkID": "0c7c6a23a122615a75e9015898472666ba5bd944a21900dddcfce33d2b28159c",
                    "EndpointID": "75b8d08b72591e315765b9625ebbfc768bebba65faa1b68ce5a0f9e2eff9ad22",
                    "Gateway": "172.17.0.1",
                    "IPAddress": "172.17.0.2",
                    "IPPrefixLen": 16,
                    "IPv6Gateway": "",
                    "GlobalIPv6Address": "",
                    "GlobalIPv6PrefixLen": 0,
                    "MacAddress": "02:42:ac:11:00:02"
                }
            }
        }
    }
]

#新建一个容器,使用刚刚的容器的网络
[root@m02 ~]# docker run -it --network container:agitated_wescoff centos:6.8
[root@27e313f7f1fa /]# ifconfig
eth0      Link encap:Ethernet  HWaddr 02:42:AC:11:00:02
          inet addr:172.17.0.2  Bcast:0.0.0.0  Mask:255.255.0.0
          inet6 addr: fe80::42:acff:fe11:2/64 Scope:Link
          UP BROADCAST RUNNING MULTICAST  MTU:1500  Metric:1
          RX packets:8 errors:0 dropped:0 overruns:0 frame:0
          TX packets:8 errors:0 dropped:0 overruns:0 carrier:0
          collisions:0 txqueuelen:0
          RX bytes:648 (648.0 b)  TX bytes:648 (648.0 b)

lo        Link encap:Local Loopback
          inet addr:127.0.0.1  Mask:255.0.0.0
          inet6 addr: ::1/128 Scope:Host
          UP LOOPBACK RUNNING  MTU:65536  Metric:1
          RX packets:0 errors:0 dropped:0 overruns:0 frame:0
          TX packets:0 errors:0 dropped:0 overruns:0 carrier:0
          collisions:0 txqueuelen:1
          RX bytes:0 (0.0 b)  TX bytes:0 (0.0 b)

[root@27e313f7f1fa /]#
#因为共用网络,端口也是共用杠杠的容器
[root@27e313f7f1fa /]# netstat -antlp|grep 80
tcp        0      0 :::80                       :::*                        LISTEN      -
[root@27e313f7f1fa /]#
#查看新建的容器信息
[root@m02 ~]# docker ps -a
CONTAINER ID        IMAGE               COMMAND              CREATED             STATUS                     PORTS               NAMES
3a531547b73e        centos:6.8          "/bin/bash"          2 minutes ago       Exited (0) 4 seconds ago                       tender_borg
27e313f7f1fa        httpd:latest        "httpd-foreground"   7 minutes ago       Up 7 minutes               80/tcp              agitated_wescoff
[root@m02 ~]# docker inspect 3a531547b73e
[
    {
        "Id": "3a531547b73eb6433e3810872172b35d4ac3850103ccd47d719adf6261e8ea59",
        "Created": "2019-08-28T00:26:25.077298262Z",
        "Path": "/bin/bash",
        "Args": [],
        "State": {
            "Status": "exited",
            "Running": false,
            "Paused": false,
            "Restarting": false,
            "OOMKilled": false,
            "Dead": false,
            "Pid": 0,
            "ExitCode": 0,
            "Error": "",
            "StartedAt": "2019-08-28T00:26:25.469976229Z",
            "FinishedAt": "2019-08-28T00:29:01.072285007Z"
        },
 "NetworkSettings": {
            "Bridge": "",
            "SandboxID": "",
            "HairpinMode": false,
            "LinkLocalIPv6Address": "",
            "LinkLocalIPv6PrefixLen": 0,
            "Ports": null,
            "SandboxKey": "",
            "SecondaryIPAddresses": null,
            "SecondaryIPv6Addresses": null,
            "EndpointID": "",
            "Gateway": "",
            "GlobalIPv6Address": "",
            "GlobalIPv6PrefixLen": 0,
            "IPAddress": "",
            "IPPrefixLen": 0,
            "IPv6Gateway": "",
            "MacAddress": "",
            "Networks": {}
        }
    }
]
Host:与主机共享Network Namespace,--net=host
所有的都共用宿主机的,连主机名都相同

[root@m02 ~]# docker run -it --network host centos:6.8
[root@m02 /]# ifconfig
docker0   Link encap:Ethernet  HWaddr 02:42:AD:A4:9A:88
          inet addr:172.17.0.1  Bcast:0.0.0.0  Mask:255.255.0.0
          inet6 addr: fe80::42:adff:fea4:9a88/64 Scope:Link
          UP BROADCAST MULTICAST  MTU:1500  Metric:1
          RX packets:11733 errors:0 dropped:0 overruns:0 frame:0
          TX packets:14400 errors:0 dropped:0 overruns:0 carrier:0
          collisions:0 txqueuelen:0
          RX bytes:141160524 (134.6 MiB)  TX bytes:127797476 (121.8 MiB)

eth0      Link encap:Ethernet  HWaddr 00:0C:29:E1:5B:21
          inet addr:10.0.0.62  Bcast:10.0.0.255  Mask:255.255.255.0
          inet6 addr: fe80::20c:29ff:fee1:5b21/64 Scope:Link
          UP BROADCAST RUNNING MULTICAST  MTU:1500  Metric:1
          RX packets:376726 errors:0 dropped:0 overruns:0 frame:0
          TX packets:152587 errors:0 dropped:0 overruns:0 carrier:0
          collisions:0 txqueuelen:1000
          RX bytes:534721552 (509.9 MiB)  TX bytes:282402392 (269.3 MiB)

eth1      Link encap:Ethernet  HWaddr 00:0C:29:E1:5B:2B
          inet addr:172.16.1.62  Bcast:172.16.1.255  Mask:255.255.255.0
          inet6 addr: fe80::20c:29ff:fee1:5b2b/64 Scope:Link
          UP BROADCAST RUNNING MULTICAST  MTU:1500  Metric:1
          RX packets:0 errors:0 dropped:0 overruns:0 frame:0
          TX packets:13 errors:0 dropped:0 overruns:0 carrier:0
          collisions:0 txqueuelen:1000
          RX bytes:0 (0.0 b)  TX bytes:938 (938.0 b)

lo        Link encap:Local Loopback
          inet addr:127.0.0.1  Mask:255.0.0.0
          inet6 addr: ::1/128 Scope:Host
          UP LOOPBACK RUNNING  MTU:65536  Metric:1
          RX packets:4 errors:0 dropped:0 overruns:0 frame:0
          TX packets:4 errors:0 dropped:0 overruns:0 carrier:0
          collisions:0 txqueuelen:1
          RX bytes:200 (200.0 b)  TX bytes:200 (200.0 b)

[root@m02 /]# exit
exit

[root@m02 ~]# docker ps -a
CONTAINER ID        IMAGE               COMMAND             CREATED              STATUS                     PORTS               NAMES
1d73f7bdbfa6        centos:6.8          "/bin/bash"         About a minute ago   Exited (0) 6 seconds ago                       determined_hopper
[root@m02 ~]# docker inspect 1d73f7bdbfa6
[
    {
        "Id": "1d73f7bdbfa6240eae5ccb28e1f71e0c861003df0c37d12e67890c0cd1e4583e",
        "Created": "2019-08-28T00:32:55.945298156Z",
        "Path": "/bin/bash",
        "Args": [],
        "State": {
            "Status": "exited",
            "Running": false,
            "Paused": false,
            "Restarting": false,
            "OOMKilled": false,
            "Dead": false,
            "Pid": 0,
            "ExitCode": 0,
            "Error": "",
            "StartedAt": "2019-08-28T00:32:56.280099664Z",
            "FinishedAt": "2019-08-28T00:34:43.941655105Z"
        },
"Networks": {
                "host": {
                    "IPAMConfig": null,
                    "Links": null,
                    "Aliases": null,
                    "NetworkID": "15e1f917a440af4fd581f1f1558d614d544c009bba9c7e1a45896dd2a4b77866",
                    "EndpointID": "",
                    "Gateway": "",
                    "IPAddress": "",
                    "IPPrefixLen": 0,
                    "IPv6Gateway": "",
                    "GlobalIPv6Address": "",
                    "GlobalIPv6PrefixLen": 0,
                    "MacAddress": ""
                }
            }
        }
    }
]
Bridge:Docker设计的NAT网络模型

[root@m02 ~]# docker run -it --network bridge centos:6.8
[root@e6d67d5940dd /]# ifconfig
eth0      Link encap:Ethernet  HWaddr 02:42:AC:11:00:02
          inet addr:172.17.0.2  Bcast:0.0.0.0  Mask:255.255.0.0
          inet6 addr: fe80::42:acff:fe11:2/64 Scope:Link
          UP BROADCAST RUNNING MULTICAST  MTU:1500  Metric:1
          RX packets:7 errors:0 dropped:0 overruns:0 frame:0
          TX packets:7 errors:0 dropped:0 overruns:0 carrier:0
          collisions:0 txqueuelen:0
          RX bytes:578 (578.0 b)  TX bytes:578 (578.0 b)

lo        Link encap:Local Loopback
          inet addr:127.0.0.1  Mask:255.0.0.0
          inet6 addr: ::1/128 Scope:Host
          UP LOOPBACK RUNNING  MTU:65536  Metric:1
          RX packets:0 errors:0 dropped:0 overruns:0 frame:0
          TX packets:0 errors:0 dropped:0 overruns:0 carrier:0
          collisions:0 txqueuelen:1
          RX bytes:0 (0.0 b)  TX bytes:0 (0.0 b)
[root@e6d67d5940dd /]# exit
exit

[root@m02 ~]# docker ps -a
CONTAINER ID        IMAGE               COMMAND             CREATED              STATUS                     PORTS               NAMES
e6d67d5940dd        centos:6.8          "/bin/bash"         About a minute ago   Exited (0) 3 seconds ago                       loving_wescoff
1d73f7bdbfa6        centos:6.8          "/bin/bash"         6 minutes ago        Exited (0) 4 minutes ago                       determined_hopper
[root@m02 ~]# docker inspect e6d67d5940dd
[
    {
        "Id": "e6d67d5940dd450e51e3f63030afff780e46878028e9bc42681f864b94314245",
        "Created": "2019-08-28T00:38:03.085308573Z",
        "Path": "/bin/bash",
        "Args": [],
        "State": {
            "Status": "exited",
            "Running": false,
            "Paused": false,
            "Restarting": false,
            "OOMKilled": false,
            "Dead": false,
            "Pid": 0,
            "ExitCode": 0,
            "Error": "",
            "StartedAt": "2019-08-28T00:38:03.556114819Z",
            "FinishedAt": "2019-08-28T00:39:16.185458418Z"
        },
"Networks": {
                "bridge": {
                    "IPAMConfig": null,
                    "Links": null,
                    "Aliases": null,
                    "NetworkID": "0c7c6a23a122615a75e9015898472666ba5bd944a21900dddcfce33d2b28159c",
                    "EndpointID": "",
                    "Gateway": "",
                    "IPAddress": "",
                    "IPPrefixLen": 0,
                    "IPv6Gateway": "",
                    "GlobalIPv6Address": "",
                    "GlobalIPv6PrefixLen": 0,
                    "MacAddress": ""
                }
            }
        }
    }
]
2.19跨主机通信之macvlan
性能比较好

创建macvlan:
docker network create --driver macvlan --subnet 10.0.0.0/24 --gateway 10.0.0.254 -o parent=eth0 macvlan_1

测试:
m02:
docker run -it --network macvlan_1 --ip=10.0.0.111 busybox:latest /bin/sh
m03:
docker run -it --network macvlan_1 --ip=10.0.0.112 busybox:latest /bin/sh
两个虚拟机中的容器网络不能互通,可以开启混杂模式.
[root@m02 ~]# ip link set eth0 promisc on
[root@m02 ~]# ip link show eth0
2: eth0:  mtu 1500 qdisc pfifo_fast state UP mode DEFAULT qlen 1000
    link/ether 00:0c:29:e1:5b:21 brd ff:ff:ff:ff:ff:ff
[root@m02 ~]#

#关闭混杂模式
[root@m02 ~]# ip link set eth0 promisc off
[root@m02 ~]# ip link show eth0
2: eth0:  mtu 1500 qdisc pfifo_fast state UP mode DEFAULT qlen 1000
    link/ether 00:0c:29:e1:5b:21 brd ff:ff:ff:ff:ff:ff
[root@m02 ~]#
m02和m03上都执行下面的命令
docker network create --driver macvlan --subnet 10.0.0.0/24 --gateway 10.0.0.254 -o parent=eth0 macvlan_1

[root@m03 ~]# docker network ls
NETWORK ID          NAME                DRIVER              SCOPE
76fe5d619a55        bridge              bridge              local
7f1efb6dc734        host                host                local
fd980e8f4294        macvlan_1           macvlan             local
82a72dedf7e6        none                null                local
b4fb0955463c        opt_default         bridge              local
[root@m03 ~]#

#m02:
[root@m02 ~]# docker network create --driver macvlan --subnet 10.0.0.0/24 --gateway 10.0.0.254 -o parent=eth0 macvlan_1
43b7a844e32523b3cfd88ebf4cc922b84c42f10c95b02fc297cba3ab2abc935a
[root@m02 ~]# docker run -it --network macvlan_1 --ip=10.0.0.111 busybox:latest /bin/sh
/ # ifconfig
eth0      Link encap:Ethernet  HWaddr 02:42:0A:00:00:6F
          inet addr:10.0.0.111  Bcast:0.0.0.0  Mask:255.255.255.0
          inet6 addr: fe80::42:aff:fe00:6f/64 Scope:Link
          UP BROADCAST RUNNING MULTICAST  MTU:1500  Metric:1
          RX packets:1 errors:0 dropped:0 overruns:0 frame:0
          TX packets:8 errors:0 dropped:0 overruns:0 carrier:0
          collisions:0 txqueuelen:0
          RX bytes:60 (60.0 B)  TX bytes:648 (648.0 B)

lo        Link encap:Local Loopback
          inet addr:127.0.0.1  Mask:255.0.0.0
          inet6 addr: ::1/128 Scope:Host
          UP LOOPBACK RUNNING  MTU:65536  Metric:1
          RX packets:0 errors:0 dropped:0 overruns:0 frame:0
          TX packets:0 errors:0 dropped:0 overruns:0 carrier:0
          collisions:0 txqueuelen:1
          RX bytes:0 (0.0 B)  TX bytes:0 (0.0 B)

/ #

#m03:
[root@m03 ~]# docker run -it --network macvlan_1 --ip=10.0.0.112 busybox:latest /bin/sh
Unable to find image 'busybox:latest' locally
Trying to pull repository docker.io/library/busybox ...
latest: Pulling from docker.io/library/busybox
ee153a04d683: Pull complete
Digest: sha256:9f1003c480699be56815db0f8146ad2e22efea85129b5b5983d0e0fb52d9ab70
Status: Downloaded newer image for docker.io/busybox:latest
/ # ifconfig
eth0      Link encap:Ethernet  HWaddr 02:42:0A:00:00:70
          inet addr:10.0.0.112  Bcast:0.0.0.0  Mask:255.255.255.0
          inet6 addr: fe80::42:aff:fe00:70/64 Scope:Link
          UP BROADCAST RUNNING MULTICAST  MTU:1500  Metric:1
          RX packets:1 errors:0 dropped:0 overruns:0 frame:0
          TX packets:8 errors:0 dropped:0 overruns:0 carrier:0
          collisions:0 txqueuelen:0
          RX bytes:60 (60.0 B)  TX bytes:648 (648.0 B)

lo        Link encap:Local Loopback
          inet addr:127.0.0.1  Mask:255.0.0.0
          inet6 addr: ::1/128 Scope:Host
          UP LOOPBACK RUNNING  MTU:65536  Metric:1
          RX packets:0 errors:0 dropped:0 overruns:0 frame:0
          TX packets:0 errors:0 dropped:0 overruns:0 carrier:0
          collisions:0 txqueuelen:1
          RX bytes:0 (0.0 B)  TX bytes:0 (0.0 B)

#ping另一个主机上的容器
/ # ping 10.0.0.112
PING 10.0.0.112 (10.0.0.112): 56 data bytes
64 bytes from 10.0.0.112: seq=0 ttl=64 time=0.155 ms
64 bytes from 10.0.0.112: seq=1 ttl=64 time=0.180 ms
^C
--- 10.0.0.112 ping statistics ---
2 packets transmitted, 2 packets received, 0% packet loss
round-trip min/avg/max = 0.155/0.167/0.180 ms
/ #

#笔记本ping虚拟机中的容器,网络也是互通的
[c:\~]$ ping 10.0.0.112

正在 Ping 10.0.0.112 具有 32 字节的数据:
来自 10.0.0.112 的回复: 字节=32 时间<1ms TTL=64
来自 10.0.0.112 的回复: 字节=32 时间<1ms TTL=64

10.0.0.112 的 Ping 统计信息:
    数据包: 已发送 = 2,已接收 = 2,丢失 = 0 (0% 丢失),
往返行程的估计时间(以毫秒为单位):
    最短 = 0ms,最长 = 0ms,平均 = 0ms
^C
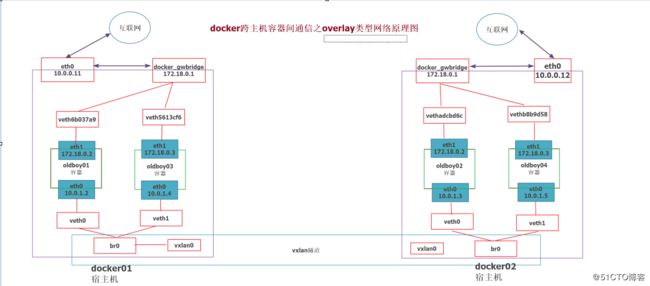
2.20跨主机通信之overlay
1)准备工作
m04-10.0.0.64上
[root@m04 ~]# docker run -d -p 8500:8500 -h consul --name consul progrium/consul -server -bootstrap
4ace81ed1bf02a4fdb736d79380de93ca14fabeb55d671c45681c4d51e207d82

m02-10.0.0.62上:
[root@m02 ~]# service docker restart
Redirecting to /bin/systemctl restart docker.service
[root@m02 ~]# cat /etc/docker/daemon.json
{
  "hosts":["tcp://0.0.0.0:2376","unix:///var/run/docker.sock"],
  "cluster-store": "consul://10.0.0.64:8500",
  "cluster-advertise": "10.0.0.62:2376"
}
[root@m02 ~]#

m03-10.0.0.63上
[root@m03 ~]# service docker restart
Redirecting to /bin/systemctl restart docker.service
[root@m03 ~]# cat /etc/docker/daemon.json
{
  "hosts":["tcp://0.0.0.0:2376","unix:///var/run/docker.sock"],
  "cluster-store": "consul://10.0.0.64:8500",
  "cluster-advertise": "10.0.0.63:2376"
}
[root@m03 ~]#

2)创建overlay网络,在一台虚拟机中操作即可,两台虚拟机中都会有该网络,因为数据存储在64服务器上,数据共享
docker network create -d overlay ol1
创建设置网段的overlay
docker network create -d overlay --subnet 172.16.0.0/16 ol4

3)启动容器测试,两个虚拟机m02和m03中都要操作
docker run -it --network ol1 --name vita  busybox:latest /bin/sh
#m04-10.0.0.64上
[root@m04 ~]# docker run -d -p 8500:8500 -h consul --name consul progrium/consul -server -bootstrap
4ace81ed1bf02a4fdb736d79380de93ca14fabeb55d671c45681c4d51e207d82

#m02-10.0.0.62上:
[root@m02 ~]# service docker restart
Redirecting to /bin/systemctl restart docker.service
[root@m02 ~]# cat /etc/docker/daemon.json
{
  "hosts":["tcp://0.0.0.0:2376","unix:///var/run/docker.sock"],
  "cluster-store": "consul://10.0.0.64:8500",
  "cluster-advertise": "10.0.0.62:2376"
}
[root@m02 ~]#

#m03-10.0.0.63上
[root@m03 ~]# service docker restart
Redirecting to /bin/systemctl restart docker.service
[root@m03 ~]# cat /etc/docker/daemon.json
{
  "hosts":["tcp://0.0.0.0:2376","unix:///var/run/docker.sock"],
  "cluster-store": "consul://10.0.0.64:8500",
  "cluster-advertise": "10.0.0.63:2376"
}
[root@m03 ~]#
http://10.0.0.64:8500/ui/#/dc1/kv/docker/nodes/
看到两个节点,说明没问题#m02上操作
[root@m02 ~]# docker network create -d overlay ol1
534fbb9508eb9b0011ff80178e901a71e00c740ef37b52b9fe8e9d2fea2c1030
[root@m02 ~]# docker network ls
NETWORK ID NAME DRIVER SCOPE
b03ef5e1e672 bridge bridge local
15e1f917a440 host host local
43b7a844e325 macvlan_1 macvlan local
7c8ca554183c none null local
534fbb9508eb ol1 overlay global
[root@m02 ~]#
[root@m02 ~]# docker run -it --network ol1 --name m02 busybox:latest /bin/sh
/ #
#m03上操作
[root@m03 ~]# docker run -it --network ol1 --name m03 busybox:latest /bin/sh
#测试网络是否互通,可以通过容器名称进行互通,因为数据存储在84服务器的服务中
/ # ping m02
PING m02 (10.0.0.2): 56 data bytes
64 bytes from 10.0.0.2: seq=0 ttl=64 time=4.153 ms
64 bytes from 10.0.0.2: seq=1 ttl=64 time=3.596 ms
64 bytes from 10.0.0.2: seq=2 ttl=64 time=0.309 ms
^C
--- m02 ping statistics ---
3 packets transmitted, 3 packets received, 0% packet loss
round-trip min/avg/max = 0.309/2.686/4.153 ms
/ #
/ # ping www.baidu.com
PING www.baidu.com (180.101.49.11): 56 data bytes
64 bytes from 180.101.49.11: seq=0 ttl=127 time=17.118 ms
64 bytes from 180.101.49.11: seq=1 ttl=127 time=105.181 ms
#笔记本ping m02上创建的容器,网络不通
[c:\~]$ ping 10.0.0.2
正在 Ping 10.0.0.2 具有 32 字节的数据:
来自 10.0.0.1 的回复: 无法访问目标主机。
请求超时。
10.0.0.2 的 Ping 统计信息:
数据包: 已发送 = 2,已接收 = 1,丢失 = 1 (50% 丢失),
[c:\~]$
#在m02中
[root@m02 ~]# docker run -d -p 8080:80 httpd
2b7d07f25a5d762ac9691ee46c4afb754a91cfc6eb35370da07d5f0745a97975
[root@m02 ~]# docker ps -a
CONTAINER ID IMAGE COMMAND CREATED STATUS PORTS NAMES
2b7d07f25a5d httpd "httpd-foreground" 11 seconds ago Up 10 seconds 0.0.0.0:8080->80/tcp zealous_bohr
4d430358e388 httpd "httpd-foreground" 21 seconds ago Created cocky_boyd
c341b13ca489 busybox:latest "/bin/sh" 7 minutes ago Exited (0) 33 seconds ago m02
[root@m02 ~]#
2.21企业级镜像仓库harbor
第一步:安装docker和docker-compose
安装docker:
yum install -y docker-io
安装docker-compose:
curl -o /etc/yum.repos.d/epel.repo http://mirrors.aliyun.com/repo/epel-7.repo
yum install -y python2-pip
pip install docker-compose

检查是否安装成功
docker-compose -v

第二步:下载harbor-offline-installer-v1.5.1.tgz

第三步:上传到/opt,并解压

第四步:修改harbor.cfg配置文件
hostname = 10.0.0.63
harbor_admin_password = 123456

第五步:执行install.sh
[root@m03 opt]# docker rm -f `docker ps -a -q`
33dc41530c38
57ea913e407d
[root@m03 opt]# tar -xvf harbor-offline-installer-v1.5.1.tgz
harbor/common/templates/
harbor/common/templates/nginx/
harbor/common/templates/nginx/nginx.https.conf
harbor/common/templates/nginx/notary.server.conf
harbor/common/templates/nginx/nginx.http.conf
harbor/common/templates/nginx/notary.upstream.conf
harbor/common/templates/ui/
harbor/common/templates/ui/env
harbor/common/templates/ui/private_key.pem
harbor/common/templates/ui/app.conf
harbor/common/templates/notary/
harbor/common/templates/notary/mysql-initdb.d/
harbor/common/templates/notary/mysql-initdb.d/initial-notarysigner.sql
harbor/common/templates/notary/mysql-initdb.d/initial-notaryserver.sql
harbor/common/templates/notary/notary-signer.crt
harbor/common/templates/notary/signer-config.json
harbor/common/templates/notary/notary-signer-ca.crt
harbor/common/templates/notary/signer_env
harbor/common/templates/notary/server-config.json
harbor/common/templates/notary/notary-signer.key
harbor/common/templates/adminserver/
harbor/common/templates/adminserver/env
harbor/common/templates/db/
harbor/common/templates/db/env
harbor/common/templates/registry/
harbor/common/templates/registry/root.crt
harbor/common/templates/registry/config.yml
harbor/common/templates/registry/config_ha.yml
harbor/common/templates/log/
harbor/common/templates/log/logrotate.conf
harbor/common/templates/jobservice/
harbor/common/templates/jobservice/env
harbor/common/templates/jobservice/config.yml
harbor/common/templates/clair/
harbor/common/templates/clair/postgres_env
harbor/common/templates/clair/config.yaml
harbor/common/templates/clair/postgresql-init.d/
harbor/common/templates/clair/postgresql-init.d/README.md
harbor/common/templates/clair/clair_env
harbor/harbor.v1.5.1.tar.gz
harbor/prepare
harbor/NOTICE
harbor/LICENSE
harbor/install.sh
harbor/harbor.cfg
harbor/docker-compose.yml
harbor/ha/
harbor/ha/sample/
harbor/ha/sample/active_active/
harbor/ha/sample/active_active/keepalived_active_active.conf
harbor/ha/sample/active_active/check.sh
harbor/ha/sample/active_standby/
harbor/ha/sample/active_standby/keepalived_active_standby.conf
harbor/ha/sample/active_standby/check_harbor.sh
harbor/ha/registry.sql
harbor/ha/docker-compose.tpl
harbor/ha/docker-compose.clair.yml
harbor/ha/docker-compose.clair.tpl
harbor/ha/docker-compose.yml
harbor/docker-compose.notary.yml
harbor/docker-compose.clair.yml
[root@m03 opt]# ll
total 858200
-rw-r--r-- 1 root root       603 Aug 27 23:24 docker-compose.yml
-rw-r--r-- 1 root root       255 Aug 27 19:56 dockerfile
drwxr-xr-x 4 root root       229 Aug 28 09:59 harbor
-rw-r--r-- 1 root root 864933610 Aug 28 09:58 harbor-offline-installer-v1.5.1.tgz
-rw-r--r-- 1 root root        62 Aug 27 19:57 init.sh
-rw-r--r-- 1 root root  13845184 Aug 27 19:55 kodexplorer4.37.zip
drwxr-xr-x 2 root root        24 Aug 27 16:26 my_dir
drwxr-xr-x 2 root root         6 Aug 27 22:27 myregistry
[root@m03 opt]# cd harbor/
[root@m03 harbor]# ll
total 856136
drwxr-xr-x 3 root root        23 Aug 28 09:58 common
-rw-r--r-- 1 root root      1185 May 31  2018 docker-compose.clair.yml
-rw-r--r-- 1 root root      1725 May 31  2018 docker-compose.notary.yml
-rw-r--r-- 1 root root      3596 May 31  2018 docker-compose.yml
drwxr-xr-x 3 root root       156 May 31  2018 ha
-rw-r--r-- 1 root root      6687 May 31  2018 harbor.cfg
-rw-r--r-- 1 root root 876607879 May 31  2018 harbor.v1.5.1.tar.gz
-rwxr-xr-x 1 root root      5773 May 31  2018 install.sh
-rw-r--r-- 1 root root     10771 May 31  2018 LICENSE
-rw-r--r-- 1 root root       482 May 31  2018 NOTICE
-rwxr-xr-x 1 root root     27379 May 31  2018 prepare
[root@m03 harbor]# vim harbor.cfg
[root@m03 harbor]# sh install.sh

[Step 0]: checking installation environment ...

Note: docker version: 1.13.1

Note: docker-compose version: 1.24.1

[Step 1]: loading Harbor images ...
52ef9064d2e4: Loading layer [==================================================>] 135.9 MB/135.9 MB
4a6862dbadda: Loading layer [==================================================>] 23.25 MB/23.25 MB
58b7d0c522b2: Loading layer [==================================================>]  24.4 MB/24.4 MB
9cd4bb748634: Loading layer [==================================================>] 7.168 kB/7.168 kB
c81302a14908: Loading layer [==================================================>] 10.56 MB/10.56 MB
7848e9ba72a3: Loading layer [==================================================>] 24.39 MB/24.39 MB
Loaded image: vmware/harbor-ui:v1.5.1
f1691b5a5198: Loading layer [==================================================>] 73.15 MB/73.15 MB
a529013c99e4: Loading layer [==================================================>] 3.584 kB/3.584 kB
d9b4853cff8b: Loading layer [==================================================>] 3.072 kB/3.072 kB
3d305073979e: Loading layer [==================================================>] 4.096 kB/4.096 kB
c9e17074f54a: Loading layer [==================================================>] 3.584 kB/3.584 kB
956055840e30: Loading layer [==================================================>] 9.728 kB/9.728 kB
Loaded image: vmware/harbor-log:v1.5.1
185db06a02d0: Loading layer [==================================================>] 23.25 MB/23.25 MB
835213979c70: Loading layer [==================================================>]  20.9 MB/20.9 MB
f74eeb41c1c9: Loading layer [==================================================>]  20.9 MB/20.9 MB
Loaded image: vmware/harbor-jobservice:v1.5.1
9bd5c7468774: Loading layer [==================================================>] 23.25 MB/23.25 MB
5fa6889b9a6d: Loading layer [==================================================>]  2.56 kB/2.56 kB
bd3ac235b209: Loading layer [==================================================>]  2.56 kB/2.56 kB
cb5d493833cc: Loading layer [==================================================>] 2.048 kB/2.048 kB
557669a074de: Loading layer [==================================================>]  22.8 MB/22.8 MB
f02b4f30a9ac: Loading layer [==================================================>]  22.8 MB/22.8 MB
Loaded image: vmware/registry-photon:v2.6.2-v1.5.1
5d3b562db23e: Loading layer [==================================================>] 23.25 MB/23.25 MB
8edca1b0e3b0: Loading layer [==================================================>] 12.16 MB/12.16 MB
ce5f11ea46c0: Loading layer [==================================================>]  17.3 MB/17.3 MB
93750d7ec363: Loading layer [==================================================>] 15.87 kB/15.87 kB
36f81937e80d: Loading layer [==================================================>] 3.072 kB/3.072 kB
37e5df92b624: Loading layer [==================================================>] 29.46 MB/29.46 MB
Loaded image: vmware/notary-server-photon:v0.5.1-v1.5.1
0a2f8f90bd3a: Loading layer [==================================================>] 401.3 MB/401.3 MB
41fca4deb6bf: Loading layer [==================================================>] 9.216 kB/9.216 kB
f2e28262e760: Loading layer [==================================================>] 9.216 kB/9.216 kB
68677196e356: Loading layer [==================================================>]  7.68 kB/7.68 kB
2b006714574e: Loading layer [==================================================>] 1.536 kB/1.536 kB
Loaded image: vmware/mariadb-photon:v1.5.1
a8c4992c632e: Loading layer [==================================================>] 156.3 MB/156.3 MB
0f37bf842677: Loading layer [==================================================>] 10.75 MB/10.75 MB
9f34c0cd38bf: Loading layer [==================================================>] 2.048 kB/2.048 kB
91ca17ca7e16: Loading layer [==================================================>] 48.13 kB/48.13 kB
5a7e0da65127: Loading layer [==================================================>]  10.8 MB/10.8 MB
Loaded image: vmware/clair-photon:v2.0.1-v1.5.1
0e782fe069e7: Loading layer [==================================================>] 23.25 MB/23.25 MB
67fc1e2f7009: Loading layer [==================================================>] 15.36 MB/15.36 MB
8db2141aa82c: Loading layer [==================================================>] 15.36 MB/15.36 MB
Loaded image: vmware/harbor-adminserver:v1.5.1
3f87a34f553c: Loading layer [==================================================>] 4.772 MB/4.772 MB
Loaded image: vmware/nginx-photon:v1.5.1
Loaded image: vmware/photon:1.0
ad58f3ddcb1b: Loading layer [==================================================>] 10.95 MB/10.95 MB
9b50f12509bf: Loading layer [==================================================>]  17.3 MB/17.3 MB
2c21090fd212: Loading layer [==================================================>] 15.87 kB/15.87 kB
38bec864f23e: Loading layer [==================================================>] 3.072 kB/3.072 kB
6e81ea7b0fa6: Loading layer [==================================================>] 28.24 MB/28.24 MB
Loaded image: vmware/notary-signer-photon:v0.5.1-v1.5.1
897a26fa09cb: Loading layer [==================================================>] 95.02 MB/95.02 MB
16e3a10a21ba: Loading layer [==================================================>] 6.656 kB/6.656 kB
85ecac164331: Loading layer [==================================================>] 2.048 kB/2.048 kB
37a2fb188706: Loading layer [==================================================>]  7.68 kB/7.68 kB
Loaded image: vmware/postgresql-photon:v1.5.1
bed9f52be1d1: Loading layer [==================================================>] 11.78 kB/11.78 kB
d731f2986f6e: Loading layer [==================================================>]  2.56 kB/2.56 kB
c3fde9a69f96: Loading layer [==================================================>] 3.072 kB/3.072 kB
Loaded image: vmware/harbor-db:v1.5.1
7844feb13ef3: Loading layer [==================================================>] 78.68 MB/78.68 MB
de0fd8aae388: Loading layer [==================================================>] 3.072 kB/3.072 kB
3f79efb720fd: Loading layer [==================================================>]  59.9 kB/59.9 kB
1c02f801c2e8: Loading layer [==================================================>] 61.95 kB/61.95 kB
Loaded image: vmware/redis-photon:v1.5.1
454c81edbd3b: Loading layer [==================================================>] 135.2 MB/135.2 MB
e99db1275091: Loading layer [==================================================>] 395.4 MB/395.4 MB
051e4ee23882: Loading layer [==================================================>] 9.216 kB/9.216 kB
6cca4437b6f6: Loading layer [==================================================>] 9.216 kB/9.216 kB
1d48fc08c8bc: Loading layer [==================================================>]  7.68 kB/7.68 kB
0419724fd942: Loading layer [==================================================>] 1.536 kB/1.536 kB
543c0c1ee18d: Loading layer [==================================================>] 655.2 MB/655.2 MB
4190aa7e89b8: Loading layer [==================================================>] 103.9 kB/103.9 kB
Loaded image: vmware/harbor-migrator:v1.5.0

[Step 2]: preparing environment ...
Generated and saved secret to file: /data/secretkey
Generated configuration file: ./common/config/nginx/nginx.conf
Generated configuration file: ./common/config/adminserver/env
Generated configuration file: ./common/config/ui/env
Generated configuration file: ./common/config/registry/config.yml
Generated configuration file: ./common/config/db/env
Generated configuration file: ./common/config/jobservice/env
Generated configuration file: ./common/config/jobservice/config.yml
Generated configuration file: ./common/config/log/logrotate.conf
Generated configuration file: ./common/config/jobservice/config.yml
Generated configuration file: ./common/config/ui/app.conf
Generated certificate, key file: ./common/config/ui/private_key.pem, cert file: ./common/config/registry/root.crt
The configuration files are ready, please use docker-compose to start the service.

[Step 3]: checking existing instance of Harbor ...

[Step 4]: starting Harbor ...
Creating network "harbor_harbor" with the default driver
Creating harbor-log ... done
Creating harbor-db          ... done
Creating harbor-adminserver ... done
Creating registry           ... done
Creating redis              ... done
Creating harbor-ui          ... done
Creating harbor-jobservice  ... done
Creating nginx              ... done

? ----Harbor has been installed and started successfully.----

Now you should be able to visit the admin portal at http://10.0.0.63.
For more details, please visit https://github.com/vmware/harbor .

[root@m03 harbor]#

[root@m03 harbor]# docker ps -a
CONTAINER ID        IMAGE                                  COMMAND                  CREATED             STATUS                   PORTS                                                              NAMES
37544fd2c13c        vmware/harbor-jobservice:v1.5.1        "/harbor/start.sh"       4 minutes ago       Up 4 minutes                                                                                harbor-jobservice
f00947bed9a5        vmware/nginx-photon:v1.5.1             "nginx -g 'daemon ..."   4 minutes ago       Up 4 minutes (healthy)   0.0.0.0:80->80/tcp, 0.0.0.0:443->443/tcp, 0.0.0.0:4443->4443/tcp   nginx
41557d762965        vmware/harbor-ui:v1.5.1                "/harbor/start.sh"       4 minutes ago       Up 4 minutes (healthy)                                                                      harbor-ui
a3c898719acc        vmware/redis-photon:v1.5.1             "docker-entrypoint..."   4 minutes ago       Up 4 minutes             6379/tcp                                                           redis
695450e513b5        vmware/registry-photon:v2.6.2-v1.5.1   "/entrypoint.sh se..."   4 minutes ago       Up 4 minutes (healthy)   5000/tcp                                                           registry
f9dfba519084        vmware/harbor-adminserver:v1.5.1       "/harbor/start.sh"       4 minutes ago       Up 4 minutes (healthy)                                                                      harbor-adminserver
b9ea4272cc9a        vmware/harbor-db:v1.5.1                "/usr/local/bin/do..."   4 minutes ago       Up 4 minutes (healthy)   3306/tcp                                                           harbor-db
2c63ffb9f6b2        vmware/harbor-log:v1.5.1               "/bin/sh -c /usr/l..."   4 minutes ago       Up 4 minutes (healthy)   127.0.0.1:1514->10514/tcp                                          harbor-log
[root@m03 harbor]#
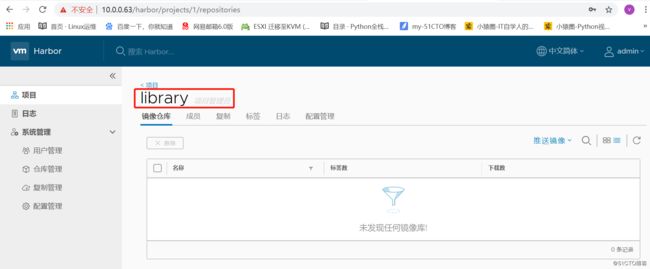
m02服务器上push镜像
[root@m02 ~]# docker tag busybox:latest 10.0.0.63/library/busybox:latest
[root@m02 ~]# docker push 10.0.0.63/library/busybox:latest
The push refers to a repository [10.0.0.63/library/busybox]
Get https://10.0.0.63/v1/_ping: dial tcp 10.0.0.63:443: connect: connection refused
[root@m02 ~]#
[root@m02 ~]# cat /etc/docker/daemon.json
{
 "insecure-registries": ["10.0.0.63"]
}

[root@m02 ~]# service docker restart
Redirecting to /bin/systemctl restart docker.service
[root@m02 ~]# docker push 10.0.0.63/library/busybox:latest
The push refers to a repository [10.0.0.63/library/busybox]
0d315111b484: Preparing
denied: requested access to the resource is denied

[root@m02 ~]# docker login 10.0.0.63
Username: admin
Password:
Login Succeeded
[root@m02 ~]# docker push 10.0.0.63/library/busybox:latest
The push refers to a repository [10.0.0.63/library/busybox]
0d315111b484: Pushed
latest: digest: sha256:895ab622e92e18d6b461d671081757af7dbaa3b00e3e28e12505af7817f73649 size: 527
[root@m02 ~]#
在m04服务器上,pull不需要账号密码
[root@m04 ~]# vim /etc/docker/daemon.json
[root@m04 ~]# cat /etc/docker/daemon.json
{
 "insecure-registries": ["10.0.0.63"]
}
[root@m04 ~]#
[root@m04 ~]# service docker restart
Redirecting to /bin/systemctl restart docker.service
[root@m04 ~]# docker pull 10.0.0.63/library/busybox:latest
Trying to pull repository 10.0.0.63/library/busybox ...
latest: Pulling from 10.0.0.63/library/busybox
ee153a04d683: Pull complete
Digest: sha256:895ab622e92e18d6b461d671081757af7dbaa3b00e3e28e12505af7817f73649
Status: Downloaded newer image for 10.0.0.63/library/busybox:latest


