RHCSA笔记整理版:
[kiosk@foundation0 Desktop]$ rht-vmctl status all 查看虚拟机状态
[kiosk@foundation0 Desktop]$ rht-vmctl reset desktop 重置虚拟机
[kiosk@foundation0 Desktop]$ rht-vmctl fullreset desktop 重装虚拟机
[kiosk@foundation0 Desktop]$ ssh root@server0 –X 远程虚拟机
1. 重置root密码,并按要求设置网络和主机名,IP设置方法为静态。
主机名: serverX.example.com
IP 地址: 172.25. X.11
网络掩码: 255.255.255.0
网关: 172.25. X.254
域名服务器: 172.25.254.254
虚拟机的root密码应该是:tianyun
重启系统,按e进入,编辑倒数第二行UTF-8后面增加 rd.break console=tty0
再按ctrl+x
mount -o rw,remount /sysroot
chroot /sysroot
passwd
或
echo tianyun | passwd --stdin root
touch /.autorelabel
exit
exit
修改主机名
vim /etc/hostname
server0.example.com
退出保存
hostname #查看主机名
配置IP
vim /etc/sysconfig/network-scripts/ifcfg-eth0
BOOTPROTO=static
IPADDR=172.25.0.11
NETMASK=255.255.255.0
GATEWAY=172.25.0.254
DNS1=172.25.254.254
退出保存
systemctl restart network
2. 配置SELinux环境,将SELinux设为enforcing模式。
setenforce 0 #临时关闭selinux
getenforce #查看selinux状态
[root@server0 ~]# vim /etc/selinux/config
SELINUX=enforcing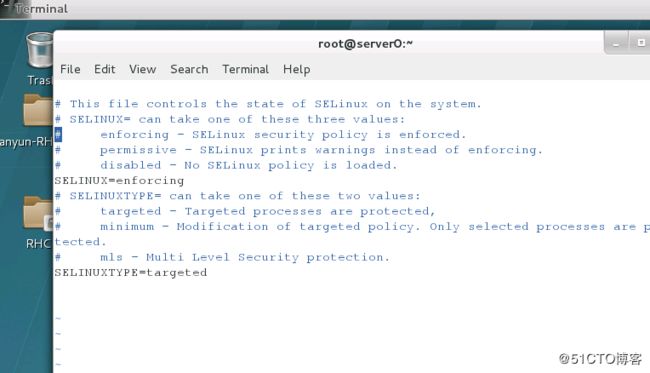
3. 建立Yum软件仓库,该Yum仓库将作为默认仓库。
[root@server0 ~]# cd /etc/yum.repos.d/
[root@server0 yum.repos.d]# vim rhel7.repo
[rhel7source]
name=rhce
baseurl=http://content.example.com/rhel7.0/x86_64/dvd
enable=1
gpgcheck=0
退出保存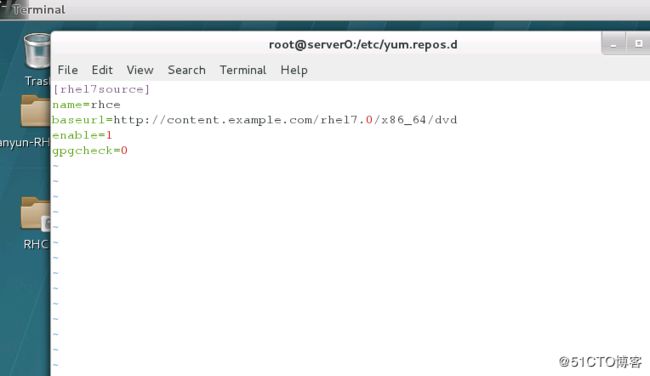
[root@server0 yum.repos.d]# yum clean all
[root@server0 yum.repos.d]# yum repolist
4. 调整逻辑卷loans及其上文件系统大小为300M(310 ~ 330M是可以接受的)。
[root@server0 ~]# lvscan
[root@server0 ~]# lab lvm setup
[root@server0 ~]# vgs
[root@server0 ~]# lvextend -L 320M /dev/finance/loans
[root@server0 ~]# xfs_growfs /dev/finance/loans
[root@server0 ~]# df –h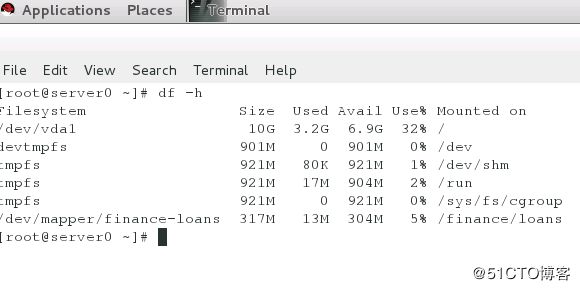
注意:
resize2fs命令 针对的是ext2、ext3、ext4文件系统
xfs_growfs命令 针对的是xfs文件系统
5. 按要求创建用户组及多个用户,设置用户的候选组,设置用户的默认shell。
创建组adminuser
创建用户natasha和harry属于该组(该组为他们的第二个组) 创建用户sarah,不属于adminuser,没有交互的shell
他们的密码都是tianyun
[root@server0 ~]# groupadd adminuser
[root@server0 ~]# useradd -G adminuser natasha
[root@server0 ~]# useradd -G adminuser harry
[root@server0 ~]# useradd sarah -s /sbin/nologin
[root@server0 ~]# cat /etc/passwd
[root@server0 ~]# cat /etc/group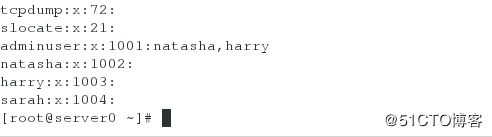
[root@server0 ~]# echo tianyun |passwd --stdin natasha
[root@server0 ~]# echo tianyun |passwd --stdin harry
[root@server0 ~]# echo tianyun |passwd --stdin sarah
6. 按要求设置文件及目录权限,会用到文件acl权限。
拷贝/etc/fstab到/var/tmp/fstab,属主和属组为root;
任何人都不能执行;natasha能读写;
harry没有任何权限;其他和将来的用户能够读。
[root@server0 ~]# cp /etc/fstab /var/tmp/
[root@server0 ~]# cd /var/tmp
[root@server0 tmp]# setfacl -m u:natasha:rw fstab
[root@server0 tmp]# setfacl -m u:harry:- fstab
[root@server0 tmp]# getfacl /var/tmp/fstab
7. 设置用户的计划任务cron。
natasha每天14:20时执行命令:/bin/echo hello
[root@server0 ~]# yum -y install crond
[root@server0 ~]# systemctl start crond.service
[root@server0 ~]# systemctl enable crond.service
[root@server0 ~]# cat /etc/crontab
[root@server0 ~]# crontab -e -u natasha
20 14 * /bin/echo/ hello
[root@server0 ~]# crontab -l -u natasha
8. 设置目录权限。
创建共享目录/home/admins;属组为adminuser;
adminuser组成员对目录有读写和执行的权限,其他所有用户没有任何权限(root除外); 在/home/admins目录中创建的文件,会自动继承adminuser组
[root@server0 ~]# mkdir -p /home/admins
[root@server0 ~]# chown :adminuser /home/admins/
[root@server0 ~]# chmod 2770 /home/admins/
[root@server0 ~]# cd /home/admins/
[root@server0 admins]# touch a
[root@server0 admins]# mkdir b
[root@server0 admins]# ll -d /home/admins/
[root@server0 admins]# rm -rf /home/admins/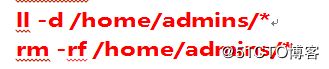
9. 按指定要求安装升级内核,保证grub2启动时为默认项目。
YUM REPO: http://content.example.com/rhel7.0/x86_64/errata
[root@server0 yum.repos.d]# vim rhel7up.repo
[root@server0 ~]# cd /etc/yum.repos.d/
[root@server0 yum.repos.d]# vim rhel7up.repo
[rhel7-source]
name=rhce
baseurl=http://content.example.com/rhel7.0/x86_64/errata
enable=1
gpgcheck=0
保存退出
[root@server0 yum.repos.d]# yum clean all
[root@server0 yum.repos.d]# yum repolist
[root@server0 yum.repos.d]# yum list kernel
[root@server0 yum.repos.d]# uname -r
[root@server0 yum.repos.d]# yum update kernel –y
[root@server0 yum.repos.d]# reboot
[kiosk@foundation0 Desktop]$ ssh root@server0 -X
[root@server0 ~]# uname –r
10. 使用LDAP作为本地用户认证方式
LDAP Server: cla**oom.example.com
LDAP Base DN: dc=example,dc=com
Root CA: http://claoom.example.com/pub/example-ca.crt**
[root@server0 ~]# yum -y install openldap openldap-clients sssd authconfig-gtk
[root@server0 ~]# authconfig-gtk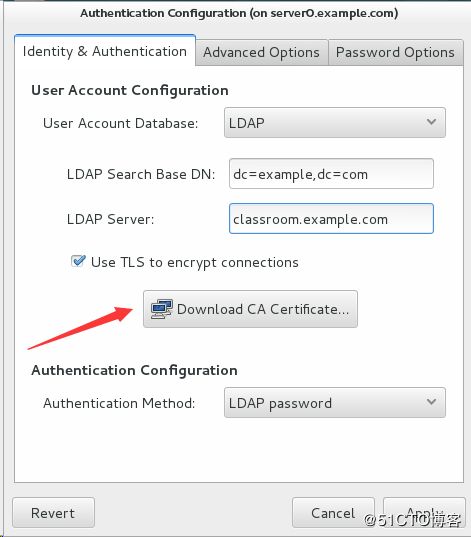

[root@server0 ~]# systemctl restart sssd.service
[root@server0 ~]# systemctl enable sssd.service
[root@server0 ~]# id ldapuser0
11. 设置NTP服务,同步指定服务器时间。
NTP Server: claoom.example.com
[root@server0 ~]# yum -y install chrony
[root@server0 ~]# vim /etc/chrony.conf
#server 0.rhel.pool.ntp.org iburst
#server 1.rhel.pool.ntp.org iburst
#server 2.rhel.pool.ntp.org iburst
#server 3.rhel.pool.ntp.org iburst
server claoom.example.com iburst
[root@server0 ~]# systemctl restart chronyd.service
[root@server0 ~]# systemctl enable chronyd.service
[root@server0 ~]# timedatectl
12. 配置和LDAP用户认证配合的autofs自动目录挂接。
配置和LDAP用户认证配合的autofs V3版本自动目录挂接。
[root@server0 ~]# ssh ldapuser0@localhost
ldapuser0@localhost's password:password
[root@server0 ~]# mkdir /home/guests
[root@server0 ~]# yum -y install autofs
oot@server0 ~]# vim /etc/auto.master
/home/guests /etc/auto.guests
[root@server0 ~]# vim /etc/auto.guests
- -rw cla***oom.example.com:/home/guests/&
注意:- -rw cla***oom.example.com:/home/guests/& #不指定版本
- -rw,sync,v3 cla***oom.example.com:/home/guests/& #指定版本
[root@server0 ~]# systemctl restart autofs
[root@server0 ~]# systemctl enable autofs
[root@server0 ~]# ssh ldapuser0@localhost
13. 建立用户jack,指定uid为2000。
[root@server0 ~]# useradd -u 2000 jack
[root@server0 ~]# cat /etc/passwd
14. 创建新的swap分区512M,需要写入fstab自动开机挂接
[root@server0 ~]# fdisk –l
[root@server0 ~]# fdisk /dev/vdb
Command (m for help): p
Command (m for help): n
Select (default p): p
Last sector, +sectors or +size{K,M,G} (1050624-20971519, default 20971519): +512M
Command (m for help): p
Command (m for help): w
[root@server0 ~]# ls /dev/vdb
[root@server0 ~]# partprobe /dev/vdb
[root@server0 ~]# ls /dev/vdb
[root@server0 ~]# mkswap /dev/vdb2 (复制uuid)
[root@server0 ~]# vim /etc/fstab
UUID=5e35cdae-ff6a-44f0-83e3-597e35b00d18 swap swap defaults 0 0
[root@server0 ~]# swapon -a
[root@server0 ~]# swapon –s
注意:考试时可能是一块硬盘,并且已经使用3个主分区,需要先创建扩展分区,在创建逻辑分区
[root@server0 ~]# fdisk –l
[root@server0 ~]# fdisk /dev/vdb
Command (m for help): p
Command (m for help): n
Select (default p): e
Command (m for help): l
Command (m for help): n
15. 查找属于用户alice的所有文件,并将其拷贝到/findfiles。
[root@server0 ~]# mkdir /findfiles
[root@server0 ~]# useradd alice
[root@server0 ~]# find / -user alice -exec cp -a {} /findfiles/ \;
[root@server0 ~]# ll /findfiles/
16. 在/usr/share/dict/words中查找到所有包含字符串seismic 的行,
将找出的行按照原文的先后顺序拷贝到/root/filelist文件中。/root/filelist文件不要包含空行
[root@server0 ~]# grep seismic /usr/share/dict/words > /root/filelist
[root@server0 ~]# cat /root/filelist
17. 将/etc目录归档并压缩到/root/backup.tar.bz2,使用bzip2压缩
[root@server0 ~]# tar -cjvf /root/backup.tar.bz2 /etc/
[root@server0 ~]# file /root/backup.tar.bz2
18. 创建逻辑卷database,属于卷组datastore,逻辑卷的大小为10个物理扩展单元,物理扩展单元(physical extent)
大小16M。使用ext4文件系统对新的逻辑卷进行格式化。自动挂载在/mnt/database 目录下。
[root@server0 ~]# mkdir /mnt/database
[root@server0 ~]# fdisk /dev/vdb
Command (m for help): n
Select (default p): p
Last sector, +sectors or +size{K,M,G} (2099200-20971519, default 20971519): +200M
Command (m for help): p
Command (m for help): w
[root@server0 ~]# ls /dev/vdb
[root@server0 ~]# partprobe /dev/vdb
[root@server0 ~]# ls /dev/vdb
[root@server0 ~]# pvcreate /dev/vdb3
[root@server0 ~]# vgcreate -s 16M datastore /dev/vdb3
[root@server0 ~]# lvcreate -L 160M -n database datastore
[root@server0 ~]# mkfs.ext4 /dev/datastore/database
[root@server0 ~]# vim /etc/fstab
/dev/datastore/database /mnt/database ext4 defaults 0 0
[root@server0 ~]# mount –a
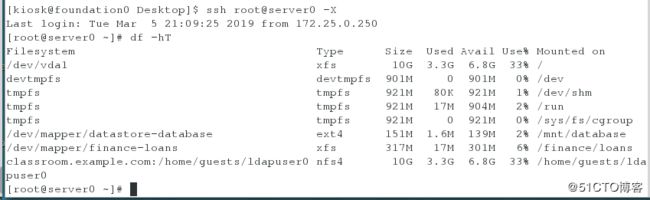
[root@server0 ~]# df –hT
[root@server0 ~]# reboot