########pxe#########
什么是PXE严格来说,PXE 并不是一种安装方式,而是一种引导的方式。进行 PXE 安装的必要条件是要安装的计算机中包含一个 PXE 支持的网卡(NIC),即网卡中必须要有 PXE Client。PXE(Pre-boot Execution Environment)协议使计算机可以通过网络启动。协议分为 client 和 server 端,PXE client 在网卡的 ROM 中,当计算机引导时,BIOS 把 PXE client 调入内存执行,由 PXE client 将放置在远端的文件通过网络下载到本地运行。运行 PXE 协议需要设置 DHCP 服务器和 TFTP 服务器。DHCP 服务器用来给 PXE client(将要安装系统的主机)分配一个 IP 地址,由于是给PXE client 分配 IP 地址,所以在配置 DHCP 服务器时需要增加相应的 PXE设置。此外,在 PXE client 的 ROM 中,已经存在了 TFTP Client。PXEClient 通过 TFTP 协议到 TFTP Server 上下载所需的文件。
什么是KickStartKickStart是一种无人职守安装方式。KickStart的工作原理是通过记录典型的安装过程中所需人工干预填写的各种参数,并生成一个名为ks.cfg的文件;在其后的安装过程中(不只局限于生成KickStart安装文件的机器)当出现要求填写参数的情况时,安装程序会首先去查找KickStart生成的文件,当找到合适的参数时,就采用找到的参数,当没有找到合适的参数时,才需要安装者手工干预。
1.配置dhcp
[root@desktop ~]#yum install dhcp httpd tftp-server -y
[root@desktop ~]# cp /usr/share/doc/dhcp-4.2.5/dhcpd.conf.example /etc/dhcp/dhcpd.conf
cp: overwrite ‘/etc/dhcp/dhcpd.conf’? y
[root@desktop ~]# vim /etc/dhcp/dhcpd.conf
7 option domain-name "example.com"; ##域名
8 option domain-name-servers 172.25.254.100; ##dns主机
27 28删除
30 subnet 172.25.254.0 netmask 255.255.255.0 { ##ip网段和子网掩码
31 range 172.25.254.50 172.25.254.60; ##ip分配地址池
32 option routers 172.25.254.254; ##网关
33 next-server 172.25.254.100; ##tftp主机的地址
34 filename "pxelinux.0"; ##pxe启动程序
2.配置tftp
[root@desktop ~]# systemctl start httpd
[root@desktop ~]]# systemctl enable httpd
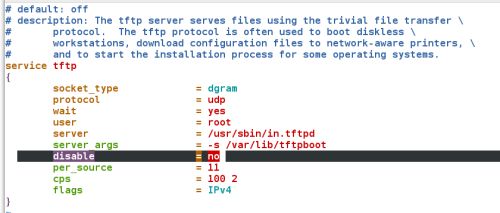
[root@desktop ~]# vim /etc/xinetd.d/tftp
disable = no
[root@desktop ~]# systemctl restart xinetd.service
service tftp
{
socket_type = dgram
protocol = udp
wait = yes
user = root
server = /usr/sbin/in.tftpd
server_args = -s /var/lib/tftpboot
disable = <<<<<<<<
per_source = 11
cps = 100 2
flags = IPv4
}
3.配置支持pxe的启动程序
[kiosk@foundation44 isolinux]$ scp * [email protected]:/var/lib/tftpboot
[root@desktop ~]# yum installsyslinux-4.05-8.el7.x86_64 -y
[root@desktop ~]# cd /var/lib/tftpboot/
[root@desktop tftpboot]# mkdir pxelinux.cfg
[root@desktop tftpboot]# ls
anaconda-ks.cfg initrd.img pxelinux.cfg
boot.cat isolinux.bin splash.png
boot.msg isolinux.cfg Templates
Desktop Mail TRANS.TBL
Documents memtest upgrade.img
Downloads Music vesamenu.c32
foundation-config-post.log ntfs-3g-2013.1.13-5.el7.x86_64.rpm Videos
grub.conf Pictures vmlinuz
initial-setup-ks.cfg Public
[root@desktop tftpboot]# cp isolinux.cfg pxelinux.cfg/default
[root@desktop tftpboot]# cp /usr/share/syslinux/pxelinux.0 /var/lib/tftpboot/
4.配置kickstar文件
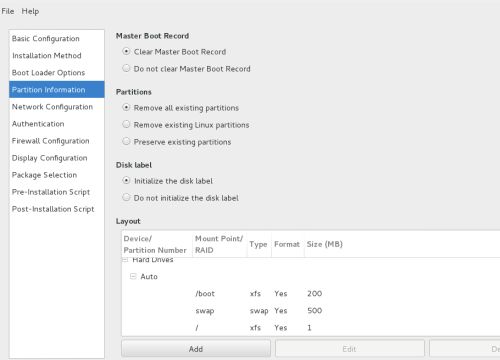
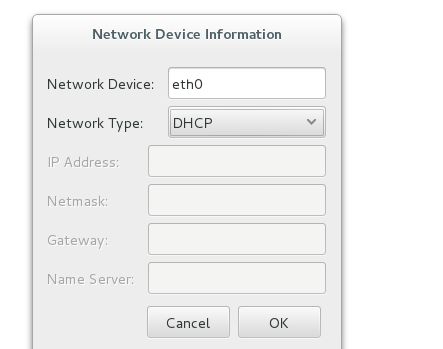
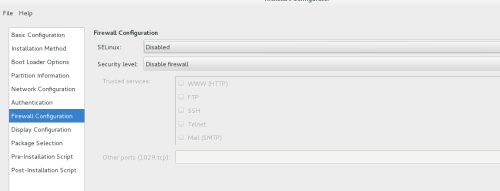
[root@desktop ~]]# yum install system-config-kickstart -y
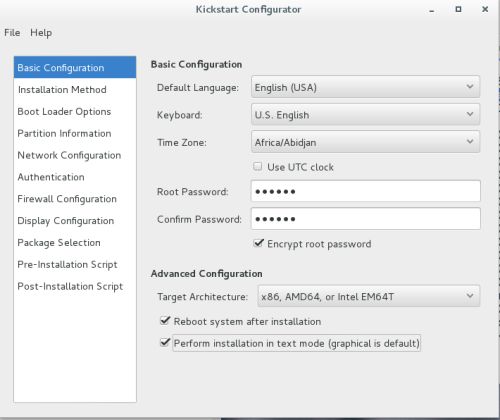
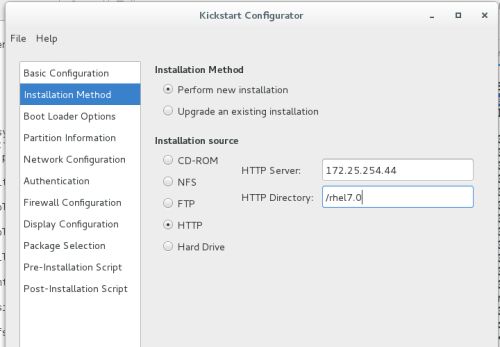
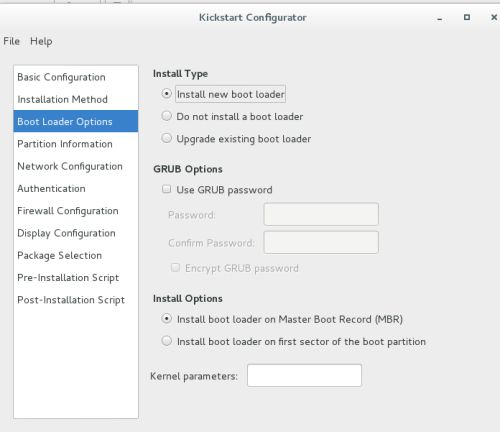
[root@desktop ~]# system-config-kickstart
[root@desktop ~]# vim /var/www/html/ks.cfg
%packages
@base
%end
5.编辑tftp文件
vim /var/lib/tftpboot/pxelinux.cfg/default
2 timeout 10 ##等待时间
11 menu title Red Hat Enterprise Linux 7.0 ##标题
62 menu label ^Install Red Hat Enterprise Linux 7.0 ##小标题
63 kernel vmlinuz
64 append initrd=initrd.img repo=http://172.25.254.60/rhel7 ks=http://172.25.254.100/ks.cfg ##安装包和ks源
68 menu default ##默认光亮标题
ce
6.测试:启动需要安装的主机,修改bios以网卡方式启动完成自动安装
附录:
####packags needed####
need packages:
system-config-kickstart##自动应答脚本制作工具
# yum install system-config-kickstart -y
syslinux##获得pxelinux.0文件安装包
dhcp##分配ip给客户机的服务
# yum install dhcp -y
tftp-server##提供tftp协议的服务
# yum install tftp-server -y
httpd##安装源共享服务
# yum install vsftpd -y
####config file rules#########
No.1 配置dhcp配置文件
config /etc/dhcpd/dhcpd.conf like this:
===============================================================
option domain-name "example.com";##域名
option domain-name-servers 172.25.254.254;##dns
default-lease-time 600;##默认租约期
max-lease-time 7200;##最长租约期
log-facility local7;##日志级别
subnet 172.25.254.0 netmask 255.255.255.0 {##网段,子网掩码
range 172.25.254.50 172.25.250.60;##地址范围
option routers 172.25.254.254;##网关
filename "pxelinux.0";##pxe启动程序
next-server 172.25.254.44;##tftp主机地址
}
systemctl restart dhcpd
systemctl stop firewalld
No.2 SED CONFIG TFTP 配置TFCP配置文件
config /etc/xinetd.d/tftp like this:
service tftp
{
socket_type = dgram
protocol = udp
wait = yes
user = root
server = /usr/sbin/in.tftpd
server_args = -s /var/lib/tftpboot
disable = <<<<<<<<
per_source = 11
cps = 100 2
flags = IPv4
}
systemctl restart xinetd
No.3 TRD MAKE SOME FILES AND PXEWORKDIRECTORY
1)
cd /var/lib/tftpboot/
mkdir pxelinux.cfg
2)
mount the iso of the rhel7
cp isolinux/* /var/lib/tftpboot
3)
cp /var/lib/tftpboot/isolinux.cfg /var/lib/tftpboot/pxelinux.cfg/default
cp /usr/share/syslinux/pxelinux.0 /var/lib/tftpboot/
4)
make a userfully install source and kickstart,my of this is in the ftp's pub
ftp://192.168.0.252/pub/rhel6
ftp://192.168.0.252/pub/ks.cfg
5)
config the file of /var/lib/tftpboot/pxelinux.cfg/default like this:
========================================================================================
default vesamenu.c32
timeout 600##等待时间
display boot.msg
# Clear the screen when exiting the menu, instead of leaving the menu displayed.
# For vesamenu, this means the graphical background is still displayed without
# the menu itself for as long as the screen remains in graphics mode.
menu clear
menu background splash.png
menu title Red Hat Enterprise Linux 7.0##大标题
menu vshift 8
menu rows 18
menu margin 8
#menu hidden
menu helpmsgrow 15
menu tabmsgrow 13
# Border Area
menu color border * #00000000 #00000000 none
# Selected item
menu color sel 0 #ffffffff #00000000 none
# Title bar
menu color title 0 #ff7ba3d0 #00000000 none
# Press [Tab] message
menu color tabmsg 0 #ff3a6496 #00000000 none
# Unselected menu item
menu color unsel 0 #84b8ffff #00000000 none
# Selected hotkey
menu color hotsel 0 #84b8ffff #00000000 none
# Unselected hotkey
menu color hotkey 0 #ffffffff #00000000 none
# Help text
menu color help 0 #ffffffff #00000000 none
# A scrollbar of some type? Not sure.
menu color scrollbar 0 #ffffffff #ff355594 none
# Timeout msg
menu color timeout 0 #ffffffff #00000000 none
menu color timeout_msg 0 #ffffffff #00000000 none
# Command prompt text
menu color cmdmark 0 #84b8ffff #00000000 none
menu color cmdline 0 #ffffffff #00000000 none
# Do not display the actual menu unless the user presses a key. All that is displayed is a timeout message.
menu tabmsg Press Tab for full configuration options on menu items.
menu separator # insert an empty line
menu separator # insert an empty line
label linux
menu label ^Install Red Hat Enterprise Linux 7.0##小标题
menu default##默认标题设定
kernel vmlinuz
append initrd=initrd.img repo=http://172.25.254.100/soucre ks=http://172.25.254.100/ks.cfg##安装源和ks
label check
menu label Test this ^media & install Red Hat Enterprise Linux 7.0
#menu default
kernel vmlinuz
append initrd=initrd.img inst.stage2=hd:LABEL=RHEL-7.0\x20Server.x86_64 rd.live.check quiet
menu separator # insert an empty line
# utilities submenu
menu begin ^Troubleshooting
menu title Troubleshooting
label vesa
menu indent count 5
menu label Install Red Hat Enterprise Linux 7.0 in ^basic graphics mode
text help
Try this option out if you're having trouble installing
Red Hat Enterprise Linux 7.0.
endtext
kernel vmlinuz
append initrd=initrd.img inst.stage2=hd:LABEL=RHEL-7.0\x20Server.x86_64 xdriver=vesa nomodeset quiet
label rescue
menu indent count 5
menu label ^Rescue a Red Hat Enterprise Linux system
text help
If the system will not boot, this lets you access files
and edit config files to try to get it booting again.
endtext
kernel vmlinuz
append initrd=initrd.img inst.stage2=hd:LABEL=RHEL-7.0\x20Server.x86_64 rescue quiet
label memtest
menu label Run a ^memory test
text help
If your system is having issues, a problem with your
system's memory may be the cause. Use this utility to
see if the memory is working correctly.
endtext
kernel memtest
menu separator # insert an empty line
label local
menu label Boot from ^local drive
localboot 0xffff
menu separator # insert an empty line
menu separator # insert an empty line
label returntomain
menu label Return to ^main menu
menu exit
menu end


