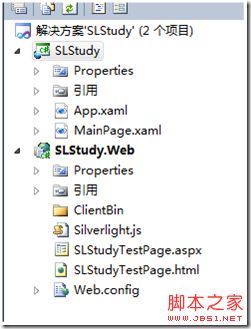
1:新建Silverlight4 应用程序,名称为SLStudy。建好后如下:
2:在SLStudy下新建Silverlight用户控件,Print1.xaml作为要打印的控件。
在Print1.xaml里面添加代码为:
3:已经建立好了要打印的内容了,这里打印的是一个按钮。
4:修改MainPage.xaml代码如下:
5:后台代码为:
private void btnPrint1_Click(object sender, RoutedEventArgs e)
{
PrintDocument printDocument = new PrintDocument();
printDocument.PrintPage += new EventHandler
PrintDocument.Print("要打印的文档的名称,这个可以随便设置");
}
void printDocument_PrintPage(object sender, PrintPageEventArgs e)
{
e.PageVisual = new Print1();
}
在SL4 中提供打印功能的是PrintDocument类,所以先实例化一个该类对象。
接着注册一个PrintPage事件,PrintPage事件在打印的时候会触发。
然后调用printDocument的Print方法来打印。
在PrintDocument的PrintPage事件中,PrintPageEventArgs,是打印的参数。
里面可以获取当前打印机的一些信息。
在这里设置PageVisual,也就是要打印的对象就可以了。
void printDocument_PrintPage(object sender, PrintPageEventArgs e)
{
e.PageVisual = new Print1();
}
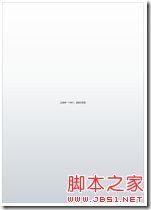
全部写好后,可以运行应用程序,点击Print1,弹出打印窗口。打印效果如下图:
当然我们的打印需求不可能这么简单,也许需要设置Print1的内容。假设我们要修改按钮显示的字,那么我们可以这样:
void printDocument_PrintPage(object sender, PrintPageEventArgs e)
{
Print1 printVisual = new Print1();
printVisual.btnSample.Content = "修改后的值,当然也可以从数据库中获取";
e.PageVisual = printVisual;
}
通过设置PrintPageEventArgs 参数的PageVisual对象,我们就可以实现打印那个页面的功能了。
在这里我总结下:
1:确定要打印的内容,然后新建一个UserControl来显示打印的内容。
2:新建PrintDocument对象,注册PrintPage事件,调用Print方法。
3:在PrintPage事件中,构造要打印的对象,然后去数据库中获取数据,然后把数据绑定到控件上,接着把绑定好数据的控件赋值给PrintPageEventArgs的PageVisual 对象。
多页打印问题:
如果要打印的只有一张,那么这种方法应该就够了,但是有时候需要将一份文档打印多张,
比如将上面的按钮打印5张,那么又该如何实现了。
还记得我们上面PrintPageEventArgs的HasMorePages参数吗?
在PrintPage 事件触发后,默认的HasMorePages 为false。将HasMorePages设置为true,可以让PrintPage事件不断被触发。当 HasMorePages 属性为 true,PrintPage 事件将多次发生,直到 HasMorePages 为 false。
假设我们要将上面的按钮打印5张,那么可以设置4次HasMorePages为true,最后设置HasMorePages为false就可以了。
修改后的printDocument_PrintPage 方法如下:
int count = 5;
int printCount = 0;
void printDocument_PrintPage(object sender, PrintPageEventArgs e)
{
Print1 printVisual = new Print1();
printVisual.btnSample.Content = "修改后的值,当然也可以从数据库中获取";
e.PageVisual = printVisual;
printCount++;
if (printCount < count) //如果已经打印的页数小于要打印的页数,说明还需要打印。
{
e.HasMorePages = true;
}
else
{
e.HasMorePages = false;
}
}
有时候需要知道当前打印的是第几页,这可以通过查询 printDocument.PrintedPageCount 属性来获得,
在PrintDocument_PrintPage 方法中,sender对象其实就是PrintDocument对象,所以我们可以将它强制类型转换。
假设我们要将上面的5个 Button的内容都修改为1,2,3,4,5.那么我们可以修改代码为:
int count = 5;
int printCount = 0;
void printDocument_PrintPage(object sender, PrintPageEventArgs e)
{
PrintDocument printDocument = sender as PrintDocument;
Print1 printVisual = new Print1();
printVisual.btnSample.Content = string.Format("按钮{0}", printDocument.PrintedPageCount);
e.PageVisual = printVisual;
printCount++;
if (printCount < count)
{
e.HasMorePages = true;
}
else
{
e.HasMorePages = false;
}
}
实际上,我们的printCount变量都不需要了,直接使用printDocument.PrintedPageCount 就可以了,具体代码实现由读者自己实现吧。
微软的Bug??
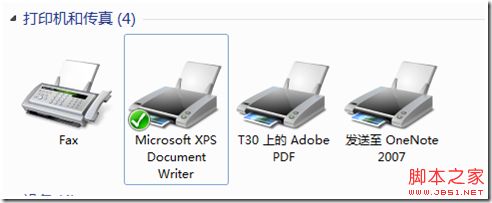
如果你的打印机设置为
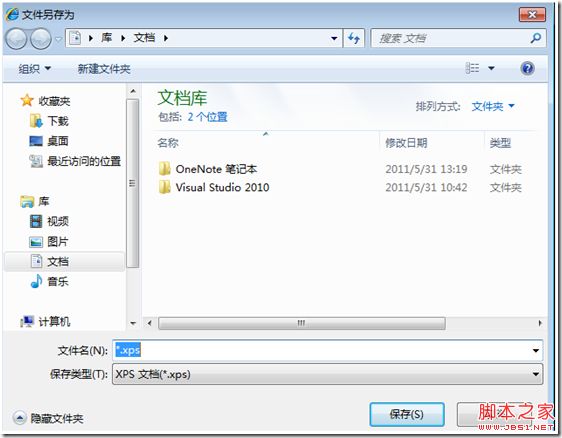
那么打印的结果就是*.xps的文件,但是在打印的过程中会弹出提示框,询问保存地址。
如果你在PrintPage事件中打上断点的话,可以看到在询问保存地址的时候,PrintPage方法已经执行了,也就是说PringPage方法会被执行两遍,第一遍并没有真正的打印。
例如:
如果在上图的界面上点击取消,则有可能会导致系统失去响应而卡死,
假设用户点击保存,那么PrintPage事件会再次的触发。
但是由于已经打印了一次了,所以有可能导致在多页打印的时候出现问题。
使用两个标志变量可以解决这个问题。
例如修改代码为:
int count = 5;
int printCount = 0;
///
/// 是否是第一次打印,因为只有第二次打印的时候才开始真正的打印。
///
private bool isInitialized = false;
private bool realPrint = false;
void printDocument_PrintPage(object sender, PrintPageEventArgs e)
{
PrintDocument printDocument = sender as PrintDocument;
int currentPage = printDocument.PrintedPageCount;
#region 因为要经过两次,第一次是初始化,而第二次才是真正的打印,而两次PrintedPageCount都是0
if (currentPage == 0)
{
if (isInitialized) //如果已经初始化,则设置realPrint为true
{
realPrint = true;
}
isInitialized = true; //运行到这里,说明已经初始化了。
}
#endregion
if (realPrint)
{
//PrintDocument printDocument = sender as PrintDocument;
Print1 printVisual = new Print1();
printVisual.btnSample.Content = string.Format("按钮{0}", printDocument.PrintedPageCount);
e.PageVisual = printVisual;
printCount++;
if (printCount < count)
{
e.HasMorePages = true;
}
else
{
e.HasMorePages = false;
}
}
}
因为两次打印,第一次可以被认为是初始化,第二次可以被认为是打印机开始真正的打印,
所以可以使用两个变量isInitialized 和realPrint 来分别表示是初始化还是真实的打印。
在执行第一遍的时候printDocument.PrintedPageCount ==0,在这时候将isInitialized 设置为true。
在执行第二遍的时候,因为isInitialized ==true,所以可以将realPrint设置为true。
在后面的代码中只需要判断realPrint为true就可以了。


