1.Zabbix监控平台部署
安装zabbix之前需要LAMP架构,为了快速上手,我们这里采用yum安装LAMP,如果你想尝试,也可以使用源码版LAMP,效果是一样,都是为了解析zabbix php代码。执行如下命令安装LAMP环境:
yum install httpd httpd-devel php php-devel mysql mysql-server mysql-devel php-mysql -y
实战环境:
Server端:192.168.57.135
Agent端:192.168.57.131
下载zabbix版本:
wget http://sourceforge.net/projects/zabbix/files/ZABBIX%20Latest%20Stable/2.0.6/zabbix-2.0.6.tar.gz/download
tar-xzf download
mvzabbix-2.0.6/ /data/
wget https://sourceforge.net/projects/zabbix/files/ZABBIX%20Latest%20Stable/3.0.5/zabbix-3.0.5.tar.gz/download
1) 在server端和agent执行:
yum -y install curlcurl-devel net-snmp net-snmp-devel perl-DBI
groupadd zabbix;useradd -g zabbix zabbix;usermod -s /sbin/nologin zabbix
2) Server端如下配置:
初始化MySQL,/etc/init.d/mysqld restart ;进入mysql –uroot -p,创建zabbix数据库,执行授权命令:
create database zabbix;
grant all on zabbix.*to zabbix@localhost identified by '123456';
表示mysql -uzabbix –p
mysql -hlocalhost -uzabbix –p
可以登录,-hlocalhost默认就有
[root@bogon usr]# mysql-uzabbix -p
然后解压zabbix并导入数据到zabbix数据库。
tar zxvfzabbix-2.0.6.tar.gz
cd zabbix-2.0.6
mysql -uzabbix -p123456zabbix
mysql -uzabbix -p123456zabbix
mysql -uzabbix -p123456zabbix < database/mysql/data.sql
顺序导入,先导入schema.sql同时导入数据库完毕后,在zabbix-2.0.6源码解压目录执行编译zabbix,命令如下:
./configure--prefix=/usr/local/zabbix/ --enable-server --enable-agent --with-mysql--enable-ipv6 --with-net-snmp --with-libcurl &&make install
//--with-libcurl 抓取网页
ln -s/usr/local/zabbix/sbin/zabbix_* /usr/local/sbin/
//链接zabbix命令直接使用 /usr/local/sbin 安装的软件命令放在这里/usr/bin-系统命令
安装完毕,进入/usr/local/zabbix/etc/下
执行如下命令,zabbix_server.conf内容:
[root@bogon etc]# grep -v "#"zabbix_server.conf|grep -v "^$"
LogFile=/tmp/zabbix_server.log
DBName=zabbix
DBUser=root
grep -v "^#" zabbix_server.conf|grep -v ^$ 内容修改为如下:
LogFile=/tmp/zabbix_server.log
DBHost=localhost
DBName=zabbix
DBUser=zabbix
DBPassword=123456
同时拷贝zabbix_server脚本,启动zabbix_server, 默认端口为10051
[root@bogonetc]# cd /data/zabbix-2.0.6/
cpmisc/init.d/tru64/zabbix_server /etc/init.d/zabbix_server ;chmod o+x/etc/init.d/zabbix_server
配置Apache发布zabbix php代码,方法如下:
cp -a /root/zabbix-2.0.6/frontends/php/* /var/www/html/
sed -i '/date.timezone/i date.timezone = PRC' /etc/php.ini
///root/zabbix-2.0.6/frontends/php/* php代码web页面
[root@bogon frontends]# pwd
/data/zabbix-2.0.6/frontends
[root@bogonfrontends]# \cp php/* /var/www/html/ -a
打开浏览器看到报错:date(): It is not safeto rely on the system's timezone settings. You are *required* to use thedate.timezone setting or the date_default_timezone_set() function. In case youused any of those methods and you are still getting this warning, you mostlikely misspelled the timezone identifier. We selected the timezone 'UTC' fornow, but please set date.timezone to select your timezone.[include/page_header.php:185]
修改php.ini时区
[root@bogonhtml]# more /etc/php.ini
date.timezone=PRC
[root@bogon html]#systemctl restart httpd
重启apache后报错消失
3) 启动所有服务安装zabbix:
重启服务端zabbix_server:/etc/init.d/zabbix_server restart
/etc/init.d/httpd restart ;/etc/init.d/mysqld restart 即可。
重启客户端zabbix_agentd:/etc/init.d/zabbix_agentd restart
4) 浏览器访问zabbix:
通过浏览器http://192.168.149.128/默认就可以访问zabbix了,如果大家的apache发布目录带有二级目录zabbix,访问需要接zabbix哦。
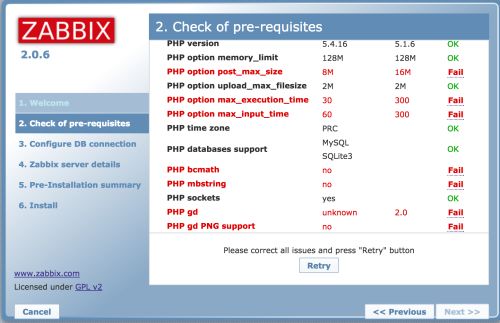
安装出现如下报错肿么办呢?
解决方法:
yum installphp-mbstring php-bcmath php-gd php-xml
yum install gd gd-devel
sed -i'/post_max_size/s/8/16/g;/max_execution_time/s/30/300/g;/max_input_time/s/60/300/g;' /etc/php.ini
[root@bogon html]# sed-i '/post_max_size/s/8/16/g;/max_execution_time/s/30/300/g;/max_input_time/s/60/300/g;'/etc/php.ini
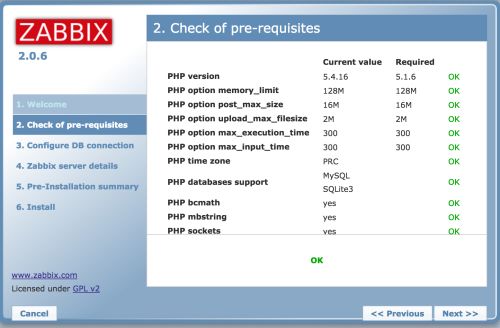
然后重启/etc/init.d/httpdrestart 即可。
如果上面是fail,报下面这个错说明没有zabbix.conf.php文件,只需要下载上传即可
然后登陆,默认用户名和密码:admin/zabbix
解决:
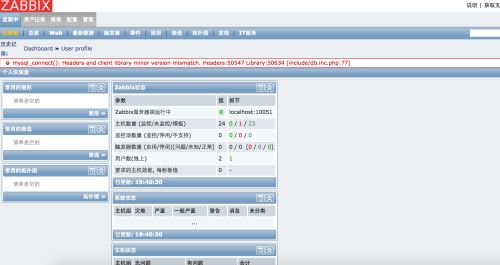
参考链接:http://stackoverflow.com/questions/19910996/mysql-connect-headers-and-client-library-minor-version-mismatch-library10000
方法;
|
Install the mysqlnd package for PHP and the warning should go away. Restart your server daemons after installing (apache, nginx, and/or php-fpm) |
安装 mysqlnd
参考链接:http://blog.csdn.net/misakaqunianxiatian/article/details/52079918
安装 mysqlnd重启服务问题解决
Agent客户端如下配置:
解压zabbix-2.0.6.tar.gz源码,解压目录执行编译zabbix,命令如下:
./configure --prefix=/usr/local/zabbix--enable-agent&&make install
ln -s/usr/local/zabbix/sbin/zabbix_* /usr/local/sbin/
执行如下命令,zabbix_agentd.conf内容:
LogFile=/tmp/zabbix_agentd.log
Server=192.168.57.135
ServerActive=192.168.57.135
Hostname=192.168.57.131 本机的IP
同时拷贝zabbix_agentd脚本, 在被监控的机器上运行zabbix_agentd,默认端口为10050
cd zabbix-2.0.6
cpmisc/init.d/tru64/zabbix_agentd /etc/init.d/zabbix_agentd; chmod o+x/etc/init.d/zabbix_agentd
注意启动server
报错:添加的主机monitor显示是红色的,提示错误
Received empty responsefrom Zabbix Agent at [192.168.1.2]. Assuming that agent dropped connectionbecause of access permission
解决:
#cat zabbix_agentd.conf| grep Server=
Server=192.168.1.2 # zabbix server ip地址
还有确保hostname与配置文件中是否一致
