Unity3D 嵌入iOS原生代码,并实现unity iOS之间的交互
承接ARVR项目开发: QQ 2118590660
Unity iOS嵌入 交互 传值
蛮牛 视频地址 http://edu.manew.com/course/434
项目需要用到iOS和Unity之间的交互, 就捯饬了一下
我项目是Unity工程大, iOS工程小, 所以在是Unity导出的xcode工程里嵌入iOS的原生代码
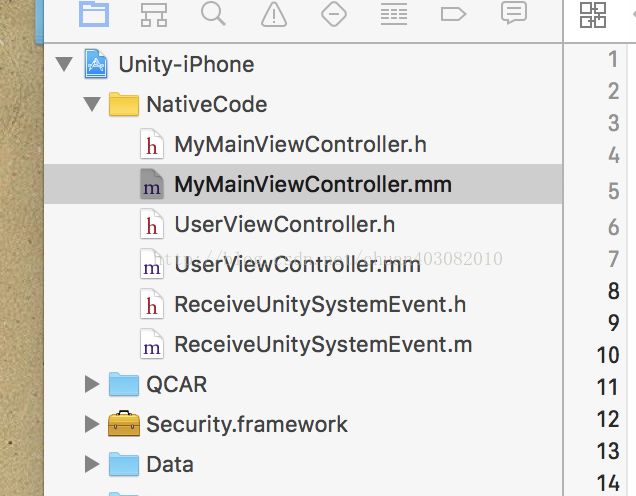
先看下我的文件目录
iOS 放iOS 原生工程代码(我是在这边做好 测试好才合并的)
Unity 放Unity的原生工程代码
Unity_iOS 方Unity导出的xcode项目(这个也是最后的合并版)
1.先建一个简单的unity工程(我项目有用到Vuforia 我就先创建了一个简单的Vuforia的界面)
2.开始导出xcode 项目(请先确保你的unity可以正常运行 )
3.设置Player Setting (根据你项目需求配置)
注意:Vuforia工程的话Auto Graphics API 删除Metal, 单是unity项目不用管它
4.路径选择到Unity_iOS文件下
5.打开导出后的工程, 正常的话配置下team 就可以运行
6.创建ARCKRAppController 继承自 UnityAppController
把.h .m合并在一起 代码如下(先不要编译,此文件是要拖到unity工程里的,在xcode里写是有提示方便写)
#import "UnityAppController.h" #import#import #import "MyMainViewController.h" @interface ARCKRAppController :UnityAppController @property (nonatomic,strong)UINavigationController *navc; //-(void)createViewHierarchyImpl; -(void)createUI; @end @implementation ARCKRAppController //iOS8后 createViewHierarchyImpl弃用更改方法为 //-(void)createViewHierarchyImpl{ -(void)createUI{ _rootController = [[UIViewControlleralloc]init]; _rootView = [[UIViewalloc]initWithFrame:[UIScreenmainScreen].bounds]; _rootController.view =_rootView; MyMainViewController *vc = [[MyMainViewControlleralloc]init]; self.navc = [[UINavigationControlleralloc]initWithRootViewController:vc]; [_rootViewaddSubview:self.navc.view]; _window.rootViewController =_rootController; [_windowbringSubviewToFront:_rootView]; [_windowmakeKeyAndVisible]; } @end IMPL_APP_CONTROLLER_SUBCLASS(ARCKRAppController)
7.上面的MyMainViewController 是我的首界面,我是把unity界面直接当做首界面了,你可以用自己的界面
在其他任何你想显示unity 界面的控制器中加这两句代码就可以 记得文件后缀改.mm
[self.view addSubview:GetAppController().unityView];
GetAppController().unityView.frame = self.view.frame;
做为首界面 [self initUI]; 放在viewDidLoad里 会缩小unity的界面,所以把它放在viewDidAppear里了
测试其他界面 在viewDidLoad里加载是正常的;
#import "MyMainViewController.h" #import#import #import "UnityAppController+ViewHandling.h" #import #import "UserViewController.h" @interfaceMyMainViewController () @end @implementation MyMainViewController - (void)viewDidLoad { [superviewDidLoad]; self.view.backgroundColor = [UIColorclearColor]; self.title =@"MyMain"; } -(void)initUI{ [self.viewaddSubview:GetAppController().unityView]; GetAppController().unityView.frame =self.view.frame; UIButton *btn = [UIButtonbuttonWithType:UIButtonTypeSystem]; btn.frame =CGRectMake(0,0,300,100); btn.center =self.view.center; [btn setTitle:@"go"forState:UIControlStateNormal]; [btn addTarget:selfaction:@selector(go)forControlEvents:UIControlEventTouchUpInside]; [self.viewaddSubview:btn]; } //写在viewDidAppear里,等到原始界面加载完再加载,写在viewDidLoad里显示不是全屏 -(void)viewDidAppear:(BOOL)animated{ [selfinitUI]; } -(void)go{ UserViewController *vc = [[UserViewControlleralloc]init]; [self.navigationControllerpushViewController:vc animated:YES]; } - (void)didReceiveMemoryWarning { [superdidReceiveMemoryWarning]; // Dispose of any resources that can be recreated. } @end 8.你可以建几个空界面进行测试跳转
9.然后把ARCKRAppController.mm 文件拖到unity工程下 注意文件存放目录,并删除xcode里的ARCKRAppController.mm
一定要是Assets-Plugins-iOS 这个目录
10.command + B 编译,不要重新导,只编译ARCKRAppController 会自动编译到xcode项目下
11.现在运行可以 跳转, 嵌入成功
首先iOS调Unity的方法
使用 Untiy写好的方法 UnitySendMessage
为了方便直接改MyMain里go的方法进行测试
#import "MyMainViewController.h" #import#import #import "UnityAppController+ViewHandling.h" #import #import "UserViewController.h" @interface MyMainViewController () @end @implementation MyMainViewController - (void)viewDidLoad { [super viewDidLoad]; self.view.backgroundColor = [UIColor clearColor]; self.title = @"MyMain"; } -(void)initUI{ [self.view addSubview:GetAppController().unityView]; GetAppController().unityView.frame = self.view.frame; UIButton *btn = [UIButton buttonWithType:UIButtonTypeSystem]; btn.frame = CGRectMake(0, 0, 300, 100); btn.center = self.view.center; [btn setTitle:@"go" forState:UIControlStateNormal]; [btn addTarget:self action:@selector(go) forControlEvents:UIControlEventTouchUpInside]; [self.view addSubview:btn]; } -(void)viewDidAppear:(BOOL)animated{ [self initUI]; } -(void)go{ //参数1 场景中模型的名字 //参数2 脚本名称方法 //参数3 想unity传递一个char类型的数据 UnitySendMessage("iOSSendMessageToUnity", "ChangeCameraDirection", ""); }
unity里代码如下
using System.Collections;
using System.Collections.Generic;
using UnityEngine;

public class iOSSendMessageToUnity : MonoBehaviour {

    // Use this for initialization
    void Start () {

    }

    // Update is called once per frame
    void Update () {

    }
    public    void ChangeCameraDirection(){
        Debug.Log(@"更改相机方向");
    }
}
Unity 调iOS
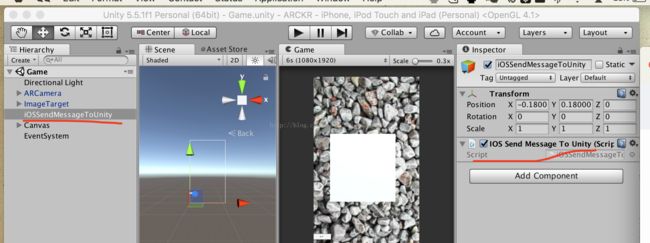
我在界面左下角创建了一个button 这个是用来测试调用iOS方法的
UnitySendMessageToiOS 准备用作工具类 放所有调用iOS的方法
using UnityEngine;
using System.Runtime.InteropServices;

public class UnitySendMessageToiOS : object {

    //导出按钮以后将在xcode项目中生成这个按钮的注册
    //iOS中的注册格式

    [DllImport("__Internal")]
    private static extern void _PressShareBtn();

    public static void ShareSceneIniOS(){
        if (Application.platform != RuntimePlatform.OSXEditor) {
            _PressShareBtn ();
        }
    }
}

btton关联的脚本 和方法
using System.Collections;
using System.Collections.Generic;
using UnityEngine;

public class MainScene : MonoBehaviour {

    public GameObject shareBtn;

    public void OnShareBtnClick(){
        UnitySendMessageToiOS.ShareSceneIniOS ();
    }
    // Use this for initialization
    void Start () {

    }

    // Update is called once per frame
    void Update () {

    }
}

然后到xcode里, 我创建了一个空的类 用来接收unity 发来的消息
#import "ReceiveUnitySystemEvent.h"
@interface ReceiveUnitySystemEvent ()

@end

@implementation ReceiveUnitySystemEvent

void _PressShareBtn()
{
    UIAlertView *alert = [[UIAlertView alloc]init];
    [alert setTitle:@"分享];
    [alert setMessage:@"点击了分享 按钮"];
    [alert addButtonWithTitle:@"确定"];
    [alert show];
}
参考链接点击打开链接


https://the-nerd.be/2014/08/06/add-unity3d-in-a-native-ios-application/ unity ios 嵌入
https://www.youtube.com/watch?v=RUmrRHeS7BU 视频 unity 导出的工程拖到iOS原生里
http://blog.csdn.net/xys289187120/article/details/6926746 iOS调用unity
http://blog.csdn.net/chaixinke/article/details/43508601 unity调用iOS