阿里第一代 android dex加固的脱壳方法
测试程序
链接:http://pan.baidu.com/s/1cMGmF8 密码:8xgn
脱壳环境: Android 4.2、dalvik模式、 root…
使用到的工具:
- IDA 6.8 Android
- Device Monitor
- Android Killer V1.3.1.0
- Android逆向助手V2.2
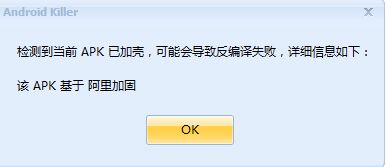
将程序拖入Android killer 工具中 ,弹出如下窗口
在清单文件中看到application中有定义android:name
Android:name 不了解 、网上收集了下
android:name属性是用来设置所有activity 属于哪个application的,默认是android.app.Application。
当然也可以自己定义一个类,例如:
public class TestApplication extends Application {}
这个类的作用是为了放一些全局的和一些上下文都要用到的变量和方法。
然后在 AndroidManifest.xml 中 application 节点中添加android:name属性
application android:icon="@drawable/icon"android:label="@string/app_name"
 android:name =".TestApplication"
这样就可以将默认的Application给设置成我们自定义的TestApplication
这样处理的好处是:继承的话,当应用程序退出后其生命周期也跟着结束,
而用静态类的话程序退出后不会立刻被gc回收,当你再次进入后会发现该静态类保存的信息状态
是之前的。有可能会导致程序不是你想要的初始化状态。PS:TestApplication一定要指明类域为public,否则运行时候会报错找不到这个类。
即使写成这样:class TestApplication extends Application{}也不可以,因为默认情况只是为包可见
大概看出,程序的入口已经不是默认的application了,而是com.ali.mobisecenhance.StubApplication
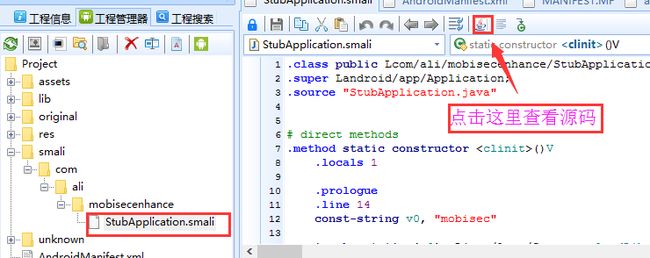
我们去找StubApplication类看个究竟
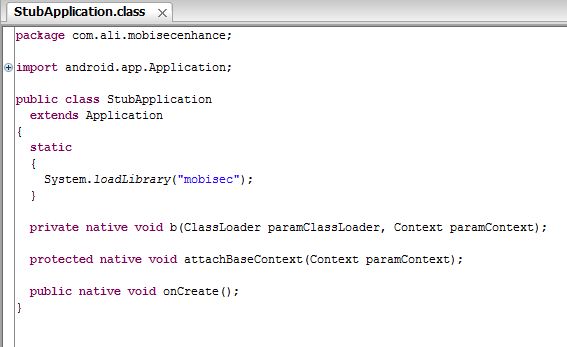
可以看到,StubApplication加载了一个so文件。名字是libmobisec.so,并声明了3个方法
疑问:并没有代码中看到调用这3个so文件中的方法,可能是工具没有解析全,需要进一步探究,这里掠过。。。
下一步我们去分析so文件。这里掠过。。。
猜测:
这个so文件是解密dex文件的。
我们让程序运行起来,在Dalivk开始加载解密后的dex文件时,把dex文件从内存中dump下来即可。
根据android源码知道,Dalivk在加载dex文件时用到方法
int dvmDexFileOpenPartial(const void* addr, int len, DvmDex** ppDvmDex)
此方法第一个参数是dex的基址,第二个参数是dex的大小。这正是我们需要的。
1. 以调试模式启动测试程序
2. 用IDA附加测试程序
3. 在内存中给dvmDexFileOpenPartial下断点,运行程序, 得到方法dvmDexFileOpenPartial参数1和参数2的值
4. 运行IDA脚本,dump dex到本地。
下面是详细操作步骤
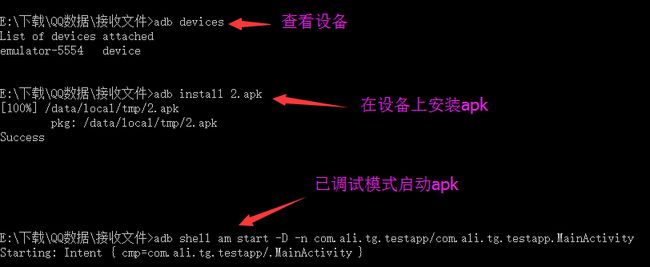
1.以调试模式启动测试程序
命令格式: adb shell am start -D -n PackageName/ActivityName
2.用IDA附加测试程序
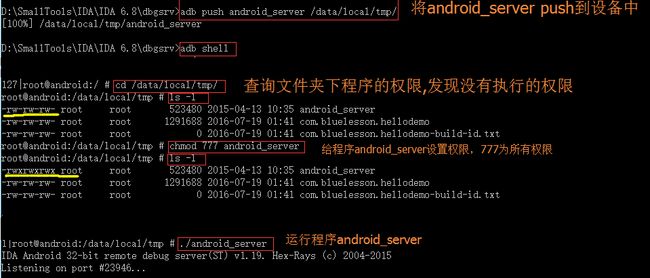
把程序android_server push到安卓设备/data/local/tmp/目录下并运行 【android_server在IDA 6.8\dbgsrv目录下】
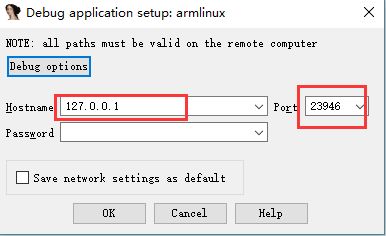
设置端口转发,转发PC数据到手机,端口为android_server监听的端口
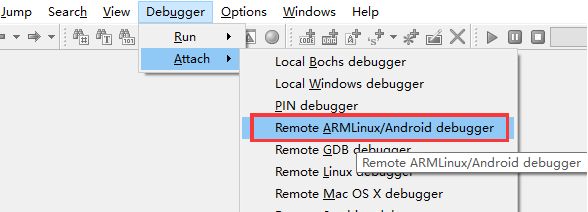
打开IDA程序,选择如下
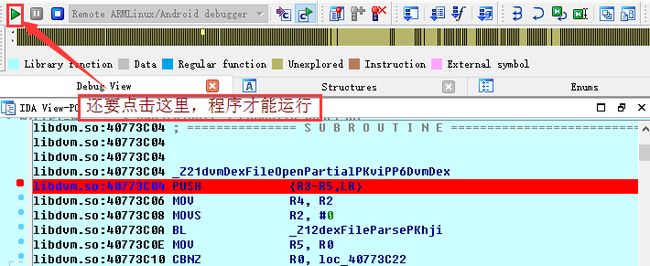
3.在内存中给dvmDexFileOpenPartial下断点,运行程序
在模块搜索dvm,然后双击进入so程序
接着搜索关键 函数 DvmDexFileOpenPartial
打开Android Device Monitor
在控制台输入指令 jdb -connect com.sun.jdi.SocketAttach:hostname=localhost,port=8700
jdb connect : 连接被调试程序应用层,使程序运行起来
按F8单步调试一下,看栈的变化,得到方法dvmDexFileOpenPartial参数1和参数2的值
为了验证是否正确,按快捷键 G ,输入地址0x4c05a008,跟过去瞧瞧,可见是正确的
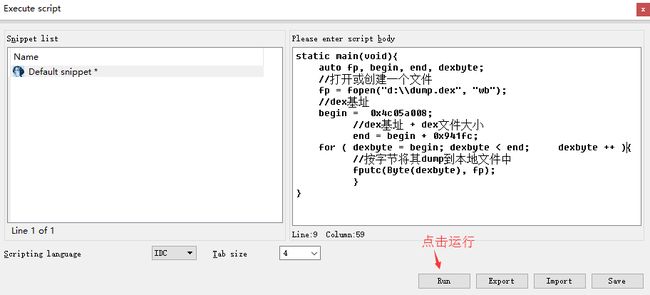
3.运行IDA脚本,dump dex到本地。
打开脚本窗口- File –Script Command 或直接用快捷键“Shift + F2 ”
将dex基址改为0x4c05a008,dex文件大小改为0x941fc
    static main(void)
    {
        auto fp, begin, end, dexbyte;
        fp = fopen("d:\\dump.dex", "wb"); //打开或创建一个文件
        begin =  0x4c05a008;              //dex基址
        end = begin + 0x941fc;            //dex基址 + dex文件大小
        for ( dexbyte = begin; dexbyte < end;dexbyte ++ )
        {
            fputc(Byte(dexbyte), fp);     //按字节将其dump到本地文件中
        }
    }
如图,点击运行,稍等片刻
可以看到D盘目录下多一个dex文件
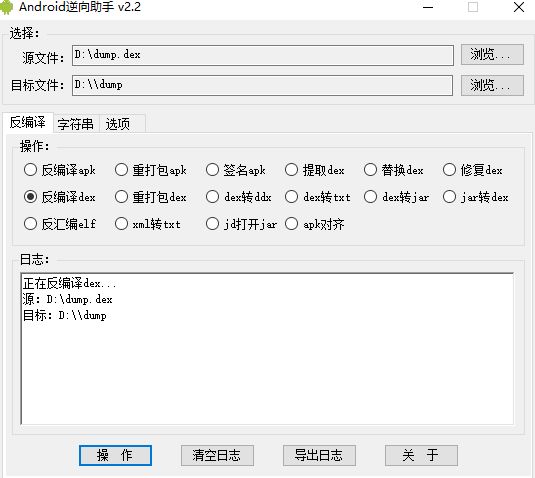
接下来用 工具 Android逆向助手 反编译dex文件
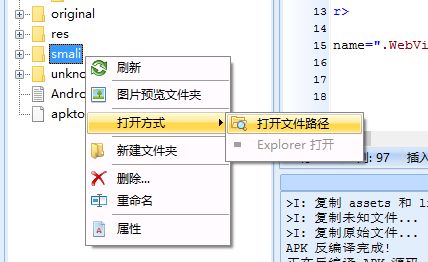
在Android Killer V1.3.1.0中打开这个路径,将反编译dex文件后生成的两个文件android和com复制到smali目录下
在清单文件中删除android:name属性,并保存
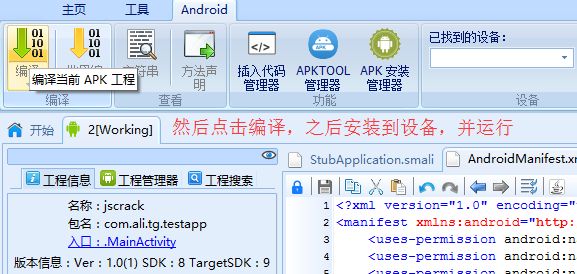
最后编译、安装、运行
能运行,我们脱壳并修复成功了
